

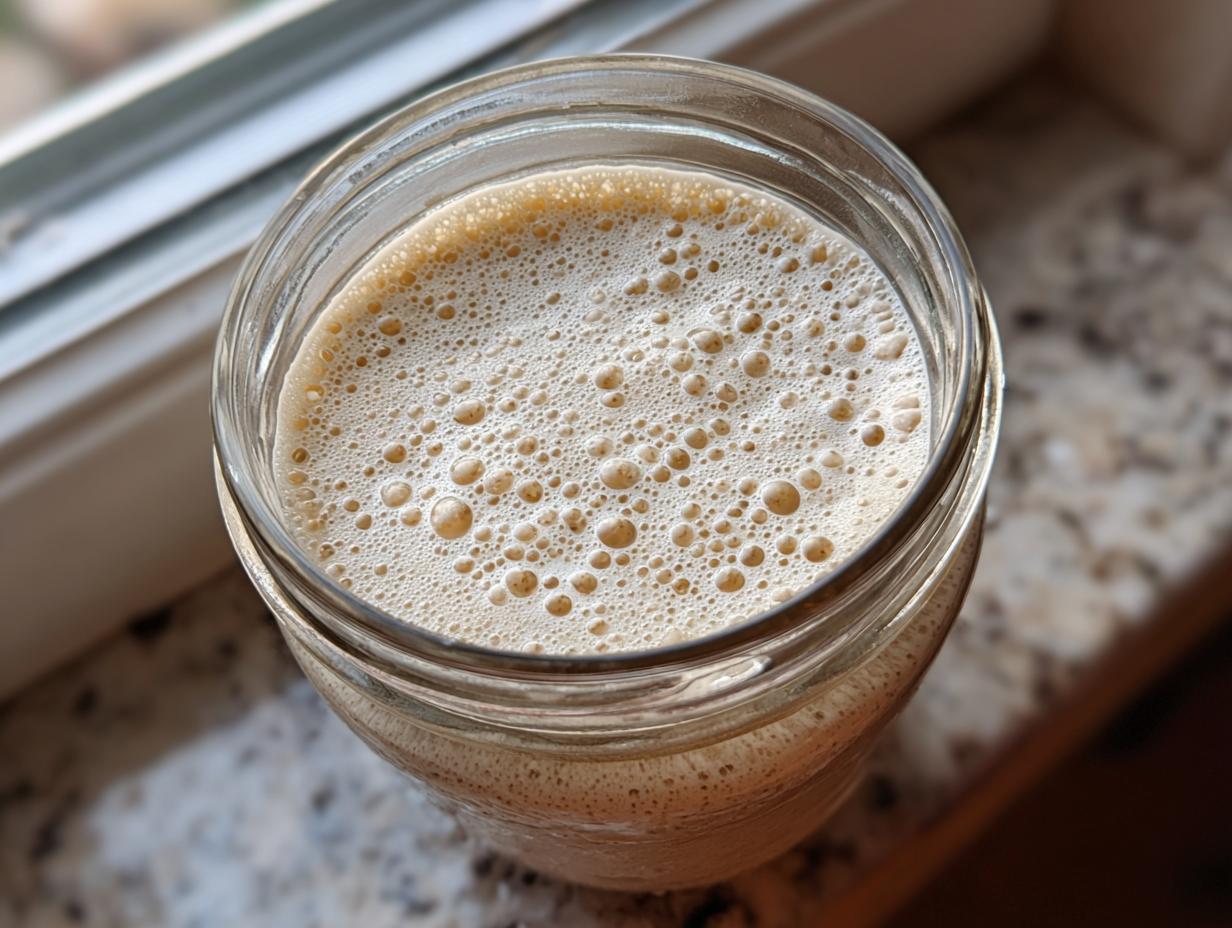
There is just something absolutely magical about baking bread at home, isn’t there? That earthy, tangy smell fills the kitchen, and when you slice into that crusty loaf, well, it’s pure joy. But I know what you’re thinking: that scary, ancient jar on the counter that bakers worship—the feeding schedules, the weird hooch—it all seems impossible!
Don’t you worry your head about it! Remember how Jaxson Riley started YumDrizzle? It’s because good food should never feel intimidating. That’s exactly what we’re doing here. This guide is the easiest, most reliable step-by-step method I’ve ever put together for making your very own vibrant sourdough starter from simple flour and water. We are tackling this sourdough starter from scratch together, and trust me, it’s way easier than everyone makes it sound!
- Why You Need Your Own Sourdough Starter For Beginners
- Gathering Supplies for Your Sourdough Starter Recipe
- The 7-Day Sourdough Feeding Schedule to Make Your Sourdough Starter
- Tips for Success When You Feed Sourdough Starter
- Sourdough Starter Troubleshooting: Common Issues for Beginners
- What to Do With Sourdough Discard Recipes
- Long-Term Sourdough Maintenance and Storage
- Frequently Asked Questions About Your New Sourdough Starter
- Start Your Sourdough From Scratch Journey Today
Why You Need Your Own Sourdough Starter For Beginners
Honestly, once you get past the first week, maintaining this thing is ridiculously simple, and the payoff is huge. You ditch those weird grocery store additives and you start developing real flavor. For sourdough for beginners, this is where the magic begins. It’s your very own supply of homemade yeast!
- Better Crust: That gorgeous, crackly exterior on rustic bread? That’s your starter working its magic.
- Deeper Flavor: Forget bland white bread; this adds tang and complexity.
- It’s Free! Once you have it, you never need to buy commercial yeast again.
- Flexibility: You get to decide when you bake, not the store hours!
If you’re looking for something quick to make while you wait for your starter to get going, check out my recipe for easy creamy chicken taco soup—it never disappoints while you wait for the dough to rise later!
Cultivating Wild Yeast: The Science Behind Your Sourdough Starter
So, what exactly is this stuff? Think of your sourdough starter as a living ecosystem in a jar. We’re just mixing flour and unchlorinated water and letting the natural microbes floating around in the air settle in. That’s it! Over the next week, you’re coaxing those wild yeasts and lactic acid bacteria to multiply. They eat the flour, produce gas (those gorgeous bubbles), and create the perfect homemade yeast culture that will leaven your bread wonderfully. Pretty cool, right?
Gathering Supplies for Your Sourdough Starter Recipe
Okay, let’s get prepared! The biggest secret to getting this right, especially when you’re just starting out, is precision—not complex tools. You absolutely must have a digital kitchen scale. Seriously, I can’t stress this enough. Measuring flour by volume (scooping cups) is a recipe for disaster in sourdough; we need weight to keep our ratios perfect as we feed sourdough starter.
Besides the scale, you just need a clean, clear glass jar—nothing too fancy, maybe quart-sized so you can see that rise! Cleanliness is crucial because we don’t want any bad bacteria crashing the party!
Ingredient Clarity: Flour and Water Starter Requirements
When we kick this off, we’re using something hearty to wake up those little microbes. For the first three days, you want whole wheat flour or even rye flour. These have more natural microbes clinging to the bran, which gives your sourdough starter a big jump start. Then, around Day 4, we switch over to unbleached all-purpose flour for maintenance.
The water is just as important. Please, please, please use water that is free of chlorine. Chlorine is designed to kill living things, which is exactly what we are trying to grow! Tap water left out overnight usually off-gasses enough chlorine, or you can grab filtered water. Remember, this whole thing is just flour plus water, but the quality matters!
The 7-Day Sourdough Feeding Schedule to Make Your Sourdough Starter
This is it—the real deal! We are committing to one week following a strict but easy sourdough feeding schedule. Don’t panic if things look dead on Day 3; it happens to everyone! Just trust the process. Our goal is to get your sourdough starter doubling reliably by the end of this week. We need to be very precise with our measurements here since we are dealing with tiny living things, so use that scale you pulled out!
Days 1 through 3: Initial Activation of the Sourdough Starter
On Day 1, you’re mixing 50 grams of your whole wheat or rye flour with 50 grams of room-temperature water in that clean jar. Stir it up until it looks like thick pancake batter. Cover it loosely—you want air to get in, but you don’t want dust bunnies! Leave it somewhere cozy, like on top of the fridge, between 68 and 75°F.
Day 2 and 3 follow the same ritual: dump out half of what you made yesterday (yes, you have to discard, sorry!) and then add 50g flour and 50g water to the remaining half. You might get a tiny bubble or two, or you might see nothing. If you see some funky layer of liquid on top (that’s called hooch), just stir it back in, dump half, and feed it. Hang in there!
Days 4 through 7: Developing an Active Sourdough Starter
Around Day 4, if you saw any activity, we make the switch to unbleached all-purpose flour. Keep discarding half and feeding 50g flour and 50g water. This is where things usually start smelling intensely vinegary or cheesy—that means the good bacteria are kicking the bad guys out! For best results, check out this guide on how to make sourdough starter for visual cues.
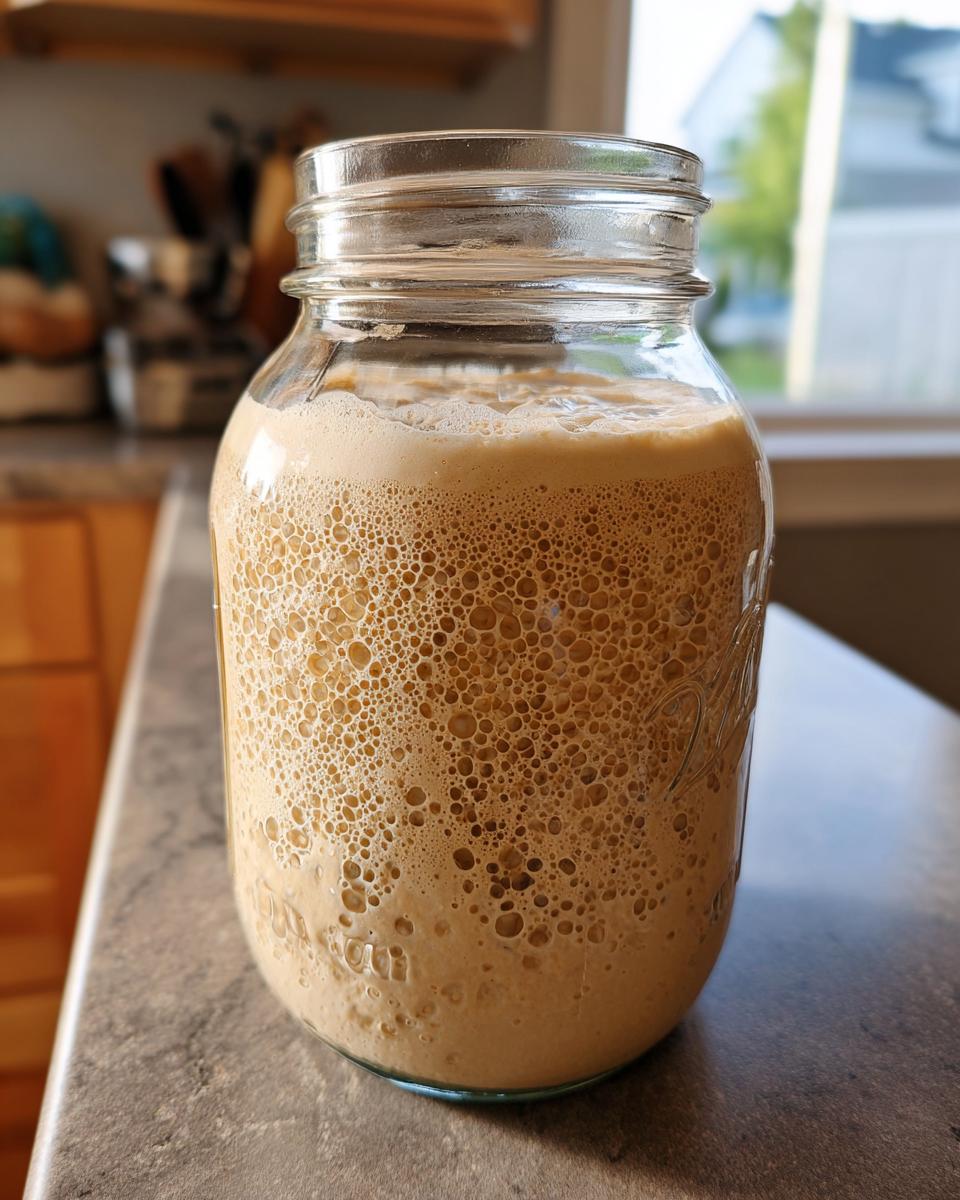
By Day 5 or 6, you should see some serious action! Your starter should be doubling in size within about 6 to 12 hours after you feed it. When it consistently reliably doubles in size and looks airy and full of bubbles after feeding, congratulations! You officially have an active sourdough starter ready to bake with from scratch! For the next step, check out the tips on how to make a sourdough starter for more encouragement.
Tips for Success When You Feed Sourdough Starter
Now that you have your living, breathing culture, the goal shifts to keeping it strong! When you feed sourdough starter, consistency is your best friend, almost as much as temperature. If your kitchen is chilly, don’t rush it—you might need closer to 24 hours between feedings. If it’s hot, you might need to feed it twice a day to keep it happy and working hard.
Don’t freak out if you see a layer of liquid, or that hooch pops up. It just means your starter is hungry! Either stir it in or pour it off, discard most of it (yes, you still have to discard!), and give it a fresh meal according to the ratio we use for maintenance. You can read more about how these ratios work over at sourdough starter ratios.
Understanding Sourdough Starter Ratios for Maintenance
Once your starter is reliably doubling, you switch to a maintenance ratio, which is super simple: 1:1:1 by weight. That means one part starter, one part flour, and one part water. If you keep 50 grams of starter, you feed it 50 grams of flour and 50 grams of water. Using a scale for this keeps everything balanced so your wild yeast stays robust and ready for baking projects!
Sourdough Starter Troubleshooting: Common Issues for Beginners
Okay, let’s talk real life for a second. Not every batch of sourdough starter jumps out of the gate ready to bake bread. Sometimes things go wrong, and that’s totally normal. If you’re staring at a jar of goo that hasn’t bubbled by Day 5, don’t toss it yet! Most early problems fall into a few categories, which is why having a quick sourdough starter troubleshooting guide is essential for us beginners.
The most common issue is just low temperature. If your kitchen is wrestling with winter chill, your wild yeast is just sleeping in. Try moving that jar to the top of the fridge or near a pilot light—a spot that stays reliably warm, around 78°F, can work wonders to wake things up. If you see a gray liquid layer, that’s hooch, just stir it in and feed it. But here’s the hard rule: if you see pink, orange, or fuzzy colored mold, you have to say goodbye to that batch, dump it all out, and start fresh. It’s a bummer, but it keeps your bread safe! You can read some helpful tips on this over at how to make a sourdough starter.
What to Do With Sourdough Discard Recipes
Okay, I know what you’re thinking: “I just spent a week growing this beautiful thing, why do I have to throw half of it away every day?!” Don’t throw it out! That “discard” is actually just unfed starter, and it’s perfect for baking things that don’t require the huge lift of a fresh loaf. This is where you get to be creative with sourdough discard recipes!
I use my discard all the time for amazing things like super fluffy pancakes or savory crackers we can munch on while we wait for the real bread to bake. It adds a lovely little tang without needing a massive rise. If you’re looking for an easy, no-mixer recipe to use that discard immediately after feeding, try my easy chocolate pudding recipe—it’s decadent!
If you want even more ideas on how to use up what you’ve pulled out of the jar, check out what my friends are whipping up over at easy sourdough starter resources. Never waste that precious flour and water mixture!
Long-Term Sourdough Maintenance and Storage
So, you’re baking every weekend instead of every day? That’s great! You definitely don’t want to keep feeding your thriving sourdough starter every single day if you aren’t baking. That’s just wasteful. The solution is simple: the fridge!
When you want to put your starter to sleep, make sure you give it a really solid meal first—feed it according to that 1:1:1 ratio we talked about. Once you see it start to peak (maybe 4 to 6 hours after the feed), pop the lid on tightly and put the jar in the cold. This period of sourdough maintenance means you might only have to feed it once every week or two. Super easy!
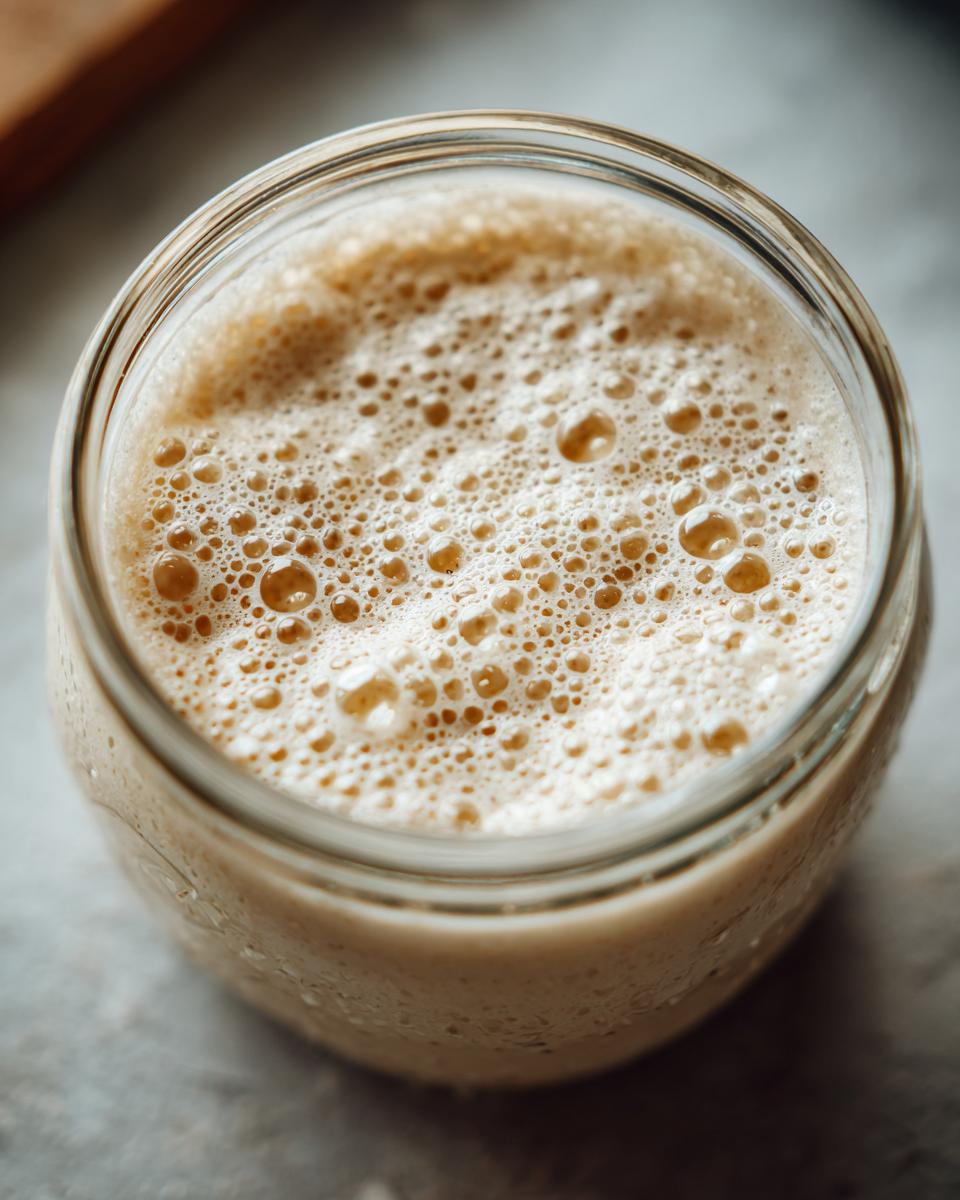
When you want to wake it up for a baking day, just pull it out, discard most of the old starter, and feed it normally for one or two cycles until it’s doubling reliably again. See? It’s just taking a little nap!
Frequently Asked Questions About Your New Sourdough Starter
It’s totally normal to have a million questions when you’re first making a wild yeast culture. Don’t feel silly! I had to call my baker friend constantly when I made my first batch of this sourdough starter for beginners. It’s all about observing what’s happening in that jar.
How long until my starter has bubbles?
That’s the million-dollar question! Usually, you’ll see the very first hesitant bubbles on Day 2 or Day 3. But don’t get discouraged if you don’t see anything major pop up until Day 4, especially if your kitchen is a bit cool. That initial activity everyone raves about often disappears for a day or two—that’s just the bad bacteria fighting the good! Keep feeding it according to the sourdough feeding schedule, and the real growth comes soon after. Be sure to check out these extra tips on easy sourdough starter journeys for encouragement!
Can I use bread flour instead of all-purpose flour?
You absolutely can! Bread flour has higher protein content, which is fantastic for building structure later on. I suggest only switching to it after Day 4 once the initial culture is established with whole wheat. It can actually make your starter peak faster! Just stick with the same weight measurements—that’s what matters most for your sourdough starter recipe.
What does a ‘bubbly sourdough starter’ look like?
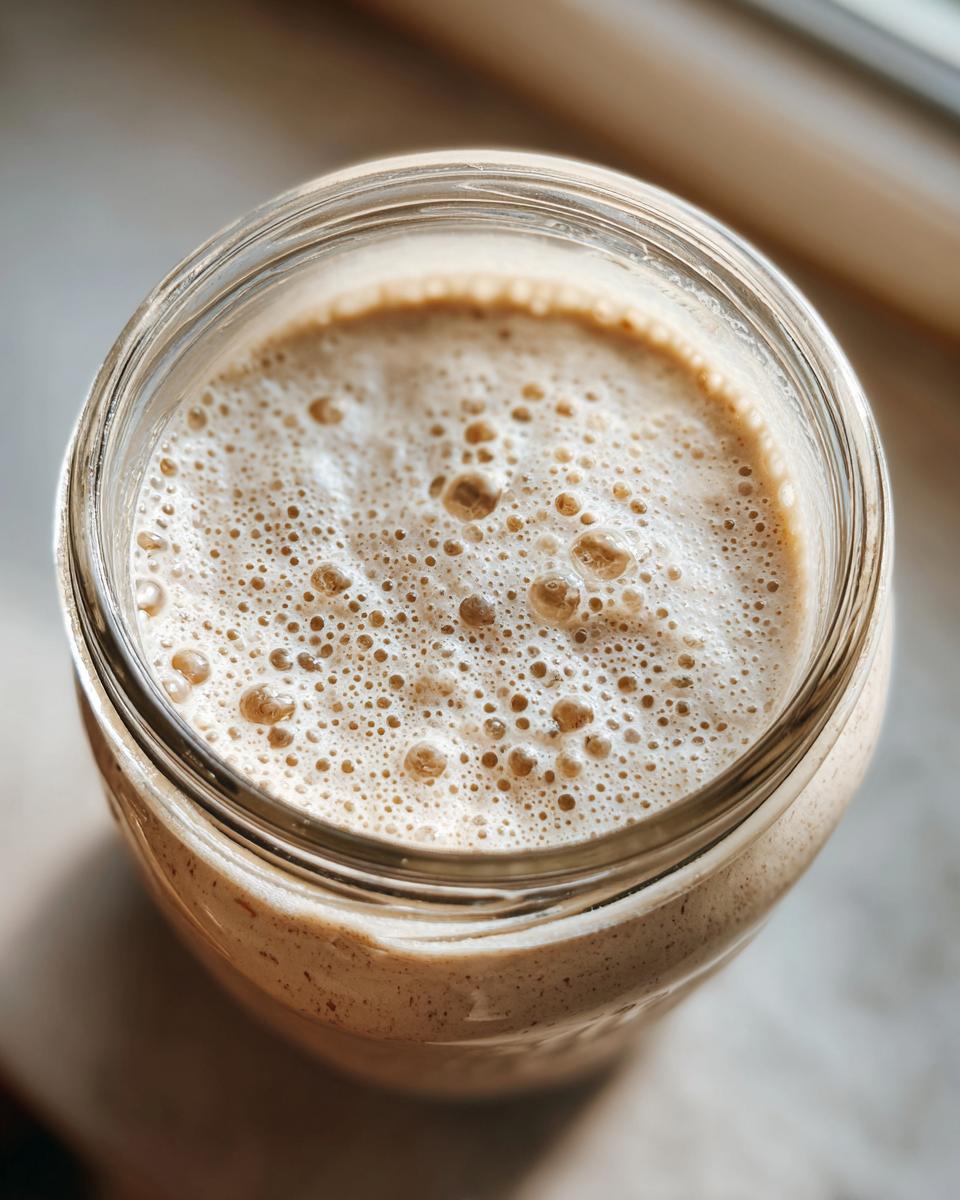
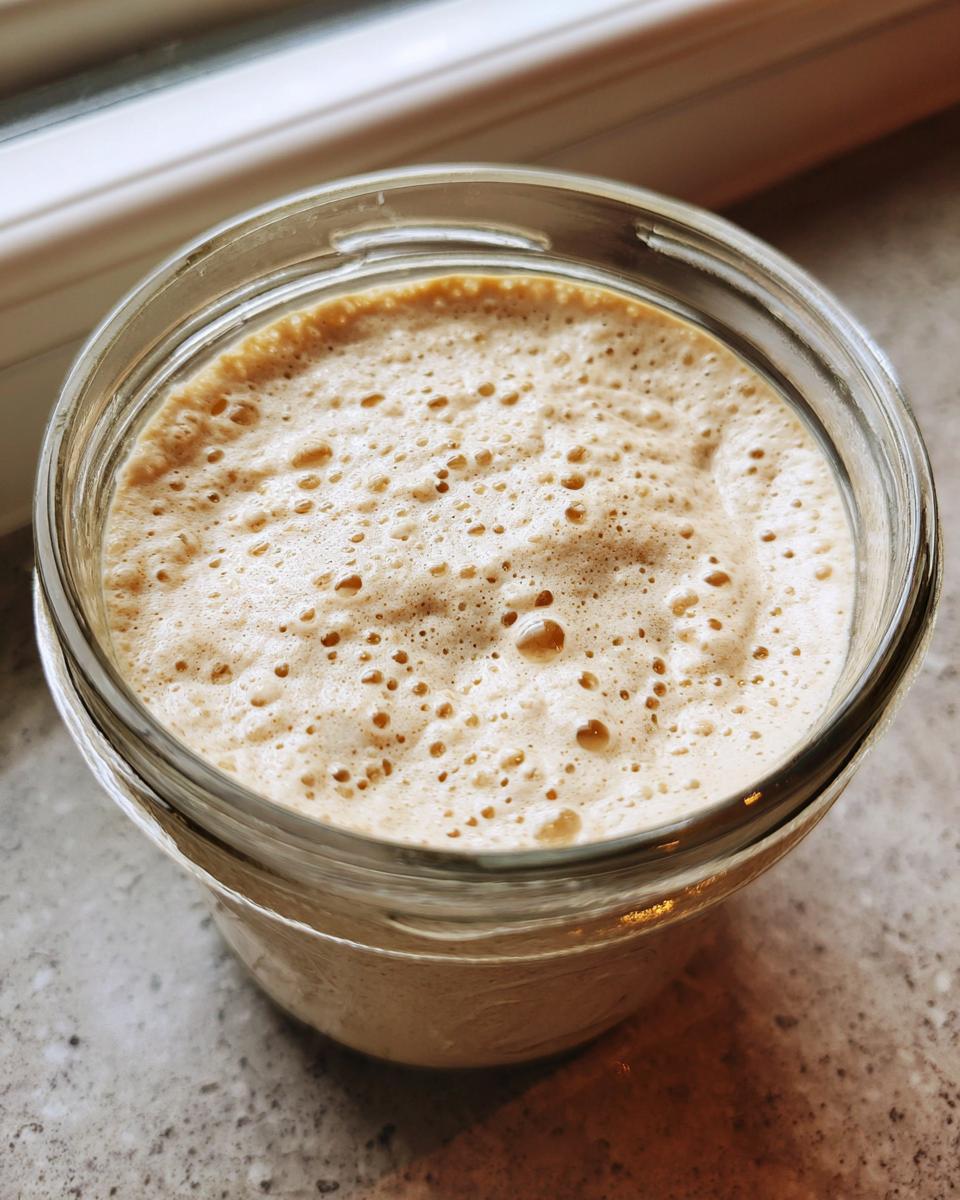
When your sourdough starter is perfectly happy and ready to use, it looks like a thick, light batter that has expanded significantly—often doubling in volume, maybe even more! It should look airy and sponge-like, with tons of small bubbles clinging to the sides of the jar, not just a few on top. If you jiggle the jar gently, it should wobble like jelly rather than slosh. That’s how you know you have your strong, bubbly sourdough starter!
Is it bad if my starter smells like vinegar a lot?
Not at all! If you notice that sharp acidic or vinegary smell right before it’s time to feed, that means your starter is hungry. That smell is lactic acid, which is what we want for that wonderful sourdough tang in the final bread. Just stir it in, discard, and give it a fresh meal right away. It’s just letting you know it’s ready for its next meal!
Start Your Sourdough From Scratch Journey Today
Seriously, you have everything you need, and you know exactly what to expect for the next seven days. Don’t let this process intimidate you! Remember what we talked about at YumDrizzle—great food is supposed to be fun and accessible, not another chore that stresses you out. You’ve got this whole wild yeast thing nailed down now.
Go find a quiet corner on your counter, grab your flour, and get mixing! That jar of flour and water is waiting to become the secret weapon in your baking toolbox. This is more than just making bread; it’s about connecting with food in a totally real way. If you end up with the proudest, bubbliest sourdough starter you’ve ever seen, please come back and tell me about it in the comments! I absolutely love hearing about everyone’s wild yeast adventures. Show off your progress!
For a little extra inspiration on the *why* behind keeping our recipes fun and easy, check out our story here. Now go get that starter going!
PrintThe Ultimate Beginner’s Guide: How to Make and Keep a Thriving Sourdough Starter From Scratch
Learn how to create your own active sourdough starter using only flour and water. This guide provides a simple, day-by-day feeding schedule perfect for beginners to cultivate wild yeast.
- Prep Time: 5 min per day
- Cook Time: 0 min
- Total Time: 7 days (active maintenance)
- Yield: Approximately 100g active starter 1x
- Category: Baking Foundation
- Method: Fermentation
- Cuisine: American
- Diet: Vegetarian
Ingredients
- 100g Whole Wheat Flour or Rye Flour (for initial days)
- 100g Unbleached All-Purpose Flour (for maintenance)
- 100g Unchlorinated Water (room temperature)
Instructions
- Day 1: Mix 50g whole wheat flour and 50g water in a clean glass jar. Stir until fully combined. Cover loosely and let it sit at room temperature (68-75°F) for 24 hours.
- Day 2: You may see small bubbles or nothing at all. Discard half of the mixture. Add 50g whole wheat flour and 50g water to the remaining starter. Mix well, cover loosely, and wait 24 hours.
- Day 3: Discard half. Feed with 50g whole wheat flour and 50g water. You should start seeing more activity.
- Day 4: If you see consistent bubbles, switch to feeding with all-purpose flour. Discard half. Feed with 50g all-purpose flour and 50g water.
- Day 5: Discard half. Feed with 50g all-purpose flour and 50g water. You should see significant doubling in size within 6-12 hours after feeding.
- Day 6: Discard half. Feed with 50g all-purpose flour and 50g water. The starter should now reliably double in volume and show many bubbles. This is often when you have an active sourdough starter.
- Day 7 (and beyond): Your sourdough starter is ready for baking when it consistently doubles in size after feeding. Maintain by discarding most of it and feeding it a 1:1:1 ratio (starter:flour:water) every 12-24 hours, depending on your room temperature.
Notes
- Use a kitchen scale for accurate measurements; consistency in ratios is key for success.
- If your starter does not show activity by Day 5, move it to a slightly warmer spot (around 78°F) and continue feeding.
- If you see pink, orange, or fuzzy mold, discard the entire batch and start over.
- You can use sourdough discard in recipes like pancakes or crackers instead of wasting it.
Nutrition
- Serving Size: 100g
- Calories: 200
- Sugar: 0.5g
- Sodium: 1mg
- Fat: 0.5g
- Saturated Fat: 0.1g
- Unsaturated Fat: 0.4g
- Trans Fat: 0g
- Carbohydrates: 40g
- Fiber: 3g
- Protein: 6g
- Cholesterol: 0mg