
You know those desserts that just scream ‘celebration’? The ones that are so rich and deeply satisfying that you almost feel guilty taking the first bite? That is exactly what happens when you make this incredible baked oreo cheesecake. Forget everything you think you know about fussy baking; this recipe delivers that famously smooth, unbelievably creamy texture, totally comparable to that Cheesecake Factory Style Dessert we all dream about, right in your own kitchen.
When I started YumDrizzle, it was because I saw too many folks missing out on home-cooked joy because the recipes felt too complicated. My philosophy, forged on endless road miles tasting the best local spots, is that incredible flavor should be accessible. This recipe is pure Jaxson Riley tested: delicious, straightforward, and guaranteed to bring the ‘wow’ factor without requiring you to be a pastry expert. Seriously, this is the Best Cheesecake Recipe you’ll ever use for Oreos.
We’re going for decadent, absolutely, but we’re also aiming for predictable perfection. If you’ve ever wanted a truly decadent Oreo treat that holds its shape and tastes like a million bucks, you’ve found your spot.
- Why This Baked Oreo Cheesecake Recipe Works (The Creamy Cheesecake Recipe Promise)
- Essential Ingredients for Your Oreo Cheesecake
- How to Prepare the Ultimate Oreo Cheesecake (Step-by-Step)
- Tips for a Flawless Baked Oreo Cheesecake
- Easy Oreo Dessert: The No Bake Oreo Cheesecake Alternative
- Making Your Oreo Cheesecake Factory Style Dessert
- Serving Suggestions for Your Party Cheesecake Recipe
- Storage and Reheating Instructions for Homemade Oreo Cheesecake
- Frequently Asked Questions About Oreo Cheesecake
Why This Baked Oreo Cheesecake Recipe Works (The Creamy Cheesecake Recipe Promise)
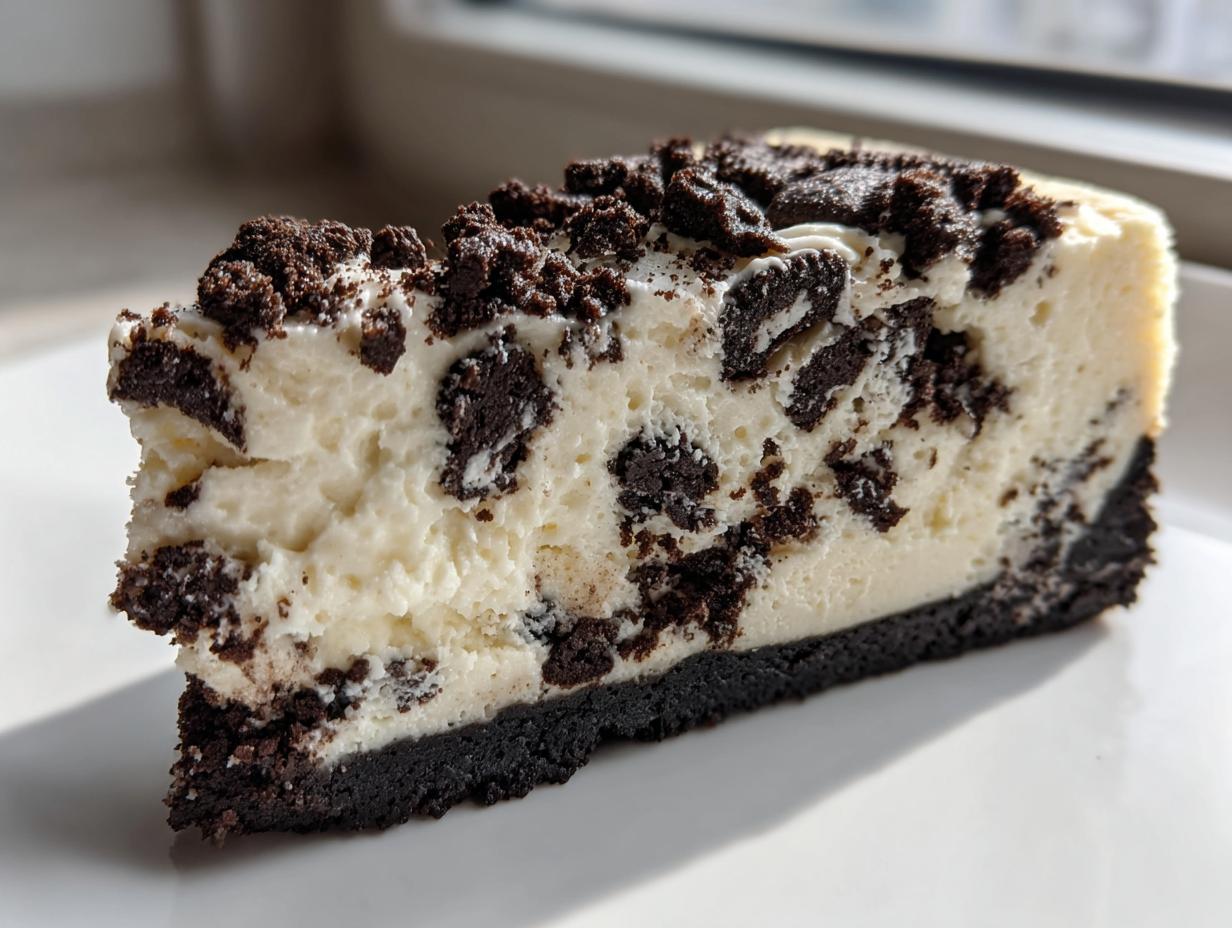
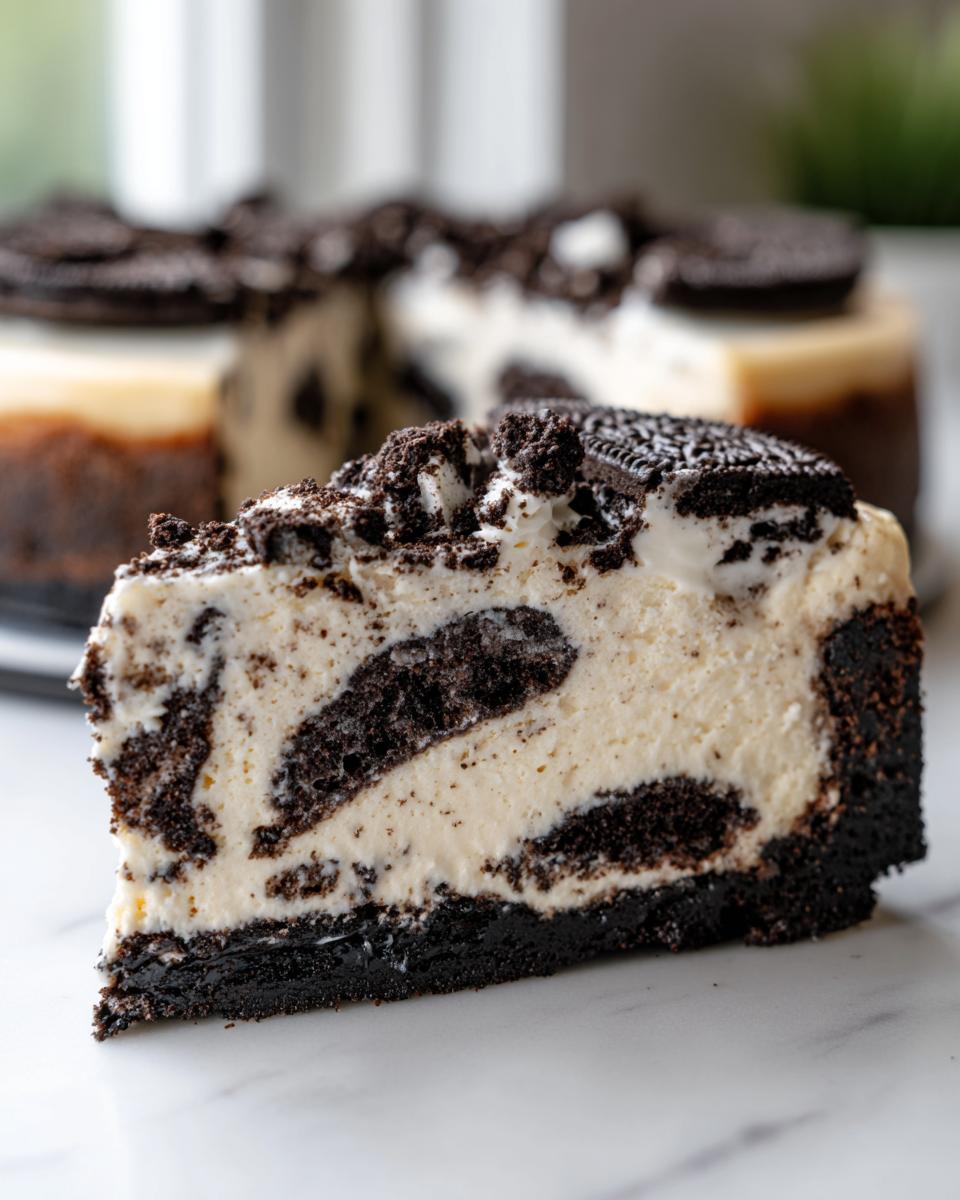
Okay, let’s talk results. The absolute best part about this Oreo Cheesecake Recipe isn’t the cookies—though those are fantastic—it’s the texture. We aren’t making a wobbly, sad dessert here! We are aiming for that signature, dense, ultra-smooth finish that melts in your mouth every single time. Trust me when I say this method sets you up for success.
- Flawless, crack-free surface—every single time.
- The filling is thick, rich, and holds its shape beautifully.
- It tastes like it came straight from that famous cheesecake restaurant, only better because you made it!
Achieving That Perfect Rich Creamy Dessert Texture
The secret weapon, my friends, is temperature control and patience. Seriously, don’t rush it! If your cream cheese is cold, you end up with little lumps, and those lumps mean overworked batter. We need that cream cheese buttery soft before we start. Then, once it’s in the oven, the water bath acts like a cozy sauna, keeping the heat gentle and steady so the edges don’t cook faster than the middle. Finally, that slow cool-down inside the turned-off oven stops any sudden temperature shock that causes cracks. It’s gentle care that creates one amazing creamy cheesecake recipe.
Essential Ingredients for Your Oreo Cheesecake
Alright, let’s get down to brass tacks. You can’t make a show-stopping dessert without treating your ingredients right. Remember how Jaxson Riley learned from the best cooks across the country? They all knew that quality ingredients make the difference between a good dessert and an unforgettable Chocolate Cookie Cheesecake. Don’t skimp here, and make sure everything for the filling is at room temperature—that’s non-negotiable for that ultra-smooth texture we talked about!
Here’s exactly what you need for the full experience. I’ve laid it out so you can print it and head straight to the store. Don’t forget to grab those extra Oreos for snacking while you bake; I always do!
- 1 3/4 cups Oreo cookie crumbs (that’s about 30 cookies, give or take a few, crushed up good!)
- 1/4 cup unsalted butter, melted
- 3 (8 ounce) packages full-fat cream cheese, softened—and I mean truly softened!
- 1 1/2 cups granulated sugar
- 1 teaspoon pure vanilla extract
- 1/4 cup sour cream (this adds essential tang and richness)
- 4 large eggs, coming to room temperature
- 1 cup crushed Oreo cookies (these go right into the filling for that cookie crunch)
- 1/2 cup mini Oreo cookies (saved just for the beautiful top layer)
If you are looking for other pantry staples to whip up fast, you should check out my recipe for when you need some quick snacks while testing this, like those easy 4-ingredient cheese crackers!
How to Prepare the Ultimate Oreo Cheesecake (Step-by-Step)
Okay, this is where the magic happens! If you follow these steps exactly, you’re guaranteeing yourself that flawless, rich creamy dessert texture we talked about. Before you even start mixing the crust, you need to set the stage. Preheat your oven to 350°F (175°C). Then, take heavy-duty aluminum foil—I mean the good stuff—and wrap the outside of your 9-inch springform pan super tightly. We’re sealing this baby up so no rogue water gets inside during the bath later. Wrap it twice, just to be safe!
Preparing the Oreo Crust Dessert Base
First things first: the foundation! Grab those Oreo crumbs and pour them into a bowl with your melted butter. Mix it all up until it looks like wet sand. Press that mixture firmly and evenly into the bottom of your wrapped pan. You want a solid base! Pop that into the oven for just 10 minutes at 350°F. This initial bake sets the crust so it doesn’t get soggy later. When it’s done, pull it out and let it cool down a touch while you drop your oven temp to 325°F (160°C).
Mixing the Creamy Cheesecake Recipe Filling
Now for the creamy part! In your big mixer bowl, beat the softened cream cheese until it’s completely silky smooth—no lumps allowed, please! Slowly add the sugar and mix until it’s just blended in. Toss in the vanilla and sour cream. Here’s the crucial bit for this Oreo cheesecake: add the four eggs one at a time, mixing only on the absolute lowest speed after each addition. Stop mixing as soon as the last bit disappears. We want to keep air out! Finally, gently fold in that cup of crushed Oreos; don’t churn them in!
Baking the Oreo Cheesecake with a Water Bath
Pour that gorgeous filling right over your set crust. Now we create the cozy steam room: place the springform pan inside a larger roasting pan. Carefully pour hot water into that big roasting pan until the water comes halfway up the sides of the cheesecake pan. Bake at 325°F for about 55 to 65 minutes. You’re looking for edges that look set, but the very center should still have a slight jiggle when you nudge the pan. If it’s completely firm, you’ve baked too long! This water bath is your insurance policy against cracking. Then comes the second patience test: turn the oven off, crack the door open slightly, and let it rest inside for a full hour before moving it to the counter.
If you need a fantastic side for this ultimate dessert, maybe try out my recipe for easy homemade garlic herb rice pilaf—just kidding! Go grab a fork instead!
Tips for a Flawless Baked Oreo Cheesecake
We’ve done the hard work with the water bath and the slow cooling, but I want to give you these little bits of wisdom I picked up trying to perfect my Homemade Oreo Cheesecake. Remember, whether you are making a full-size cake or want to make Simple Cheesecake Bars, temperature is king!
First, please, please, please don’t try to shortcut the chilling time. That minimum 6 hours is non-negotiable for slicing. If you rush it, it will turn into a puddle when you cut it, and that defeats the entire purpose of making such a decadent dessert!
The best tip I can share, which is something I learned recreating recipes from diners all over the map, is about achieving that incredible density. If you want that luxurious, heavy mouthfeel, make sure you’re using full-fat cream cheese and sour cream. Low-fat versions just don’t give you the same buttery, rich factor that makes this the Ultimate Oreo Dessert.
After the long chill, right before serving, I like to run a thin, sharp knife around the edge of the pan before I even release the springform lock. This little trick guarantees that when you take the ring off, the sides don’t pull or tear away from the crust. It’s such a small effort for a huge payoff!
For another technique-focused recipe that needs gentle heat, check out my guide on how to get perfectly poached eggs. Precision matters in baking, even when you’re dealing with something as fun as Oreos!
Easy Oreo Dessert: The No Bake Oreo Cheesecake Alternative
Look, I get it. Sometimes the oven is just not your friend, or maybe you’re planning a big party and need a dessert that doesn’t hog oven space. That’s why I always make sure to provide a way to turn this incredible Oreo cheesecake into a fantastic No Bake Oreo Cheesecake. This variation is honestly shocking at how creamy it gets without ever seeing heat!
To switch gears, you basically ditch most of the baking steps—say goodbye to setting that water bath and doing the gradual cooling dance! We are simplifying our process heavily, but we keep the flavor profile sharp and that satisfying crunch of Oreos front and center. This is perfect for those scorching summer days when you want an Easy Oreo Dessert that sets up beautifully.
Here’s what you need to adjust based on the main recipe card above:
- Skip steps 1, 2, 4, 5, 6, 7, 8, 9, and 10 entirely. Seriously, toss out that foil!
- For the filling, you beat the cream cheese, sugar, vanilla, and sour cream until smooth—just like before, making sure absolutely everything is soft.
- Gently fold in that cup of crushed Oreos, just as you did for the baked version.
- Press the crust mix (Oreos and butter) right into the pan. Since we aren’t baking it, you definitely want to pack that crust down hard. Maybe use the bottom of a measuring cup for extra compression!
- Pour the filling over the unbaked crust.
- Then, here’s the critical part for No Bake Oreo Cheesecake: you MUST chill it for at least 8 hours, but overnight is always better, to make sure it actually firms up.
This version is slightly lighter, but still totally indulgent. If you are looking for other truly effortless sweet snacks, you might want to check out my recipe for no bake pumpkin pie next time the craving hits! Though if you prefer that dense texture, you might want to peek at how the folks over at Handle the Heat tackle their baked version.
Making Your Oreo Cheesecake Factory Style Dessert
If you’re staring at your bowl of batter thinking, ‘This is good, but is it that good?’—I hear you. So many people search for that specific experience: the incredibly thick, rich, dense crumb that defines a Cheesecake Factory Style Dessert. Mine is pretty close, honestly, but if you want to nail that specific commercial texture, you need to be mindful of two things: fat content and bubbles!
First, forget about cutting corners on fat. Real, full-fat cream cheese and full-fat sour cream are essential here. They bring the necessary weight that those lighter versions just can’t replicate. Using anything less guarantees a slightly fluffier texture, which is fine, but it isn’t the dense treat you’re chasing when you try to recreate a restaurant favorite.
The second secret is air. Remember halfway through the filling instructions where I told you to mix on low speed and only until combined? That’s the key to density. High-speed mixing whips in too much air, making the cake light and fluffy—the opposite of what we want for this heavy-hitting Oreo cheesecake.
I’ve had a few readers try to make bars out of this version, and they loved it because the density holds up perfectly for slicing. If you want to get that restaurant presentation at a party, use a 9-inch springform pan for the full height, or try a 9×13 pan for perfect square slices. If you’re looking for more bar ideas, definitely check out my recipe for churro cheesecake bars for inspiration!
To see how one of the masters approaches this, you can always check out the recipe breakdown over at Recipe Horizon and compare notes!
Serving Suggestions for Your Party Cheesecake Recipe
The moment of truth! You’ve successfully chilled this magnificent creation, and now you have to serve it. Presentation is everything, especially when you’ve put this much love into making an indulgent dessert for guests. I always think about how this treat will look sitting out at a party, and I have a few tricks up my sleeve for serving beyond just slicing it into basic wedges.
If you are having a huge gathering and worried about slicing a whole 9-inch cake perfectly—which trust me, is hard even the next day—let’s talk portioning! The easiest method is turning this into Simple Cheesecake Bars. When you use a 9×13 inch pan for the baked version, you get about 16 perfect squares that are easy for people to grab with a napkin. If you go the no-bake route, bars are often even easier to manage!
For a more dramatic look on the dessert table, make mini bites! Pour the batter into lined muffin tins (you can use the parchment paper liners that stick up a bit, which makes lifting them out super easy) and bake them for maybe 20 minutes instead of an hour. These little jewels are fantastic because everyone gets perfect edges and they look super fancy.
And let’s elevate those toppings! While the recipe calls for mini Oreos on top, think about adding a drizzle of salted caramel sauce right before serving—the salt cuts through that richness beautifully. Or, if you’re feeling fancy, try whipping up some chocolate ganache using good quality dark chocolate and a splash of heavy cream. A soft drizzle over the top makes this look like it belongs in a bakery window.
If you are looking for another easy dish to round out your party spread that tastes comforting and familiar, you might want to try out my easy cranberry chicken recipe. It’s totally different, but just as crowd-pleasing!
Storage and Reheating Instructions for Homemade Oreo Cheesecake
Alright, the hard part is over, and you have this massive, decadent Oreo cheesecake masterpiece sitting there begging to be eaten. But hold on just a second! Cheesecake, especially one this rich, needs time to set up properly so you can slice it without creating a gorgeous, messy disaster. You absolutely have to let it chill.
The minimum time I’ll ever let this sit is six hours, but honestly, I’m a firm believer that if you can wait until the next day—overnight—it tastes exponentially better. Why? Because those flavors deepen, and the structure firms up perfectly. That dense, creamy texture we worked so hard for really locks in when it’s properly cold.
Once it’s chilled and you’ve managed to slice it (good job!), storage is pretty straightforward. If you’re lucky enough to have leftovers—and that’s a big ‘if’ in my house—cover the cheesecake tightly in the pan or transfer slices to an airtight container. It keeps beautifully in the refrigerator for up to four or five days. It’s usually better on day two, in my opinion!
Now, about reheating. Since this is a baked cheesecake built on delicate dairy, you really don’t want to reheat it in the traditional sense. Putting it in the microwave will warm up the fats and turn it weirdly soft and soupy, and that defeats the whole purpose of the water bath we used! The best way to enjoy leftover Homemade Oreo Cheesecake is straight from the fridge, nice and cold. If you absolutely cannot stand cold cheesecake, let a slice sit on the counter for about 20 to 30 minutes before serving. That little bit of warming up on its own brings out the flavor without compromising the texture.
If you’re looking for ways to repurpose any extra dairy or leftovers you might have from a big holiday meal that might have inspired this, you might want to check out my recipe for easy turkey soup. But for the cheesecake, chilled is the champion!
Frequently Asked Questions About Oreo Cheesecake
I always get so many great questions about this dessert after people try it! Since we covered the baked version and the No Bake Oreo Cheesecake option, let’s tackle a few common sticking points. I want to make sure your experience making this Best Cheesecake Recipe is totally stress-free!
Can I skip the water bath for the baked cheesecake?
Technically, yes, you *can* skip it, but I absolutely wouldn’t recommend it if you want that signature crack-free surface. The water bath (or ‘bain-marie’) is our safety net. It keeps the oven humidity up and ensures gentle, even heat delivery. If you skip it, you run a much higher risk of the edges setting too fast and shrinking, which leads to cracking right when it cools. For a perfect Creamy Cheesecake Recipe, the bath is worth the extra roaster pan!
How do I easily turn this into simple cheesecake bars?
That’s one of my favorite ways to serve it for a crowd! For bars, skip the springform pan and use a standard 9×13 inch baking dish. Line it with parchment paper, leaving an overhang on two sides—this acts as handles later so you can lift the whole thing out cleanly. You might need to shave 5 to 10 minutes off the bake time, but still check for that little jiggle in the center before you start the cool-down process.
What if my cream cheese isn’t fully softened?
If your cream cheese is cold when you start mixing, you’re fighting an uphill battle! Cold cream cheese chunks break up terribly, and when you try to mix out those lumps, you end up whipping too much air into the mixture. This leads to a slightly grainy texture and increases the chance of cracking later. For the ultimate rich and dense dessert, take your time and let the cream cheese sit on the counter for at least an hour until it’s buttery soft.
Do I have to use Oreos? What about other cookies?
While this is the star Oreo Lovers Recipe, you can absolutely swap the cookies! If you used chocolate wafers or even graham crackers for the crust, that works fine. For the filling, you need something with similar sturdiness. Vanilla wafers or shortbread cookies can replace the Oreos in the filling, though you’ll lose that signature black-and-white contrast and deep chocolate punch. It’s still delicious, but it won’t be the classic Oreo Cheesecake!
If you need some simple savory ideas to balance out all that indulgence, be sure to check out my easy caesar chicken recipe!
PrintThe Ultimate Creamy Baked Oreo Cheesecake Recipe
Make a rich, creamy Oreo cheesecake with a crisp chocolate cookie crust. This recipe delivers a decadent dessert perfect for parties, similar to Cheesecake Factory style, with instructions to prevent cracking.
- Prep Time: 25 min
- Cook Time: 65 min
- Total Time: 7 hours 55 min
- Yield: 12 servings 1x
- Category: Dessert
- Method: Baking
- Cuisine: American
- Diet: Vegetarian
Ingredients
- 1 3/4 cups Oreo cookie crumbs (about 30 cookies)
- 1/4 cup unsalted butter, melted
- 3 (8 ounce) packages cream cheese, softened
- 1 1/2 cups granulated sugar
- 1 teaspoon vanilla extract
- 1/4 cup sour cream
- 4 large eggs
- 1 cup crushed Oreo cookies (for filling)
- 1/2 cup mini Oreo cookies (for topping)
Instructions
- Preheat your oven to 350°F (175°C). Wrap the outside of a 9-inch springform pan tightly with heavy-duty aluminum foil.
- Prepare the crust: Mix the Oreo cookie crumbs and melted butter in a bowl until combined. Press the mixture firmly into the bottom of the prepared springform pan. Bake for 10 minutes. Remove and let cool slightly.
- Reduce the oven temperature to 325°F (160°C).
- Prepare the filling: In a large bowl, beat the softened cream cheese with an electric mixer until smooth. Gradually add the granulated sugar and beat until fully incorporated.
- Mix in the vanilla extract and sour cream until just combined. Do not overmix.
- Add the eggs one at a time, mixing on low speed after each addition until just blended. Scrape down the sides of the bowl as needed.
- Gently fold in the 1 cup of crushed Oreo cookies.
- Pour the filling over the cooled crust. Place the springform pan inside a larger roasting pan. Carefully pour hot water into the roasting pan until it reaches halfway up the sides of the springform pan (this is a water bath to prevent cracking).
- Bake for 55 to 65 minutes, or until the edges are set but the center still has a slight jiggle.
- Turn off the oven, crack the door open slightly, and let the cheesecake cool inside the oven for 1 hour. This gradual cooling helps prevent cracking.
- Remove the cheesecake from the water bath and let it cool completely on a wire rack. Once cool, cover and chill in the refrigerator for at least 6 hours, or preferably overnight.
- Before serving, top with the remaining mini Oreo cookies. Run a thin knife around the edge before releasing the springform side.
Notes
- For a No Bake Oreo Cheesecake variation, skip steps 1, 2, 4, 5, 6, 7, 8, 9, and 10. Instead, mix the cream cheese, sugar, vanilla, and sour cream. Fold in the crushed Oreos. Press the crust mixture into the pan, top with the filling, and chill for at least 8 hours until firm.
- To achieve a Cheesecake Factory Style texture, ensure your cream cheese is fully softened and mix the batter just until combined to keep the texture dense and creamy.
- If you want simple cheesecake bars, use a 9×13 inch baking dish instead of a springform pan and adjust baking time slightly.
Nutrition
- Serving Size: 1 slice
- Calories: 450
- Sugar: 35g
- Sodium: 350mg
- Fat: 30g
- Saturated Fat: 18g
- Unsaturated Fat: 12g
- Trans Fat: 0.5g
- Carbohydrates: 40g
- Fiber: 1g
- Protein: 7g
- Cholesterol: 95mg