
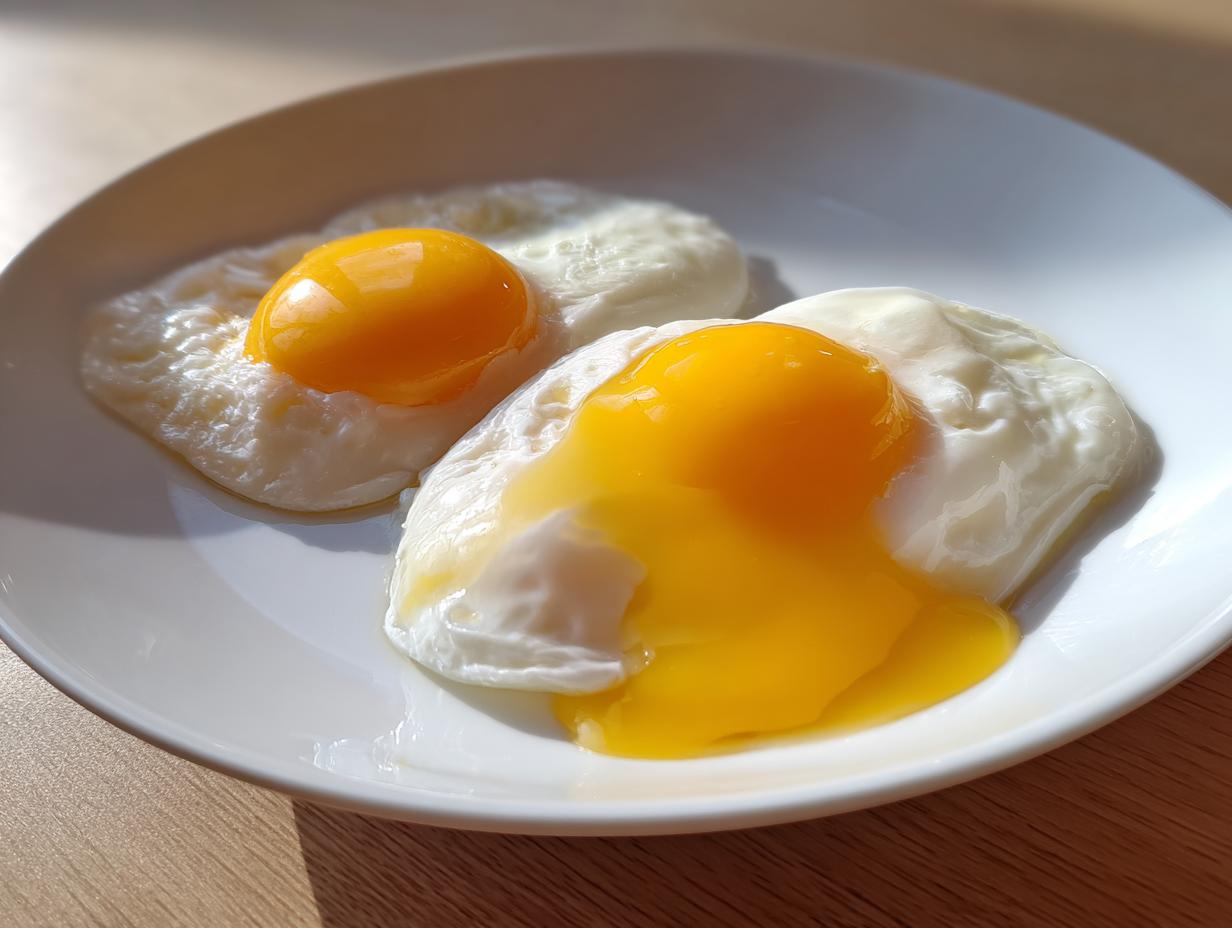
Okay, let’s just admit it: poaching eggs can feel like a total gamble! You watch some fancy chef on TV swirl the water perfectly, and then you drop yours in, and BAM—you’ve got sad, wispy white streamers floating around that look more like spaghetti than breakfast. I’ve been there, many times, usually on a truck stop hot plate trying to recreate something amazing I tasted the night before. But I’m here to tell you that achieving those beautiful, firm-white, runny-yolk poached eggs isn’t some culinary secret reserved for Michelin stars. This is the ultimate, road-tested guide to making them perfectly every single time, no fuss required. We’re keeping it real and accessible, just like every recipe here at YumDrizzle. Now let’s get that golden yolk flowing!
If you’re making something spectacular like easy breakfast recipes, you need the star of the show to behave! Trust me, once you get this technique down, you’ll be making perfect breakfast egg recipes all the time.
- Why You Will Master How to Poach Eggs After Reading This Guide
- Essential Ingredients for Perfect Poached Eggs
- The Best Way to Poach Eggs: Step-by-Step Instructions
- Expert Tips for Flawless Poached Eggs Every Time
- Quick Solutions: Microwave Poached Eggs and Oven Poached Eggs
- Serving Suggestions for Your Runny Yolk Eggs
- Storage and Reheating Instructions for Poached Eggs
- Frequently Asked Questions About Poached Eggs
- Share Your Perfect Poached Eggs Creations
Why You Will Master How to Poach Eggs After Reading This Guide
I’ve seen every silly hack out there, and honestly, most of them overcomplicate things or rely on weird props. My method focuses on the science happening right there in your pot. We aren’t using strainers or plastic wrap—we use simple physics to get the job done right. We’re aiming for consistent results, even when you’re rushing through poached eggs before work.
Key Benefits for Perfect Poached Eggs
- Runny yolk guaranteed every time, provided you watch the clock!
- No more messy, wispy white strings floating everywhere; we keep that egg contained.
- This setup requires only equipment you already have on hand—no special tools needed for great results.
- It’s the foundation for making great healthy egg breakfasts without any heavy oil or fat.
Essential Ingredients for Perfect Poached Eggs
Look, you can’t cheat biology, right? The biggest secret to getting those neat, tight packages of protein is using the absolute freshest eggs you can get your hands on. If your eggs are old, the whites get watery and spread out before they can set. Don’t even try with those one-week-old carton eggs if you want perfect poached eggs. When I’m shopping, I always grab them straight from the carton.
Here’s exactly what you need for two servings. It’s simple, I promise!
- 2 large, very fresh eggs
- 4 cups water
- 1 tablespoon white vinegar
- Pinch of salt (optional)
The Best Way to Poach Eggs: Step-by-Step Instructions
This is where the magic happens. Forget worrying about whether you have the right fancy poacher—we’re using a regular old skillet! The trick to getting those beautiful, tight packages of poached eggs is all in managing the water temperature and that little bit of acid. Don’t panic about the timing; 3 to 4 minutes is usually perfect for that creamy, just-set white and that gorgeous, runny yolk that people rave about.
Preparing the Water Bath for Poached Eggs
First, fill up a wide, deep skillet—at least 3 inches deep is what I use. You need room for the egg to float comfortably! Now, here’s where we add our secret weapon: the vinegar. I toss in about a tablespoon of white vinegar. People always worry they’ll taste it, but trust me, you won’t! The vinegar’s job is to help those egg whites firm up super fast when they hit the heat. Bring that water up to a simmer, and I mean a *gentle* simmer. We want tiny, lazy bubbles rising, not a violent, rolling boil that will tear your egg apart. If it’s boiling hard, turn the heat down! If you want to make a big batch for meal prep later, maybe check out some tips on easy egg bites instead, because overcrowding the pan ruins everything.
Creating the Vortex and Dropping the Egg
This vortex step is crucial for shaping the egg nicely. Using a spoon, stir the simmering water firmly in one direction until you have a nice, steady whirlpool going in the middle. Don’t stir so hard you splash water everywhere! Before you drop the egg, crack it gently into a small ramekin or a tiny bowl. This step is non-negotiable; it keeps the egg intact right until it hits the water perfectly. Slide that egg right into the center of your swirling water. That swirl tucks the white right around the yolk for you. Let it cook undisturbed for about 3 to 4 minutes for that ideal runny yolk, then use your slotted spoon to lift it gently out!
Expert Tips for Flawless Poached Eggs Every Time
We’ve covered the standard technique, but like anything worth mastering, there are a few insider whispers that take your poached eggs from great to absolutely unforgettable. Getting that perfect consistency—firm white, liquid gold center—really comes down to two things: how fresh your egg is and how you handle the temperature. You can’t fake fresh, folks, that’s step one for everything in my kitchen!
I picked up a few tricks from cooks on the road who were making gourmet breakfast at home with limited supplies. They all agreed on a few crucial points that prevent disaster when you’re making something as delicate as a poached egg.
Ingredient Notes and Substitutions
Let’s talk about the egg freshness again because it’s that important. If the egg white looks thin and watery when you crack it onto a plate before it even hits the water, you’re going to have wisps. The fresher the egg, the thicker the white stays, and the better it holds its shape around that beautiful yolk. That’s why picking good eggs is the best *hack* there is.

And the vinegar? I promise you, once that egg is poached, you won’t taste a single bit of it! It’s just there working on the quick-set proteins. If you absolutely cannot stand the thought of vinegar, you *can* skip it, but you need even hotter, fresher eggs and you should link here for some alternative methods that focus on intense swirling instead. But honestly, I always add that vinegar for the easiest, most foolproof method for cooking eggs without oil.
Quick Solutions: Microwave Poached Eggs and Oven Poached Eggs
Okay, sometimes you need that runny yolk goodness, but you do *not* have five minutes for a water bath, or maybe you’re cooking for a crowd and can’t manage fifteen pans of simmering water. Been there! When I was touring, sometimes the only thing working backstage was a single microwave. So, I figured out a couple of fast hacks for getting delicious poached eggs when time is screaming at you. These aren’t my *favorite* way, but they absolutely get the job done when you need an easy egg poaching technique ASAP.
We are cheating a little bit here, but cheating is just resourceful cooking, right? These methods are fantastic for quick breakfast hacks or when you’re making something simple like poached eggs for avocado toast.
Microwave Poached Eggs in a Mug
This is pure speed. You need a microwave-safe mug—make sure it’s totally safe! Fill that mug with water until it just covers whatever egg you’re about to drop in. Seriously, crack that egg right into the water. If you’re feeling fancy, a tiny splash of vinegar here can help keep the white together, though it’s often not necessary because the mug walls do most of the work containing it.
I don’t mess with covering it, but be careful when removing it! Zap it on high power for about 60 to maybe 90 seconds. If your microwave is super powerful, start at 60 seconds and check it. If the white is still runny, give it 15 more seconds. Once it’s done, use a fork or a slotted spoon to gently scoop out your microwave poached egg. Remember, the texture will be slightly different than the stovetop version, maybe a little more firm, but the yolk will still be golden and soft!
Oven Poached Eggs for Hands-Off Cooking
If you’ve got a crowd coming, or honestly, if you just hate standing over the stove, oven poaching is a winner. This method is so much less fuss! Grab a standard muffin tin—the little indentations act like mini poaching cups. I spray inside each well liberally with non-stick spray or use a bit of butter. You want to make sure nothing sticks since we aren’t using oil in the water bath.
Crack one egg into each cup. You can sprinkle them with a teeny bit of salt and pepper right now. Pop that tin into an oven that’s preheated to 350°F (175°C). They usually take between 12 to 15 minutes, depending on exactly how runny you want that yolk. I usually pull mine out closer to the 13-minute mark. For more details on how to get this going, some folks have really documented the timing over at this spot. It’s a great way to make a batch of oven poached eggs all at once!
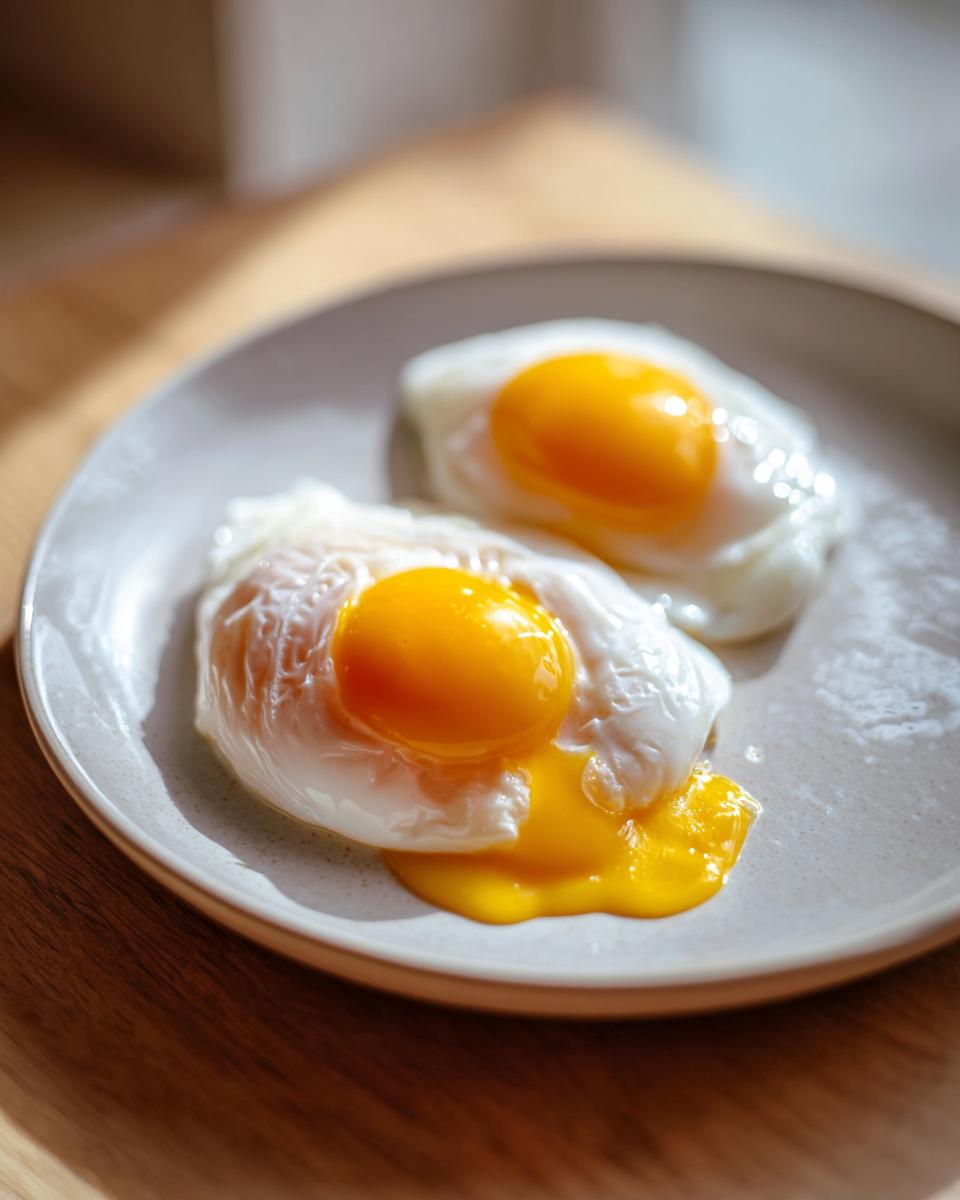
Serving Suggestions for Your Runny Yolk Eggs
Now that you have conquered the technique for perfect poached eggs, the real fun begins: eating them! That gorgeous, runny yolk is practically begging to mingle with something delicious. I always think about my time on the road; surviving on gas station food makes you appreciate a truly fresh dish when you can make one. These aren’t just for fancy brunch anymore; they make a killer weeknight meal!
If you want a truly gourmet breakfast at home, stop thinking about just toast. A perfectly poached egg elevates everything it touches. Check out my guides on how to make amazing poached eggs for avocado toast or ditch the carbs entirely with poached eggs on salad for a super healthy egg breakfast.
Classic Brunch Ideas with Eggs
If you’re having people over and want to pull out all the stops, these eggs are the foundation for the best weekend brunch ideas with eggs. Forget calling a restaurant! You can ace the eggs benedict recipe right in your own kitchen, or try the equally delicious Eggs Florentine tutorial which swaps ham for spinach. Just get that egg soft, and the hollandaise sauce (or even a simple lemon dressing) will do the rest!
Storage and Reheating Instructions for Poached Eggs
So, you nailed the technique, but you made way too many perfect poached eggs for one person (I’ve done this!), or maybe you want to prep for a big Sunday brunch ahead of time. Good news—you absolutely can make these beauties ahead of time! The key here is handling them gently when they cool down so that yolk stays liquid gold and doesn’t turn solid.
When I’m doing prep work for a crowd, I usually cook them right at 3 minutes so they are just barely set. They won’t keep indefinitely, but they last a couple of days if you treat them right. This is for when you want that quick, gourmet breakfast at home without the hassle of boiling water during the main meal.
The Cold Water Shower Method
This is my go-to trick for storing them for about 24 hours. Once you gently lift those runny yolk eggs out of the hot poaching water, let them cool down completely on a paper towel. Once they are room temperature, transfer them into a bowl filled with ice-cold water. Make sure they are fully submerged! They can hang out in the fridge like this for up to two days. The cold water keeps the whites firm but prevents the residual heat from cooking the yolk any further.
Gently Reheating Your Poached Eggs
Reheating is where people mess up and turn a soft yolk into a hard one, so listen up! Never, ever throw them back into boiling water. That’s a recipe for disaster!
To reheat, you want to bring a pot of water back up to that same *gentle* simmer—small bubbles rising, not a rolling boil. Carefully take your chilled eggs out of the cold water bath (they might look weird, but that’s okay!). Drop them into the barely simmering water for about 30 to 60 seconds, tops. That’s all it takes to warm them through without actually cooking them more. Pull them out with the slotted spoon, let the water drip off, and they are ready to serve on toast or over greens. Easy, right? No need to curse the kitchen when you can just reheat!
Frequently Asked Questions About Poached Eggs
I know that when you’re trying this for the first time, your head is probably swimming with little doubts. Do I really need vinegar? What if my egg just dissolves? Don’t sweat it! Here are the biggest questions I get about getting those perfect poached eggs on the table without any fuss.
Does the size of the egg really matter for poaching?
It matters a whole lot, especially when you are aiming for that perfectly shaped appearance! You should absolutely stick to large eggs. If you use jumbo eggs, the whites take longer to set around the yolk, and you risk a thinner outer white tearing away. For the best experience making runny yolk eggs, use large, fresh eggs every time. Jumbo or medium eggs throw off the timing, so large is always the standard in my book.
Can I skip the vinegar in the poaching water? What happens?
You *can* skip it, but I really don’t recommend it if you want the easiest time cooking eggs without oil! The vinegar is acidic, and acid helps the egg proteins tighten up and coagulate—or “set”—much faster when they hit the hot water. If you skip it, your whites are way more likely to spread out into those sad, wispy strings we talked about. You honestly won’t taste it, so keep it in the water for the best results for your breakfast egg recipes.
What should I do if the egg whites separate into wisps in the water?
Ah, the dreaded wisps! This usually means one of two things: your eggs aren’t perfectly fresh, or your water is boiling too hard. If your water is violently bubbling, those little currents are ripping the thin parts of the white apart. Turn that heat down to a very gentle simmer immediately. If the eggs are fresh, you can use a slotted spoon to gently gather those stray wisps back toward the main egg mass, or in a pinch, pull them out. But honestly, learning how to make simple easy egg bites is a healthier alternative if you have constant issues here!
Are microwave poached eggs really a true substitute for stovetop poaching?
They are a fantastic substitute for busy mornings when you need a quick solution! They won’t have that beautiful, silken texture you get from the vortex method, but for topping toast or a salad in under two minutes, they are amazing. It’s all about speed vs. perfection. If you need a high-quality result fast, try the microwave poached eggs hack we detailed. If you have the time, always stick to the water bath!
Share Your Perfect Poached Eggs Creations
Well, that’s it! You’ve done it. You’ve unlocked the secret to making poached eggs that look like they belong in a magazine spread. I feel like I’ve been right there with you, stirring that water bath, and I’m so excited for you to cut into that perfectly runny yolk.
Now that you know the best way to poach eggs, I want to see what you’ve made! I learned all my best tricks standing next to roadside diners and mixing recipes with bandmates who were starving—and that’s what YumDrizzle is all about: sharing the success.
Did you serve your masterpiece on buttered toast, or did you go all out with a full Eggs Benedict recipe? Don’t keep that deliciousness to yourself! Let me know how it went down in the comments below. Tell me your cooking timing worked perfectly, or if you had a little wobble on your first vortex attempt—we learn best when we share the bumps in the road!
Seriously, drop a rating for this guide, leave a comment telling me about your breakfast, or send me a picture if you’re hanging out on social media. I can’t wait to celebrate your kitchen victory!
PrintUltimate Guide: How to Poach Eggs Perfectly Every Single Time

You want perfect poached eggs with runny yolks and set whites. This guide gives you the best way to poach eggs using simple techniques, including the vortex method and tips for using vinegar. Make these healthy egg breakfasts for brunch or top your avocado toast.
- Prep Time: 5 min
- Cook Time: 5 min
- Total Time: 10 min
- Yield: 2 servings 1x
- Category: Breakfast
- Method: Stovetop Poaching
- Cuisine: American
- Diet: Low Fat
Ingredients
- 2 large, very fresh eggs
- 4 cups water
- 1 tablespoon white vinegar
- Pinch of salt (optional)
Instructions
- Fill a wide, deep skillet or pot with about 3 inches of water. Add the tablespoon of white vinegar and a pinch of salt, if using. Bring the water to a gentle simmer over medium heat. You want small, slow bubbles rising, not a rolling boil.
- While the water heats, crack one egg into a small bowl or ramekin. This keeps the yolk intact before it enters the water.
- Create a gentle vortex (whirlpool) in the simmering water by stirring the water in one direction with a spoon. Do not stir too vigorously.
- Carefully slide the egg from the ramekin into the center of the vortex. The swirling water helps wrap the white around the yolk.
- Cook the egg for 3 to 4 minutes for a soft, runny yolk. If you prefer slightly firmer yolks, cook for 5 minutes.
- Use a slotted spoon to gently lift the poached egg from the water. Let excess water drip off.
- Repeat the process with the second egg, making a new vortex if needed, but avoid overcrowding the pan.
- Serve immediately on buttered toast, as part of an Eggs Benedict recipe, or on your favorite grain bowls.
Notes
- Freshness matters: Older eggs have thinner whites that spread out in the water. Use the freshest eggs you can find for the best shape.
- Vinegar helps the proteins in the egg white set faster, keeping the shape tight. You will not taste it in the final product.
- If you need a quick solution for busy mornings, try the microwave poached eggs hack: crack an egg into a mug with water to cover and microwave for about 60-90 seconds.
- For oven poached eggs, crack eggs into greased muffin cups and bake at 350°F (175°C) for about 12-15 minutes.
Nutrition
- Serving Size: 1 egg
- Calories: 78
- Sugar: 0.6
- Sodium: 71
- Fat: 5.3
- Saturated Fat: 1.6
- Unsaturated Fat: 3.7
- Trans Fat: 0.0
- Carbohydrates: 0.6
- Fiber: 0.0
- Protein: 6.3
- Cholesterol: 186