
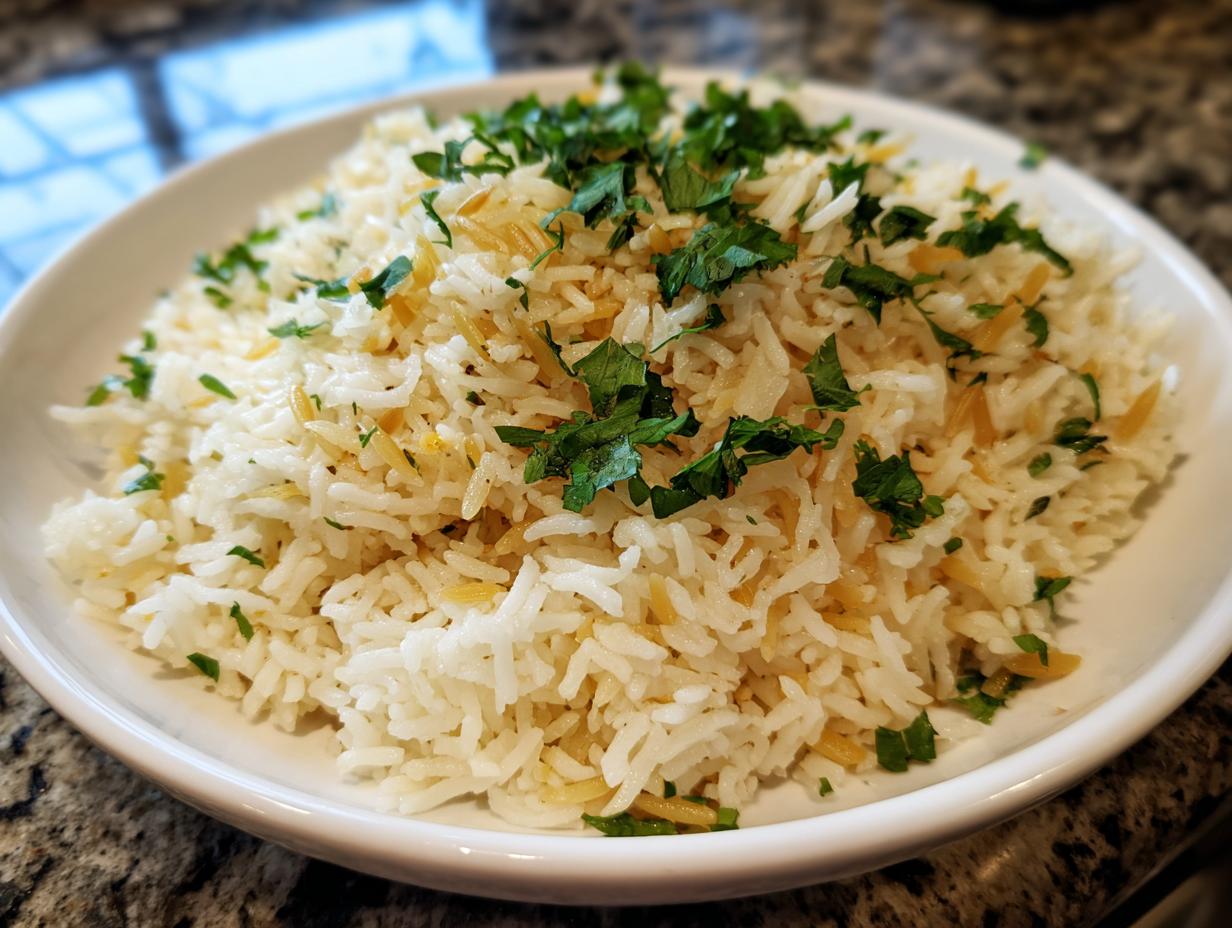
I know how it is. You finish a long day, you stare into the fridge, and the last thing you want is some fussy side dish that takes forever and uses ten different bowls. That’s exactly why I developed this Easy Homemade Garlic Herb Rice Pilaf with Toasted Orzo. When I was living out of a van, making incredible meals on a hot plate, I learned that flavor shouldn’t be complicated. Ditch the plain steamed stuff; this rice pilaf is ready in about 35 minutes, it’s unbelievably fluffy, and it’s packed with savory garlic and herbs. It proves that even on a crazy weeknight, you can make something truly worth sharing. If you need more quick solutions, check out my favorite weeknight dinner recipes!
- Why This Easy Homemade Garlic Herb Rice Pilaf Recipe Works for You
- Gathering Ingredients for Your Flavorful Rice Pilaf with Orzo
- Mastering the Rice Pilaf Cooking Techniques
- Tips for the Best Homemade Rice Pilaf Success
- Versatile Serving Suggestions for Your Rice Pilaf
- Customizing Your Aromatic Rice Side Dish
- Storing and Reheating Your Weeknight Rice Pilaf
- Frequently Asked Questions About Rice Pilaf
- Nutritional Estimates for This Rice Pilaf Side Dish
- Share Your Experience Making This Garlic Herb Rice Pilaf
Why This Easy Homemade Garlic Herb Rice Pilaf Recipe Works for You
Listen, I’ve messed up rice more times than I can count when I was running from gig to gig. That’s why this rice pilaf recipe is one of my absolute keepers. It’s reliable magic, folks. You don’t need fancy gear or hours of simmering time to get that perfect, fluffy texture where every grain is separate. This is real food that delivers big on flavor without demanding your entire evening schedule.
When you’re looking for a dependable side dish, you want reassurance. Here’s why this version is a guaranteed win:
- It’s genuinely ready in about 35 minutes total. Perfect for those tight schedules!
- We rely on pantry staples like butter, onions, and broth, so you don’t need a separate grocery run.
- The addition of toasted orzo gives it a complex bite that tastes way more labor-intensive than it actually is – I love that trick.
- It’s the ultimate supporting actor, pairing beautifully with grilled chicken or anything coming off the grill. If you want another simple winner, try my recipe for Garlic Butter Rice!
Gathering Ingredients for Your Flavorful Rice Pilaf with Orzo
Okay, don’t panic when you see the list. This is where the real flavor foundation gets laid! Seriously, these are mostly pantry staples you probably have hanging around, which is exactly what I look for when I’m trying to whip up something fast. We’re using long-grain white rice here because it absorbs flavor beautifully, but trust me on one thing: rinsing that rice is non-negotiable if you want that fluffy texture we talked about. That little bit of effort removes the surface starch that leads to gummy messes.
Essential Components for Classic Rice Pilaf
Here is what you need to gather up for the pan right now. Make sure your onion is chopped small so it melts into the dish rather than dominating the bite.
- 1 tablespoon olive oil
- 1 tablespoon butter
- 1/2 cup orzo pasta
- 1 small yellow onion, finely chopped
- 2 cloves garlic, minced
- 1 1/2 cups long-grain white rice, rinsed
- 2 1/2 cups chicken or vegetable broth
- 1/2 teaspoon salt
- 1/4 teaspoon black pepper
- 2 tablespoons fresh parsley, chopped
We need that broth—chicken broth gives the absolute best savory base, but veggie broth keeps it vegetarian. Just make sure you have enough liquid because that’s where all the aroma soaks in!
Mastering the Rice Pilaf Cooking Techniques
Okay, this is where the magic happens, the technique that separates sad, wet rice from the truly stunning, flavorful rice pilaf you see on restaurant plates. It’s all about layering flavor through toasting. Don’t rush this part; it’s where we build that nutty, aromatic foundation that makes this dish so special. Pay attention to the heat, keep stirring when told, and we’ll walk through this perfectly together. If you want to really dive deep into the science behind these methods, I’ve got a great little read on rice pilaf cooking techniques.
Step 1: Toasting the Orzo and Aromatics
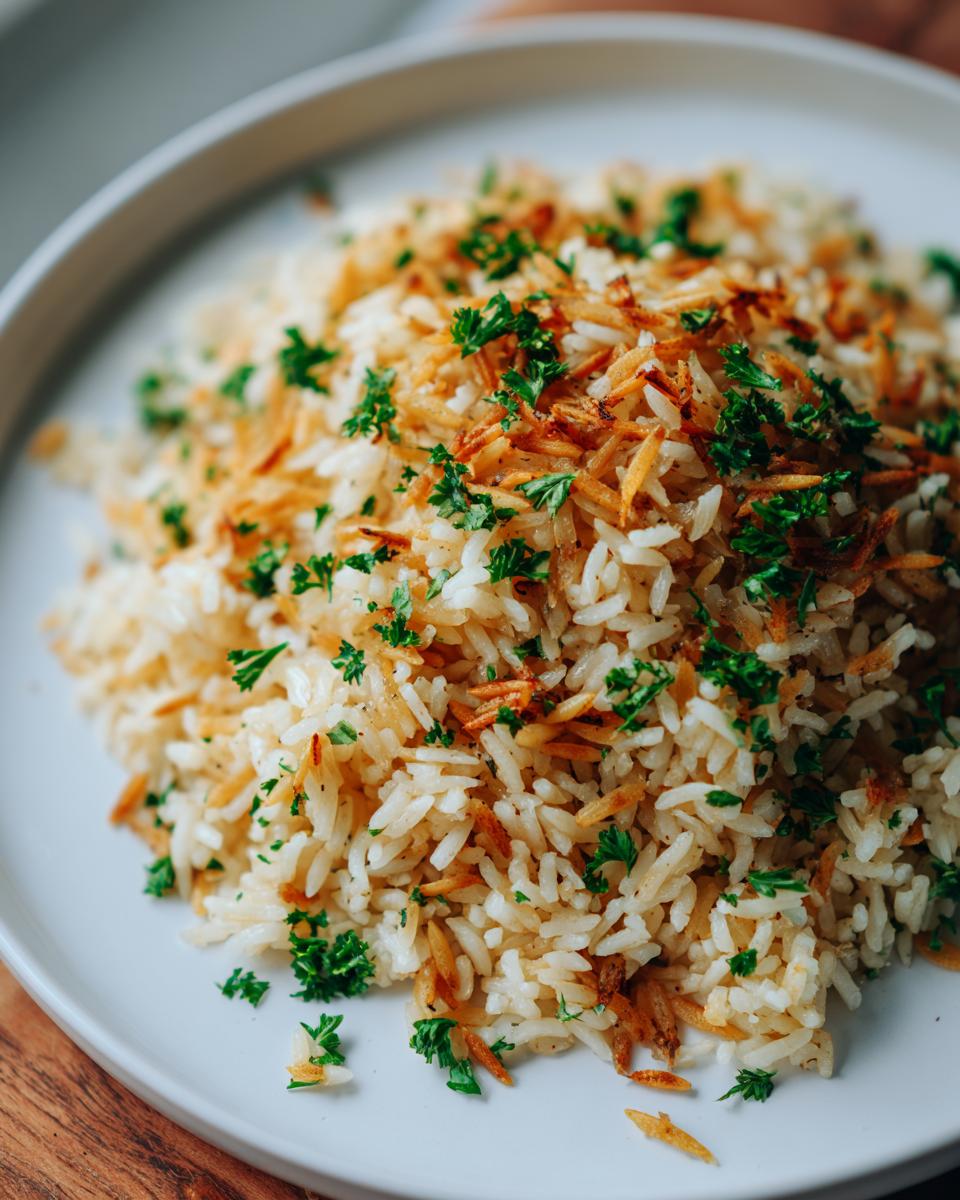
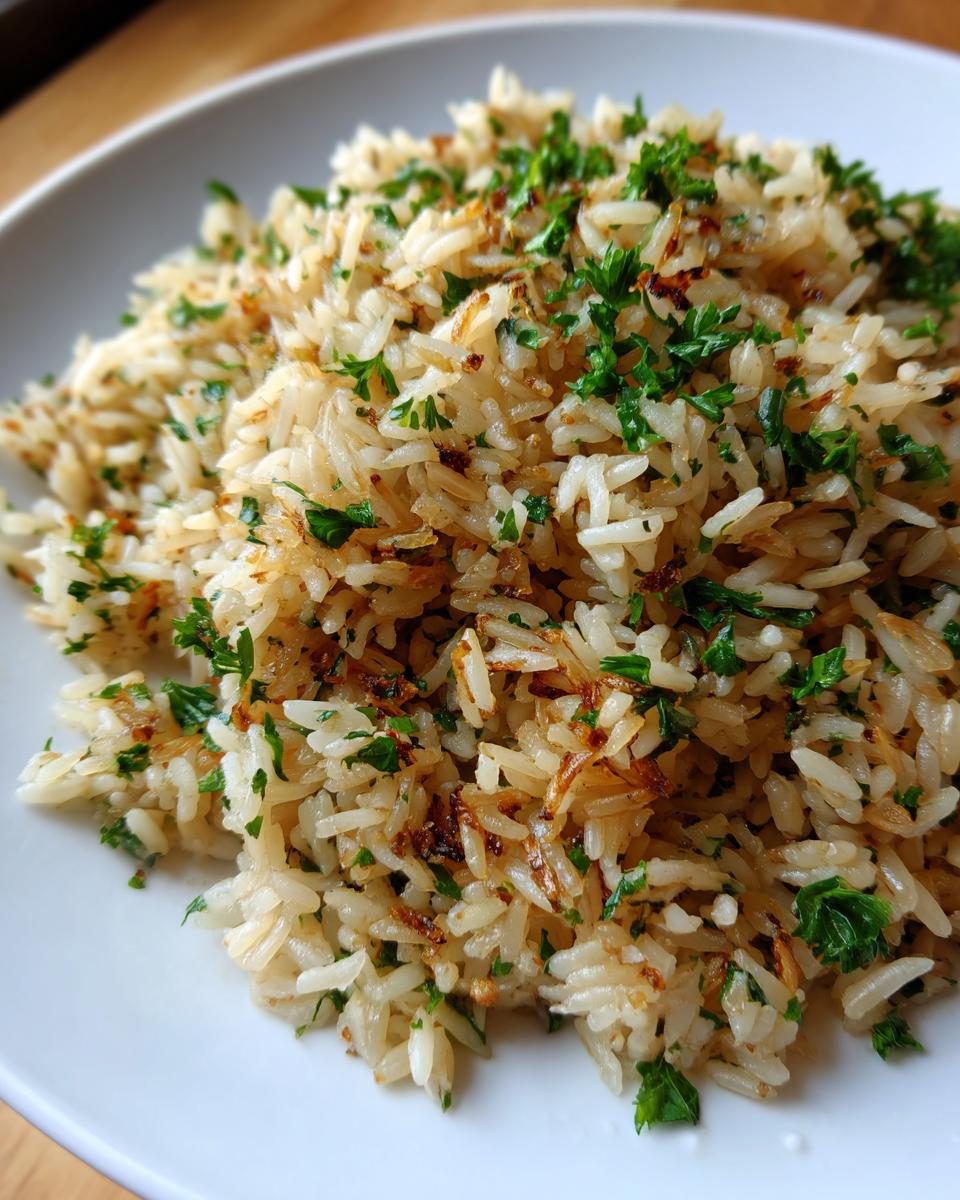
Get that oil and butter shimmering over medium heat in your saucepan. Toss in the orzo first—this is crucial for our rice pilaf with orzo guide! You have to cook this, stirring constantly, for three to five minutes until it hits this perfect light golden brown. It smells amazing, almost like slight toasted cereal. Once it’s golden, throw in your onion. We want that onion soft and sweet, give it about four minutes. Then, bring in the garlic—but only for one minute! Garlic burns fast when it’s minced, and burned garlic ruins everything, I learned that the very hard way on the road!
Step 2: Building the Base for Perfect Rice Pilaf
Now that the foundations are smelling fantastic, it’s time for the star: the rinsed rice. Add the rice, salt, and pepper in there, and stir it all around for just one minute. We are giving the outside of those rice grains a quick coat of fat and heat. This little toasting action seals the starch inside, which is the main secret to addressing that ‘how to make perfect rice pilaf’ question. It helps them stay separate and prevents them from dissolving into a sticky blob later on.
Step 3: Simmering and Resting for Fluffy Rice Pilaf
Here’s where you pour in the broth and bring the whole thing up to a rolling boil. As soon as that first bubble hits, kill the heat way down low—as low as your stove goes—and clamp that lid on super tight. You have to resist the urge! Let it steam and cook for exactly 15 minutes. When the timer goes off, take the entire pan off the burner. Now for the part that guarantees your fluffy rice pilaf recipe success: let it stand, still covered, for a full 10 minutes while you go grab a drink or check your phone. Do not peek! That resting period allows the steam to redistribute evenly, making the grains plump without turning mushy. After that rest, just gently fluff it with a fork and stir in that fresh parsley. Easy peasy!
Tips for the Best Homemade Rice Pilaf Success
Look, I get it—sometimes you follow the steps perfectly and still end up with less-than-perfect rice. Making the best homemade rice pilaf is often about double-checking those tiny details that everyone skips. If your rice is ever sticky or bland, circle back to these three areas. These are the tweaks that took me from roadie cook to someone who actually impressed my bandmates with a side dish!
First, let’s talk rinsing again. If you skip rinsing your long-grain rice, you are basically inviting starch glue into your pan. That’s why we rinse it until the water runs almost clear—it really pushes you toward that fluffy rice pilaf result. Second, don’t skimp on the broth; it’s the flavor carrier. While chicken broth is my go-to for depth, if you only have vegetable broth available, that works too, but maybe add just a tiny pinch more salt to compensate for any lost savoriness. See how I use broth in other ways? Check out my recipe for Easy One-Pot Creamy Chicken and Rice Soup for more ideas!
Finally, do not, I repeat, *do not* lift that lid during the 15-minute simmer or the 10-minute rest. That steam is trapped magic, and letting it out lets the fluffiness escape!
Versatile Serving Suggestions for Your Rice Pilaf
One of the best things about perfecting a base recipe like this is how versatile it becomes. This isn’t just some one-note side dish; this savory rice side dish can pivot easily between a casual Tuesday night and a slightly nicer weekend dinner. It acts like a perfect white canvas ready to soak up whatever flavor you throw at it from the main course.
If I’m making this pilaf on a busy evening, it’s usually accompanying my quick skillet meals. It’s fantastic underneath pan-seared pork chops or alongside some simple roasted salmon. You can’t beat throwing a scoop of this next to some saucy meatballs either—it soaks up that extra gravy beautifully.
But let’s talk ultimate pairings. This rice pilaf sings next to white meats. When I’m going for the easy win, I pair it with grilled chicken breast, maybe drizzled with a little lemon. If you’re looking for a great chicken recipe to go with it, try my Garlic Butter Chicken and Broccoli Skillet; the rice soaks up all that sauce perfectly. It also stands up well enough to richer flavors like pot roast or even robust seafood recipes!
Customizing Your Aromatic Rice Side Dish
Part of the fun of cooking is making a dish truly yours, adapting it to whatever mood you’re in or whatever you happen to have lurking in the pantry. This aromatic rice side dish is super flexible once you nail the basic technique. You can take this simple garlic and herb base and blast it into something totally different!
For example, if you’re feeling a little tart and bright—maybe serving it alongside a heavy roasted pork loin—toss in the zest from half a lemon right at the end when you fluff the rice. Wow, does that wake everything up! Or, if you want to make it a bit sweeter for the holidays or just because you like that contrast, stir in about a quarter cup of dried cranberries along with the broth. I actually have a recipe for Spiced Pear Butter that would go great on the side of this tart pilaf, surprisingly!
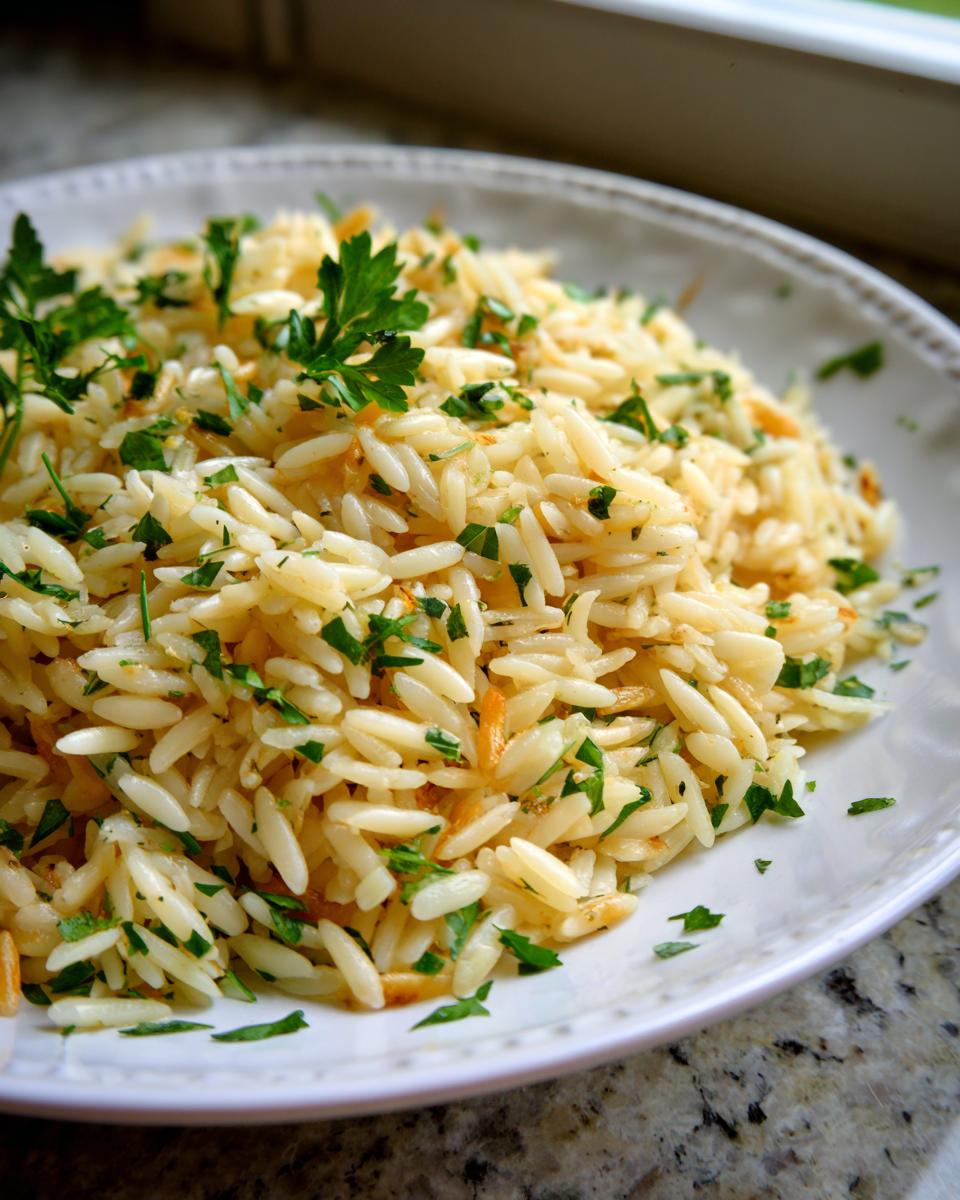
If you want more crunch without going full sweet, swap out the orzo for toasted slivered almonds instead. Just toast them lightly in the butter before you add the onion. Every little substitution changes the game, making this the last side dish recipe you’ll ever need!
Storing and Reheating Your Weeknight Rice Pilaf
We all aim for that perfect, fluffy final product, right? But let’s be real—sometimes you make a double batch because leftover rice is the best lunch the next day! To make sure your delicious weeknight rice pilaf holds up beautifully, storage is key. You want to treat cooked rice right so it doesn’t turn into a hardened brick in the fridge.
The first thing you need to remember is cooling it down quickly. Spread the leftover pilaf out on a baking sheet for about 15 minutes before sealing it up. This stops residual steam from making everything soggy. Then, transfer it to a really good airtight container. It’ll keep perfectly well in the fridge for three, sometimes four days. I’ve sniffed out a few bad batches over the years, so always give it a good smell test before eating, just in case!
Reheating takes just as much care if you want to keep that texture intact. My absolute top recommendation is using the stovetop, though the microwave is faster in a pinch. For the stovetop method, put the amount you want in a small saucepan with just a tablespoon or two of water or broth—don’t use much liquid! Cover it, heat it over low heat, and let that moisture essentially steam the rice back to life. It takes about 5 to 7 minutes, and it keeps those grains separate.
If you’re using the microwave, take the portion you need, sprinkle a tiny bit of water over it, cover it loosely with a damp paper towel, and heat it in 45-second bursts, stirring in between. The damp towel helps create a nice steam environment. Avoid reheating huge quantities at once in the microwave because the center will stay cold and dry out the edges. Honestly, this pilaf is so good, I rarely have leftovers for more than a day!
Frequently Asked Questions About Rice Pilaf
I always get so many questions when people find a recipe that finally works for them, and that’s awesome! It means you’re trusting the process. Here are a few things I hear most often about fixing flavor issues or getting that reliably fluffy outcome with this rice pilaf base. Don’t hesitate to reach out via my contact page if you have more specific cooking questions!
Can I use Basmati or Jasmine rice instead of long-grain rice in this rice pilaf recipe?
Absolutely, you can! If you want to step up the fragrance on this dish, Basmati rice is my favorite substitute. It has a naturally more aromatic quality than standard long-grain rice, which really complements the garlic and herbs well. Jasmine rice also works, but keep in mind it tends to be a little softer, so be extra careful not to overcook it during the simmer time!
What is the purpose of toasting the orzo in this recipe?
This is one of my favorite little secrets! If you just dumped dry orzo into the broth, it would just taste like pasta. But by toasting it in the butter and brown bits for those few minutes, you bring out this incredible, deep, nutty warmth. It adds a fantastic layer of complexity to what would otherwise be a simpler savory rice side dish. It elevates the whole thing without adding an extra step that takes long!
My rice came out sticky, what went wrong in my rice pilaf?
Ugh, nobody likes sticky rice! If your grains fused together, it almost always boils down to one of two things we talked about. First, did you rinse the rice until the water looked pretty clear? If you skip that, you leave too much surface starch behind. Second, and this one is crucial: did you lift the lid during the 15-minute simmer or the 10-minute rest? If you let that steam out too early, you lose the internal moisture balance, and the rice grains can end up doughy instead of separate and fluffy. Stick to the timing, keep the lid on!
Nutritional Estimates for This Rice Pilaf Side Dish
Okay, so here’s the rundown on what you’re looking at if you commit to eating a serving of this fantastic rice pilaf. I always try to keep my roadside cooking pretty sensible, and this recipe is easy to fit into most eating plans because it’s honestly just rice, veggies, and broth!
Remember, I’m not a registered dietitian; I’m just a guy who learned to cook on a hot plate while touring. So, these numbers are based on the ingredients listed above and standard measurements—your actual nutrition facts might wiggle around depending on whether you use low-sodium broth or exactly how much butter sneaks onto the spoon when you’re not looking. But for a dependable side dish, it’s a great baseline!
- Serving Size: 1/4 of recipe
- Calories: 320
- Fat: 6g (2g saturated, 4g unsaturated)
- Carbohydrates: 58g (2g Fiber)
- Protein: 8g
- Sodium: 550mg
Honestly, keeping the sodium managed relies heavily on the broth you choose. If you use a low-sodium vegetable broth, you can shave that sodium number down pretty easily. Either way, this stuff tastes like happiness and that’s what matters most to me!
Share Your Experience Making This Garlic Herb Rice Pilaf
Now that you see just how simple it is to create this amazing, fluffy side dish, I really, truly want to hear about it!
This whole concept of YumDrizzle is about building a community where we all share what works in our real kitchens. When you try this rice pilaf with herbs and garlic, don’t be shy—head down to the comments and let me know how it turned out for you. Did you toast the orzo until it was perfectly golden? What main dish did you decide to pair it with?
Your feedback is what gives me the confidence to keep sharing these accessible recipes developed from my time on the road and listening to what busy folks actually need. If you loved how easy it was to get that perfect texture, drop me a five-star rating. If you tried one of my customization ideas, tell me about it! I love seeing your results, and it lets others know they can trust this recipe, too. If you’re curious about my journey bringing these ideas to life, you can read more about my story on the About Me page. Now go make some dinner!
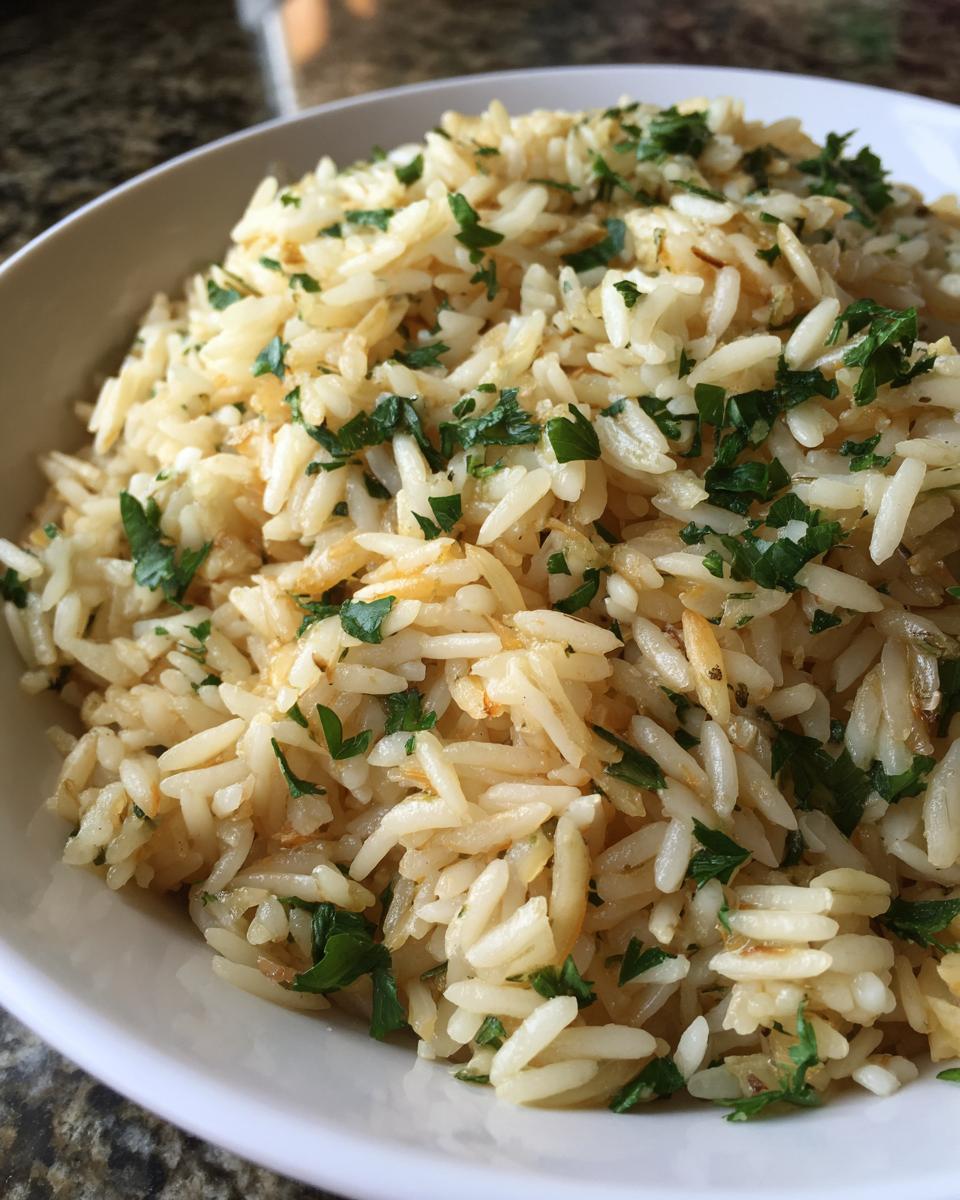
PrintEasy Homemade Garlic Herb Rice Pilaf with Toasted Orzo

Make weeknight dinners better with this quick and easy rice pilaf. This recipe uses long-grain rice, toasted orzo, onion, and garlic cooked in broth for a flavorful, fluffy side dish ready in about 30 minutes.
- Prep Time: 10 min
- Cook Time: 25 min
- Total Time: 35 min
- Yield: 4 servings 1x
- Category: Side Dish
- Method: Stovetop
- Cuisine: American
- Diet: Vegetarian
Ingredients
- 1 tablespoon olive oil
- 1 tablespoon butter
- 1/2 cup orzo pasta
- 1 small yellow onion, finely chopped
- 2 cloves garlic, minced
- 1 1/2 cups long-grain white rice, rinsed
- 2 1/2 cups chicken or vegetable broth
- 1/2 teaspoon salt
- 1/4 teaspoon black pepper
- 2 tablespoons fresh parsley, chopped
Instructions
- Heat the olive oil and butter in a medium saucepan over medium heat.
- Add the orzo pasta and cook, stirring often, until it turns light golden brown, about 3 to 5 minutes. Watch carefully to prevent burning.
- Add the chopped onion to the pan and cook until softened, about 4 minutes.
- Stir in the minced garlic and cook for 1 minute until fragrant.
- Add the rinsed rice, salt, and pepper to the pan. Stir and cook for 1 minute to lightly toast the rice grains.
- Pour in the broth. Bring the mixture to a boil.
- Once boiling, reduce the heat to low, cover the saucepan tightly, and simmer for 15 minutes without lifting the lid.
- Remove the pan from the heat and let it stand, covered, for 10 minutes. Do not remove the lid during this resting time.
- Fluff the rice gently with a fork. Stir in the fresh parsley before serving.
Notes
- Rinsing the rice removes excess starch, helping you achieve a fluffier texture.
- You can substitute basmati rice for long-grain white rice for a more aromatic result.
- For a richer flavor, use chicken broth instead of vegetable broth.
- This pilaf pairs well with grilled chicken, pork chops, or roasted vegetables.
Nutrition
- Serving Size: 1/4 of recipe
- Calories: 320
- Sugar: 1
- Sodium: 550
- Fat: 6
- Saturated Fat: 2
- Unsaturated Fat: 4
- Trans Fat: 0
- Carbohydrates: 58
- Fiber: 2
- Protein: 8
- Cholesterol: 5