
I swear, buying store-bought pita bread is one of the great kitchen letdowns. You unwrap those sad, flat discs hoping for a vehicle worthy of your amazing hummus or a perfect gyros wrap, and they just crumble or refuse to puff. Well, we’re done with that disappointment right now! My mission is to show you exactly how to nail that pillowy, soft feeling using only what you likely already have. Making incredible, fluffy homemade pita bread that puffs up to create those perfect pockets is surprisingly accessible. Trust me, we’re skipping the intimidating bakery tricks and sticking to straightforward methods that always work. You’re going to achieve professional-level results using nothing more than basic pantry staples. Let’s get this Mediterranean flatbread magic happening!
- Why This Homemade Pita Bread Recipe Delivers Fluffy Pockets Every Time
- Essential Ingredients for Fluffy Pita Bread
- Step-by-Step: How to Make Pita Bread From Scratch
- Cooking Methods for Perfect Pita Bread Pockets
- Tips for Success with Your Homemade Pita Bread
- Serving Suggestions: What to Eat With Pita Bread
- Storage and Reheating Instructions
- Frequently Asked Questions About Pita Bread
- Share Your Homemade Pita Bread Creations
Why This Homemade Pita Bread Recipe Delivers Fluffy Pockets Every Time
I know you want the secret to that beautiful puff, and that’s exactly what we built into this formula. Forget dense, tough loaves; this recipe guarantees wonderfully soft pita bread that feels just as good as anything you get at a real Greek spot. We focused on making a truly fluffy flatbread that doesn’t take all day.
- The rise time is managed perfectly so the yeast does its job without taking hours.
- We use a specific rolling technique that sets the stage for maximum puffing action.
- The cooking method is the most reliable way to get that satisfying air bubble right in the middle.
Achieving the Perfect Pita Pocket
That beautiful pocket? It’s just steam doing its thing, but we help it along! The trick is getting the dough thin enough—we’re talking about 1/8 of an inch thick. If the dough is too thick, the steam doesn’t have the strength to separate the layers quickly enough before the outside sets. You need that thin canvas for the best balloon effect!
Quick Preparation Time for Fresh Pita Bread
Listen, I get it; sometimes you need great bread fast. We aren’t messing around with multi-day ferments. We nail the entire process—from activating the yeast to pulling the finished product off the skillet—in under 95 minutes. It really is one of the best quick bread recipes you can find when you need authentic Mediterranean flavor tonight.
Essential Ingredients for Fluffy Pita Bread
Okay, you asked for ingredients, and here is what you need for a batch of the absolute best Mediterranean flatbread. We aren’t using anything exotic here—just high-quality basics make all the difference when you’re making bread from scratch. You’ll notice I listed Greek yogurt as optional, and trust me, if you have it on hand, throw it in! It’s my little way of making these even more luxurious.
- 3 cups all-purpose flour (The reliable standard always works best here.)
- 1 cup warm water (It has to be warm, not hot, or you’ll kill the yeast!)
- 2 1/2 teaspoons active dry yeast
- 1 teaspoon sugar (This is just food for the yeast, don’t skip it.)
- 1 teaspoon salt
- 1 tablespoon olive oil
- 2 tablespoons Greek yogurt (This is the secret handshake for that extra pillowy soft texture.)
If you want to make this a completely vegan pita bread, just skip the yogurt, and you’ll still have fantastic results!
Ingredient Notes and Substitutions
The yeast part is non-negotiable, folks. When you mix that yeast with the warm water and sugar, you must wait. If you don’t see it getting foamy and bubbly on top in about five to ten minutes, you need to start that part over. That foam means your yeast is alive and ready to push air into this dough. If it’s dead, you get flat bread, and we are aiming for maximum puff!
As for the flour, standard all-purpose works great for this easy recipe. We aren’t aiming for the chewiness of bread flour; we want that soft, pliable dough. And remember what I said: if you skip the Greek yogurt, you’ve got a wonderful, ready-to-go vegan version. No substitutions needed unless you’re out of yeast, in which case you should look up a no yeast pita bread recipe—but this one performs best with the rise!
Step-by-Step: How to Make Pita Bread From Scratch
This is where the real magic happens, and honestly, making soft pita bread from scratch is so rewarding. Get ready to see these ingredients transform. I broke down the process into two huge steps: building the dough and then letting it rest so you get that beautiful, airy structure. Follow these directions, and you’ll have that incredible pita bread puff you’re craving!
Activating Yeast and Mixing the Pita Bread Dough
First things first, get that yeast happy. Mix up your warm water, sugar, and delicate dry yeast. Seriously, step away for 5 to 10 minutes. I can’t stress this enough: if you don’t see that nice foamy layer, that yeast is ready to give up, and we can’t have that. Once you have your foam, toss in the flour, salt, olive oil, and that optional yogurt if you’re going for the softest result possible.
Mix it up until you can barely stir it with a spoon. It’s going to look messy—what I call a ‘shaggy dough’—and that’s okay! It shouldn’t look smooth yet. We’re saving the smooth part for the next step, which is the kneading.
Kneading and Rising for Soft Pita Bread
Now, turn that shaggy mess out onto a lightly floured counter. This is where we develop the strength in the dough so it can trap the steam later. You need to knead this for five full minutes—I count them out—until it feels smooth and actually elastic when you poke it. It shouldn’t feel sticky anymore.
Pop that smooth ball of dough into an oiled bowl, cover it up tight, and find the warmest, draft-free spot in your kitchen. This dough needs a solid hour to relax and double in size. Don’t try to rush the rise! That hour of patient waiting is what guarantees you get that beautiful, soft pita bread later on. When it’s doubled, gently punch the air out—you’re ready to roll!
Cooking Methods for Perfect Pita Bread Pockets
Here’s the moment of truth: turning those flat discs into magnificent, puffy little balloons! While some world-class bakers might swear by an oven, the best, easiest, and fastest way to get incredible pita bread pockets that rival any bakery is right on your stovetop. We are focusing on mastering the stovetop pita bread method because it provides instant feedback on those all-important pockets. You’ve rolled them thin, now let’s see them inflate!
Stovetop Pita Bread Technique: Heat is Key
You need to prepare that surface before the dough even touches it. Forget adding oil—this is a dry cooking method! Grab your heaviest cast-iron skillet—that’s the secret weapon here—and get it scorching hot over medium-high heat. I mean, seriously hot. When you drop the first rolled-out round onto that pan, you should hear a definite sizzle right away. If you don’t hear that sizzle, the pan isn’t ready, and you will end up with flatbread instead of pocketed bread.
Watch it closely. Within maybe 60 to 90 seconds, you’ll see bubbles forming, and then—*WHOOSH*—the whole thing should inflate like a balloon. That’s how to make pockets in pita successfully! A quick flip to kiss the other side until it gets just a few golden spots. Here’s my tip learned from the road: never try to cook more than one pita at a time! Overcrowding the pan drops the temperature instantly, and that puff is gone forever.
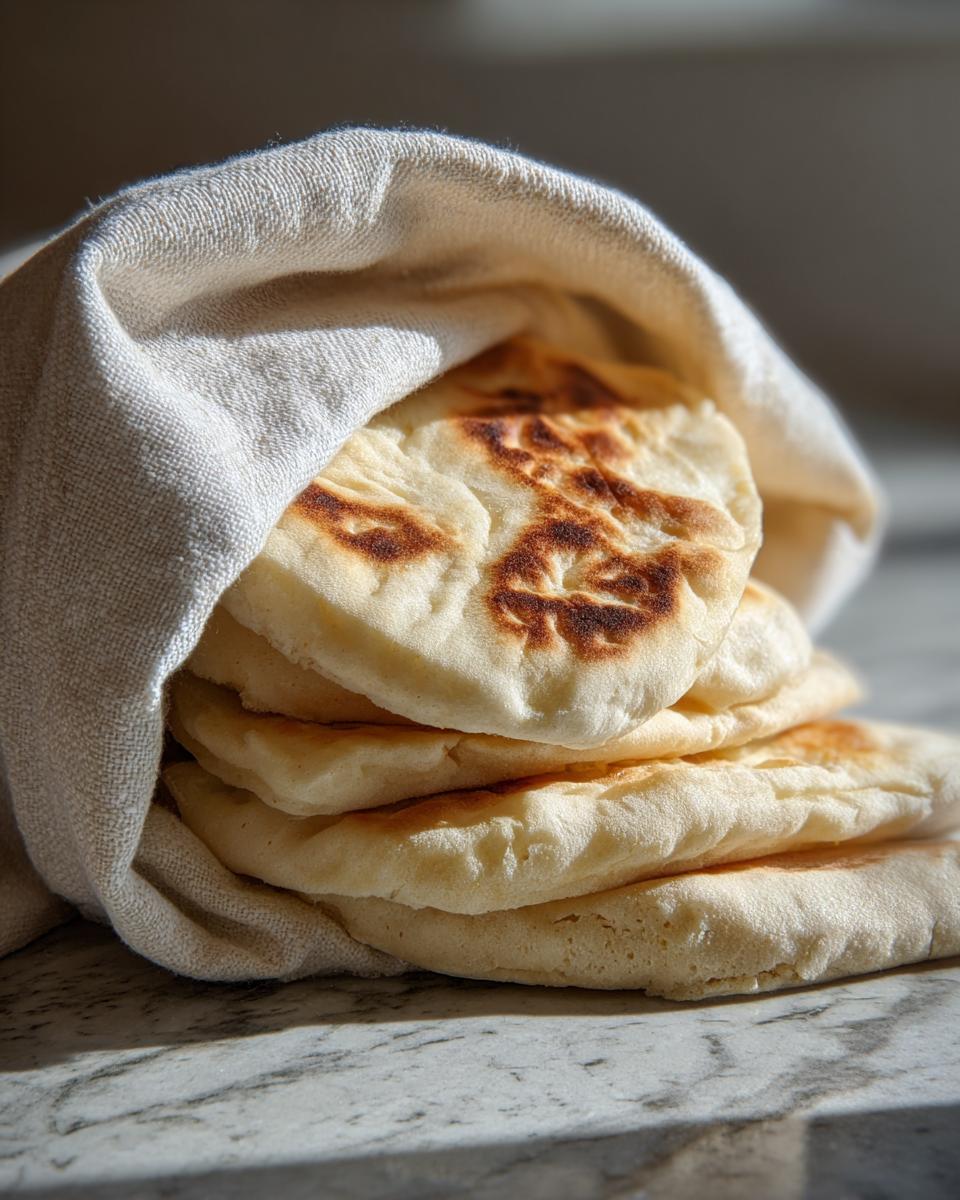
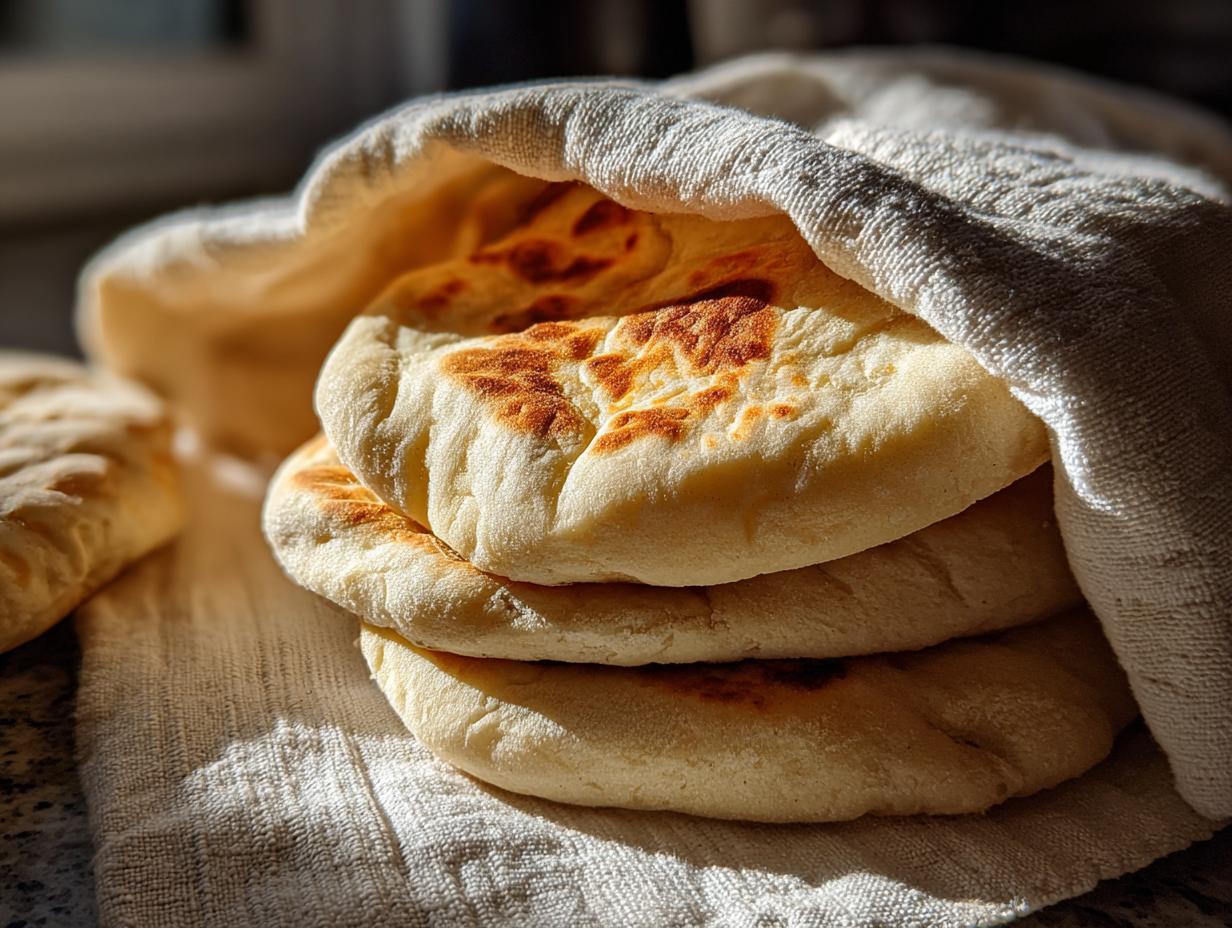
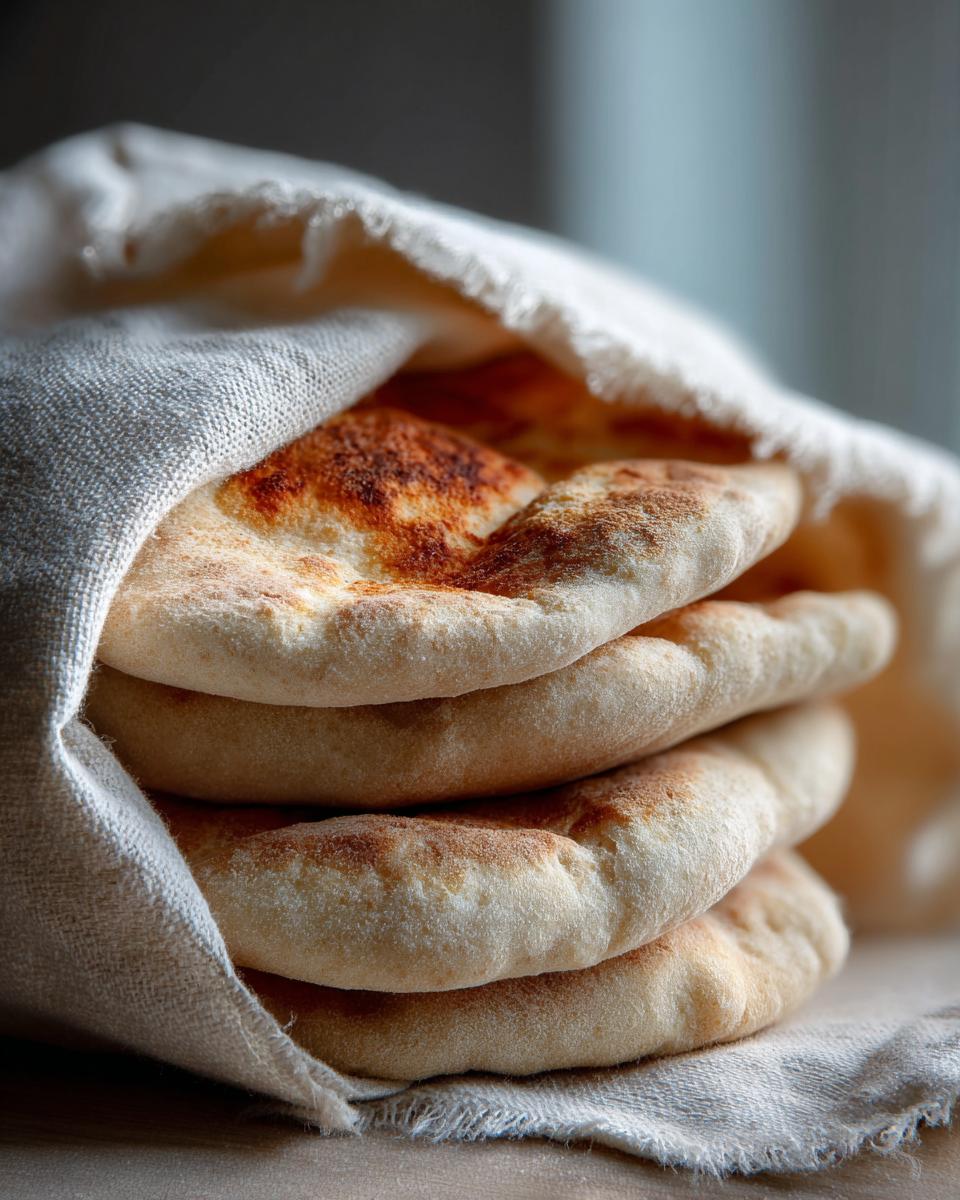
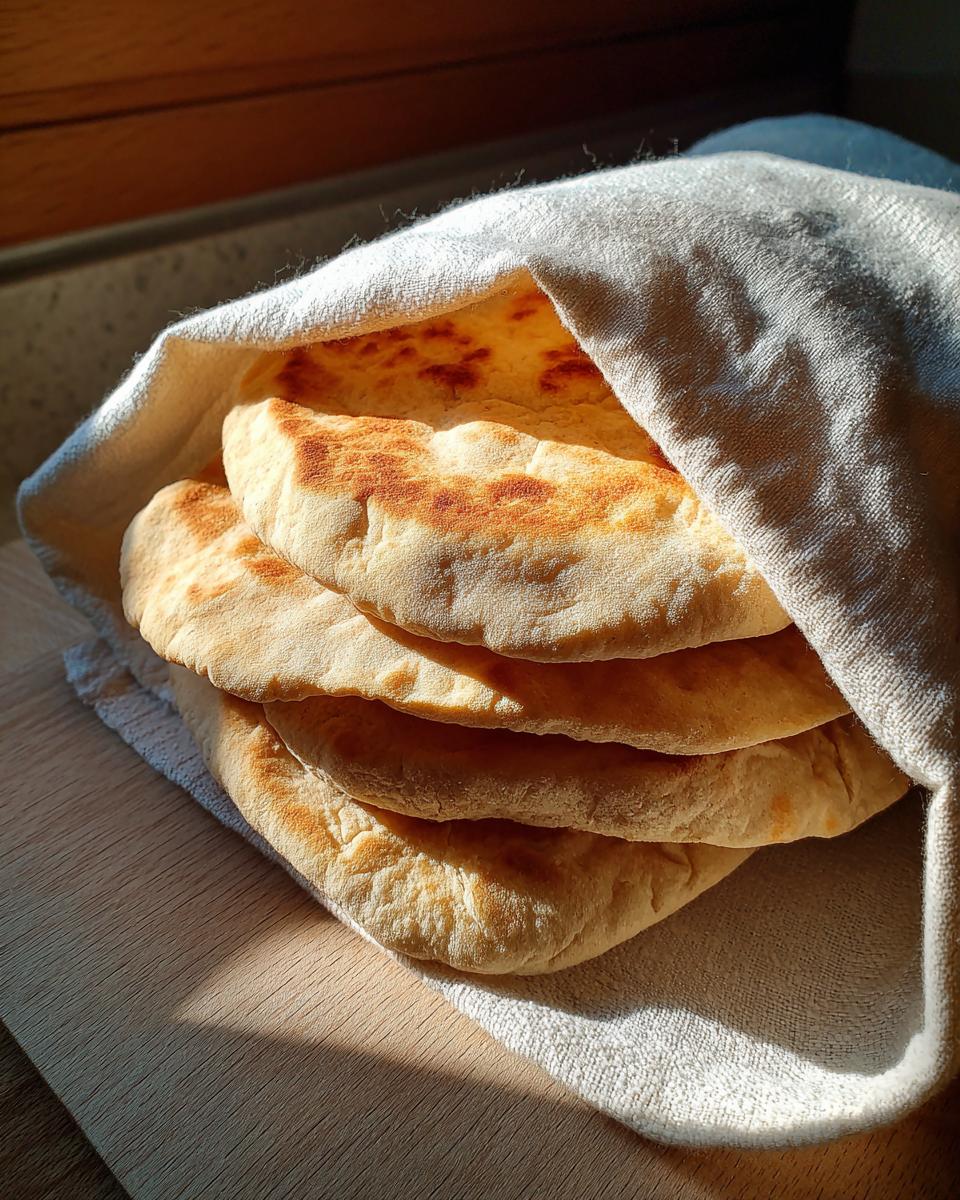
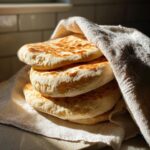
Keeping Your Pita Bread Soft After Cooking
So, you pulled your perfectly puffed bread off the skillet. Don’t just let them sit there on a cooling rack; that’s how they get stiff and crunchy! The second I pull a round off the heat, I toss it right into a clean, soft kitchen towel and wrap it up snug. As you cook the rest of your dough balls, you stack them up inside that towel cocoon.

That trapped steam is crucial. It keeps all that wonderful softness locked in, ensuring your homemade pita bread stays flexible and pillowy. By the time the last one is done, the whole pile is perfectly steamed, pliable, and ready to rip apart for dipping or fold up for a killer gyro.
Tips for Success with Your Homemade Pita Bread
Look, I know bread baking can look fussy, but honestly, making this pita bread is super forgiving once you know the few non-negotiables. The biggest insider tip I can give you, which I stressed above, is that pan temperature. If you’re questioning if the skillet is hot enough, it isn’t! Get that cast iron smoking hot before that dough hits it, or you’ll be disappointed by a limp flatbread instead of a glorious, inflated pocket.
Also, be gentle when you divide and roll the dough. You want those little dough balls to be smooth, but you don’t want to deflate all the air you worked so hard to build in during the rising time. Treat those rounds gently when rolling them out to that 1/8-inch thickness. If you are following these steps carefully, especially getting that great optional yogurt in there for that extra fluffy Greek pita texture, you absolutely cannot miss.
Serving Suggestions: What to Eat With Pita Bread
Now that you’ve baked the best pita bread of your life—warm, soft, and perfectly puffed—the best part begins: eating it! Don’t just let these beautiful things sit on the counter; they are shouting to be filled or dipped into something amazing. This isn’t just bread; it’s the foundation for an incredible meal, whether you’re doing quick lunches or putting together a massive spread.
Ideas for Mediterranean Flatbread Fillings
When I was out on the road, one of the best meals I often threw together involved whatever I could easily grab and fold into one of these fresh rounds. If you’re aiming for a classic, you absolutely have to try making pita for gyros. Think about filling it with seasoned grilled chicken, thinly sliced tomatoes, maybe some red onion, and a big dollop of tzatziki. It’s unbeatable!
But these are so versatile, you don’t have to stick to meat. Falafel is a no-brainer, or you can go vegetarian with roasted vegetables like eggplant and zucchini. Remember, because this bread is so soft, it makes the ultimate quick wraps. Seriously, even wrapping up leftover roasted turkey feels gourmet when you use these fresh pockets. We also love making quick hummus bowls, treating the pita wedges like essential scooping tools.
Speaking of dips, you’ll need something incredible to tear chunks off your bread for. Check out my recipe for Cowboy Caviar—it’s zesty and bright, and serving it with warm homemade pita bread is just perfection. And don’t forget the classic: using your fresh bread for pita bread for hummus. It’s why we made them in the first place, right?
Storage and Reheating Instructions
I’m going to be totally honest with you, like I always am: these flatbreads taste unbelievably good right off the skillet while they are still warm and steamy. They shine brightest on Day One. That trapped steam in the kitchen towel does heavy lifting, but eventually, that moisture will dissipate.
If you have leftovers—and I hope you do—you need to store them properly to keep them ready for action the next day. For short-term storage (1 to 2 days), just keep them tightly wrapped in that same clean kitchen towel and stick them in an airtight container or a zip-top bag on the counter. Keep them away from the fridge if you can, because cold air steals moisture fast and dries bread out.
Now, if you want to bring them back to life, you have options! The goal is to reintroduce steam so they become soft again. My favorite way to reheat is briefly in the microwave—just 10 to 15 seconds per pita. If you’re doing a big batch, wrap a few of them loosely in a damp paper towel and heat them for about 30 seconds total. That quick burst of steam makes them pliable again!
If you are using them later in the week, they freeze beautifully. Just separate them with a small square of parchment paper—so they don’t stick together once they thaw—and toss them into a heavy-duty freezer bag. They thaw out quickly on the counter, usually within an hour, and then you can reheat them using that damp towel trick I mentioned. If you’re planning a big meal, warm up some garlic herb rice pilaf to serve alongside those freshly warmed pockets!
Frequently Asked Questions About Pita Bread
We’ve covered the mixing and the magic puffing moment, but I know you might still have some lingering questions about making this totally awesome pita bread at home. Don’t sweat it! Baking bread is about practice, and if you run into a hitch, I’ve got you covered. Here are the things I get asked about most often when folks try this recipe for the first time.
Why did my pita bread not puff up?
This is the number one question I get, and nine times out of ten, it boils down to two culprits. First, the heat! You have to get that skillet screaming hot. If the pan isn’t hot enough, the outside of the dough cooks too slowly, it doesn’t trap the steam, and you get a sad, flatbread. Seriously, give it five full minutes on medium-high heat until you think it might be too hot—that’s when it’s ready!
Second, check your rolling thickness. If you rolled them too thick, the dough is too heavy for the steam to lift all the way through. Remember what I said: aim for about 1/8 of an inch. If you follow those two rules for your homemade pita bread recipe, you should see success on the next try!
Is this considered a Greek Pita Recipe?
Yes, absolutely! This is built to be a beautiful Greek pita recipe. Traditional Hellenic style often relies on a little bit of dairy to keep that final product incredibly soft and slightly tangy. That’s why I included the Greek yogurt as an option in the dough. If you use it, you are nailing that soft, fluffy texture that is signature to the Greek style. If you skip it, it’s still fantastic, just leaning more toward a general Mediterranean flatbread.
Can I make this dough ahead of time?
You sure can! Bread dough likes to think it’s on your schedule, but it usually dictates its own. After you knead it smooth, you can let that dough rise slowly in the fridge for up to 24 hours. Just make sure you take it out about an hour before you want to roll and cook it, because cold dough is tough to roll thinly. It still makes amazing soft pita bread—it just requires a little pre-planning!
Share Your Homemade Pita Bread Creations
Listen, the best part of sharing these recipes is seeing what you all come up with! I put my heart into telling you how to make the best pita bread, but when you get that perfect puff in your own kitchen, that’s the real win. If you followed these steps, I’m picturing mountains of fluffy rounds ready for dipping or stuffing. Take a picture of your results—whether they are stacked high or already filled with some amazing gyro meat—and tag me online!
I love checking out your successful puffs and seeing how you serve up your fresh Mediterranean flatbread. It builds up our whole community when we share what worked! If you loved how easy this was, please don’t forget to leave a quick rating right here on the recipe card. Ratings help other cooks find accessible recipes like this one. You can also connect with us over on Facebook to share your favorite ways to use these incredible pitas; I’ve included a link to share your posts right here. Let me see those homemade pockets!
PrintThe Ultimate Fluffy Homemade Pita Bread: Achieve Perfect Pockets Every Time
You can make incredibly soft, fluffy Greek pita bread right in your kitchen. This easy recipe uses basic pantry staples to create flatbreads that puff up perfectly, making them ideal for gyros or scooping dips. Forget store-bought; you will have authentic flavor ready fast.
- Prep Time: 20 min
- Cook Time: 15 min
- Total Time: 95 min
- Yield: 8 servings 1x
- Category: Bread
- Method: Stovetop Cooking
- Cuisine: Mediterranean
- Diet: Vegan
Ingredients
- 3 cups all-purpose flour
- 1 cup warm water
- 2 1/2 teaspoons active dry yeast
- 1 teaspoon sugar
- 1 teaspoon salt
- 1 tablespoon olive oil
- 2 tablespoons Greek yogurt (optional, for extra softness)
Instructions
- Mix the warm water, sugar, and yeast in a bowl. Let this mixture sit for 5 to 10 minutes until it becomes foamy.
- Add the flour, salt, olive oil, and Greek yogurt (if using) to the yeast mixture. Mix everything until a shaggy dough forms.
- Turn the dough out onto a lightly floured surface. Knead the dough for 5 to 7 minutes until it becomes smooth and elastic.
- Place the dough in a lightly oiled bowl, turning to coat. Cover the bowl and let the dough rise in a warm spot for 1 hour, or until it doubles in size.
- Gently punch down the risen dough. Divide it into 8 equal pieces and shape each piece into a ball.
- On a lightly floured surface, roll each ball into a thin round, about 1/8 inch thick. Keep the rounds covered while you work with the others.
- Heat a heavy skillet or cast-iron pan over medium-high heat until it is very hot. Do not add oil to the pan.
- Place one rolled pita round onto the hot, dry skillet. Cook for 1 to 2 minutes per side. You should see the pita puff up to form a pocket.
- Flip the pita and cook the second side until it is lightly golden brown in spots.
- Remove the pita from the pan and stack them, wrapping them in a clean kitchen towel to keep them soft while you cook the remaining rounds.
- Serve the warm, fluffy pita bread immediately with your favorite dips or fillings.
Notes
- For the best pocket formation, make sure your pan is very hot before adding the dough.
- If you skip the optional Greek yogurt, you are making a vegan pita bread.
- These pitas are best eaten the day they are made.
Nutrition
- Serving Size: 1 pita
- Calories: 180
- Sugar: 1
- Sodium: 250
- Fat: 3
- Saturated Fat: 0.5
- Unsaturated Fat: 2.5
- Trans Fat: 0
- Carbohydrates: 34
- Fiber: 2
- Protein: 6
- Cholesterol: 0