
Are you ever slammed with one of those deep, unavoidable cravings for chocolate and peanut butter hitting at the exact same time? I know I am! When that happens—and trust me, it happens often, even after years of cooking—you need something decadent, fast, and requiring zero effort. That’s why I’m sharing what might be the best buckeye fudge you’ll ever encounter. Forget rolling those little peanut butter balls; this is the ultimate, easy shortcut. We’re talking about making this creamy treat completely in one 8×8 pan with absolutely no oven time needed. Like the best campfire meals or diner discoveries I made on the road, this recipe proves that incredible flavor doesn’t need complicated steps. It’s pure, accessible comfort, ready in minutes of hands-on time. If you love simple peanut butter recipes, you’ll definitely want to check out my quick, creamy 3-ingredient peanut butter fudge!
- Why This Easy No-Bake Buckeye Fudge Recipe Works for You
- Gathering Ingredients for Buckeye Fudge
- Step-by-Step Instructions for Perfect Buckeye Fudge
- Expert Tips for the Best Buckeye Fudge
- Storage and Serving Suggestions for Your Homemade Candy Recipes
- Frequently Asked Questions About This Fudge
- Estimated Nutritional Data for Simple Candy Making
- Share Your Experience Making This Treat
Why This Easy No-Bake Buckeye Fudge Recipe Works for You
Listen, I know life is packed right now. That’s why this recipe isn’t just good; it’s designed for real kitchens and busy schedules. It hits that sweet spot where amazing taste meets minimal effort. You need this in your life, trust me.
Quick Preparation Time for Your Buckeye Fudge
You seriously won’t believe this, but you are only looking at about 15 minutes of active time. That’s less time than it takes to decide what you want to watch on TV! This means you can whip up a batch of this Quick Fudge Dessert before the craving even gets scary.
The Appeal of No Bake Fudge
The best part? We aren’t turning the oven on. Zero temptation to burn anything, zero preheating time. This is pure magic in a pan and fits perfectly right alongside those No Oven Desserts you’re always looking for during the summer months.
Classic Chocolate Peanut Butter Candy Flavor
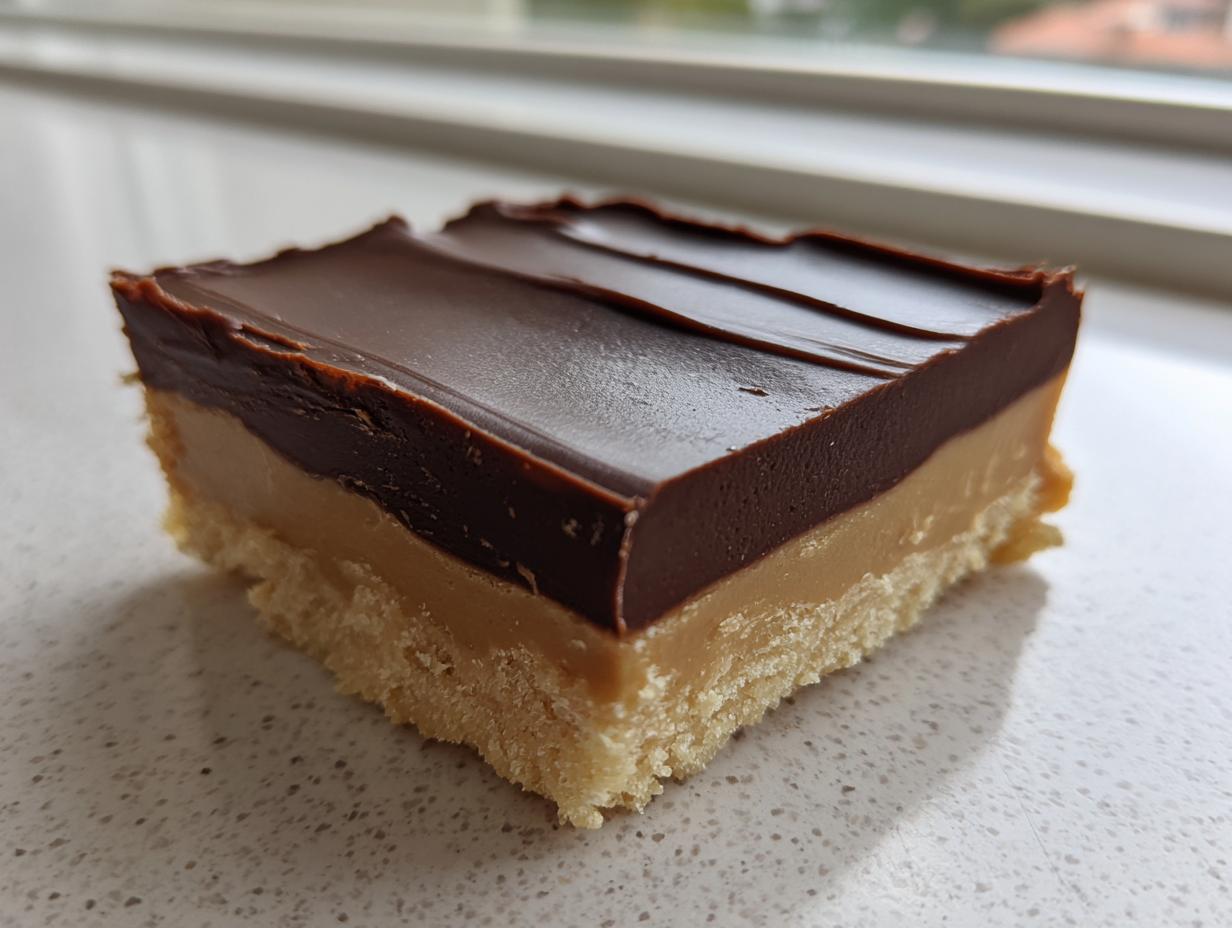
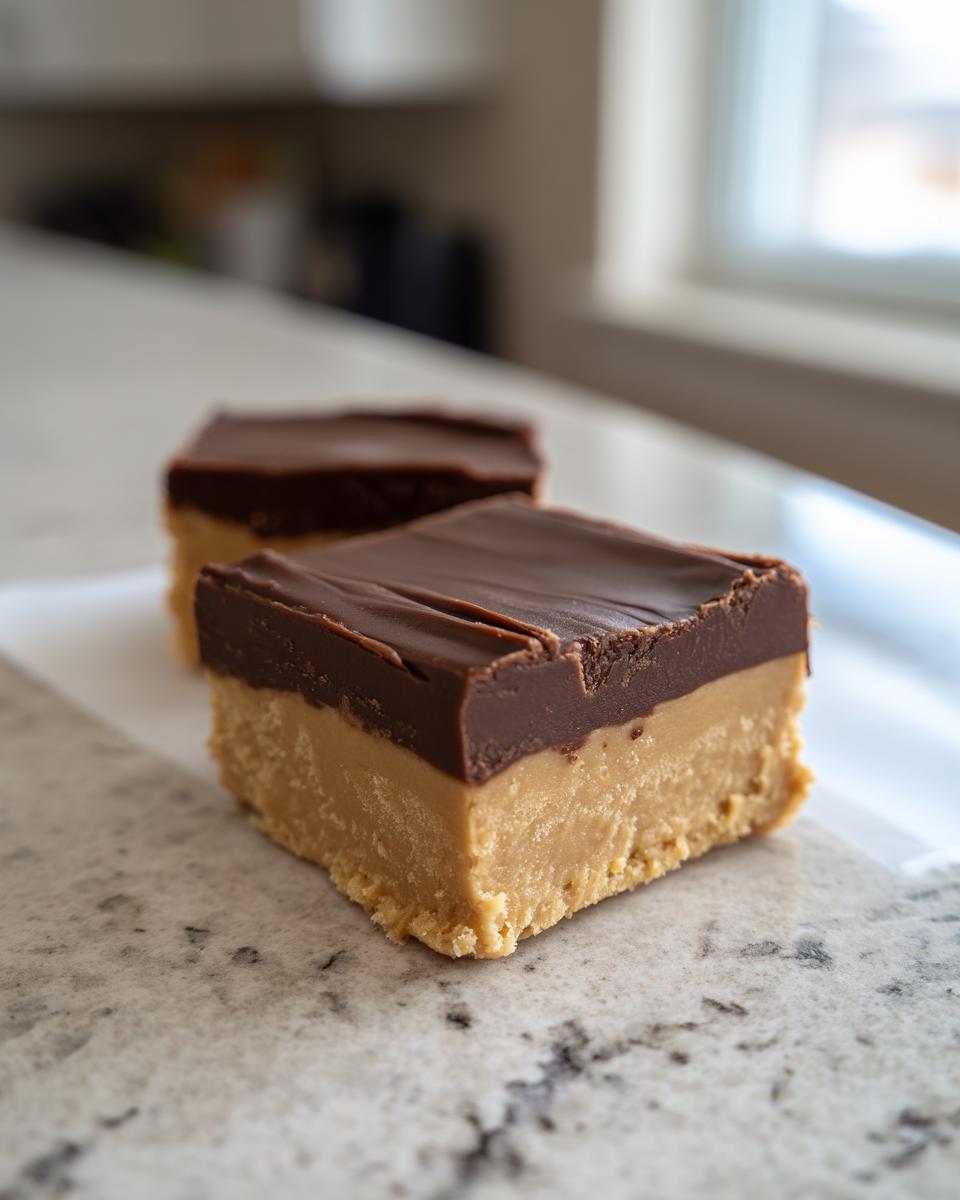
This is where the payoff happens. We get the bold, satisfying blend of salty, creamy peanut butter base completely smothered in rich, shiny chocolate. It achieves that perfect balance, delivering a truly decadent bite every single time.
Gathering Ingredients for Buckeye Fudge
Okay, gathering ingredients for this beauty is half the fun because it’s what you probably already have tucked away in your pantry! This recipe relies on simple, classic staples to create that incredible texture. When I first started recreating diner classics on the road, I learned quickly that quality matters, even when things are simple. For instance, using creamy peanut butter—not the natural stuff that separates—is essential for this easy homemade garlic herb rice pilaf texture.
Peanut Butter Base Components
This is the part you’re going to fall in love with the most because it’s so rich! You need:
- 1 cup unsalted butter, softened (make sure it’s soft!)
- 1 ½ cups creamy peanut butter
- 1 teaspoon vanilla extract
- 3 ½ cups powdered sugar, sifted
Seriously, don’t skip sifting that powdered sugar. It’s my non-negotiable step for achieving that perfectly smooth **buckeye fudge** base that melts in your mouth.
Chocolate Topping Ingredients for Creamy Peanut Butter Fudge
For the glossy, rich chocolate blanket, grab these items. They mix up so easily:
- 7 ounces sweetened condensed milk (just use half of a standard can, easy peasy!)
- 1 ½ cups semi-sweet chocolate chips
- 2 tablespoons butter (reserved just for the topping)
That little bit of extra butter in the chocolate layer keeps our topping super shiny and helps it achieve that perfect meltiness when you pour it over that Creamy Peanut Butter Fudge.
Step-by-Step Instructions for Perfect Buckeye Fudge
Alright, let’s get into the fun part—making this happen! Since there’s no baking, the whole process moves super fast, but a little patience during the mixing and chilling stages is what takes this from good to unbelievable. I always make sure my butter is perfectly room temperature before I start. If you treat this like a precision science, you’ll end up with the best results. If you need a refresher on simple baking tools, check out my guide on easy garlic breadsticks recipe—the principles of measuring are the same!
Preparing the Pan and Peanut Butter Layer of Your Buckeye Fudge Recipe
First things first, grab an 8×8 inch baking pan and line it with parchment paper. Make sure you leave some overhang! We need those flaps later to lift this beauty out cleanly. Now, in your mixing bowl, beat that softened butter, peanut butter, and vanilla until it’s looking perfectly smooth. Next, gradually add that sifted powdered sugar on low speed until everything is incorporated into a thick, scoopable mixture. Scoop it all into your pan and press it down *really* firmly. Here’s my trick: use the flat bottom of a drinking glass or a measuring cup to pack that peanut butter layer flat. Evenness is key for slicing those perfect squares later.
Creating the Decadent Chocolate Topping
Time for the glorious topping! In a microwave-safe bowl, combine your condensed milk, chocolate chips, and that reserved two tablespoons of butter. We’re melting this gently. Remember what I said about not rushing things? Microwave in 30-second bursts only, stirring well between each one until it’s completely silky. You want a rich, glossy finish, not gritty, scorched chocolate. Stirring is crucial here to keep that beautiful sheen on your chocolate so you get that amazing top layer on your **buckeye fudge**.
Assembling and Setting the Simple Dessert Bars
Once your chocolate topping is smooth as glass, pour it right over the peanut butter base. Be gentle! Spread it out slowly so you don’t disturb the bottom layer. Now, the hard part: waiting. You must get this into the refrigerator for at least three hours. If you cut it early, your layers will just slide apart. We want firm, clean cuts when we slice these Simple Dessert Bars, so set a timer and go do something else!
Expert Tips for the Best Buckeye Fudge
I’ve made a *ton* of fudge in my time, between the road and the kitchen, and I’ve figured out the little things that separate an okay fudge from one that makes people ask for your recipe immediately. Since this is a no-bake treat, the ingredients do all the heavy lifting, so we need to be smart about what we choose. Check out these little secrets I learned that really elevate this treat into the realm of what I call **buckeye fudge** royalty.
Peanut Butter Choice for Perfect Texture
This is absolutely critical, so listen up! You have to use creamy, stabilized peanut butter—you know, the kind that stays smooth on the shelf. If you try to use a natural peanut butter where the oil separates out, your base is going to turn grainy and sad. It won’t mix right, and you’ll lose that signature, melt-in-your-mouth silkiness. Stick to the classic jarred stuff for this recipe; it gives us the structure we need for that flawless peanut butter layer.
Adjusting Sweetness with Chocolate Options
For those of you who think things are getting a little too sweet with semi-sweet chips, I have a brilliant fix that plays right into that rich texture we want. Don’t be afraid to swap in dark chocolate chips when you’re making that top layer. If you like things a little less sugary and want a bigger pop of cocoa flavor, dark chocolate pairs beautifully with the peanut butter. It instantly ramps up the richness, making it taste even more like a true Decadent Fudge experience without changing any of the steps!
Storage and Serving Suggestions for Your Homemade Candy Recipes
So, you’ve made this incredible batch of chocolate peanut butter candy, and now you have to put it away? Don’t worry, keeping this fudge perfect is almost as easy as making it! Since this is a no-bake recipe, structure is everything, and the fridge is your best friend. I always make sure I have a plan for leftovers, especially since this stuff disappears fast at any party. Don’t forget to check out my recipe for easy cranberry chicken recipe if you need to balance out all this sweetness later!
Keeping Buckeye Fudge Fresh
Because we aren’t putting this in the oven, we rely on cold temperatures to keep everything solid and tasting fresh. Store your Buckeye Fudge in an airtight container—any decent plastic container with a tight lid will do the trick. Keep it chilling in the refrigerator; it lasts beautifully for up to a whole week! Honestly, I usually can’t keep it that long, but knowing it will hold up makes it perfect for making ahead of time when you’re planning a big holiday spread. Chilling is what maintains that nice, firm structure so you get clean cuts later.
Presentation for Gatherings
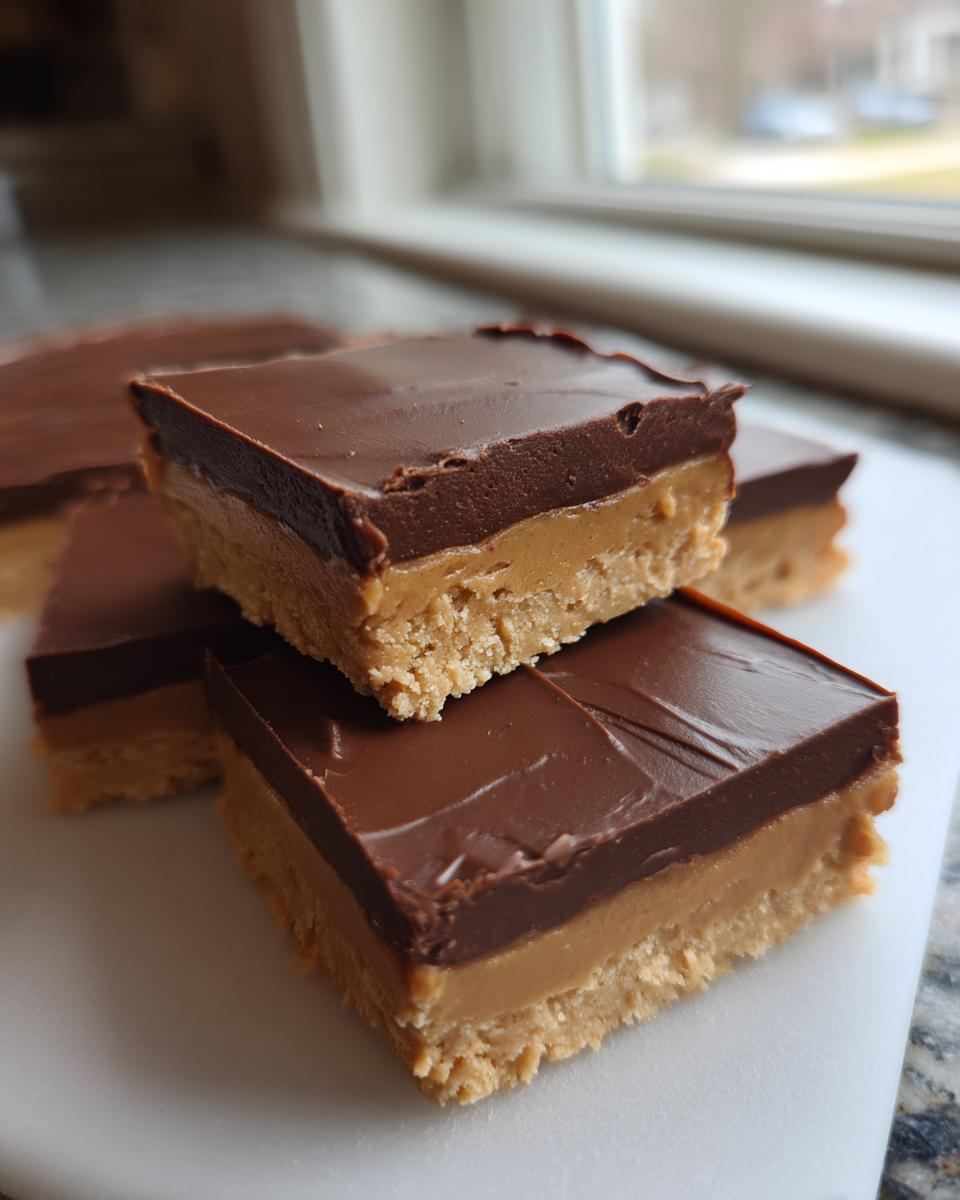
When it comes time to serve these little squares of joy, think small. This recipe yields about 36 small squares, and trust me, these are rich! You don’t need a huge piece to get that amazing chocolate and peanut butter hit. I always cut them into neat little squares—it makes them look more professional, even though we made them on a kitchen counter. These are fantastic as part of your main dessert table, but they are also my secret weapon for easy cleanup later. They look so cute arranged on a platter alongside cookies or brownies for your next big get-together. These are excellent Party Fudge Ideas because people can grab one and go!
Frequently Asked Questions About This Fudge
Whenever I share recipes that come together this quickly, people always have questions—and that’s great! Asking questions is how we learn and build confidence in the kitchen. I’ve gathered the most common things I hear about this simple **Buckeye Fudge** below, hoping to clear up any doubts you have before you start mixing. If you’re looking for something savory after all this sweetness, you should absolutely check out my recommendation for easy turkey soup recipe leftover turkey!
Can I use natural peanut butter in this No Bake Fudge?
I really wish you could, but the answer is usually no if you want this kind of ease and texture. Natural peanut butter—the kind you have to stir because the oil separates out—is just too thin and oily for the peanut butter base here. It doesn’t have the right stabilizers or fat content to blend properly with the powdered sugar. If you try to force it, you end up with a runny mess that won’t set up right. Stick to creamy, shelf-stable peanut butter if you want this perfect **No Bake Fudge** consistency, okay?
How long does this Homemade Candy need to chill?
For the best results possible, you need to give it a full three hours, minimum! That gives the chocolate topping time to get firm and prevents the peanut butter layer from pushing up or crumbling when you slice it. Now, I know sometimes you’re in a rush, and yes, you *can* put it in the freezer for an hour. But please know, sometimes freezing it makes it too hard to cut cleanly, and it can sometimes get a little grainy. Three hours in the fridge is the sweet spot for perfect texture!
Is this recipe suitable for Holiday Fudge Treats?
Oh, absolutely! This is my go-to when the holiday baking list gets too long. It travels incredibly well, lasts for ages in the fridge, and everyone who tries it loves that classic flavor combination. Since it cuts into so many small squares, it’s the perfect addition to any platter of **Holiday Fudge Treats** you’re assembling. They look so festive piled high, and frankly, they disappear faster than anything else on the table!
Estimated Nutritional Data for Simple Candy Making
Now, I know some of you food lovers are always curious about what you’re putting into your body, even when it’s pure indulgence like this fudge! Since this is one of my favorite easy caesar chicken recipe companions when I’m feeling guilty about dessert, I totally get it. Remember, the numbers below are just estimates based on standard ingredients—the exact amounts can change depending on the brands you pick up at your local supermarket.
We serve this fudge in small squares, which is smart because it’s rich! Each little square comes out to about 185 calories. I wanted to lay out the basic macro numbers here for you:
- Serving Size: 1 square
- Calories: 185
- Fat: 12g (Be mindful of that saturated fat at 6g!)
- Carbohydrates: 18g
- Sugar: 18g (It is fudge, after all!)
- Protein: 3g
- Sodium: 85mg
So, yes, it’s a treat, but seeing the breakdown helps put things in perspective. Enjoying a rich, homemade candy like this is totally worth it, especially when you know exactly what went into it!
Share Your Experience Making This Treat
Well, that’s it! We’ve gone from zero to glorious, decadent Buckeye Fudge in just a couple of easy steps. Now, I have to ask you something important: Did you try it? I seriously can’t wait to hear what you think! My goal here at YumDrizzle is to get great, comforting food into everyone’s hands, and knowing this recipe worked for you makes all my effort worth it. If you made this, let me know how it turned out in the comments below!
Tell me which part you loved most—was it the ridiculously smooth peanut butter layer, or that incredible chocolate blanket? I always love hearing if someone tried my tip to use dark chocolate chips instead of semi-sweet. Hearing about your success with this Easy Chocolate Peanut Butter Fudge is the best part of my day.
If you snapped a picture of your tray of homemade candy, please share it! Tag me on social media so I can celebrate with you. I love seeing how these simple recipes fit into your real lives, whether they are destined for a big holiday party or just a quiet Tuesday night treat. If you want to know more about what drives me to share these accessible recipes, you can always check out my About page. Keep cooking boldly, and I’ll see you in the next recipe!
PrintEasy No-Bake Buckeye Fudge Recipe
Make this rich, creamy Buckeye Fudge using simple ingredients. This no-bake recipe combines classic chocolate and peanut butter flavors for a decadent treat perfect for holidays or quick indulgence.
- Prep Time: 15 min
- Cook Time: 0 min
- Total Time: 3 hr 15 min
- Yield: 36 small squares 1x
- Category: Dessert
- Method: No-Bake
- Cuisine: American
- Diet: Vegetarian
Ingredients
- 1 cup unsalted butter, softened
- 1 ½ cups creamy peanut butter
- 1 teaspoon vanilla extract
- 3 ½ cups powdered sugar, sifted
- 7 ounces sweetened condensed milk (half of a 14-ounce can)
- 1 ½ cups semi-sweet chocolate chips
- 2 tablespoons butter (for chocolate layer)
Instructions
- Line an 8×8 inch baking pan with parchment paper, leaving an overhang for easy removal.
- In a large bowl, beat the softened butter, peanut butter, and vanilla extract until smooth.
- Gradually add the sifted powdered sugar, mixing on low speed until fully combined and the mixture is thick.
- Press the peanut butter mixture evenly into the bottom of the prepared pan.
- In a microwave-safe bowl, combine the sweetened condensed milk, chocolate chips, and 2 tablespoons of butter.
- Microwave in 30-second intervals, stirring well after each, until the chocolate is completely melted and smooth. This creates your chocolate ganache topping.
- Pour the melted chocolate mixture evenly over the peanut butter layer in the pan. Spread carefully to cover the entire surface.
- Refrigerate the fudge for at least 3 hours, or until completely firm.
- Use the parchment overhang to lift the fudge from the pan. Cut into small squares before serving.
Notes
- For the best texture, use creamy peanut butter, not natural style.
- You can substitute dark chocolate chips for semi-sweet in the topping if you prefer a less sweet finish.
- Store leftover fudge in an airtight container in the refrigerator for up to one week.
Nutrition
- Serving Size: 1 square
- Calories: 185
- Sugar: 18
- Sodium: 85
- Fat: 12
- Saturated Fat: 6
- Unsaturated Fat: 6
- Trans Fat: 0
- Carbohydrates: 18
- Fiber: 1
- Protein: 3
- Cholesterol: 15