
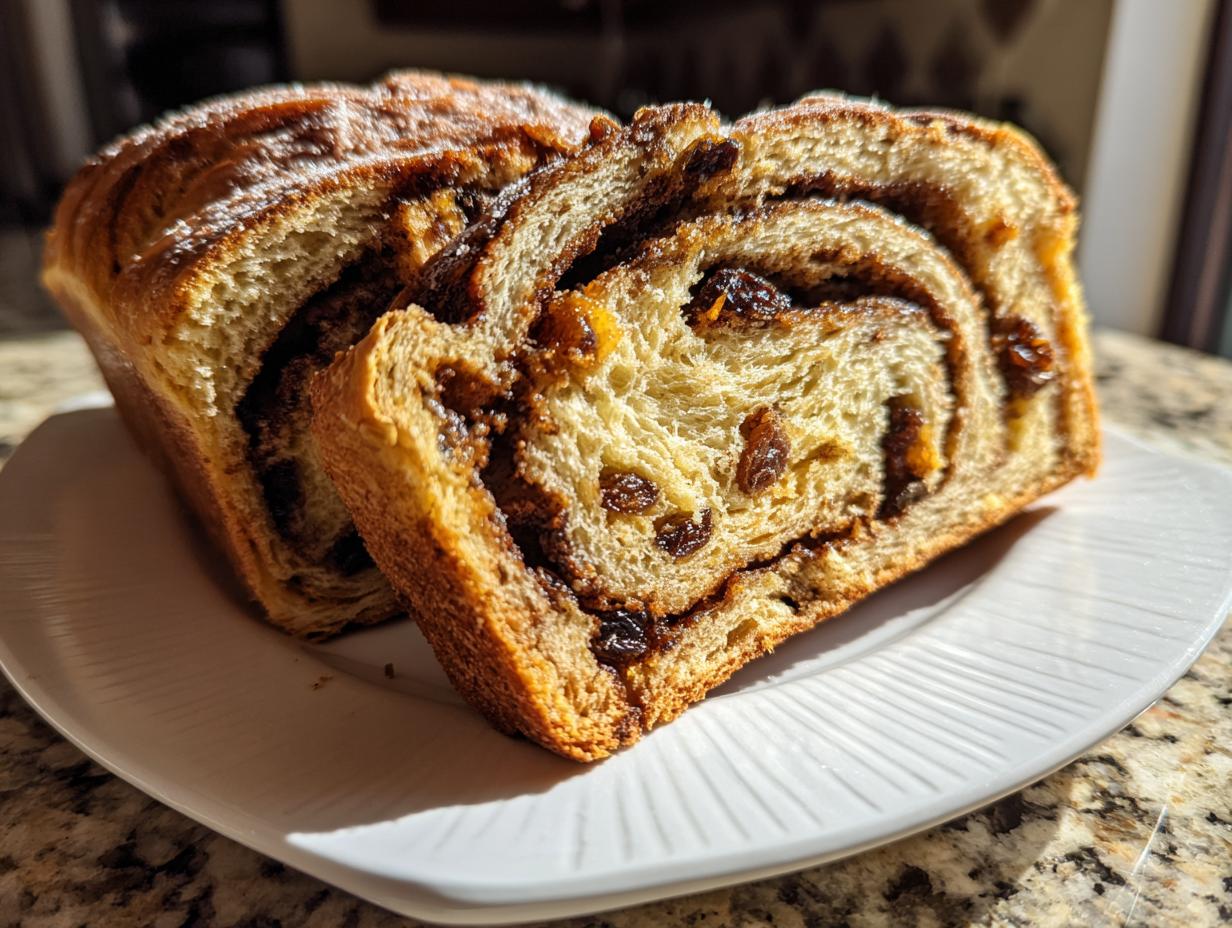
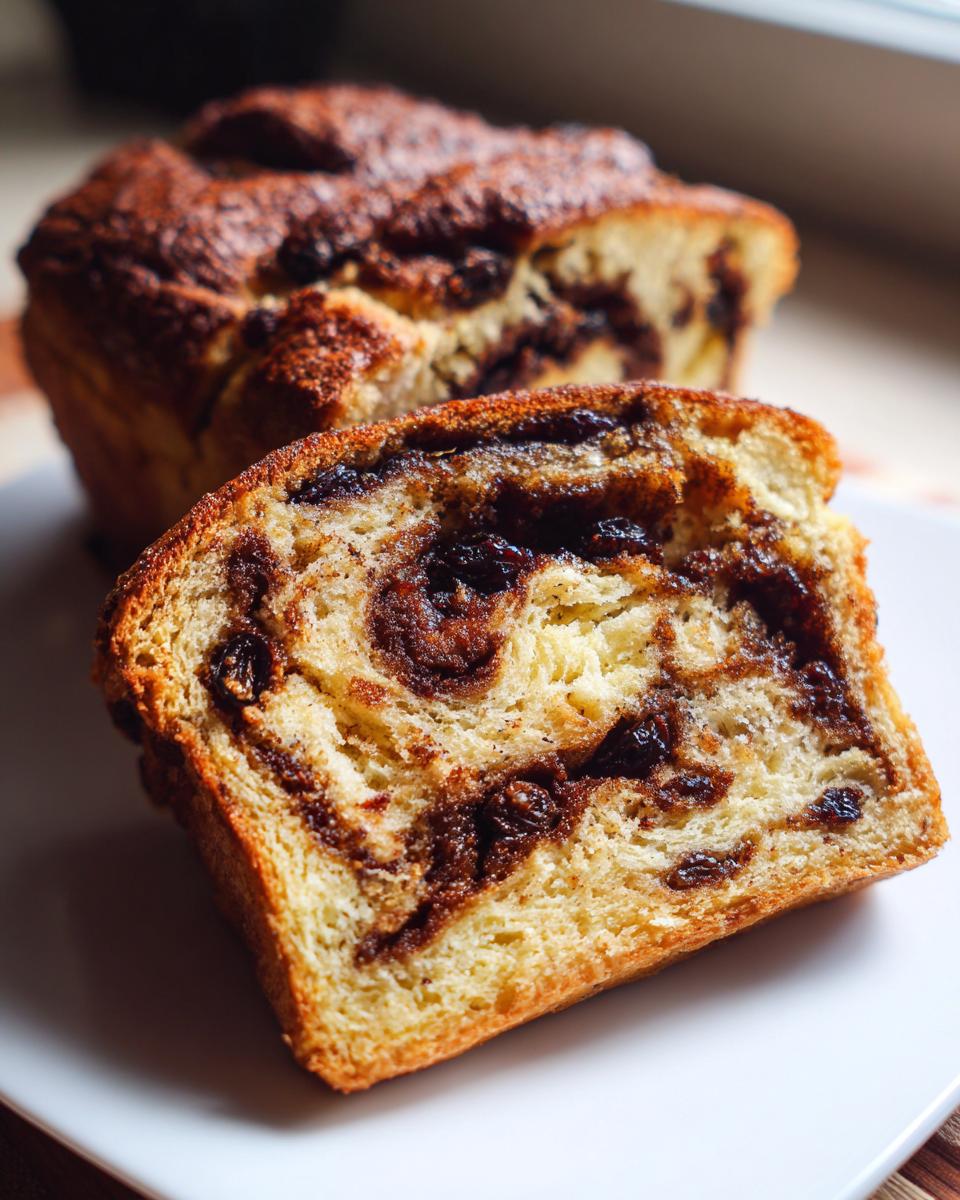
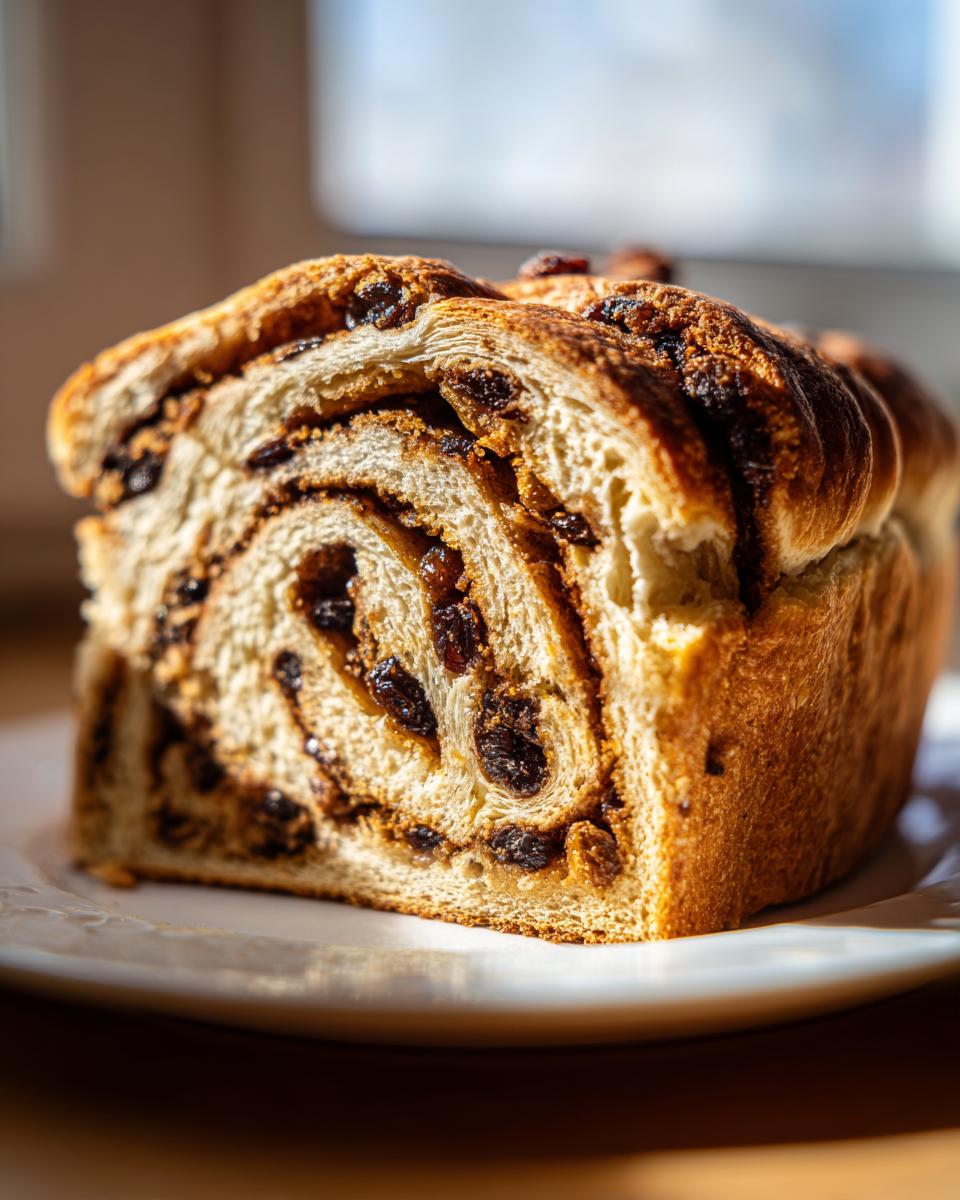
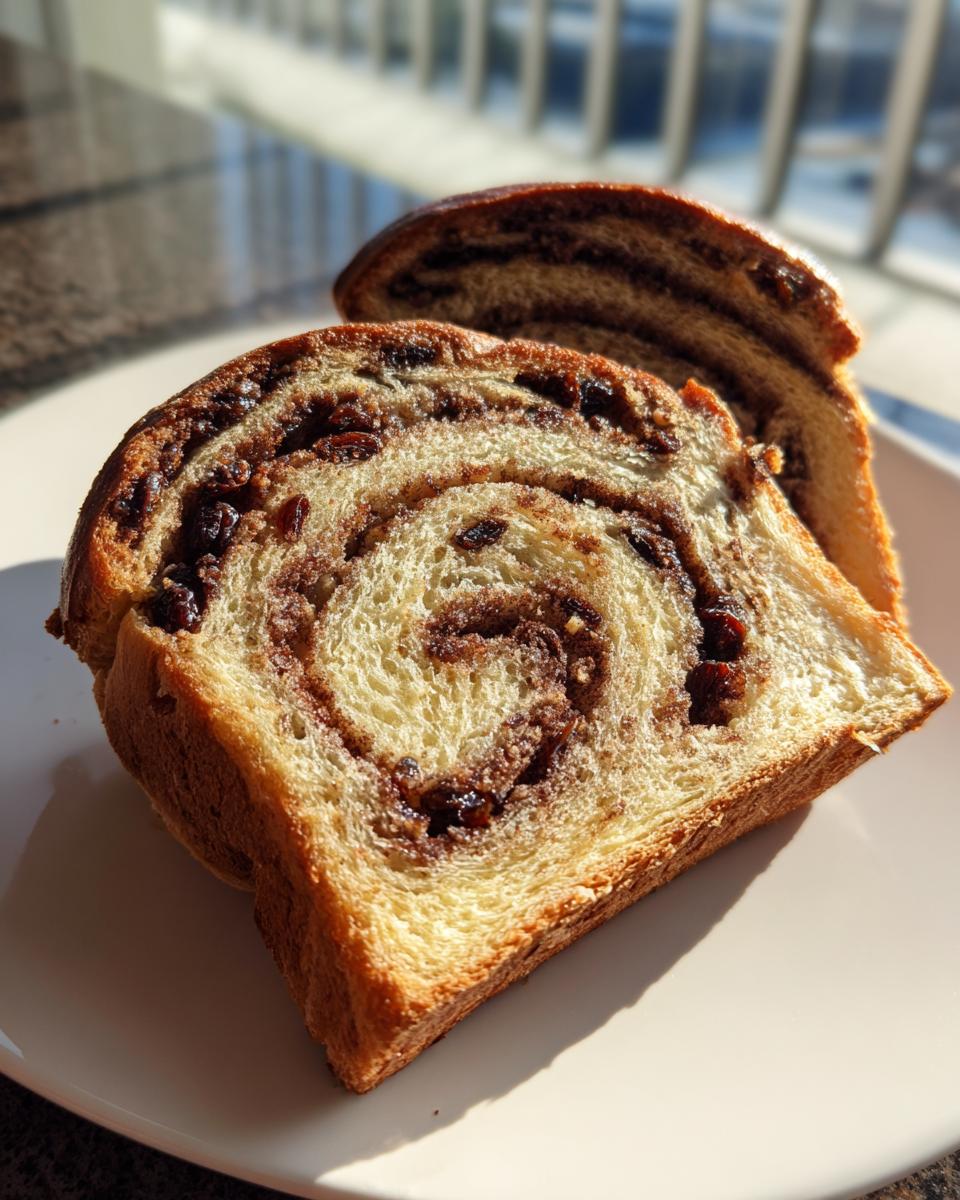
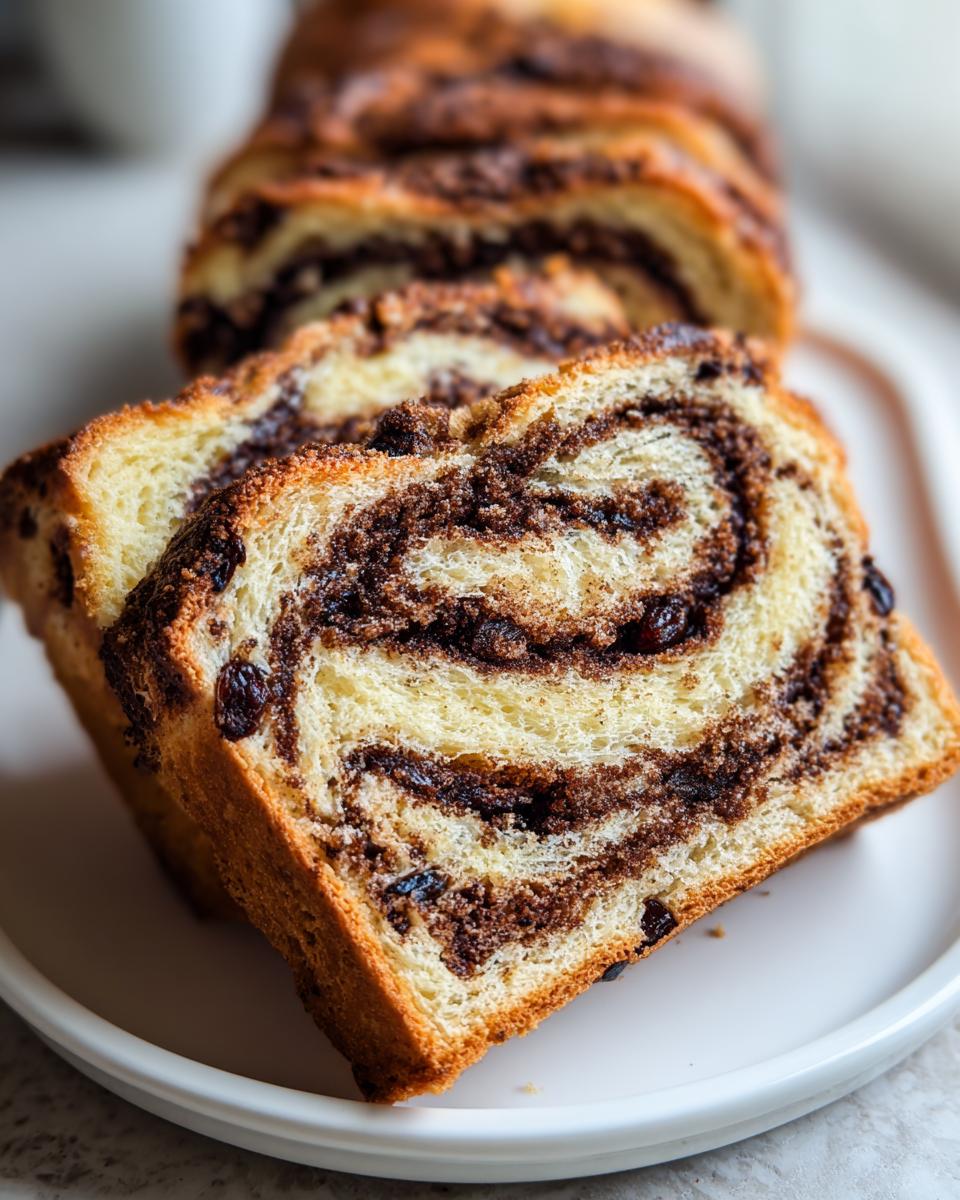
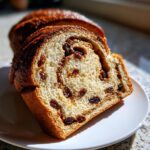
If you’re anything like me, nothing shouts comfort louder than a slice of warm, sweet, homemade **raisin bread**. I’m not talking about the dry stuff you find on endcaps—I mean that pillowy soft and fluffy loaf with thick, gorgeous ribbons of salty-sweet cinnamon swirl running all the way through. That’s the magic we’re chasing here.
You know, before YumDrizzle was even a thought, I spent years on the road with a band. My kitchen was a hot plate in a smelly bus, but my education started in every town we hit. I skipped the fancy joints and hunted down the local legends—the roadside diners and the neighborhood bakeries. I learned that the soul of great food isn’t about three-star ingredients; it’s about using what you have with genuine care. That’s the passion Jaxson Riley brings to every recipe, and that’s exactly how we are going to create the absolute best homemade cinnamon raisin bread you’ve ever tasted.
- Why This Homemade Raisin Bread Recipe is Your New Favorite Warm Breakfast Bread
- Gathering Ingredients for the Best Cinnamon Raisin Bread
- How to Make Raisin Bread From Scratch: The Soft and Fluffy Loaf Tutorial
- Tips for Success: Achieving Bakery Style Raisin Loaf Texture
- Storage and Reheating Instructions for Your Raisin Bread
- Serving Suggestions: Toasting Bread Ideas for Your Raisin Bread
- Frequently Asked Questions About Making Raisin Bread
- Nutritional Estimate for One Slice of Raisin Bread
- Share Your Cozy Homemade Baked Goods Experience
Why This Homemade Raisin Bread Recipe is Your New Favorite Warm Breakfast Bread
Listen, I know yeast bread can look intimidating, but trust me when I say this recipe is built for real life—it’s incredibly straightforward. This isn’t some fancy artisan loaf that fights you every step of the way. This is your new go-to for a seriously cozy morning.
Here’s why you’re going to fall in love with this batch:
- It creates the ultimate soft and fluffy raisin loaf texture. No dense bricks here!
- The cinnamon swirl? It’s thick, gooey, and perfectly distributed. That’s the key to maximum flavor in every bite.
- It’s the very definition of warm breakfast bread. Seriously, slice it thick and watch it disappear next to your coffee.
If you’re looking for more simple morning magic, check out my collection of easy breakfast recipes!
Gathering Ingredients for the Best Cinnamon Raisin Bread
Before we even think about kneading, we need to gather our troops! Getting your ingredients ready beforehand—this is what us pros call mise en place—makes the whole process feel calm instead of chaotic. We’re using standard pantry staples here, but pay close attention to the preparation requirements for the raisins and butter, because those small details are what move this bread from good to bakery-worthy.
Here is exactly what you’ll need for this cozy loaf:
- Milk: 1 cup, warmed to that perfect 105–115°F range. Too hot and you kill the yeast, too cool and it gets lazy!
- Yeast: 2 1/4 teaspoons active dry yeast, plus 1 teaspoon of sugar we’ll borrow for activation.
- Sugars: 1/4 cup granulated sugar for the dough, and 1/2 cup packed light brown sugar just for that sweet, rich swirl later on.
- Fats & Flavor: 1 large egg that needs to be at room temperature, 1/4 cup melted unsalted butter for the dough, and 2 tablespoons of softened (but not melty!) unsalted butter reserved specifically for the filling.
- Structure: 1 teaspoon salt and 3 1/2 cups all-purpose flour, plus extra for dusting, of course.
- The Stars: 1 cup raisins, which we’ll prepare separately, and 2 tablespoons of ground cinnamon.
Ingredient Notes and Substitutions for Perfect Raisin Bread
The most important prep step is handling those raisins! They need a quick soak. I usually just cover them with hot tap water for about ten minutes, then you absolutely must drain them well and pat them dry with a paper towel. If they’re too wet, they’ll water down our precious dough. Also, don’t skip the room temperature egg; it incorporates much better into the dough structure that way.
If you want that extra bakery touch? Right after the loaf comes out of the oven, brush the top with a little melted butter for a softer crust. That really heightens the experience. If you feel like skipping the drizzle later, mix that 1/2 cup of powdered sugar with just a splash of milk until it’s pourable!
How to Make Raisin Bread From Scratch: The Soft and Fluffy Loaf Tutorial
Okay, it’s time to get our hands dirty! Learning how to make raisin bread from scratch using yeast might sound like a huge undertaking, but honestly, it’s just a few very specific steps that turn simple flour into pure happiness. We’re aiming for that bakery-quality chewiness, which means we need to respect the dough’s timeline. Don’t rush that yeast; it’s the engine for that soft and fluffy texture we adore. If you want to dig into yeast science even further, you should check out my deep dive on learning sourdough starter from scratch!
We’re going to stick close to the recipe steps, but I want you to really focus on the feel of the dough during the kneading stage—that’s where the muscle memory builds up so fast!
Activating Yeast and Mixing the Raisin Bread Dough
Step one is crucial: we need to wake up our yeast. Take about half a cup of your warm milk and gently warm it just until it feels comfortably warm to your wrist—that’s the sweet spot between 105°F and 115°F. Whisk in one teaspoon of sugar, then sprinkle the yeast right on top. If it starts getting foamy and bubbly after about five to ten minutes, congratulations, your yeast is alive and ready to work!
Once foamy, add the rest of your wet ingredients—the milk, sugar, room-temperature egg, melted butter, and salt—and whisk it up. Now, gradually add the flour until everything just comes together into a shaggy mess. Turn that shaggy dough out onto a lightly floured surface. Now for the workout: you need to knead this dough for a solid six to eight minutes. You’ll know it’s ready when it stops sticking to everything and feels smooth and elastic under your palms. Then, let it proof in an oiled bowl until it’s doubled up; that usually takes around an hour and a half in a warm spot.
The Sweet Cinnamon Raisin Swirl Technique
While that first rise is happening, mix up your filling: the light brown sugar and that lovely ground cinnamon. Once your dough is puffy, punch it down gently—we want to get the air out so we can build those layers back in. Turn the dough onto your counter and roll it out into a nice, big rectangle, aiming for about 12 by 18 inches. Don’t stress if the shape isn’t perfect, we’re rolling it up next!
This is where the sweet raisin swirl bread happens! Take those two tablespoons of softened butter we set aside earlier and spread it edge-to-edge, really thinly. Then, sprinkle your cinnamon-sugar mix right over the butter, followed by scattering those nice, plumped raisins evenly across the surface. Starting from one of the long sides, roll it up as tightly as you possibly can—think of rolling up a carpet. You want that roll tight so you get defined swirls later on. Pinch that final seam shut firmly, and tuck it seam-side down right into your greased 9×5 inch loaf pan. If you want to see how some of my favorite food bloggers handle their swirls, you can peek at this tutorial!
Proofing and Baking Your Raisin Bread Loaf
Now we let those swirls set! Cover the loaf pan loosely and let it proof again in a warm area for about 30 to 45 minutes. You’re looking for it to crown about an inch over the top edge of the pan—that’s how you know you’ll get that gorgeous, bakery-style dome. While it’s puffing up, preheat your oven to 375°F (190°C).
Bake this beauty for about 30 to 35 minutes. The color should be golden brown, but the best test is temperature: stick a digital thermometer in the center—you want it reading around 200°F (93°C). If the top starts looking too dark before it hits that internal temp, just loosely drape a piece of aluminum foil over it to keep it from burning. Important last step: get it out of that hot pan immediately and let it cool completely on a wire rack before you dare slice into it. Trust me, slicing it warm turns it gummy!
Tips for Success: Achieving Bakery Style Raisin Loaf Texture
We all aim for that perfect slice, right? The one that’s chewy from the swirl but melts in your mouth? Getting that coveted bakery style raisin loaf texture isn’t magic; it’s just about nailing a few non-negotiables that I learned from watching the best bread makers out there. Don’t let this yeast dough intimidate you!
For the fluffiest results, make sure your **warm milk (105–115°F)** is right on the money. If it’s scorching, you’ll struggle to get a good rise later. Also, when you blend that cinnamon-sugar mixture, make sure your 2 tablespoons of butter are truly softened—almost spreadable. That buttery cushion is what keeps the cinnamon from just burning onto the raisins instead of creating those beautiful, moist streaks.
And please, the cooling part matters more than you think! Seriously, let it cool completely on a wire rack before slicing. I know it’s torture waiting for the aroma to fade, but slicing it hot traps steam, and that steam turns your perfect loaf a little gummy. If you want more tips on getting that cloud-like crumb, check out my thoughts on sourdough sandwich bread; the principles are similar!
If you’re looking for some outside inspiration on getting a fantastic crust, take a peek at how the folks over at Origin Oven handle their baked goods!
Storage and Reheating Instructions for Your Raisin Bread
Okay, you’ve pulled off the impossible: you made the best cinnamon raisin bread, and now you have to figure out how to keep it tasting as good tomorrow as it does right now! I get it; you don’t want to ruin this masterpiece.
For short-term storage, keeping it fresh for three or four days is easy. Just make sure it is completely cool—and I mean bone-chillingly cool—before you wrap it. Use beeswax wraps or good quality aluminum foil. Store it on the counter at room temperature. Do not put it in the fridge! Cold air is the enemy of soft bread; it makes it go stale faster, and nobody wants that.
If you’re a planner (unlike me sometimes), freezing is the way to go for long-term freshness. Slice the whole loaf first; this is essential. Wrap the slices tightly in plastic wrap, and then put those wrapped slices inside a zip-top freezer bag. It lasts beautifully for up to three months this way.
How to Reheat for That Fresh-From-the-Oven Taste
This brings us back to that glorious warm breakfast bread feeling! Reheating is super simple, but you have to treat it right.
If you’re eating a whole slice, pop it in a toaster oven or a regular toaster until it’s nicely golden and warm inside. If you grabbed a frozen slice, try this: microwave it just briefly—like 10 seconds—to take the chill off, and then immediately toast it. That quick blast of steam followed by the crisp toast mimics that just-baked softness perfectly. Never skip the butter when reheating, I swear it makes the flavors pop!
Serving Suggestions: Toasting Bread Ideas for Your Raisin Bread
Now that you’ve gone through all that work to make the most amazing homemade loaf, we need to honor it with the right toppings, right? Eating this bread fresh is great, but toasting it? That’s when the **raisin bread** truly shines and brings back all those cozy vibes!
Forget those sad, dry slices you get at the hotel breakfast bar. We are elevating the experience. I keep a jar of my slow cooker spiced pear butter on hand specifically for this loaf, but here are a few ways I rely on simple pairings:
- The Classic Butter Bomb: You have to start here. Toast a thick slice until golden, let it cool just a moment so the butter doesn’t just immediately melt into a pool, and spread a generous layer of good quality salted butter across it. The salt balances that cinnamon swirl beautifully.
- Cream Cheese Dream: This is wonderful if you’re having it with coffee mid-morning. Use full-fat cream cheese, softened slightly, so you can get a nice, even layer without tearing the delicate crust.
- Jam or Honey Drizzle: If you want to lean into the sweetness, a tart jam like raspberry or apricot cuts through the richness of the brown sugar swirl perfectly. A drizzle of local honey also works wonders!
Whatever you choose, make sure that slice is perfectly toasted—warm enough to soften the topping, but still sturdy enough to hold its shape. Enjoy that moment of pure, homemade perfection!
Frequently Asked Questions About Making Raisin Bread
I know when you spend time making a beautiful yeast bread like this, you end up with a few lingering questions. It’s totally normal! Yeast can be tricky, and figuring out how to tweak recipes for your own kitchen takes practice. I’ve put together some of the things I get asked most often when people try this homemade raisin bread recipe for the first time. Hopefully, this helps build your confidence!
Can I adapt this recipe to be a quick bread raisin recipe?
That’s a fair question if you’re in a huge rush! But I have to be honest with you: this recipe is built around yeast. It needs that rise time because the yeast develops the gluten structure that allows us to have that soft, fluffy texture and tight swirl. A quick bread, like a banana bread, uses baking soda or powder for lift. They are totally different beasts! If you try to skip the yeast and just use baking powder, you’ll end up with something dense and crumbly, not soft! If you need something fast, you should definitely search out a specific quick bread raisin recipe instead of trying to force this one to change.
What is the best way to get a strong cinnamon raisin swirl bread effect?
This is the fun part! The swirl is what makes this recipe feel special, right? The key really comes down to two moments. First, make sure that 2 tablespoons of butter you use for the filling is truly soft—not melted, but soft enough that you can spread it thinly and evenly right to the edges of your rolled-out dough. If you miss a spot, you get a band of plain bread!
Second, you have to roll that log tightly. I mean, roll it as tightly as you can without squishing the air completely out of it. When you pinch that final seam closed, give it a good seal. That tension you create when rolling ensures that when the bread expands in the oven, those cinnamon layers stretch and create those gorgeous, defined ribbons we all crave. If you’re looking for other great morning bakes, check out my other easy breakfast recipes!
Nutritional Estimate for One Slice of Raisin Bread
Now, I always tell people that baking at home as a hobby is about joy and flavor, not about strict calorie counting. That said, since we are using real butter and brown sugar in this amazing loaf, it’s only fair to give you a rough idea of what’s in that fantastic slice you’re about to enjoy.
Remember, every measurement, every raisin distribution error, and how thick you slice it will change these numbers! These are just good faith estimates based on the standard recipe proportions. This data is here to give you a complete picture of this wonderful fruit and spice bread.
Here is the breakdown for one slice:
- Serving Size: 1 slice
- Calories: 230
- Fat: 5g (Saturated Fat: 3g, Trans Fat: 0g)
- Cholesterol: 25mg
- Sodium: 280mg
- Carbohydrates: 43g (Fiber: 2g, Sugar: 14g)
- Protein: 5g
This is honestly a pretty solid estimate for a rich, sweet, homemade bread like this. It’s definitely a weekend treat or something special for a warm breakfast bread moment. Enjoy it responsibly, but definitely enjoy it!
Share Your Cozy Homemade Baked Goods Experience
Alright, my friend, now the hard part is over! You’ve mixed, you’ve kneaded, you’ve waited patiently for those rises, and you’ve pulled that golden, fragrant loaf out of the oven. You officially have some of the most satisfying cozy homemade baked goods right there on your cooling rack!
But honestly, I don’t want to just let you go without hearing about it! The absolute best part of this whole process for me, Jaxson Riley, is knowing that my discoveries from the road are making it into your kitchen and creating memories for you and your family just like they did for my bandmates.
So here’s what I need you to do:
- Slice that loaf—fresh, warm, or totally cooled—and tell me what you thought! Did the swirl turn out exactly how you pictured it? Did the smell fill your whole house up? Drop a star rating right down there in the comments section so I know exactly how this batch performed!
- If you took a picture of that beautiful cross-section, please tag me on Instagram! I love seeing your results. It helps me keep refining these recipes for everyone.
Don’t forget, if you’re already looking for what to bake next—maybe something a little decadent that still captures that homemade warmth—you might want to check out my recipe for amazing carrot cake bars next. Happy baking, and thanks for making my kitchen journey worthwhile!
PrintThe Best Homemade Cinnamon Raisin Bread
You can make soft and fluffy homemade cinnamon raisin bread with a sweet swirl. This recipe is perfect for toasting with butter for a warm breakfast treat.
- Prep Time: 30 min
- Cook Time: 35 min
- Total Time: 2 hr 40 min
- Yield: 1 loaf (about 12 slices) 1x
- Category: Breakfast
- Method: Baking
- Cuisine: American
- Diet: Vegetarian
Ingredients
- 1 cup warm milk (105-115°F)
- 2 1/4 teaspoons active dry yeast
- 1/4 cup granulated sugar, plus 1 teaspoon for yeast
- 1 large egg, room temperature
- 1/4 cup unsalted butter, melted
- 1 teaspoon salt
- 3 1/2 cups all-purpose flour, plus more for dusting
- 1 cup raisins, plumped in hot water and drained
- 1/2 cup packed light brown sugar
- 2 tablespoons ground cinnamon
- 2 tablespoons unsalted butter, softened (for swirl)
Instructions
- In a large bowl, dissolve 1 teaspoon of granulated sugar in 1/2 cup of the warm milk. Sprinkle the yeast over the top and let it sit for 5 to 10 minutes until foamy.
- Add the remaining 1/2 cup warm milk, 1/4 cup granulated sugar, egg, melted butter, and salt to the yeast mixture. Whisk to combine.
- Gradually add the flour, mixing until a shaggy dough forms. Turn the dough out onto a lightly floured surface and knead for 6 to 8 minutes until the dough is smooth and elastic.
- Place the dough in a lightly oiled bowl, turning once to coat. Cover the bowl with plastic wrap and let it rise in a warm place for 1 to 1.5 hours, or until doubled in size.
- While the dough rises, prepare the filling: In a small bowl, mix the brown sugar and cinnamon together.
- Gently punch down the risen dough. Turn it out onto a lightly floured surface. Roll the dough into a rectangle about 12 by 18 inches.
- Spread the 2 tablespoons of softened butter evenly over the dough surface. Sprinkle the cinnamon-sugar mixture over the butter. Scatter the drained raisins evenly over the sugar mixture.
- Starting from the long edge, tightly roll the dough into a log. Pinch the seam closed.
- Carefully place the log, seam-side down, into a greased 9×5 inch loaf pan. Cover loosely and let it rise again in a warm spot for 30 to 45 minutes, or until the dough has crowned about 1 inch over the rim of the pan.
- Preheat your oven to 375°F (190°C). Bake for 30 to 35 minutes, or until the top is golden brown and the internal temperature reaches 200°F (93°C). If the top browns too quickly, loosely tent it with foil.
- Remove the loaf from the pan immediately after baking and let it cool completely on a wire rack before slicing for the best texture.
Notes
- To plump the raisins quickly, soak them in hot water for 10 minutes, then drain and pat them very dry before adding them to the dough. Excess moisture can affect the dough structure.
- For a bakery-style loaf, you can brush the top with melted butter immediately after it comes out of the oven for a softer crust.
- If you prefer a sweeter finish, you can make a simple glaze using 1/2 cup powdered sugar mixed with 1-2 tablespoons of milk and drizzle it over the cooled bread.
Nutrition
- Serving Size: 1 slice
- Calories: 230
- Sugar: 14g
- Sodium: 280mg
- Fat: 5g
- Saturated Fat: 3g
- Unsaturated Fat: 2g
- Trans Fat: 0g
- Carbohydrates: 43g
- Fiber: 2g
- Protein: 5g
- Cholesterol: 25mg