
Okay, let’s be real. Sourdough is amazing, right? It tastes incredible, and we all love that gut healthy boost. But finding a true, honest-to-goodness, soft sourdough sandwich bread that actually slices nicely without squishing into a dense pancake? That’s the real challenge. For years, I felt like I was stuck between artisan loaves that were too holey for jam or just heavy bricks that didn’t cut it for school lunches.
I spent so much time on the road experimenting with doughs, trying to nail down that perfect balance. We needed a recipe that kept the tang and the health benefits but delivered that fluffy, sliceable texture every single time. Well, friends, I finally cracked the code! This recipe is my absolute favorite because it delivers on that promise. I’m giving you the ultimate soft sourdough sandwich bread recipe that’s even beginner-friendly, ensuring your homemade sandwich bread sourdough is a dream to work with.
- Why This Soft Sourdough Sandwich Bread Recipe Works for Beginners
- Ingredients for Your Ultimate Sourdough Sandwich Bread
- Step-by-Step Instructions for Homemade Sandwich Bread Sourdough
- Baking and Cooling: Tips for the Best Sourdough Sandwich Bread
- Storage and Reheating Instructions for Sourdough Sandwich Bread
- FAQ About Making Soft Sourdough Bread Recipe
- Estimated Nutritional Data for Your Sourdough Sandwich Bread
- Share Your Best Sourdough Sandwich Bread Results
Why This Soft Sourdough Sandwich Bread Recipe Works for Beginners
I know what you’re thinking: Sourdough bread is too complicated! But trust me, this recipe is designed to be your new best friend if you’re looking for an Easy Sourdough for Beginners. We aren’t aiming for those big, rustic holes here; we want structure for sandwiches! The secret to avoiding that dense, gummy texture that plagues so many loaves is twofold: enrichment and gentle handling.
We sneak in a little avocado oil and honey. That might sound weird if you usually only use flour, water, and salt, but these additions make a huge difference. They tenderize the crumb, giving you that cloud-like softness we associate with bakery loaves. That means this is a truly Fluffy Sourdough Recipe that still uses your healthy starter!
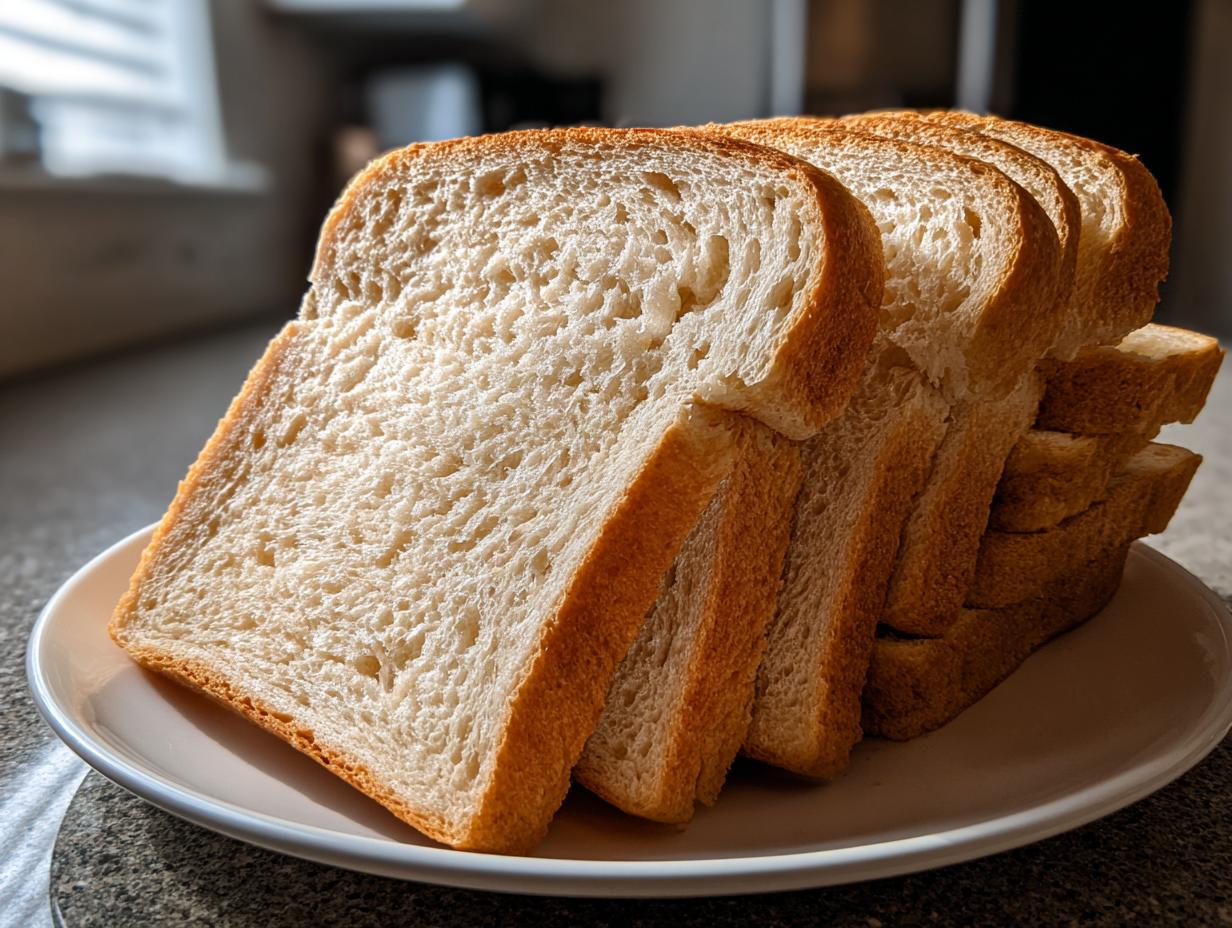
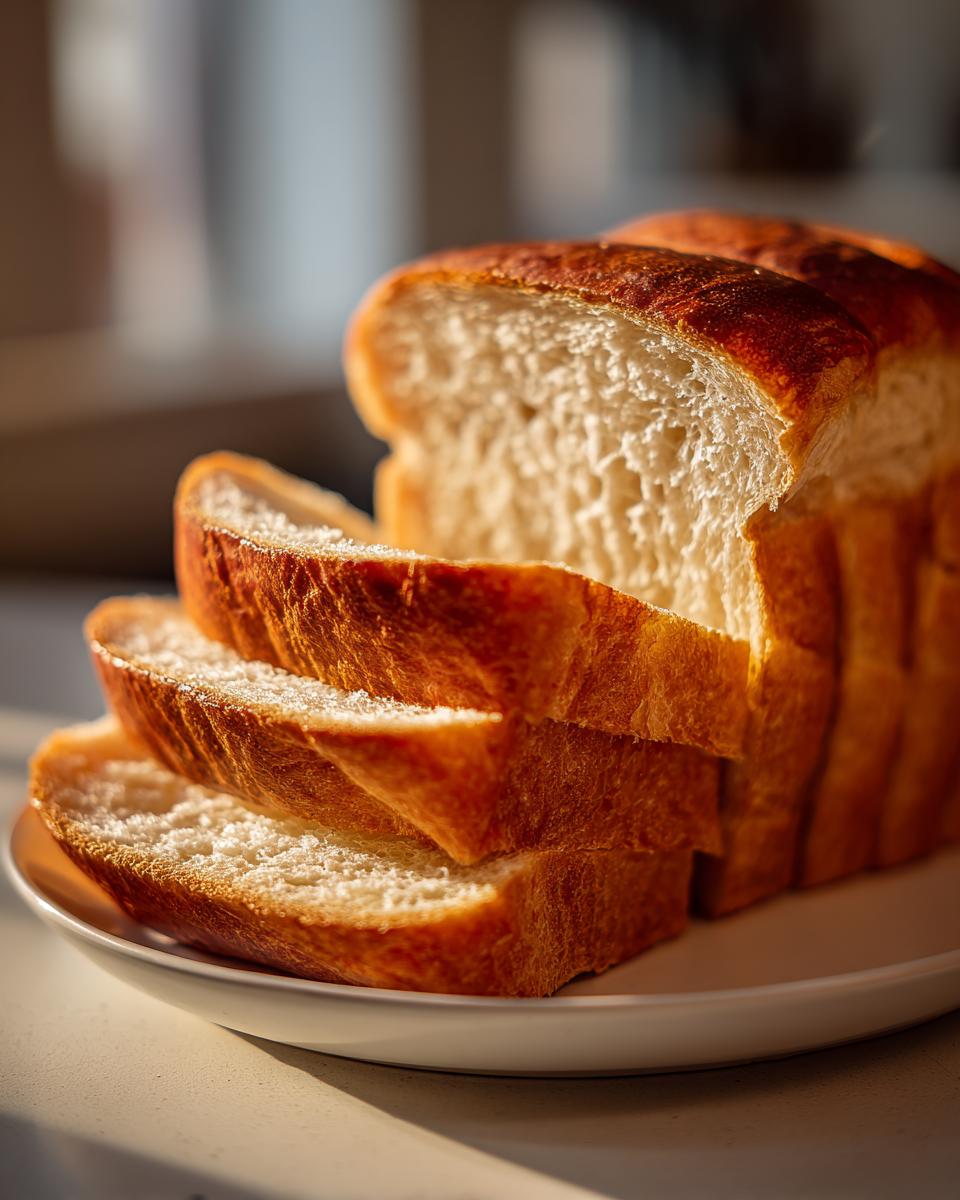
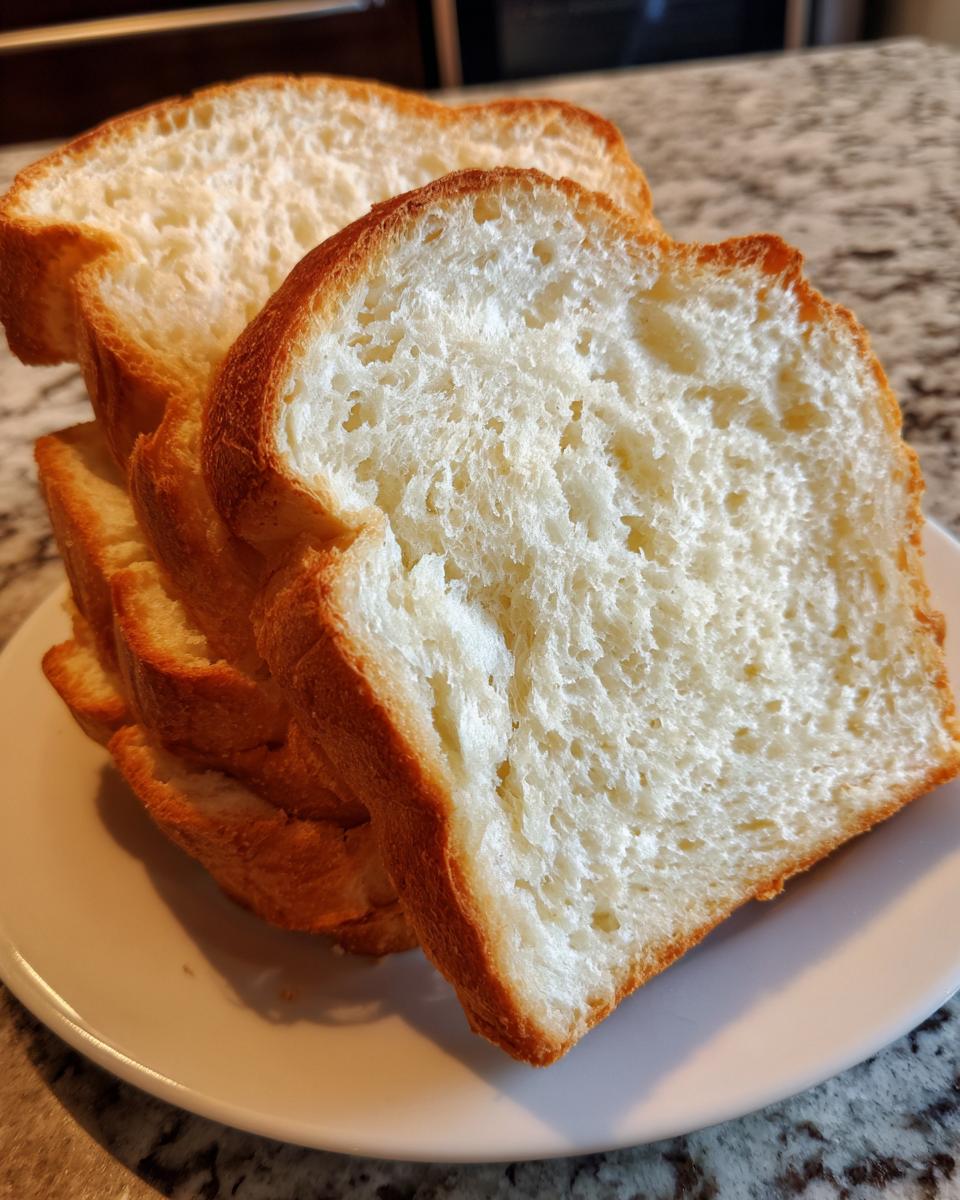
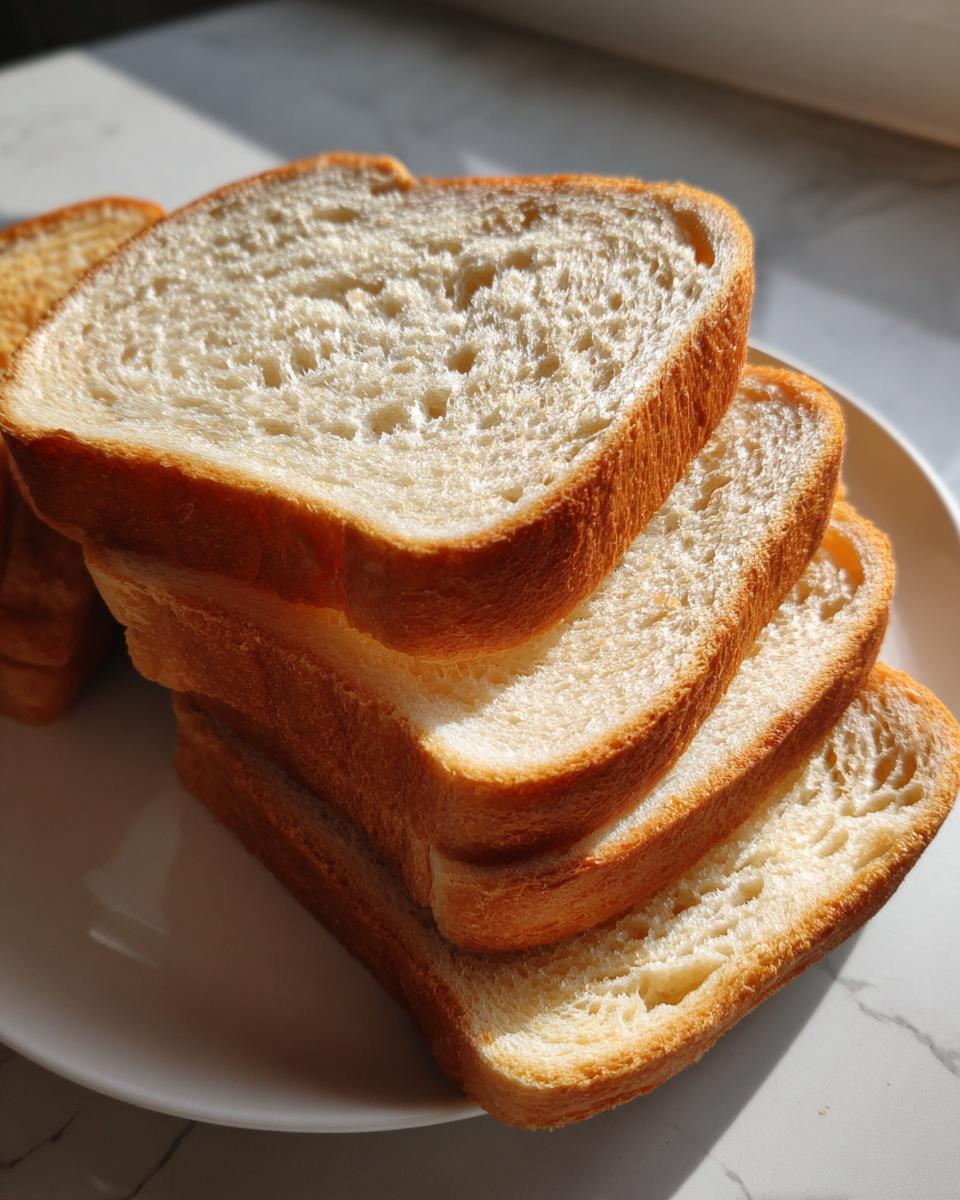
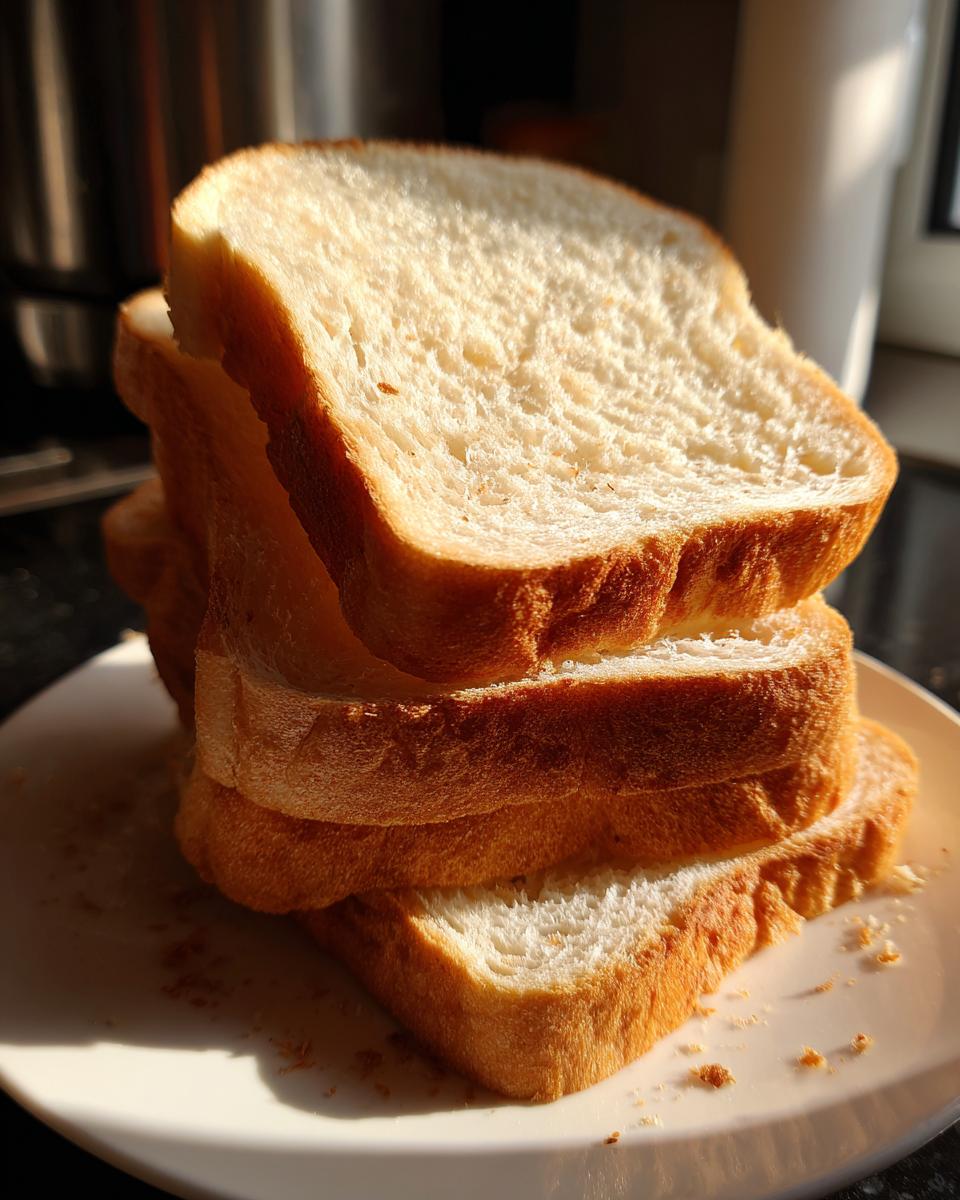
Achieving That Perfect Sliceable Sourdough Bread Crumb
The texture is everything for a sandwich loaf. You need a Sliceable Sourdough Bread, not something that fights back when you put a knife to it. The key is managing the bulk fermentation perfectly. You only want the dough to increase by about 30% to 50%. If you let it go too long, you get weak structure. Don’t worry if this sounds scary; we do a few folds to build strength!
And here’s the absolute non-negotiable tip for great texture: you have to let it cool completely—and I mean *completely*—before slicing it. If you cut it warm, you release all that steam and the inside turns gummy, no matter how great the bake was. Patience pays off, promise! Checking out some fun things to put on your finished bread is easy when you look at these simple morning ideas while you wait for it to cool.
Ingredients for Your Ultimate Sourdough Sandwich Bread
Okay, this is where we lock everything down. Getting the ingredients right is half the battle for a perfect rise on a soft loaf. I’ve listed exactly what I use for this sourdough sandwich bread recipe down below. Be precise, especially with your starter—it needs to be active and bubbly, ready to work!
- 150g active sourdough starter (fed and bubbly—this is non-negotiable!)
- 325g warm filtered water (warm helps get things moving quickly)
- 20g avocado oil (our secret weapon for softness!)
- 25g honey (for flavor and a slight tenderness boost)
- 500g unbleached bread flour (protein matters here!)
- 10g salt
Ingredient Notes and Substitutions for Sourdough Sandwich Bread
The addition of oil and honey is what separates this loaf from those super-lean, rustic sourdoughs. That little bit of fat—the avocado oil—coats the gluten strands, keeping them supple and preventing that super tight, dense crumb structure you definitely don’t want in a sandwich loaf. Honey just adds a touch of sweetness that pairs wonderfully with the sourdough tang.
If you’re looking to mix it up, you absolutely can! If you don’t have honey, maple syrup works beautifully as a direct swap, though the flavor profile shifts slightly. For a variation, say you wanted to try a Honey Wheat Sourdough, you could swap out 50g of that bread flour for whole wheat flour. Just make sure you’ve used that whole wheat flour in your starter feeding leading up to baking day!
Step-by-Step Instructions for Homemade Sandwich Bread Sourdough
Now for the fun part—turning that shaggy mess into something beautiful! Since this is an enriched dough, it’s a bit stickier than your standard lean sourdough, but don’t panic. We are going to use gentle handling to whip up structure over time. Remember, great flavor comes from time, so we need a good long bulk fermentation period. If you need some dinner inspiration while you wait for that dough to do its job, check out this recipe for easy honey garlic butter baked salmon!
First, we mix everything up. Combine your active starter, the warm water (that warmth really wakes up the starter—I aim for about 85°F), the avocado oil, and the honey until that starter looks milky and dissolved. Then, toss in your flour and salt. Mix it all until you have absolutely no dry flour visible. It’s going to look rough; that’s okay! Cover it up and let it rest for a full hour. We call this an autolyse/rest period.
After that hour, we start building the power into our dough with our folds. You need four sets of stretch and folds, exactly 30 minutes apart. This process develops the gluten network gently so you get that strong, yet soft, structure needed for a perfect loaf that folks online are always raving about, like over here at this amazing soft sourdough guide.
Building Structure: The Stretch and Fold Technique for Sourdough Sandwich Loaf
This is where the magic of structure happens! After resting for 30 minutes, wet your hands slightly—this stops the sticky dough from gluing itself to you. Gently stretch the dough up from one side, pull it slightly toward the center, and fold it over itself. Rotate the bowl a quarter turn and repeat that stretch and fold motion until you’ve completed a full circle. Cover it and let it rest for 30 minutes before you do the next set. You repeat this four times in total.
Once the folds are done, you let it rest. This is your bulk fermentation. For this enriched recipe, I watch the dough, not the clock! I wait until the dough has increased in volume by about 30% to 50%. If your kitchen is warm, that might take 4 hours; if it’s chilly, maybe 8 hours. My personal tell? When you gently jiggle the bowl, the dough should flow slightly, almost trembling, rather than just sitting there like a lump. That slight wobble means the internal structure is ready to hold its shape.
Achieving the Perfect Final Proof for Your Sourdough Sandwich Bread
Once bulk fermentation is done, gently turn the dough onto a lightly floured surface. You’re going to shape it into a tight log or rectangle—think about the size of the loaf pan you are using (mine is a standard 9×5 inch). You need to create tension on the outside skin of the dough during this shaping. Place that shaped dough seam-side down right into any greased loaf pan you are using. Make sure the top is smooth!
Now we proof it one last time. Cover that pan loosely—a plastic bag works great—and let it sit at room temperature. For a beautiful sliceable sourdough bread, we want that dough to crown about 1 inch over the rim of the pan before it hits the oven. If it’s too low, it won’t have enough spring. If it rises too much over the rim and deflates in the oven, you over-proofed! Watch it closely during those last couple of hours. If you poke it gently with a floured finger, the indentation should slowly spring back but not disappear entirely. That slight memory is what you’re looking for!
Baking and Cooling: Tips for the Best Sourdough Sandwich Bread
We’ve babied this dough through the mixes and the folds; now it’s time for the heat! You want to get your oven preheated about 30 minutes before your final proof looks ready. I set mine to 375 degrees Fahrenheit (that translates to 190 degrees Celsius). This enriched dough doesn’t need those scorching hot temperatures that lean sourdoughs sometimes require for great oven spring.
Bake the loaf for about 35 to 45 minutes on the center rack. You’re looking for a gorgeous golden-brown crust. But here’s my best tip for knowing for sure that it’s done—don’t just guess! Pull the bread out (carefully, it’s hot!) and use an instant-read thermometer right into the bottom center of the loaf. You are aiming for an internal temperature between 200 and 205 degrees Fahrenheit. That temperature means the internal starches have set properly.
As soon as it hits that target temp, get it out of the metal pan immediately. Seriously, don’t let it sit there for even five minutes. Metal holds heat, and you risk over-baking the bottom or encouraging that dreaded gummy texture. Place the loaf right onto a wire cooling rack. I know you’ll be tempted to tear off a heel—we all are!—but you must, must, must wait until it’s completely cooled down. This step guarantees you get that perfectly Sliceable Sourdough Bread that makes such great toast later on. If you cut it warm, all that beautiful structure collapses internally!
If you need some ideas for what to eat this amazing bread with once it’s cool, you can check out some great tips over here at Duvall Homestead for what they like to pair with their loaves!
Storage and Reheating Instructions for Sourdough Sandwich Bread
Okay, you’ve waited patiently, you’ve sliced that beautiful, structurally sound loaf, and now you have some left over—or maybe you just baked a masterpiece and want it to last all week! Since this sourdough sandwich bread has that little bit of oil and honey in it, it stays softer longer than a lean country loaf, but it definitely won’t sit on the counter for two weeks like the stuff at the store!
My rule is simple: room temperature storage only for the best flavor. Once it’s completely cool, wrap it tightly. I usually use a large Ziploc bag, squeezing out every bit of air, or sometimes I even wrap it in foil first and then put it in a bag. Keep it on the counter; never in the fridge! Putting bread in the fridge is the fastest way to make it go stale, and we worked too hard for that!
If you just want a single slice for breakfast, don’t try to eat it straight if it’s a day or two old. We’re aiming for that perfect Sourdough Toast Recipe experience! You can toast it directly from the loaf, but I actually prefer to lightly warm it first. I put a slice briefly in the microwave—literally 5 to 10 seconds—to wake up that softness, and *then* I put it in the toaster.
That little warm-up step makes the toasting much more even. And if you end up with some leftover slices that are perfect for soaking up egg? You can make the best French toast with that bread! Check out my recipe for apple cinnamon French toast when you’re ready to turn that leftover loaf into an epic breakfast.
FAQ About Making Soft Sourdough Bread Recipe
I gathered up the questions I get asked the most about this recipe. Sourdough can be tricky, but once you know the little secrets, it’s a breeze! If you’re packing school lunches or just need a quick, healthy lunch idea, getting this loaf right is everything.
Can I skip the oil in this Sourdough Sandwich Bread?
You absolutely *can* skip it, technically. But I strongly advise against it if your goal is that soft, pillowy texture! That 20 grams of avocado oil is included because it acts like a little cushion inside the dough. It keeps the gluten strands from snapping together too tightly during baking, which is exactly what gives you that incredibly tender crumb that makes this a great Sourdough Sandwich Loaf. Without it, your loaf will lean much more toward a traditional, slightly chewier sourdough.
How long does bulk fermentation take for this Easy Sourdough for Beginners?
Ah, time versus visual cues—the eternal sourdough struggle! I gave you a range of 4 to 8 hours because your kitchen temperature plays a huge role. If it’s 68 degrees in your house, you’re going to be waiting closer to that 8-hour mark. If you’ve got it cranked up to 75 degrees, maybe 4 hours will do it. For this Easy Sourdough for Beginners recipe, you stop when the dough has visibly increased in size by about 30% to 50%. It should look puffed up and jiggly, not doubled in size. Trust your gut feeling, not just the clock!
Is this loaf considered Gut Healthy Bread?
Yes, it absolutely is! That’s one of the huge benefits of letting your starter do the heavy lifting. Because we allow for that long bulk fermentation time—even stretching it out over 8 hours—the wild yeast and bacteria in your starter get time to pre-digest some of the complex starches and gluten in the flour. This process makes the finished loaf much easier on your stomach. So yes, this is definitely a wonderful, flavorful choice when you are looking for Gut Healthy Bread that you can proudly eat every day!
Estimated Nutritional Data for Your Sourdough Sandwich Bread
I know some of you are counting things, planning meals, or just curious about what exactly you’re munching on when you make this amazing loaf—and that’s fair! Nutrition is important, especially when you’re baking from scratch. Here is the estimated nutritional breakdown based on my calculations for one slice of this sourdough sandwich bread.
- Serving Size: 1 slice
- Calories: 250
- Fat: 3g
- Carbohydrates: 48g
- Protein: 9g
- Sugar: 3g
- Fiber: 2g
- Sodium: 230mg
Now, before you get mad if your slice differs slightly, I have to throw in the standard disclaimer that’s super important! These numbers are *estimates*. They depend heavily on the exact brand of bread flour you use, the specific nutritional makeup of your honey, and how thick you decide to cut your slices (which, let’s be honest, we all tend to cut them thick when they smell this good!). So, take these as a fantastic guide, but know that when you bake at home, your results might sway a little bit based on your exact ingredients.
Share Your Best Sourdough Sandwich Bread Results
Wow! We made it through the mixing, the folding, the waiting, and the baking. You’ve created a beautiful, soft sourdough sandwich bread, and I couldn’t be prouder of you! Remember what I said about YumDrizzle? We believe that sharing the joy of cooking makes it even better. Food tastes more delicious when you know you’ve nailed something you were nervous about, right?
So, please don’t just close the tab when you pull that beautiful loaf out of the oven! I genuinely want to hear how it went. Did you nail that fluffy crumb? Was it sturdy enough for big turkey sandwiches? Did your kids finally agree that homemade sourdough is better than the stuff wrapped in plastic?
Head down to those comments and give this recipe a star rating—let other bakers know how easy you found this sourdough sandwich bread to tackle! Tell me what you’re using it for. Are you making grilled cheese? Or maybe you’re just slicing thick pieces for snacking.
And if you took a picture of your final loaf—especially if you can show off those soft interior crumb shots—please share them! Tag me wherever you are online. Seeing your success stories is what keeps me experimenting and creating more accessible recipes like this one. If you want to learn more about our philosophy on making cooking fun and stress-free, take a look at our About Page. Happy baking, friend!
PrintThe Ultimate Soft Sourdough Sandwich Bread: Fluffy and Sliceable

Follow these steps to bake a soft, fluffy sourdough sandwich loaf that is perfect for daily use, toasting, and sandwiches. This recipe focuses on achieving a tender crumb that beginners can manage.
- Prep Time: 30 min
- Cook Time: 45 min
- Total Time: 8 hours 45 min (includes bulk fermentation)
- Yield: 1 loaf 1x
- Category: Baking
- Method: Baking
- Cuisine: American
- Diet: Vegetarian
Ingredients
- 150g active sourdough starter (fed and bubbly)
- 325g warm filtered water
- 20g avocado oil
- 25g honey
- 500g unbleached bread flour
- 10g salt
Instructions
- Combine Starter Mix: In a large bowl, mix the active starter, warm water, avocado oil, and honey until they are well combined.
- Add Dry Ingredients: Add the bread flour and salt to the wet mixture. Mix by hand until no dry flour remains. The dough will be shaggy.
- Rest: Cover the bowl and let the dough rest for 1 hour (autolyse/rest period).
- Stretch and Fold Set 1: Gently stretch and fold the dough over itself in the bowl. Cover and rest for 30 minutes.
- Stretch and Fold Sets 2, 3, and 4: Repeat the stretch and fold process three more times, waiting 30 minutes between each set. This builds structure.
- Bulk Fermentation: Cover the dough and allow it to bulk ferment at room temperature for 4 to 8 hours, or until the dough has increased in volume by about 30-50% and shows signs of activity.
- Shape: Gently turn the dough out onto a lightly floured surface. Shape the dough into a tight log or rectangle suitable for a standard loaf pan (9×5 inch).
- Pan Transfer: Place the shaped dough seam-side down into a greased loaf pan.
- Final Proof: Cover the pan loosely and let the dough proof at room temperature until it crowns about 1 inch over the rim of the pan. This can take 2 to 4 hours, depending on your kitchen temperature.
- Preheat Oven: Preheat your oven to 375 degrees Fahrenheit (190 degrees Celsius) about 30 minutes before baking.
- Bake: Bake the loaf for 35 to 45 minutes, or until the crust is golden brown and the internal temperature reaches 200-205 degrees Fahrenheit (93-96 degrees Celsius).
- Cool: Immediately remove the bread from the pan and cool completely on a wire rack before slicing. Slicing too early causes a gummy texture.
Notes
- Use warm water (around 80-90°F) to encourage faster fermentation for this enriched dough.
- For best results, use a high-protein bread flour.
- This recipe yields a loaf that is gut-healthy and easy to digest due to the long fermentation process.
- Wait until the loaf is fully cool before slicing to get the best sliceable sourdough bread texture.
Nutrition
- Serving Size: 1 slice
- Calories: 250
- Sugar: 3
- Sodium: 230
- Fat: 3
- Saturated Fat: 0.5
- Unsaturated Fat: 2.5
- Trans Fat: 0
- Carbohydrates: 48
- Fiber: 2
- Protein: 9
- Cholesterol: 0