
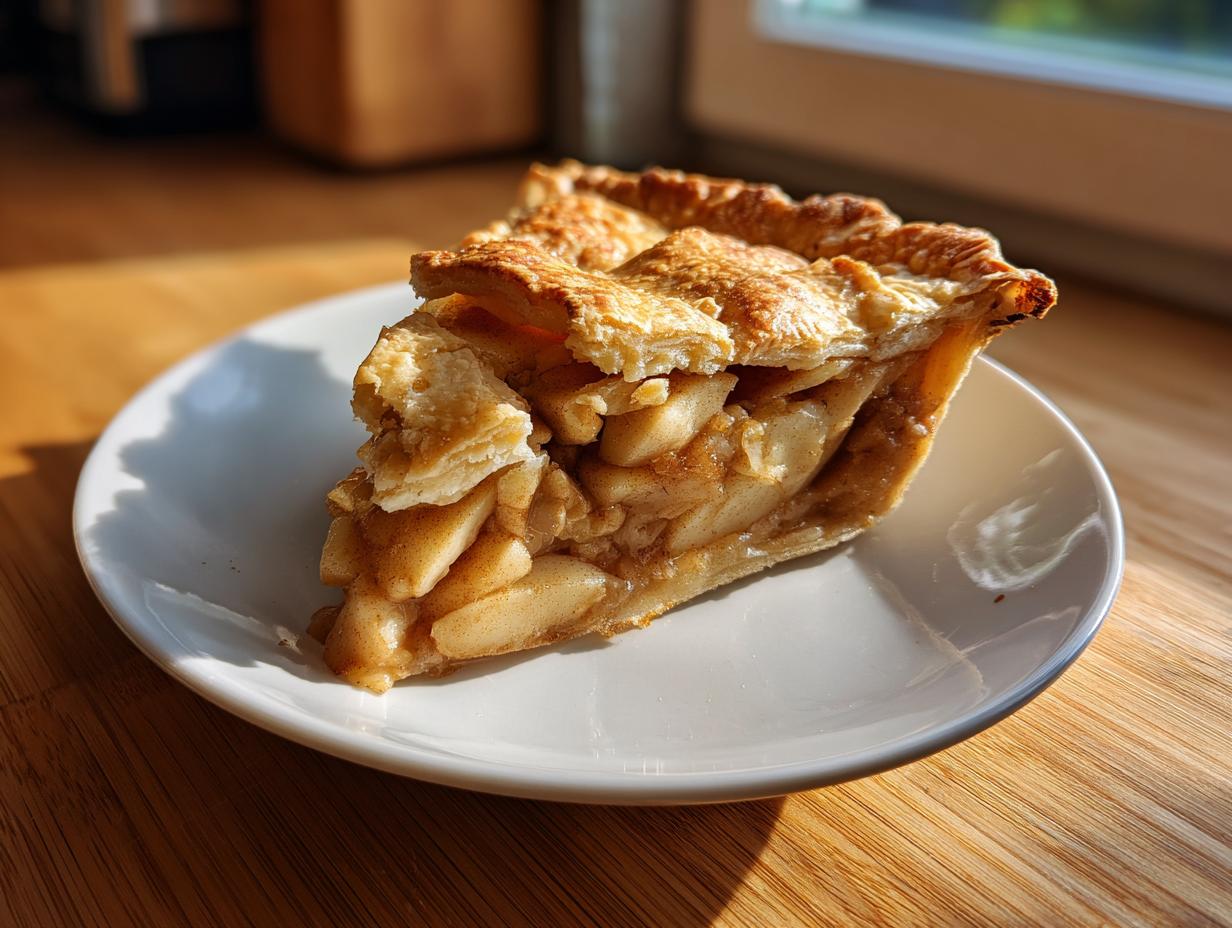
There’s nothing quite like pulling a shimmering, golden-brown pie out of the oven, the warm, sweet scent of baked apples and cinnamon flooding the entire kitchen. That first slice—the one where the crust shatters just right and the filling holds its shape? That moment is pure home harmony. I’m Jaxson Riley, and I firmly believe that mastering the apple pie is the benchmark for any home baker. It feels complicated, right? Mushy apples, soggy bottoms, tough crusts. Forget all that. This recipe, honed from experiences across diners and grandma’s counters, guarantees you the best homemade classic apple pie recipe, focusing purely on that unbelievably flaky crust and that perfectly tender filling that melts in your mouth. Trust me; you’re going to nail this!
- Why This Is The Best Homemade Classic Apple Pie Recipe Ever
- Gathering Ingredients for Your Apple Pie
- Step-by-Step Instructions for a Classic Apple Pie Recipe
- Tips for Success When Making Your Apple Pie
- Ingredient Notes and Substitutions for Your Apple Pie
- Serving Suggestions for This Traditional Apple Pie
- Storage and Reheating Instructions for Leftover Apple Pie
- Frequently Asked Questions About Making Apple Pie
- Share Your Perfect Apple Pie Creation
Why This Is The Best Homemade Classic Apple Pie Recipe Ever
Look, I’ve tasted pies that broke my heart—they were either all crust and no flavor, or they were soup disguised as dessert. That stops here. We are making the best apple pie recipe ever, and I mean that. My focus when I developed this homemade apple pie from scratch wasn’t just on taste; it was on texture—we want shatteringly crisp layers and apples that actually taste like apples, not baby food. We are tackling the two biggest fear factors head-on: that sad, pale crust and, yes, the dreaded soggy bottom. Once you nail these techniques, you’ll never look back. This is serious comfort food baking. For more incredible Southern classics, check out my recipe for amazing buttermilk pie; it shares that same foundational love for simple, perfect baking.
Achieving the Flaky Pie Crust Tutorial
The road taught me patience, and your crust demands it. Flakiness is strictly a temperature game. You absolutely must keep your butter and water ice cold. I mean, drop the water right from the ice tray into the flour mix. Those little chunks of super-cold butter are what create pockets of steam in the oven, forcing the dough layers apart. That’s the secret to our flaky pie crust tutorial. If your butter gets warm and smears into the flour, you’ve essentially made shortbread, not layers in the dough. Keep it cold, handle it minimally, and chill it well!
The Secret to Perfect Apple Pie Filling
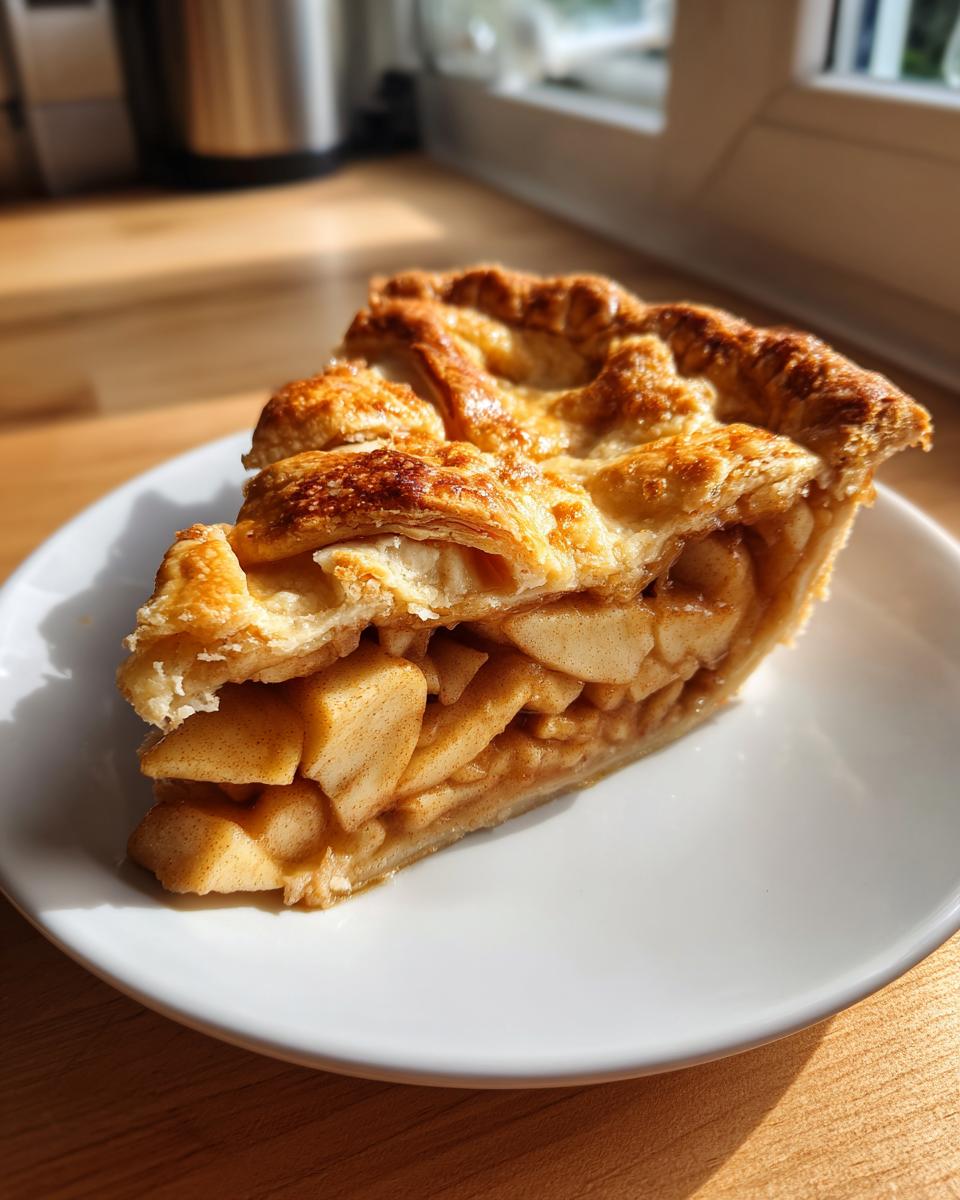
For the filling, we lean on Granny Smith apples. They hold their shape beautifully, giving you that perfect bite instead of mush. We mix granulated and brown sugar with our warm spices—cinnamon is key, but don’t skip the nutmeg and allspice. This is how to make apple pie filling that tastes deep and spiced. Here’s my trick: once the sugar and spices are tossed with the apples, dip a clean finger in and taste the raw mix. Does it need a tiny extra pinch of salt or spice? Adjust it now! You can’t fix the seasoning once the crust is on.
Gathering Ingredients for Your Apple Pie
Alright, time to rally the troops! Baking this incredible apple pie relies on good, honest ingredients, and nothing throws off my whole vibe faster than subbing out quality components. Seriously, don’t try to hustle this; we need the best starting materials for that perfect texture we talked about. Remember, the colder the butter, the better! For those of you looking for creamy finishes on other desserts, I have a great vanilla buttercream recipe, but for this pie, we stick to the basics and focus on temperature.
For the Buttery Pie Crust Recipe
- 2 1/2 cups all-purpose flour
- 1 teaspoon salt
- 1 cup (2 sticks) cold, unsalted butter, cut into cubes—and I mean COLD!
- 1/2 cup ice water, plus more if needed
For the Cinnamon Spiced Apple Dessert Filling
- 6 large Granny Smith apples, peeled, cored, and sliced 1/4-inch thick
- 1/4 cup lemon juice
- 3/4 cup granulated sugar
- 1/4 cup packed light brown sugar
- 1/4 cup all-purpose flour (this helps thicken it!)
- 1 teaspoon ground cinnamon
- 1/4 teaspoon ground nutmeg
- 1/8 teaspoon ground allspice
- 1 tablespoon unsalted butter, cut into small pieces (for dotting the top)
And for the finishing touch, we need one large egg beaten with 1 teaspoon water for the egg wash, and just 1 tablespoon of coarse sugar to sprinkle over the top for that necessary crunch.
Step-by-Step Instructions for a Classic Apple Pie Recipe
We’re getting down to business now! This is where we take those perfect ingredients and turn them into that classic apple pie everyone dreams about. Follow these steps exactly, especially when it comes to temperature and timing, and you are golden. I’ve learned that rushing the chilling phase or mixing the dough too much is an open invitation for a tough crust. If you’re hungry for great bread while you wait, I have a fantastic easy french bread recipe that might tide you over. Remember, patience pays off massively here.
Making the Flaky Pie Crust Tutorial Dough
First things first: the dough needs that chill time. Whisk your flour and salt together, then cut in that super-cold butter until it looks like coarse crumbs with some larger, pea-sized bits still visible. Don’t let those butter chunks melt! Now, add the ice water slowly, just a tablespoon at a time, stirring until the dough *just* holds together. Seriously, stop mixing the second it clumps up. Divide that shaggy mass into two discs, wrap them tight, and put them away for at least one hour. They need to rest and firm up before we roll them out.
Assembling the Apple Pie
While the dough chills, make sure your apple filling is tossed well and ready to go. Once your oven is preheated to 425 degrees F, take one chilled disk and roll it out on a floured surface into about a 12-inch circle. Gently lay that into your 9-inch pie plate. Trim the overhang to about an inch. Pour in all those gorgeous spiced apples, making sure they mound slightly in the center. Then, dot the top of the filling with those tiny pieces of butter—that adds richness right where you need it! Roll out the second dough disk and place it over the top. Crimp the edges to seal them shut (you can pinch them with a fork or your fingers). Don’t forget to cut those essential steam slits right in the center!
Baking the Apple Pie and No Soggy Bottom Apple Pie Hacks
Here’s where we tackle that crust worry. Brush the top crust with your egg wash and sprinkle it generously with coarse sugar. Place the whole pie onto a baking sheet—this is one of our main no soggy bottom apple pie hacks, as it helps conduct heat directly to the bottom dough! Bake hard at 425 degrees F for just 15 minutes. Then, drop the heat down to 375 degrees F and keep baking another 40 to 50 minutes until that filling is bubbly and the crust is deep golden brown. If the edges look like they are getting too dark too soon, just loosely wrap some foil around the rim. Crucially, don’t touch the knife until it cools for a full two hours. That time lets the filling set up properly so you get those perfect slices.
Tips for Success When Making Your Apple Pie
We’ve got the structure down, but now let’s talk about those pro moves that make people ask, “Did you buy this?” First up, remember what the recipe notes said: seriously consider mixing apples. While Granny Smith is amazing for its tartness and firmness, adding some sweeter Fuji or Honeycrisp apples gives your apple pie filling a much deeper, more complex flavor profile. It’s worth the extra trip to the market!
Also, you know I stressed the chilling butter rule. But if you are still sweating about the bottom, here’s a little non-standard trick I picked up: try a very quick blind bake. Pop that bottom crust, unbaked, into the hot oven (425°F) for about 8 minutes before you fill it. It won’t cook all the way through, but it sets the base enough to stand up to any juicy filling. That’s a solid addition to our list of no soggy bottom apple pie hacks. Trust me, every extra step you take to keep that crust crisp is worth it. If you are looking for other comforting fruit bakes, my applesauce cake recipe is another keeper!
Ingredient Notes and Substitutions for Your Apple Pie
So, you’ve gathered everything, but maybe you’re staring at your fridge wondering if you can swap things out because you’re missing one tiny thing. I get it—we cook with what we have! When it comes to this amazing apple pie, substitutions are okay, but you need to know where you absolutely cannot compromise. I learned early on that pantry flexibility is key, like when making things like lemon blueberry scones, but not for the foundation of this pie.
The biggest thing? Cold butter for that buttery pie crust recipe. Seriously, do not cheat this. If your butter is even slightly soft, it incorporates right into the flour, and you get a tough, flat crust instead of those lovely flaky layers we worked so hard to create. It has to be near-freezing!
For the apples, while Granny Smiths are the backbone—they give us that essential tartness—mixing them with a sweeter apple like Honeycrisp or Fuji is highly recommended. Aim for about a 2:1 ratio of tart to sweet. That combination gives you the depth of flavor that makes people ask for the recipe.
Serving Suggestions for This Traditional Apple Pie
Okay, your apple pie is out of the oven, it’s cooled *just* enough so the filling isn’t lava, and you are ready to serve this masterpiece. You’ve earned this! This cinnamon spiced apple dessert is hearty enough to stand alone, but honestly, it sings when you give it a partner. Those warm, tart, buttery flavors need something creamy and cool to balance them out.
The absolute classic pairing—and the one I always default to—is a big scoop of good quality vanilla ice cream melting slowly over the slice. The hot pie meets the cold cream? Perfection. It’s simple, it’s nostalgic, and it never misses. If you are feeling extra cozy, especially as we head into cooler weather, remember that for the holidays, my creamy eggnog recipe makes a phenomenal, rich companion, maybe even served on the side instead of ice cream.
But let me share a little secret I picked up from some folks in the Midwest: sharp cheddar cheese. Yes, cheese! Cut a thin slice of very sharp, tangy cheddar and place it right on top of your warm slice of pie. The saltiness and the sharpness cut through the sweetness of the filling beautifully. It sounds weird, I know, but once you try it, you’ll understand the magic of that savory contrast. And hey, if neither of those sounds right, you can never go wrong with a simple, fluffy dollop of freshly whipped cream!
Storage and Reheating Instructions for Leftover Apple Pie
So, you managed to have leftovers—impressive! Your apple pie is best eaten the day it’s baked, but it holds up well. For short-term eating (say, the next day), you can safely keep it loosely covered on the counter. If you need it to last longer than 24 hours, you absolutely must put it in the fridge. Don’t even think about the microwave for reheating, though! That will turn your beautiful, flaky crust into a sad sponge.
To bring back that crispness—and this is key, folks—pop a slice (or the whole thing, if you’re really committed) back into a 350-degree oven for about 10 minutes until it’s warmed through. That gentle dry heat completely refreshes the buttery crust. If you’re looking for other baked treats that freeze and reheat well, you should check out my sour cream coffee cake recipe next!
Frequently Asked Questions About Making Apple Pie
I know you are all going to have questions once you dig into making this classic apple pie recipe from scratch. That’s totally normal! When I was learning on the road, I felt like I needed someone right there whispering instructions. I’ve compiled the questions I get the most from folks trying to bake their first or their best pie. We want everyone to feel confident tackling this incredible cinnamon spiced apple dessert!
Can I use pre-made pie dough for this apple pie recipe?
Listen, if you are looking for the ultimate easy apple pie recipe shortcut for a busy weeknight, absolutely, you can use good quality store-bought dough. I teach you how to make the best buttery pie crust recipe right here because it just tastes so much better, but hey, no judgment! If you go that route, just make sure you let the refrigerated dough thaw slowly in the fridge for a few hours before rolling. Never try to rush it on the counter, or it will crack and tear when you try to transfer it to the pie plate.
What is the best way to tell if my apple pie is fully baked?
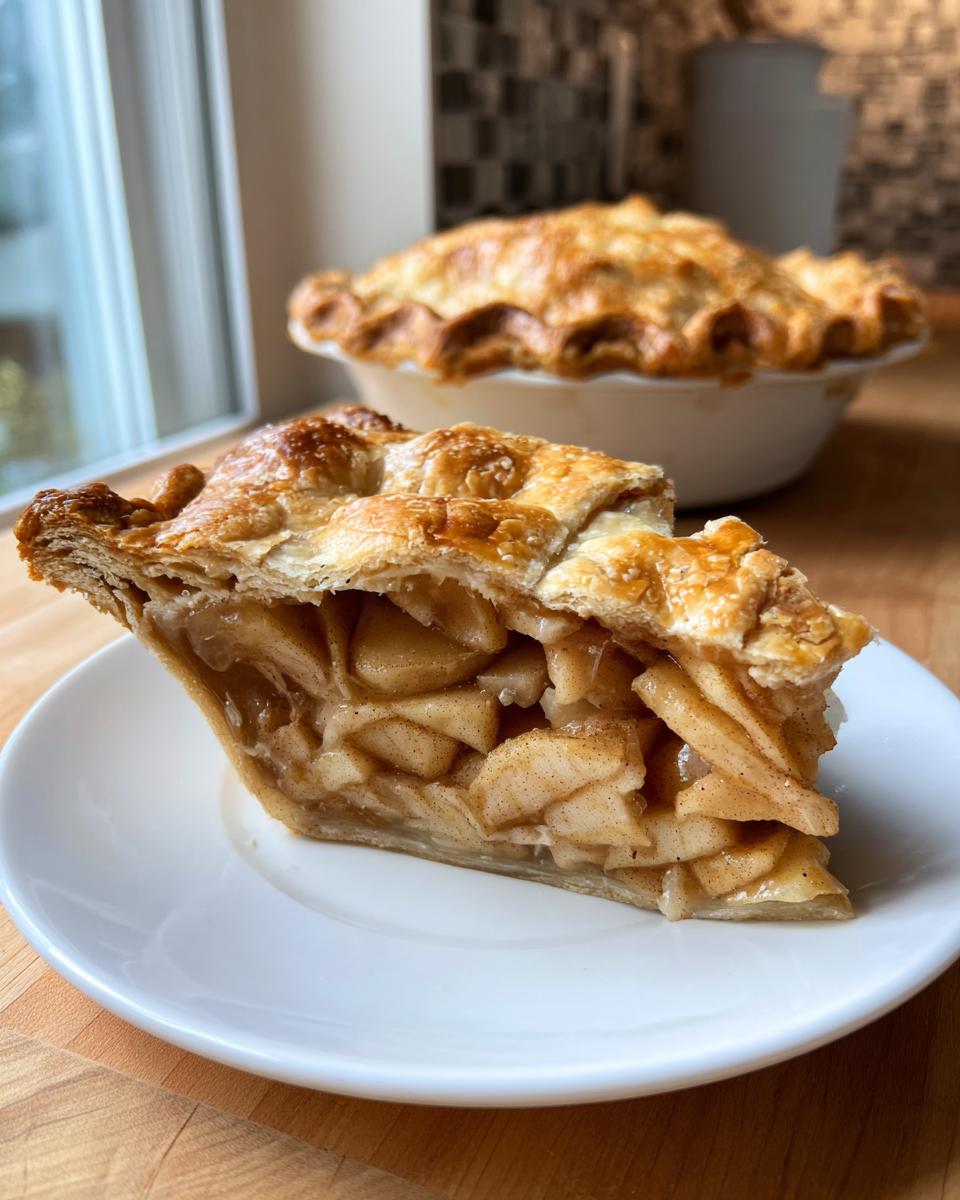
This is essential! Don’t trust the clock alone in your oven, because every oven is different. You are looking for two main visual cues. First, the crust needs to be a deep, rich golden brown—not pale yellow. Second, you need to look down into those steam vents you cut in the top. The filling inside should be bubbling thick, like slow-moving lava, not watery thin. If you see those big, slow bubbles popping through, that means the starches have activated and your filling is setting up perfectly. That’s the secret to success for any traditional apple pie.
Can I make this recipe ahead of time?
You definitely can prep ahead, which I highly recommend for busy days like Thanksgiving! You can assemble the entire, unbaked pie—crust, filling, everything—then wrap it tightly and keep it in the fridge overnight. For the best results in terms of crust texture, I’d say aim to bake it within 12 hours. Reheat your oven safely to the 425°F initial blast temperature. If you bake it totally ahead of time and store it, the crust will lose some of its fresh snap, but it will still taste amazing. If you struggle with storage, remember that my homemade tartar sauce recipe is perfect for shorter-term flavor storage!
Share Your Perfect Apple Pie Creation
Whew! You made it! You navigated the ice-cold butter, you spaced out those apple slices perfectly, and you avoided the dreaded soggy bottom. Honestly, if you can bake this apple pie successfully, you can bake anything. That’s the confidence I want you to take away from YumDrizzle—that you can handle the classics!
Now, I really want to see what you came up with. Did you go for a classic crimp, or did you try a rustic design around the edges? Did you dust it with simple sugar or sneak on some coarse sugar for extra crunch on top? Please, come back here and leave a comment below. Tell me how it turned out, and if you are feeling generous, give this recipe a five-star rating. Your feedback helps other bakers who might be nervous about tackling their first homemade apple pie from scratch!
If anything surprised you, or if you have a genius little swap you tried out, don’t keep it secret! Share the knowledge down in the comments. If you have questions that popped up mid-bake, send them over. You can always reach out directly through my contact page too, but the community comments are the best place to chat. Happy baking, and enjoy every single bite of that perfect slice!
PrintThe Best Homemade Classic Apple Pie Recipe

This classic apple pie recipe delivers a shattering buttery crust and a perfectly spiced, tender apple filling. Learn the secrets to making a traditional apple pie from scratch that avoids a soggy bottom, making it the best dessert for any gathering.
- Prep Time: 45 min
- Cook Time: 65 min
- Total Time: 110 min
- Yield: 8 servings 1x
- Category: Dessert
- Method: Baking
- Cuisine: American
- Diet: Vegetarian
Ingredients
- 2 1/2 cups all-purpose flour
- 1 teaspoon salt
- 1 cup (2 sticks) cold, unsalted butter, cut into cubes
- 1/2 cup ice water, plus more if needed
- 6 large Granny Smith apples, peeled, cored, and sliced 1/4-inch thick
- 1/4 cup lemon juice
- 3/4 cup granulated sugar
- 1/4 cup packed light brown sugar
- 1/4 cup all-purpose flour
- 1 teaspoon ground cinnamon
- 1/4 teaspoon ground nutmeg
- 1/8 teaspoon ground allspice
- 1 tablespoon unsalted butter, cut into small pieces
- 1 large egg, beaten with 1 teaspoon water (for egg wash)
- 1 tablespoon coarse sugar for sprinkling
Instructions
- Prepare the Pie Crust: In a large bowl, whisk together the 2 1/2 cups flour and 1 teaspoon salt. Cut in the cold butter using a pastry blender or your fingers until the mixture resembles coarse crumbs with some pea-sized pieces of butter remaining. Gradually add the ice water, one tablespoon at a time, mixing until the dough just comes together. Do not overmix. Divide the dough in half, flatten each half into a disk, wrap in plastic, and chill for at least 1 hour.
- Prepare the Apple Filling: In a large bowl, toss the sliced apples with lemon juice. In a separate small bowl, mix the granulated sugar, brown sugar, 1/4 cup flour, cinnamon, nutmeg, and allspice. Pour the sugar mixture over the apples and toss gently to coat evenly.
- Assemble the Pie: Preheat your oven to 425 degrees F. On a lightly floured surface, roll out one disk of dough into a 12-inch circle. Carefully transfer the dough to a 9-inch pie plate. Trim the edges, leaving a 1-inch overhang. Pour the apple filling into the crust. Dot the top of the filling with the small pieces of butter.
- Top the Pie: Roll out the second disk of dough. Place it over the filling. Trim the top crust, leaving a 1-inch overhang. Crimp the top and bottom edges together to seal. Cut several slits in the top crust to allow steam to escape. Brush the top crust with the egg wash and sprinkle with coarse sugar.
- Bake the Pie: Place the pie on a baking sheet. Bake at 425 degrees F for 15 minutes. Reduce the oven temperature to 375 degrees F. Continue baking for 40 to 50 minutes more, or until the crust is golden brown and the filling is bubbly. If the edges brown too quickly, cover them loosely with foil.
- Cool: Let the apple pie cool on a wire rack for at least 2 hours before slicing. This allows the filling to set properly.
Notes
- Use a mix of apples, like Granny Smith for tartness and Honeycrisp for sweetness, for the best flavor balance.
- Chilling the butter and water is essential for achieving a flaky pie crust.
- Baking the pie on a preheated baking sheet helps cook the bottom crust faster, preventing a soggy bottom.
Nutrition
- Serving Size: 1 slice
- Calories: 450
- Sugar: 35g
- Sodium: 250mg
- Fat: 25g
- Saturated Fat: 15g
- Unsaturated Fat: 10g
- Trans Fat: 0.5g
- Carbohydrates: 58g
- Fiber: 3g
- Protein: 5g
- Cholesterol: 60mg