
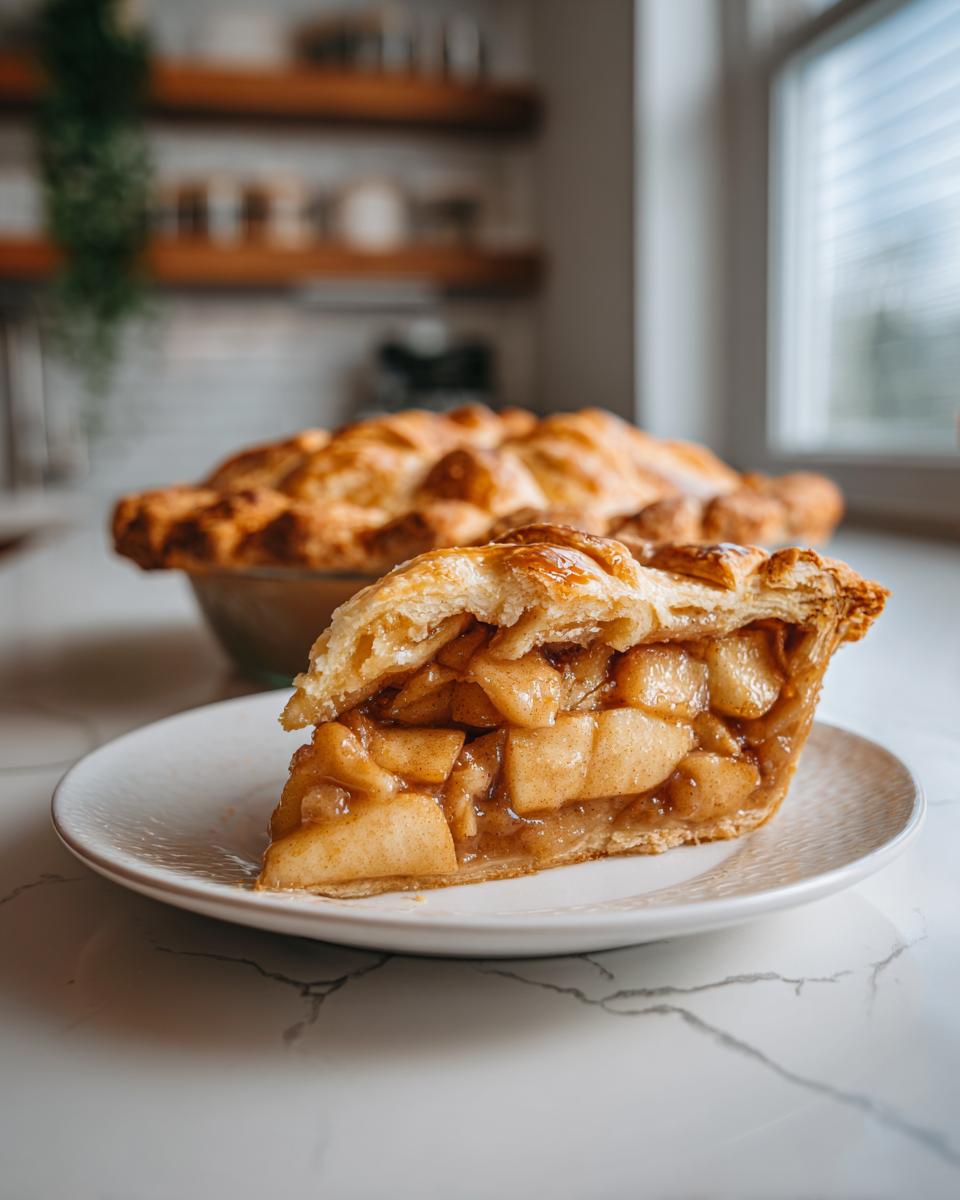
Forget everything you thought you knew about pie drama! This classic apple pie recipe is what comfort tastes like—warm, buttery, and made with real love right in your own kitchen. I’m talking about that perfectly flaky double crust and a sweet, cinnamon-spiced apple filling that just melts the stress away. You know, I used to live life on the road, hauling gear, and my real education wasn’t on a stage; it was finding those incredible, authentic American flavors in diners and roadside stops. That experience taught me that the best food isn’t fussy—it’s resourceful. This recipe, built from the ground up, captures that road-tested authenticity for you. If you want to read more about where this philosophy comes from, check out our story over at YumDrizzle.
- Why This Classic Apple Pie Recipe is Your New Favorite
- Ingredients for the Best Homemade Apple Pie Recipe
- Step-by-Step Instructions for Your Apple Pie Recipe from Scratch
- Tips for the Perfect Apple Pie Recipe Success
- Ingredient Notes and Substitutions for Your Apple Pie Recipe
- Making Ahead and Storage for This Apple Pie Recipe
- Serving Suggestions for Your Classic Apple Pie Recipe
- Frequently Asked Questions About This Apple Pie Recipe
- Share Your Apple Pie Recipe Creations
Why This Classic Apple Pie Recipe is Your New Favorite
There are a lot of apple recipes floating around, but I promise you, this apple pie recipe is different. Why? Because it’s built for real life while still delivering that showstopper quality!
- Unbelievably Flaky Crust: We nail that shatteringly flaky double crust using just butter and ice water. No complicated techniques needed, trust me!
- Easy From Scratch Magic: Yes, you make it entirely from scratch, but I’ve broken down the steps so it feels simple, not stressful.
- Perfect Spiced Filling: The cinnamon and nutmeg ratio is dialed in for that classic, aromatic taste you crave in fall baking recipes.
- Holiday Hero: This is the kind of beautiful dessert that you’ll be proud to bring to any gathering, especially when you tell everyone you made it yourself!
Ingredients for the Best Homemade Apple Pie Recipe
Okay, let’s get down to business. The secret to a truly best homemade apple pie isn’t some fancy technique; it’s having exactly the right stuff sitting on your counter, ready to go. Don’t rush this shopping trip! Fresh, quality components are how we get that amazing from-scratch flavor without stressing out. I’ve compiled everything you need right here. Remember, clear measurements mean a happy oven, so grab your scale if you’re feeling fancy, or just trust your trusty measuring cups!
Making the Flaky Apple Pie Crust
This is where the magic starts, so pay attention to the temperature here. You need the power of butter for flavor, but chilling it handles the flake factor.
- 2 1/2 cups all-purpose flour
- 1 teaspoon salt
- 1 cup (2 sticks) unsalted butter, cold and cubed (It has to be ice cold, seriously! If it squishes when you touch it, you’re already losing flakiness.)
- 1/2 cup ice water, plus more if needed
Creating the Sweet Spiced Apple Filling
This mix sings! It’s the combination of tart apples and warm spices that makes this pie taste like the holidays.
- 6 large Granny Smith apples, peeled, cored, and sliced 1/4 inch thick (Granny Smiths are non-negotiable for me; they hold their shape and give us that necessary tartness!)
- 1/4 cup lemon juice (Keeps those beauties from turning brown while we work.)
- 3/4 cup granulated sugar
- 1/4 cup packed light brown sugar (That molasses flavor is huge for richness.)
- 2 tablespoons all-purpose flour (This thickens everything up nicely.)
- 1 teaspoon ground cinnamon
- 1/4 teaspoon ground nutmeg
- 1/8 teaspoon ground allspice
- 1 tablespoon unsalted butter, cut into small pieces (We dot the top of the filling before the lid goes on—don’t skip this part!)
And for the finishing touches? You’ll also grab 1 large egg beaten with 1 teaspoon water for the egg wash, and 1 tablespoon coarse sugar for sprinkling right before it hits the oven.
Step-by-Step Instructions for Your Apple Pie Recipe from Scratch
This is it! The moment we turn those beautiful ingredients into the greatest apple pie recipe you’ve ever made. Don’t panic about the steps; we’re just building layers of flavor and texture here. I want you to take your time, especially with the crust. If you sneak the dough into the fridge early, you’ll thank me later when it rolls out like a dream!
Preparing and Chilling the Flaky Apple Pie Crust
First, let’s deal with that flaky apple pie crust. In a big bowl, whisk your flour and salt together. Now, grab that cold butter—and I mean cold—and cut it in with a pastry blender. You want the bits to be about the size of little peas. If you’re using your hands, work fast so the butter doesn’t melt! You’re mixing until it looks shaggy. Next, drizzle in that ice water, just a splash at a time. Stop mixing the second the dough holds shape when you squeeze a handful. Divide that gorgeous dough in two, wrap those disks up tight, and get them in the fridge. They need at least an hour to relax. Patience is flavor development, remember?
Assembling the Spiced Apple Filling and Pie
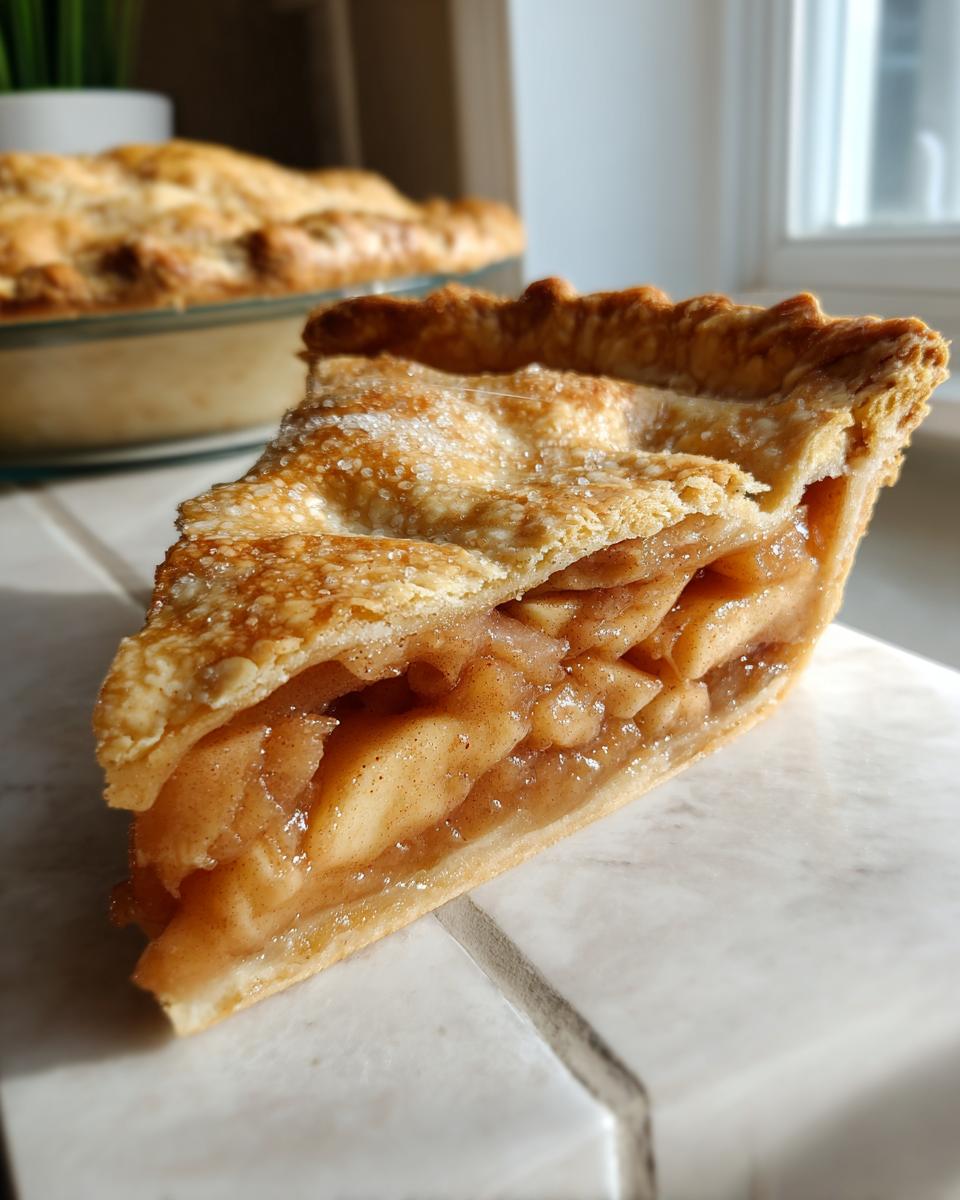
While the dough chills out, let’s get cozy with the filling. Toss your sliced apples in lemon juice, then in a separate bowl, mix up all those sugars and spices until they are perfectly blended. Gently combine the spices with the apples—don’t mash them! Now, roll out the first disk bigger than your 9-inch pie plate. Tuck it in carefully, trim the edges, leaving about an inch to play with later. Pour in all those sweet apples. Now, dot the top with those tiny pats of butter; this adds richness right where the action is. Roll out the second disk, drape it over, and crimp those beautiful edges together securely. Finally, brush the top lightly with your egg wash and sprinkle that coarse sugar on top. Oh, and cut those vents so the steam can escape!
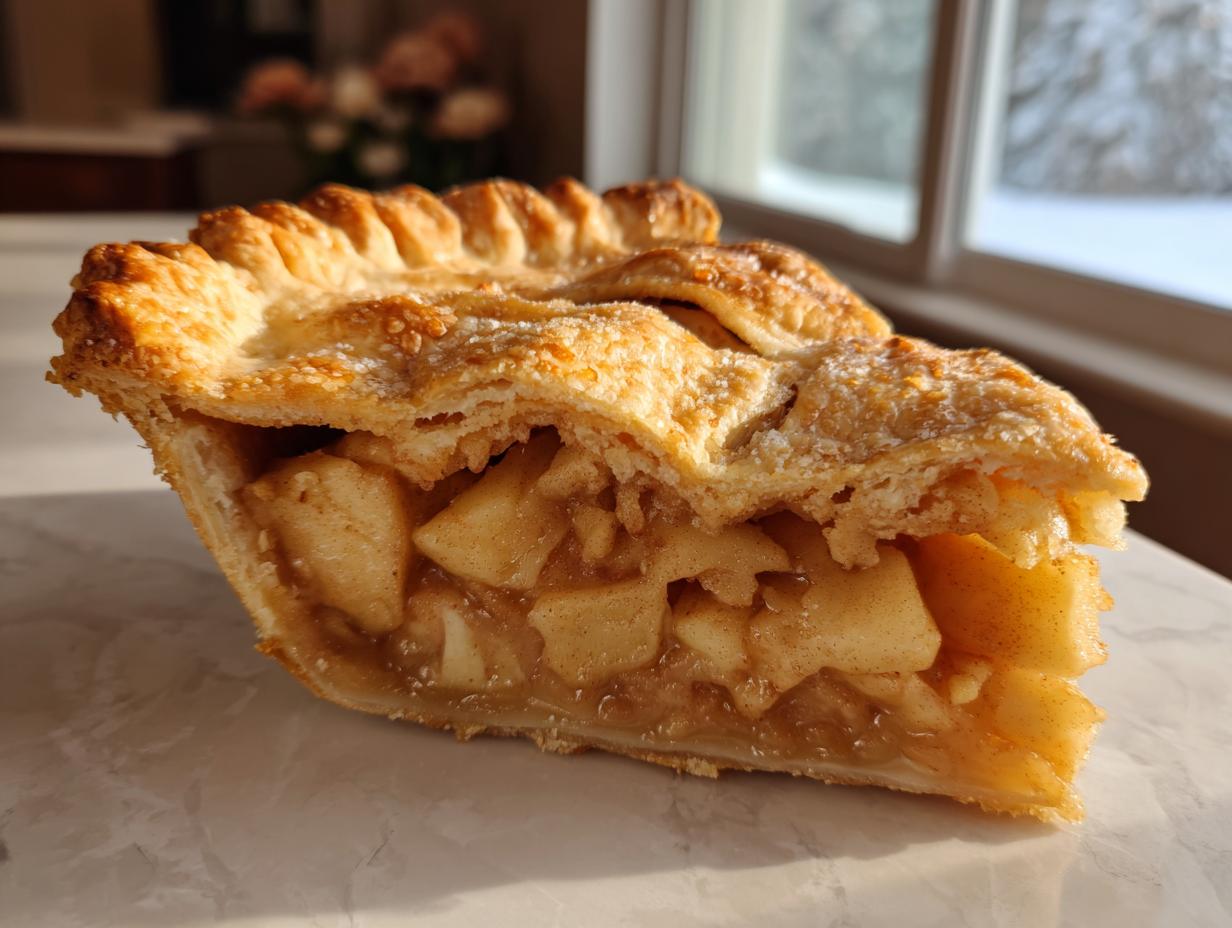
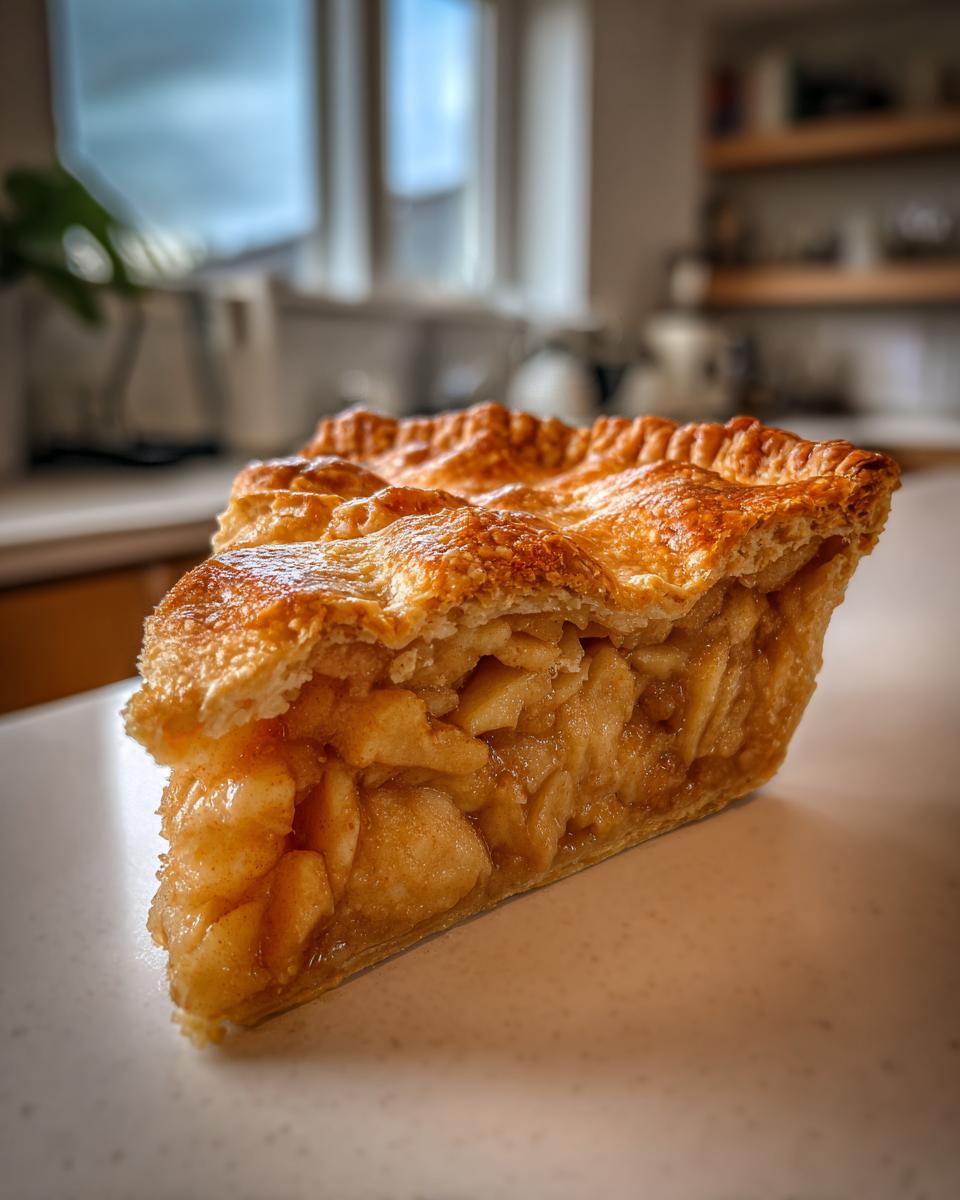
Baking and Cooling the Double Crust Apple Pie Recipe
We use a little temperature trick for the double crust apple pie recipe. Pop that baby onto a baking sheet (because drips happen!) and bake at a hot 425°F for just 15 minutes. This sets up the bottom crust fast. Then, drop the temp down to 375°F and let it bake for another 40 to 50 minutes. You’re looking for that deep golden brown crust and bubbly filling peeking through those slits. Here’s the hardest part: cooling! As I learned from my time studying regional cooking, the filling needs time to set up properly. You absolutely must let it cool on a rack for three full hours before you even think about slicing it. If you cut it sooner, it’ll just run everywhere. Visit our baking guides if you need more help mastering oven temps!
Tips for the Perfect Apple Pie Recipe Success
Listen, I know baking can feel like walking a tightrope, especially when you’re aiming for that picture-perfect result in your apple pie recipe. But trust me, I’ve learned a few things over the years that make all the difference between a good pie and *the* pie. These aren’t just suggestions; these are the rules I follow when I want that totally impressive, flaky texture every single time.
First up, let’s talk apples again. I keep pushing Granny Smith for a reason, but if you want a little extra depth, you can mix them! Try maybe 4 Granny Smiths and 2 Honeycrisp. The Honeycrisp adds sweetness without dissolving completely under the heat. Never use Red Delicious; they turn to applesauce the second they see the sun, and we need structure in our filling!
The big one everyone worries about is the dreaded soggy bottom. That happens when the bottom crust gets steam-logged before it can crisp up. Here’s my two-part fix:
- Bottom Layer Protection: Make sure your filling isn’t swimming in liquid after you mix it. If your apples seem extra juicy, drain off a tiny bit of that liquid before putting them in the shell.
- The Heat Hack: For the first 15 minutes of baking, move that pie halfway down the oven rack—closer to the heating element down there. That blast of direct heat starts cooking the bottom crust immediately, giving it a head start on crisping up before the top even browns. Once I drop the temp, I move it back to the middle rack. It works like magic on my apple cinnamon French toast, and it works even better on pie!
Finally, don’t overwork that dough. Seriously, less handling equals more flake. The butter needs to stay in distinct little cold pockets so that when the water turns to steam in the oven, those gaps create those beautiful layers we all crave in a classic apple pie recipe.
Ingredient Notes and Substitutions for Your Apple Pie Recipe
I know not everyone keeps a fully stocked, old-school pantry, and that’s totally okay! We created YumDrizzle to work with your real life, not against it. While I absolutely swear by this specific ingredient breakdown for the best homemade apple pie, I’m happy to talk substitutions. We want you baking, not stressing because you’re missing one obscure spice!
Apples are the star, right? If you can’t find six big Granny Smiths, go for a mix! I mentioned using Honeycrisp earlier, and that’s a great way to introduce some sweetness. Use about two-thirds tart apples and one-third sweet apples. That contrast keeps the filling interesting instead of just tasting like one-note sugar.
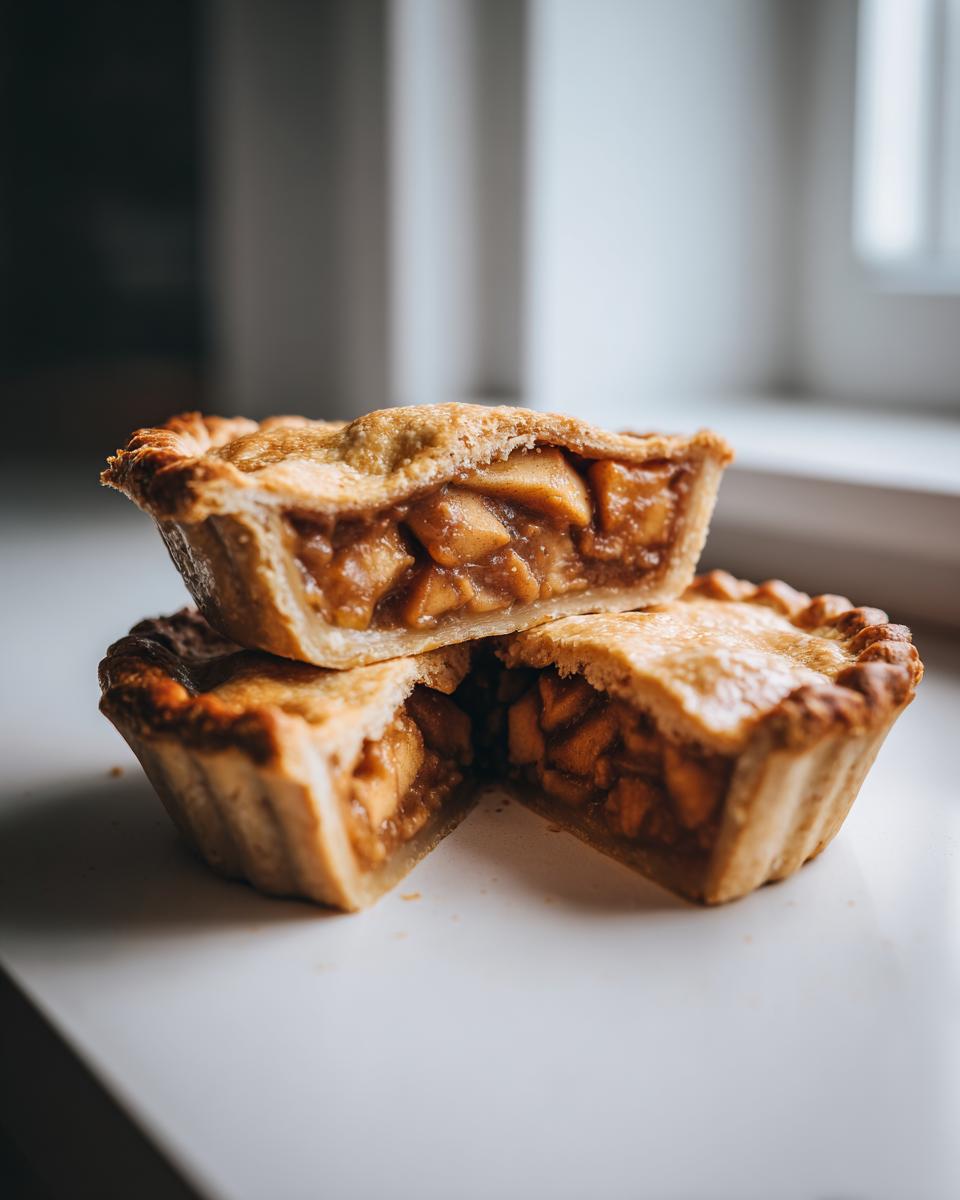
Now, let’s talk crusts. If you’re gunning for a quick apple pie recipe because life got hectic? Go ahead and grab that ready-made crust. It’s not my personal favorite—I mean, nothing beats that pure butter flavor—but trust me, the real flavor bomb in this recipe is actually in the filling.
Speaking of butter… I get asked a lot if I use shortening for flakiness. I always shake my head, no. Crisco or shortening gives you a tender crust, sure, but it doesn’t give you that deep, rich, slightly nutty flavor that real, unsalted butter provides. I learned that flavor respect on the road—the small-town diners always used butter because flavor was king. Shortening doesn’t brown as nicely, either. So, if you’re making the crust from scratch, stick to the butter. If you use store-bought, chances are they used a blend, and that’s fine for a pinch!
Don’t ever feel bad about substituting the nutmeg or allspice if you only have cinnamon and a little bit of cloves. Just play with the spices until you find the aroma that smells like home to you. That’s the real secret to any good apple pie recipe!
Making Ahead and Storage for This Apple Pie Recipe
The best part about making an incredible apple pie recipe is that you usually end up with leftovers—though honestly, I rarely have any! But knowing how to store it properly means you can enjoy that perfect slice later without ruining the crust.
If you’ve followed all the steps correctly, especially letting it cool for those crucial three hours, you’re in great shape for storage. Since our filling uses flour as a thickener and not dairy, you have a bit more flexibility than creamy pies.
For room temperature storage, keep it somewhere cool and dry, loosely covered (you don’t want condensation trapping moisture on the crust!). It should be fine sitting out on the counter, away from direct sun, for up to two days. After that, I highly recommend moving it to the fridge to keep those apples tasting fresh, especially if your house is warm.
The Trick to a Quick Assembly Later
If you’re planning this for a big event, or you just want to cheat your way to a quick apple pie recipe on a random Tuesday, prepping the dough ahead of time is your best friend! You can make the crust dough (remember the two cold disks?) up to three days in advance. Just wrap those disks tightly in plastic after you chill them the first time, and store them in the fridge.
When you’re ready to bake, let the dough warm up on the counter for maybe ten minutes—just long enough so it doesn’t crack when you roll it out. Then, your filling mixing is the only ‘from scratch’ work you have to do that day! It cuts your active prep time way down.
Reheating Leftover Apple Pie
Nobody wants a cold slice of fruit pie, right? Reheating is simple, but you have to be careful not to steam up that beautiful crust!
If you’re reheating a whole pie, I suggest popping it back into a 350°F oven for about 10 to 15 minutes. This gets the filling warm and crispy without drying out the apples too much. If you’re just warming up a single slice? That’s where the foil comes in handy.
Wrap that slice loosely in aluminum foil and pop it into a warm oven—maybe 325°F—for about 8 minutes. The foil traps just enough heat to warm the apples through while protecting the edges of the crust from turning hard or soggy. Serve it with ice cream, and honestly, it tastes just as good as fresh!
Serving Suggestions for Your Classic Apple Pie Recipe
You did it! You nailed the apple pie recipe, you respected the cooling time, and now the only decision left is how to serve this masterpiece. Honestly, eating a slice standing over the sink qualifies as a good serving suggestion in my book when it’s fresh out of the oven, but if you’re sharing this beauty with company, we need to dress it up a little!
The number one, non-negotiable classic pairing for this warm, spiced goodness is, of course, vanilla ice cream. That cool, creamy texture hitting that warm, tart apple filling? It’s legendary for a reason. Make sure it’s a good vanilla bean ice cream; you can taste the difference when you’re eating something this good!
If you’re feeling a little lighter on the dairy, a big dollop of homemade whipped cream is fantastic, especially if you whip it with just a tiny splash of bourbon or a little extra vanilla extract. It adds complexity without weighing down that perfect slice of pie.
And hey, if you happen to have some other comfort dessert recipes waiting in your rotation—maybe something chocolatey for those who aren’t pie fanatics—you can find some really easy-to-make recipes over at YumDrizzle. Check out our easy chocolate pudding recipe from scratch if you need a counter-offer! But I’ll tell you right now, this apple pie will steal the show every single time. Enjoy every single crumb!
Frequently Asked Questions About This Apple Pie Recipe
I get it—when you’re taking the time to bake a whole pie, you want to make sure you get it right the first time! Here are a few things people always ask me when they are trying to nail down that perfect apple pie recipe.
Can I use apples other than Granny Smith in this apple pie recipe?
That is such a great question! While I champion the Granny Smith apple pie for structure, you absolutely can mix them up. Granny Smiths are superstar apples because they hold their shape beautifully when baked—they don’t turn to mush on you. If you swap them out entirely, you risk ending up with apple sauce instead of filling!
My recommendation for the best flavor and texture in this old fashioned apple pie is to use a combination. Try using about two-thirds truly tart apples like Granny Smith or Northern Spy, and one-third sweeter apples like Honeycrisp or Fuji. That way you get the tartness and structure but a richer overall sweetness. It’s the best of both worlds!
How do I prevent the bottom crust of my apple pie recipe from getting soggy?
Oh, the dreaded soggy bottom—it haunts every pie baker! But we don’t let it haunt *our* pies. We fight back with two things that really work in this homemade apple pie recipe.
First, remember how I told you to turn the heat up to 425°F for the first 15 minutes? That’s your first defense! Baking that bottom crust hotter and faster right away starts crisping it up so the liquid from the apples can’t soak in. Make sure you bake it on the lower-middle rack if you can, closer to that heat source.
Second, make sure your filling itself isn’t too watery. When you toss the apples with the sugar and flour mix, give it a minute. If you see a pool of juice gathering at the bottom of the bowl, very carefully pour *just that extra juice* off before you put the apples into your pie shell. Less liquid equals a crispier bottom crust!
Is this the best homemade apple pie recipe if I want to use store-bought crust?
Heck yes, you can! Look, being a good cook means knowing when to save time. If you use a store-bought crust for convenience, you’re still going to end up with the best homemade apple pie flavor because, let’s be real, the filling is the heart and soul of this thing!
The flavor difference between my all-butter crust and a commercial one is noticeable, sure, but the spices, the lemon, the sugar blend—that’s what people rave about. So go ahead, grab those premade shells, focus your energy on making that amazing, sweet spiced apple filling from scratch, and nobody will ever be the wiser. You still get the comfort element, just faster!
Share Your Apple Pie Recipe Creations
You’ve done the hard work! You’ve mixed the butter, chilled the dough, filled it with those gorgeous spiced apples, and pulled a golden, bubbling beauty out of the oven. Now for the fun part: showing it off! We built YumDrizzle because we believe cooking should be fun and accessible, and nothing makes me happier than seeing someone conquer a classic like this apple pie recipe.
I really want to know how it turned out for you! Did you nail that flaky apple pie crust on your first try? Did the smell of cinnamon and brown sugar just fill your whole house? Please, don’t keep that amazing creation to yourself!
Head down to the comment section and give this recipe a star rating. Even better, tell me what happened! Did you serve it with ice cream, or do you have another favorite way to eat a slice of this comfort dessert? Your feedback is gold—it helps me keep these recipes honest and real for the next person diving in.
And if your phone is handy, snap a picture! Tag us on social media. I always love swooning over perfectly crimped edges and golden tops. If you are looking for another rustic approach to try next time, you might enjoy Sarah’s technique over at Rustic Apple Pie. But for now, bask in the glory!
If for some reason you need to reach out directly, maybe to ask a super specific question about your bake, you can always drop us a line via our contact page. Happy baking, and thanks for trusting this old roadie’s collection of tried-and-true American comfort dishes!
PrintThe Best Classic Homemade Apple Pie Recipe with Flaky Double Crust

Make this easy, classic homemade apple pie from scratch. It features a buttery, flaky double crust and a sweet, cinnamon-spiced apple filling that tastes like comfort.
- Prep Time: 45 min
- Cook Time: 65 min
- Total Time: 110 min
- Yield: 8 servings 1x
- Category: Dessert
- Method: Baking
- Cuisine: American
- Diet: Vegetarian
Ingredients
- 2 1/2 cups all-purpose flour
- 1 teaspoon salt
- 1 cup (2 sticks) unsalted butter, cold and cubed
- 1/2 cup ice water, plus more if needed
- 6 large Granny Smith apples, peeled, cored, and sliced 1/4 inch thick
- 1/4 cup lemon juice
- 3/4 cup granulated sugar
- 1/4 cup packed light brown sugar
- 2 tablespoons all-purpose flour
- 1 teaspoon ground cinnamon
- 1/4 teaspoon ground nutmeg
- 1/8 teaspoon ground allspice
- 1 tablespoon unsalted butter, cut into small pieces (for dotting)
- 1 large egg, beaten with 1 teaspoon water (for egg wash)
- 1 tablespoon coarse sugar (for sprinkling)
Instructions
- Prepare the Crust: In a large bowl, whisk together the flour and salt. Cut in the cold butter using a pastry blender or your fingers until the mixture resembles coarse crumbs with some pea-sized pieces of butter remaining. Gradually add the ice water, one tablespoon at a time, mixing until the dough just comes together. Do not overmix.
- Divide the dough in half, form each half into a disk, wrap in plastic wrap, and chill in the refrigerator for at least 1 hour.
- Prepare the Filling: In a large bowl, toss the sliced apples with lemon juice. In a separate small bowl, mix the granulated sugar, brown sugar, flour, cinnamon, nutmeg, and allspice. Pour the sugar mixture over the apples and toss gently to coat. Let the filling sit while you roll out the bottom crust.
- Assemble the Pie: Preheat your oven to 425°F (220°C). On a lightly floured surface, roll out one dough disk into a 12-inch circle. Carefully transfer the dough to a standard 9-inch pie plate. Trim the edges, leaving a 1-inch overhang.
- Pour the apple filling into the crust. Dot the top of the filling with the small pieces of butter.
- Roll out the second dough disk for the top crust. Place it over the filling. Trim the top crust, leaving a 1-inch overhang. Crimp the edges of the top and bottom crusts together to seal. Cut several slits in the top crust to allow steam to escape.
- Brush the top crust lightly with the egg wash and sprinkle with coarse sugar.
- Bake: Place the pie on a baking sheet to catch any drips. Bake at 425°F (220°C) for 15 minutes. Then, reduce the oven temperature to 375°F (190°C) and continue baking for 40 to 50 minutes, or until the crust is golden brown and the filling is bubbling. If the edges brown too quickly, cover them loosely with foil.
- Cool: Let the pie cool on a wire rack for at least 3 hours before slicing and serving. This allows the filling to set properly.
Notes
- For the flakiest crust, keep all your ingredients, especially the butter and water, very cold.
- If you prefer a quicker method, you can substitute one or both crusts with a store-bought refrigerated pie crust.
- Use a mix of tart and sweet apples, like Granny Smith and Honeycrisp, for the best flavor balance.
Nutrition
- Serving Size: 1 slice
- Calories: 450
- Sugar: 35g
- Sodium: 300mg
- Fat: 25g
- Saturated Fat: 15g
- Unsaturated Fat: 10g
- Trans Fat: 0g
- Carbohydrates: 58g
- Fiber: 3g
- Protein: 5g
- Cholesterol: 60mg