
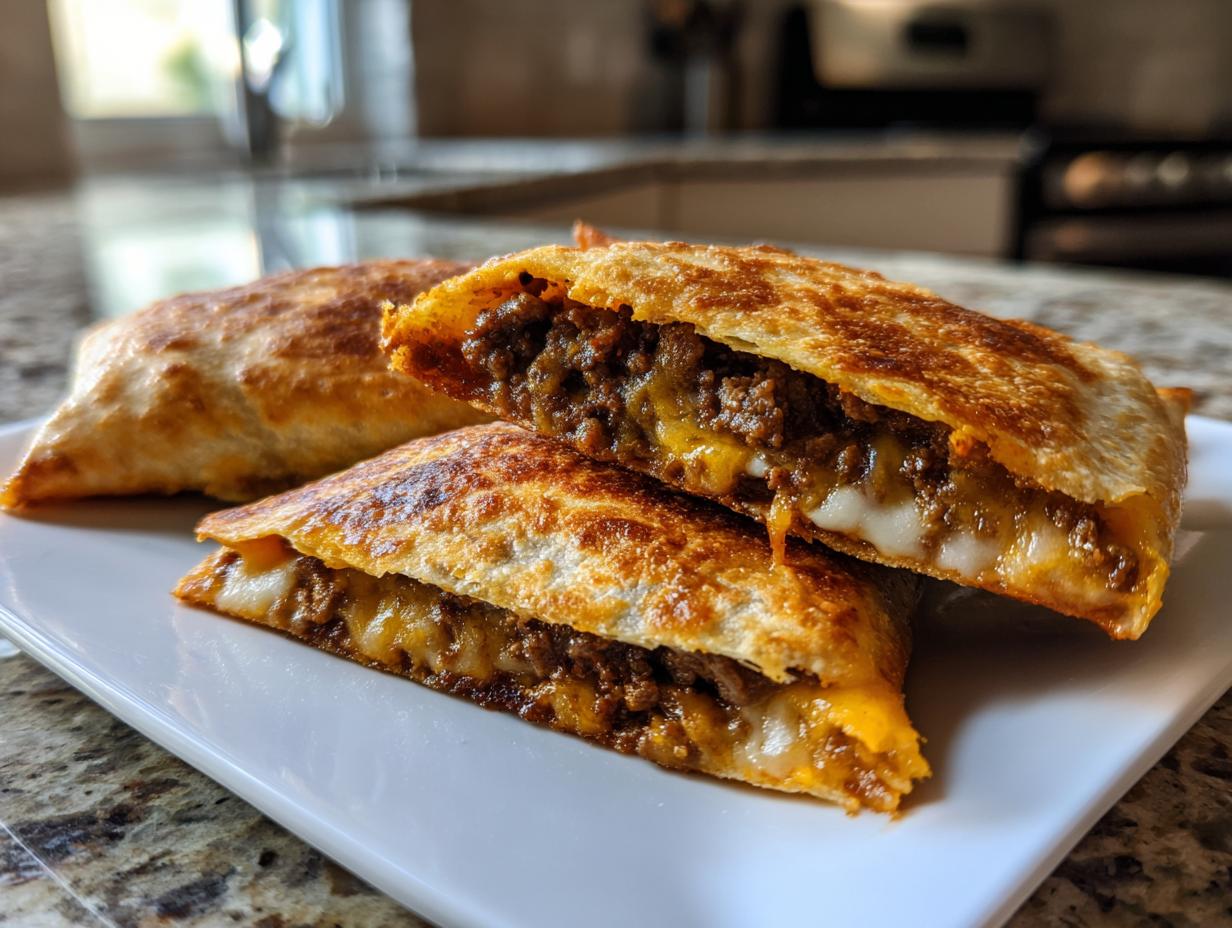
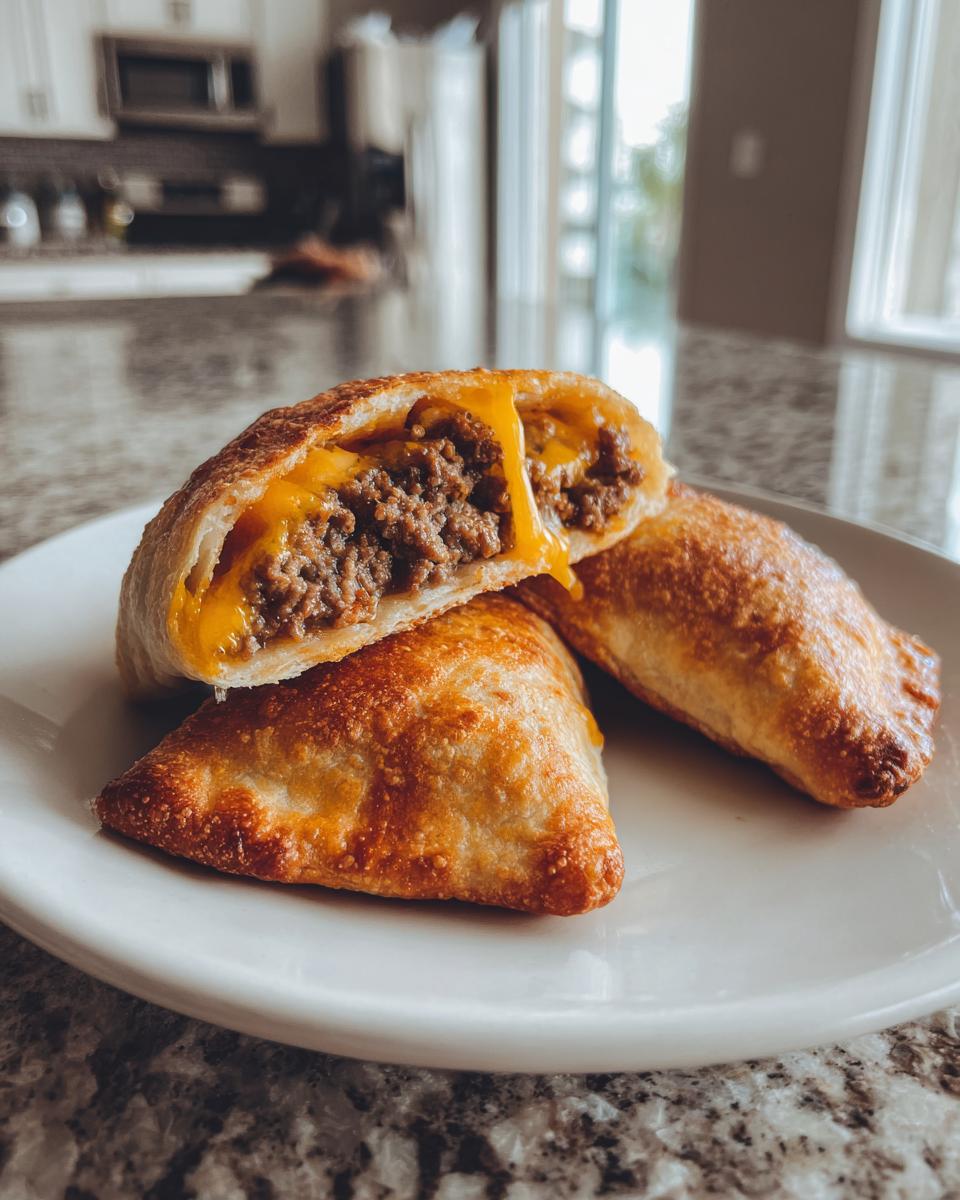
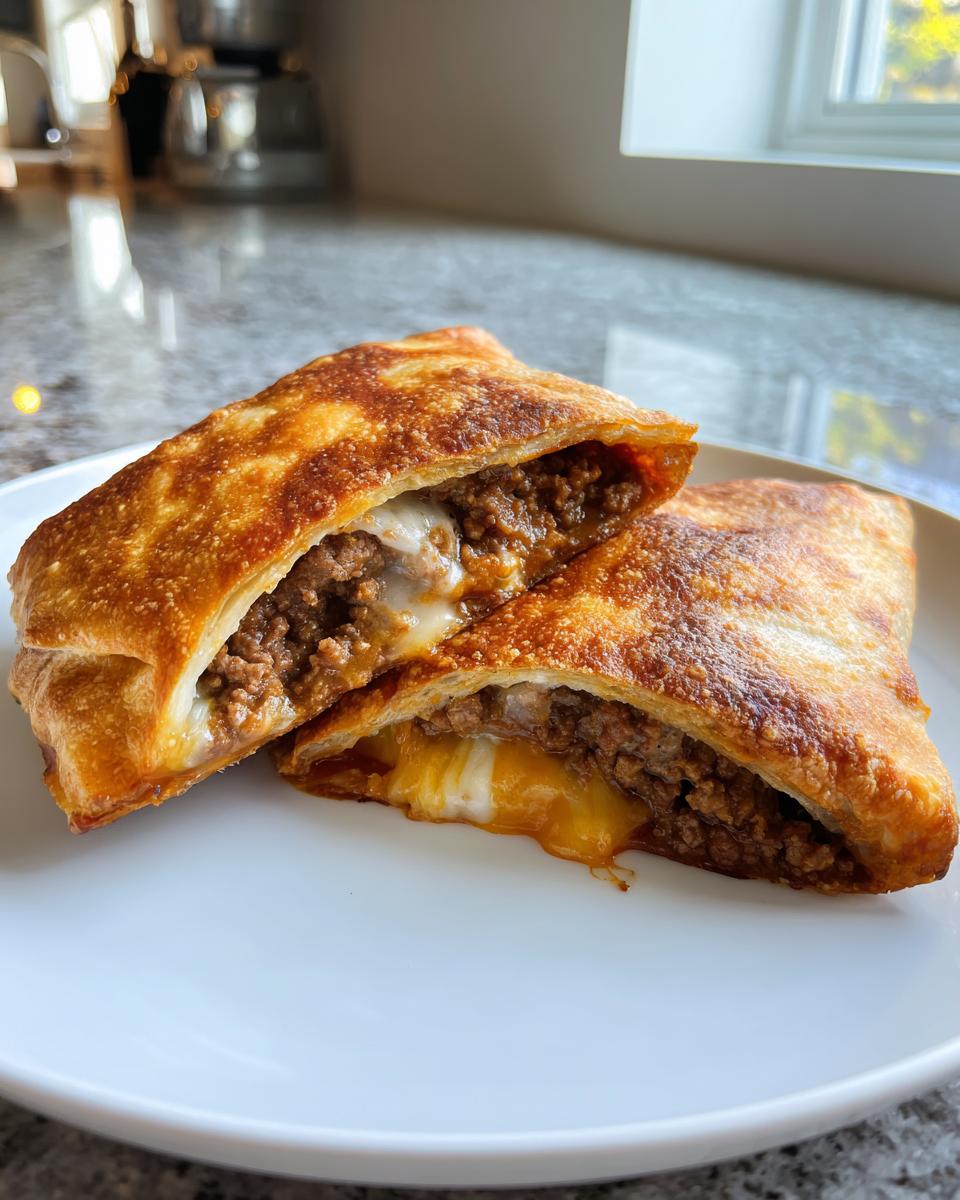
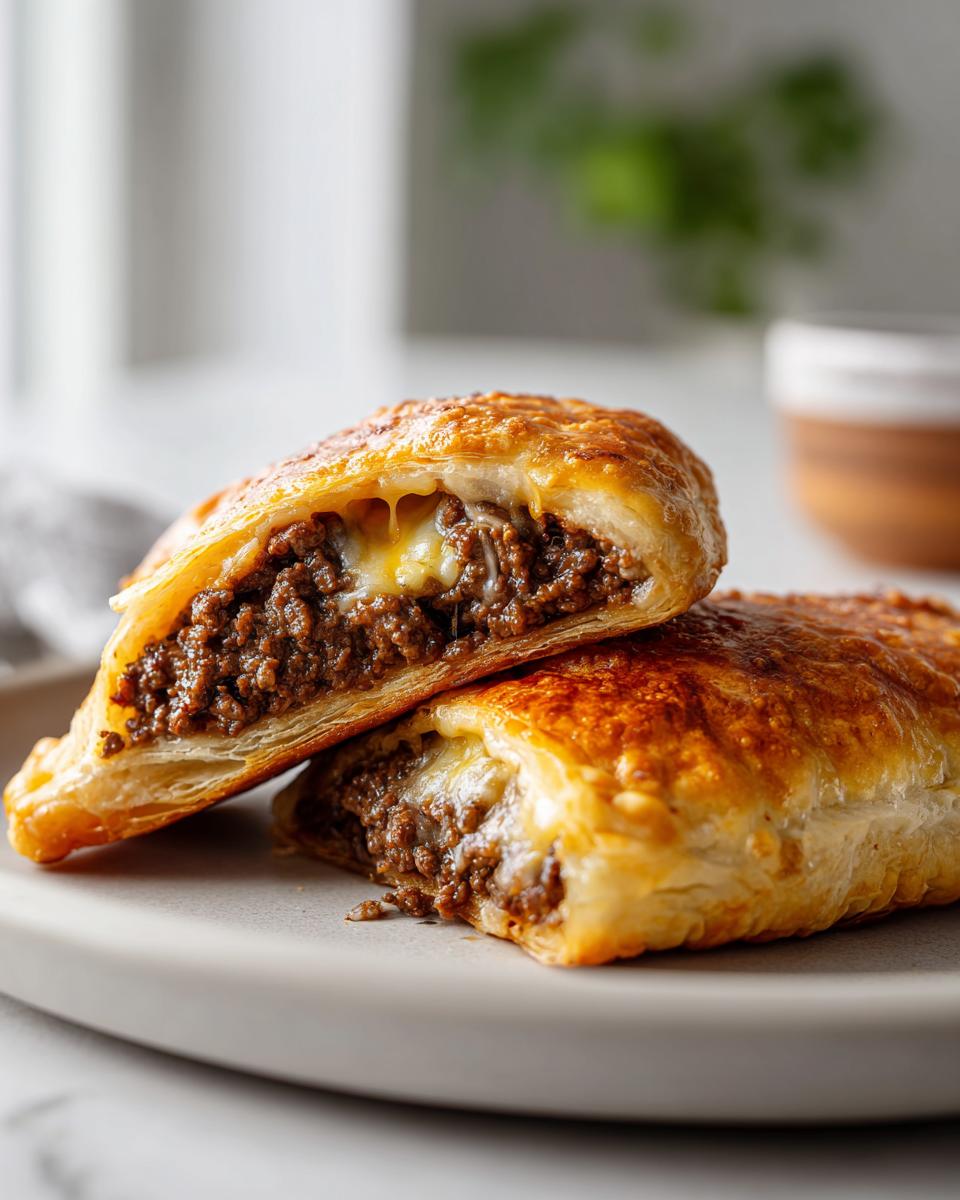
Okay, let’s talk comfort food because sometimes only that savory, golden-brown Tex-Mex hug will do the trick. Forget spending forever wrestling with deep fryers; I’ve got the game-changer you need for the most satisfying crunch. We are making Air Fryer Crispy Beef and Cheese Chimichangas, and trust me, these are weeknight winners. When I was on the road with the band, I learned that the best flavors aren’t complicated; they’re just smart. That’s why I developed this recipe—it takes all the savory goodness of classic chimichangas and makes them easy to handle. If you love bold flavor without all the fuss, you’re gonna love how fast we get dinner on the table. Check out this link for more of my go-to quick meals when the clock is ticking: easy weeknight dinner recipes.
- Why This Air Fryer Beef and Cheese Chimichangas Recipe Works
- Gathering Ingredients for Your Beef Chimichangas
- Step-by-Step Instructions for Air Fryer Chimichangas
- Tips for Success with Your Homemade Crispy Chimichangas
- Serving Suggestions for These Easy Chimichangas
- Storage and Freezer Friendly Chimichangas Instructions
- Variations on Classic Chimichangas
- Frequently Asked Questions About Chimichangas
- Nutritional Estimates for Crispy Beef Chimichangas
- Share Your Tex-Mex Creations
Why This Air Fryer Beef and Cheese Chimichangas Recipe Works
Listen, I love the flavor of deep-fried food—who doesn’t? But cleaning up that oil? No thanks. That’s why this air fryer method is my secret weapon for incredible chimichangas.
- It’s a truly easy chimichanga recipe that cuts down on mess and dishes.
- It serves as a fantastic healthy chimichanga alternative since we aren’t submerging them in grease.
- You get that satisfying crunch we all crave, ready surprisingly fast!
This technique just respects your time while still delivering that bold Tex-Mex experience. If you need quick wins in the morning too, check out my favorite easy breakfast recipes—I use the same speed principles!
Achieving Homemade Crispy Chimichangas Texture
This is where the magic happens, folks. The reason they get so golden and stiffly crisp is simple: oil and hot air circulation. We aren’t drowning them, but that light coating of vegetable oil or spray is essential!

When you brush or spritz them before they go in, the hot air whips around that tiny layer of fat, essentially creating a blast-cooking effect that seals the tortilla. You’re convincing the tortilla it just came out of two inches of oil, without actually doing that! That’s exactly how to make chimichangas crispy without the hassle.
Perfect for Weeknight Tex Mex Meals
Honestly, I put this together faster than most microwave meals. From ground beef browning to air fryer finish, we’re talking about 30 minutes total time if you’re moving! This speed makes it a genuine staple for us when those hectic Tuesday nights roll around.
You get all the satisfying flavor of a big restaurant plate without having to carve out an evening for it. It’s homemade comfort food designed for real-life schedules.
Gathering Ingredients for Your Beef Chimichangas
This recipe is wonderfully straightforward, which is exactly what I love when I’m trying to get dinner done quickly. You only need a handful of basics to get this party started! Grab eight medium flour tortillas—and I mean the big burrito size, not the small taco ones, or they won’t hold the filling. We’re using a full pound of ground beef because we want these chimichangas to be hearty.
You’ll also need taco seasoning, water, and about a cup of your favorite melting cheese. Oh, and don’t forget the refried beans if you want that extra creamy layer—they are totally optional but they really help everything stick together!
Ingredient Notes and Substitutions for Perfect Chimichangas
A couple of quick notes from my kitchen before you start shopping. First, please make sure those tortillas are fresh! Stale tortillas tear when you roll them up, and nobody wants exploding chimichangas in the air fryer basket. Trust me on the size; burritos are the move here.
For the seasoning, if you’re feeling feisty, make your own blend! But a quality store-bought packet is fine for a go-getter weeknight Tex Mex meal. If you aren’t feeling beef but still want that crunch, you can easily swap the ground beef for two cups of pre-cooked shredded chicken chimichangas filling instead. Just season it up the same way!
Step-by-Step Instructions for Air Fryer Chimichangas
Alright, this is the exciting part! We’re rolling these beauties up and getting that beautiful crisp. Following these steps exactly is how you guarantee amazing chimichangas every single time. Pay close attention to how much filling you use; overstuffing is the easiest way to get a blowout. If you’re looking for crispy sides, I swear by my crispy pan-fried potatoes recipe, but for this, we focus on the wrap!
Preparing the Ground Beef Chimichanga Filling Ideas
First thing first, we handle the star of the show: the beef. Toss your ground beef into a skillet over medium heat. You need to cook it until it’s nicely browned all over. Once it’s done, drain off every bit of excess fat. Seriously, drain it well, or your final product will be greasy, not crisp! After draining, stir in your taco seasoning and the half cup of water, just like the packet says.
Let this simmer gently for about five to seven minutes. We want that liquid to reduce down—we need flavor, not soupiness! After simmering, pull the skillet off the heat. This is important: let that seasoned meat cool down just a tiny bit before you try to stuff the tortillas. Hot meat steams the tortilla and makes it weak.
Assembling Your Cheesy Chimichangas Dinner
Now for the rolling technique for these cheesy chimichangas dinner wonders. Lay one tortilla flat on your prep surface. If you’re using those refried beans, spread a thin line right down the center of the tortilla. Next, spoon about a quarter cup of that cooled beef mixture right over the beans. Don’t pile it too high!
Time to fold! First, gently fold the left and right sides of the tortilla inward over the filling. Then, grab the bottom edge closest to you and roll it up tightly, tucking the end in as you go. This rolling action keeps everything snug. If the seam is giving you trouble, stick a toothpick right in there to hold it shut. Repeat this until all your chimichangas are rolled up.
The Air Fryer Method for Crispy Chimichangas
We are skipping the deep fryer today, which is why this is one of the best air fryer chimichangas recipes out there! First, preheat your machine to 375°F (190°C). This preheating step is non-negotiable for getting that instantaneous crisp. While they heat up, brush or spray *all* sides of your rolled chimichangas with a little vegetable oil. Don’t skip this oil step!
Carefully place the oiled rolls into the air fryer basket. You must keep them in a single layer so the air can really circulate around them. If they overlap, they steam instead of crisp. Pop them in for 8 to 10 minutes total, but remember to flip them halfway through, around the 5-minute mark. This ensures they get beautifully golden and crispy all the way around. You can see how gorgeous these turn out over at Olivia Cooks for visual inspo!
Tips for Success with Your Homemade Crispy Chimichangas
I’ve definitely had a few floppy, sad chimichangas in my life before I figured out the right way to build and cook them! Getting that perfect, shatteringly crisp exterior takes just a couple of small, but serious, adjustments to your technique. Remember, we are aiming for crunch here, not chewiness!
First up: the tortilla handling. You absolutely must seal that seam well, maybe even using a second toothpick if the first one seems weak. If the filling escapes even a tiny bit during the air frying, that little bit of meat and cheese hits the heating element and burns right away, which messes up the flavor of the whole batch.
Another pro tip I learned is about the seasoning. Don’t just dump the mix in the meat and call it done. Simmering it down with that water, as we discussed in the steps, is key to infusing the beef—not just dusting it. It makes the filling robust enough to stand up to the high heat of the air fryer. For great side ideas that keep the comfort vibe going, you have to try my creamy white chicken chili—it’s perfect for dipping those crispy shells into!
Also, don’t crowd the basket! I can’t stress this enough. If you pile them in, the hot air can’t flow freely, and you end up steaming the bottom ones. Cook in batches if you have to. It takes an extra five minutes, but having eight perfectly crisp chimichangas is way better than having twelve half-soggy ones. For more great recipe inspiration, check out the way The Fervent Mama handles their beef and cheese approach!
Serving Suggestions for These Easy Chimichangas
So, you’ve got these perfectly golden, ridiculously crispy shells packed with savory beef and melted cheese. Fantastic! But a chimichanga isn’t truly complete unless it has its supporting cast ready on the side or draped right on top. These aren’t meant to be eaten plain, right? They need that cool creaminess or bright acidity to balance out all that richness.
When I make these for a cheesy chimichangas dinner, I try to offer a little something for everyone. Sour cream is the absolute must-have; it cools down any heat from the seasoning. But if you’re looking to really load up that plate, here are my non-negotiable toppings:
- Guacamole or Sliced Avocado: The healthy fat here complements the beef beautifully. Make it chunky, not too smooth.
- Fresh Salsa Fresca: Forget the jarred stuff if you can—a quick mix of diced tomatoes, onion, cilantro, and lime juice just brightens everything up.
- A Big Dollop of Sour Cream or Greek Yogurt: I often swap yogurt for sour cream when I want to cut a little fat, and honestly, you can barely tell the difference!
- Shredded Lettuce and Diced Tomato: This adds the necessary texture and freshness that prevents the meal from feeling too heavy.
If you want to turn this into a full-on Tex-Mex spread without making another fussy main dish, you have to try my taco pasta salad on the side! It’s creamy, tangy, and everyone asks for the recipe. You can find the details here: taco pasta salad recipe. It’s an easy, satisfying companion to any crispy dish.
Storage and Freezer Friendly Chimichangas Instructions
You know how it is—sometimes you just want to make ahead, right? Because who always has time to brown beef on a Tuesday evening? The great news is that these chimichangas are fantastic for meal prepping! You can totally assemble them ahead of time, and they freeze like a dream.
For leftovers you plan to eat in a day or two, just pop them in an airtight container in the fridge. They’ll be fine for about three days. But for the real time-saver, freezing is the way to go. This makes pulling out a quick, crispy meal ridiculously easy down the road.
Here’s the trick for making these truly Freezer Friendly Chimichangas: Once you’ve assembled them (steps 1 through 4 in the recipe), you need to let them chill slightly on a baking sheet for maybe 20 minutes. This firms them up so they don’t stick together when wrapped.
Once slightly firm, wrap each rolled chimichanga tightly—and I mean TIGHTLY—in plastic wrap. Then, place those wrapped rolls into a heavy-duty freezer bag or an airtight container. They’ll last up to three months looking great!
When you get the craving, don’t even bother thawing them out! Just unwrap that little package, give it a light spray of oil or cooking spray, and toss it straight into the 375°F air fryer. Since they are going in frozen, you need to add a bit more time. Plan on cooking them for about 12 to 15 minutes total, flipping halfway, until they are piping hot and gloriously golden brown. It’s the perfect way to have an Easy Mexican Dinner Recipe ready to go!
If you’re looking for other things to freeze and reheat easily, I have a fantastic easy French bread recipe that freezes beautifully too. You can never have too many make-ahead staples!
Variations on Classic Chimichangas
Look, I love my beef and cheese combo—it’s dependable! But the beauty of a great wrapper like this is that it’s begging you to start experimenting. Once you master how to get those chimichangas crispy in the air fryer, you’ll want to try everything in them. That’s the fun part of cooking, right?
Never feel restricted to just ground beef. The structural integrity of the filling we built is strong, meaning you can swap out the main protein easily. If you want something just as satisfying but maybe a little lighter, use chicken! I often default to shredded chicken chimichangas when I have leftovers from roasting a bird earlier in the week.
Or maybe you need a vegetarian option for a guest? Totally doable. You can take the refried beans from the original recipe, bulk them up with some finely diced potatoes seasoned well, maybe some corn and black beans, and you have a fantastic meatless option. It holds together just as nicely when rolled!
We also need to talk about spices, because that’s where you can completely shift the flavor profile of your chimichangas. If you aren’t feeling the standard taco seasoning, try leaning into some other flavors. For instance, use a smoky chipotle seasoning mixed with a little cumin for a deeper, earthier taste. Or, for something totally different, try an adobo seasoning blend—it gives a wonderful tang.
If you’re trying out some of those other options, I highly recommend pairing them correctly. For instance, if you make the shredded chicken version, you have to check out my potato tacos recipe for side dish inspiration; the flavor profiles work so well together! Honestly, once you try making these chimichangas with chicken instead of beef, you might never go back!
If you want to see how some other cooks approach the chicken version, I saw a great recipe for oven-baked ones over at Chi-Chi’s Baked Chicken Chimichangas that you might enjoy checking out for an alternative baking method!
Frequently Asked Questions About Chimichangas
I know you might have a couple of burning questions rolling around in your head after mastering this recipe. People always ask me about the trade-offs, especially when we move away from the traditional deep fryer. Don’t worry, I’ve answered the most common ones below so you feel totally confident tackling these anytime you need an Easy Mexican Dinner Recipe!
Can I make these Chimichangas without an air fryer?
Absolutely! While the air fryer gives us that amazing ‘less oil, maximum crisp’ experience, you can still get wonderful homemade crispy chimichangas using older methods. If you’re going traditional, you’ll need about an inch of oil heated to 350°F in a heavy-bottomed skillet. Fry each side for about 2 to 3 minutes until golden brown. Drain them really well on paper towels afterward—that’s key for managing the grease.
If you’re looking for a healthy chimichanga alternative but don’t have an air fryer, baking is your friend! Preheat your oven to 400°F. Place the lightly oiled and rolled chimichangas on a wire rack set over a baking sheet. Brush them once more after about 10 minutes. Bake them for about 18–22 minutes total, flipping halfway. They won’t be quite as aggressively crunchy as the air-fried ones, but they are definitely still golden and satisfying!
What is the best cheese blend for Cheesy Chimichangas?
I used a simple mix of good old cheddar and Monterey Jack in the main recipe because they melt beautifully together. They give you that classic, gooey pull for a perfect Cheesy Chimichangas Dinner. But if you want to kick the flavor up a notch, definitely experiment!
My favorite upgrade is swapping out about half of the Monterey Jack for Pepper Jack cheese. It melts just as smoothly but adds a little warm background heat that plays perfectly with the seasoned beef. If you love smoky flavors, try adding a small amount of shredded smoked Gouda—it melts incredibly well, too, and gives the filling a depth that is just fantastic. No matter what you choose, make sure the cheese is shredded fresh; the pre-shredded stuff has anti-caking agents that keep it from melting into that perfect, smooth blanket around your meat.
If you’re looking for something creamy and cool to serve alongside those hot wraps, I have a killer creamy dill dip recipe that is way more versatile than you’d think. It’s great with these!
Nutritional Estimates for Crispy Beef Chimichangas
Listen, when we talk about satisfaction, sometimes we also need to talk numbers, right? I want you to feel great about making these chimichangas, especially since we’re opting for the air fryer! I ran these ingredients—using the ground beef, one tortilla, and the standard amount of filling/cheese—through the calculator to give you a real idea of what you’re eating.
Please remember this very important detail: These values are just estimates based on the recipe I gave you, cooked in the air fryer, and divided by eight servings. Every brand of seasoning, tortilla, and amount of oil you use will change these totals! We call this E-E-A-T science, folks—you gotta trust the process, but know it’s a ballpark figure!
When you compare this to a deep-fried version, even with the slight oil spray we use, the difference is huge. It’s definitely one of my favorite ways to make healthy snack recipes that still taste totally indulgent.
- Serving Size: 1 chimichanga
- Calories: 380
- Fat: 18g
- Saturated Fat: 7g
- Carbohydrates: 35g
- Protein: 18g
- Sodium: 550mg (This can jump up if you use salty seasoning!)
- Sugar: 2g
See? Almost 20 grams of protein in one easy wrap! That’s why this beats a super-slim snack most days, in my book. It’s real food that fills you up. If you’re looking for other quick wins that give you great performance on the macro front, check out my guide to healthy snack recipes!
Share Your Tex-Mex Creations
We made it! You’ve successfully turned simple tortillas and ground beef into golden, crispy, cheesy chimichangas. Seriously, pause for a moment and appreciate that crunch! That’s the taste of a successful weeknight victory, right there.
Now, here’s the thing about cooking—it’s supposed to be fun and shared. I genuinely want to know how these turned out for you at your table. Did the air fryer give you that perfect crisp you were looking for? Did you stick to the classic beef filling, or did you try out the chicken variation?
Don’t be shy! Hit the comments below and let me know. We build this community on sharing what works and troubleshooting what doesn’t. A rating tells me the recipe is solid, but telling me about your favorite topping combo tells me you really loved making it.
If you have any lingering questions about rolling technique, oil amounts, or anything else when making these chimichangas, drop them in the comments too. I always try to check back and help out fellow cooks. You can also shoot me a direct message straight through my contact page if you need something private!
Thanks for cooking with me today. Go enjoy those amazing, easy, crispy Tex-Mex dreams!
PrintCrispy Air Fryer Beef and Cheese Chimichangas

You can make perfectly crispy, satisfying beef and cheese chimichangas using your air fryer. This recipe delivers the crunch of deep-fried food with less oil, making it a great weeknight Tex-Mex dinner.
- Prep Time: 15 min
- Cook Time: 15 min
- Total Time: 30 min
- Yield: 8 servings 1x
- Category: Dinner
- Method: Air Frying
- Cuisine: Tex-Mex
- Diet: Vegetarian
Ingredients
- 8 medium flour tortillas (burrito size)
- 1 tablespoon olive oil or cooking spray
- 1 pound ground beef
- 1 packet (1 ounce) taco seasoning mix
- 1/2 cup water
- 1 cup shredded cheddar or Monterey Jack cheese
- 1/2 cup refried beans (optional)
- 1/4 cup vegetable oil (for brushing)
Instructions
- Cook the ground beef in a skillet over medium heat until browned. Drain off any excess fat.
- Stir in the taco seasoning and water according to the seasoning packet directions. Simmer for 5 to 7 minutes until the liquid reduces. Remove from heat and let the meat cool slightly.
- Lay a tortilla flat. If using, spread a thin layer of refried beans down the center. Spoon about 1/4 cup of the seasoned beef mixture over the beans. Sprinkle with cheese.
- Fold the sides of the tortilla inward over the filling, then tightly roll the tortilla up like a burrito. Secure the seam with a toothpick if necessary. Repeat with the remaining ingredients.
- Lightly brush or spray all sides of the rolled chimichangas with vegetable oil or cooking spray. This helps them crisp up.
- Preheat your air fryer to 375 degrees Fahrenheit (190 degrees Celsius).
- Place the chimichangas in the air fryer basket in a single layer, ensuring they do not touch. You may need to cook in batches.
- Air fry for 8 to 10 minutes, flipping them halfway through, until they are golden brown and crispy.
- Remove toothpicks before serving hot with your favorite toppings like salsa, sour cream, or guacamole.
Notes
- For an even crispier exterior, you can lightly spray the chimichangas again with oil halfway through the air frying time.
- You can prepare these ahead of time. Assemble the chimichangas, wrap them individually in plastic wrap, and freeze them. When ready to cook, remove the plastic wrap and cook directly from frozen, adding about 3 to 5 minutes to the air fryer time.
- Use pre-cooked shredded chicken instead of ground beef for quick chicken chimichangas.
Nutrition
- Serving Size: 1 chimichanga
- Calories: 380
- Sugar: 2
- Sodium: 550
- Fat: 18
- Saturated Fat: 7
- Unsaturated Fat: 11
- Trans Fat: 0
- Carbohydrates: 35
- Fiber: 2
- Protein: 18
- Cholesterol: 55