
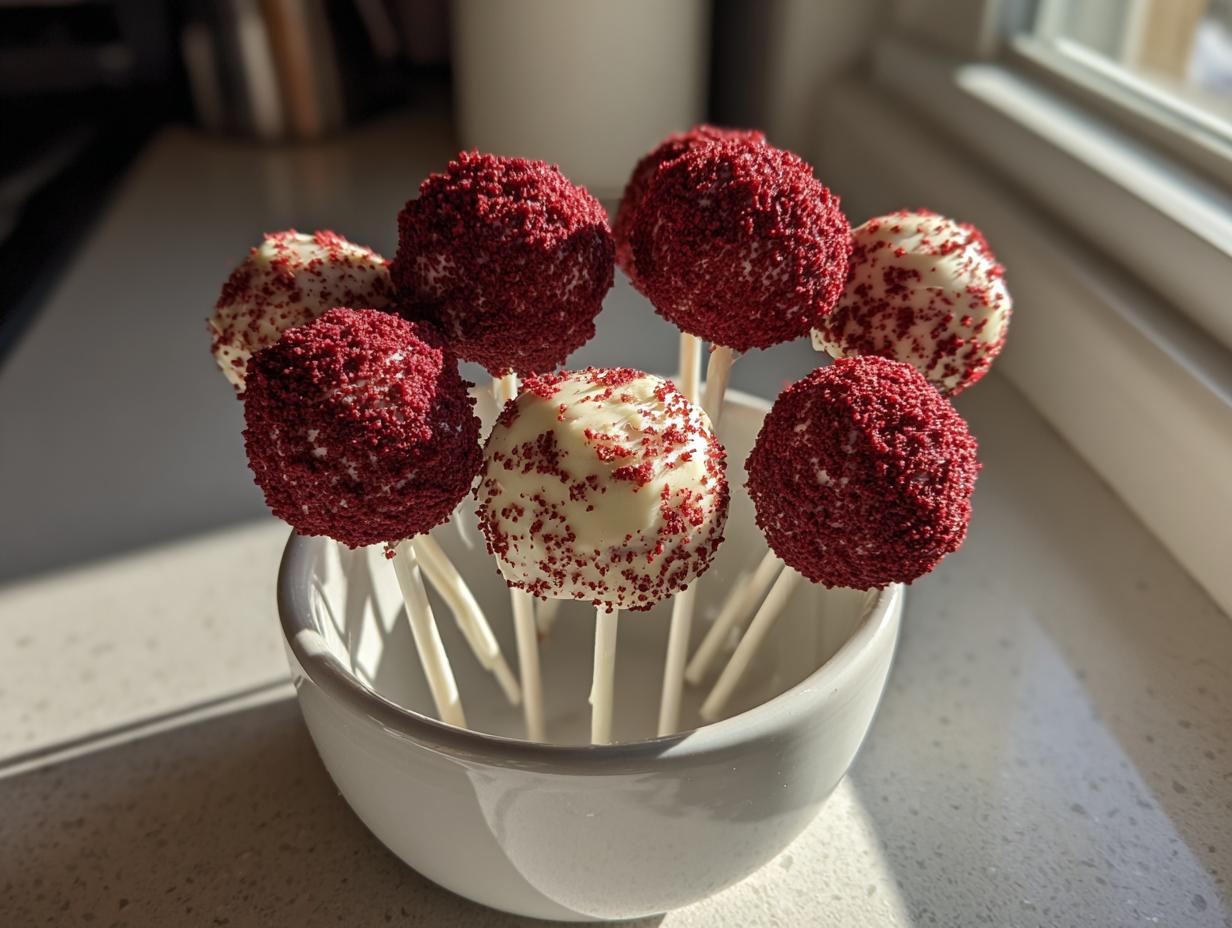
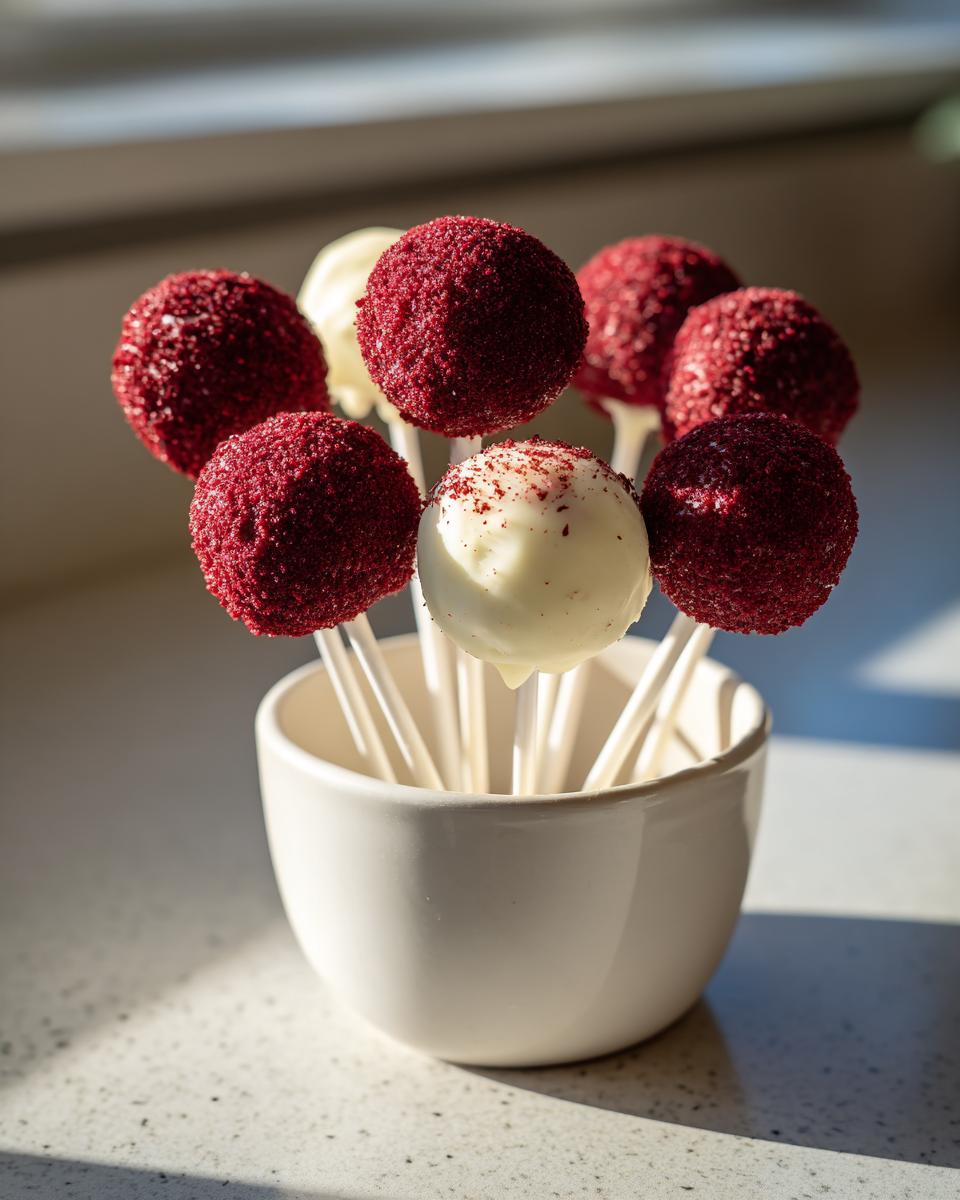
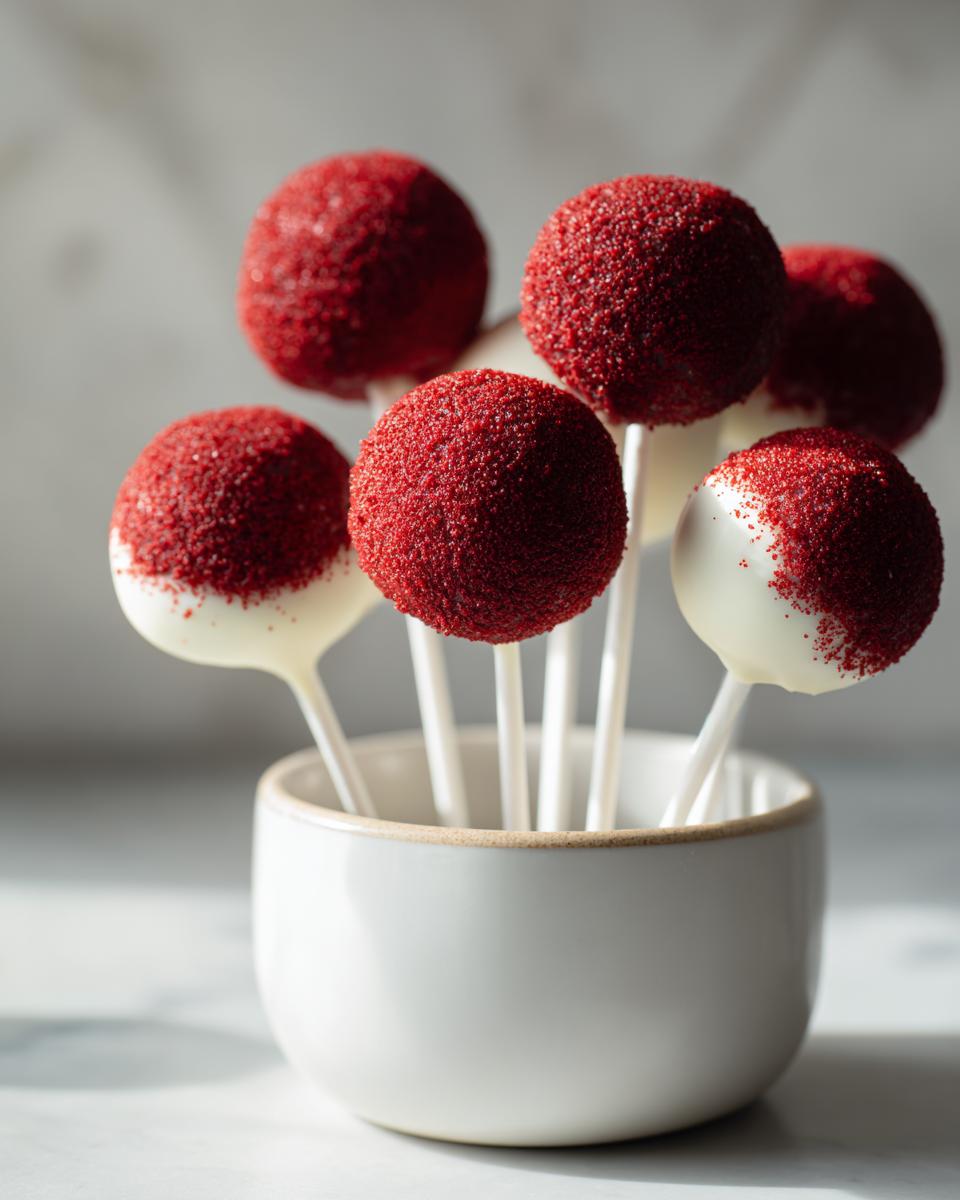
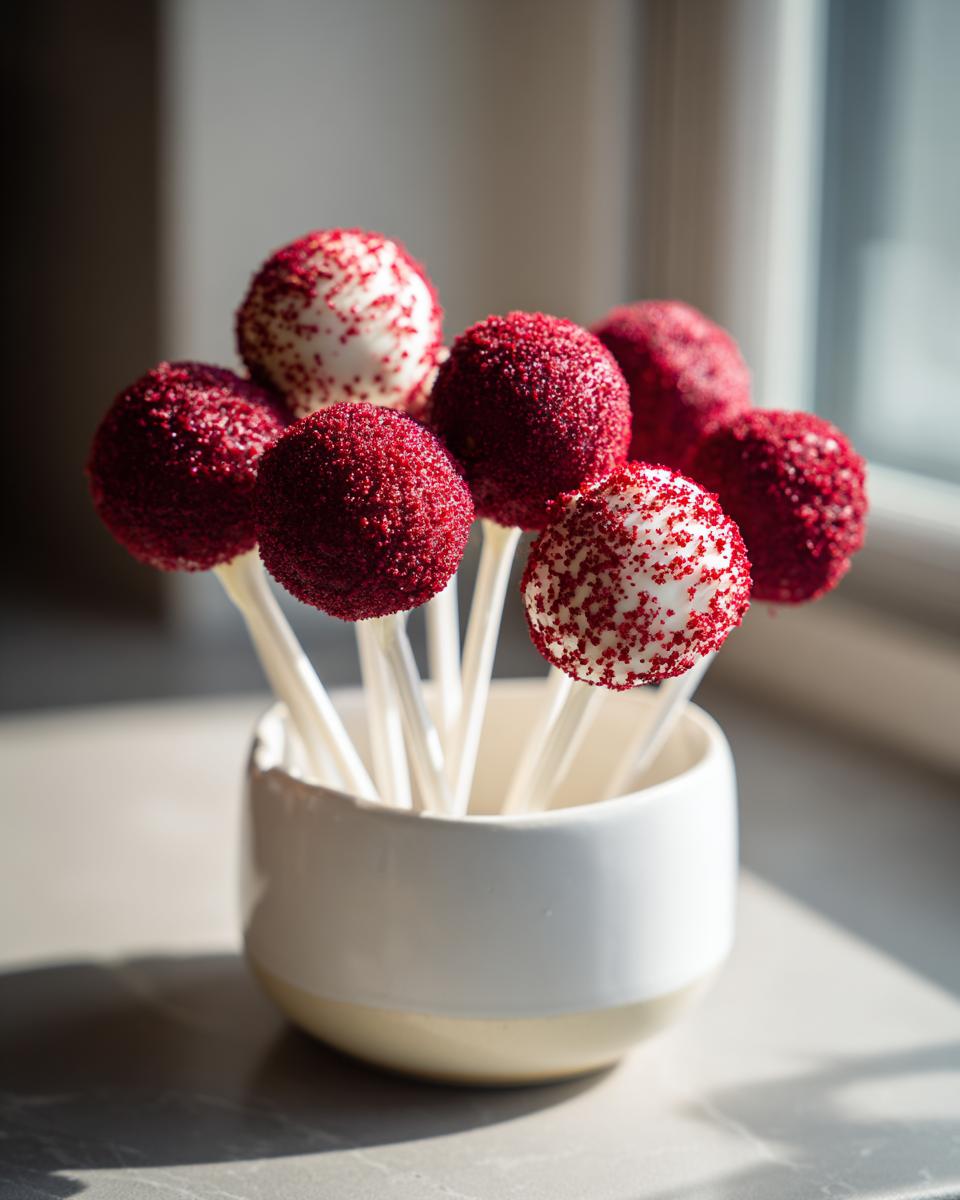
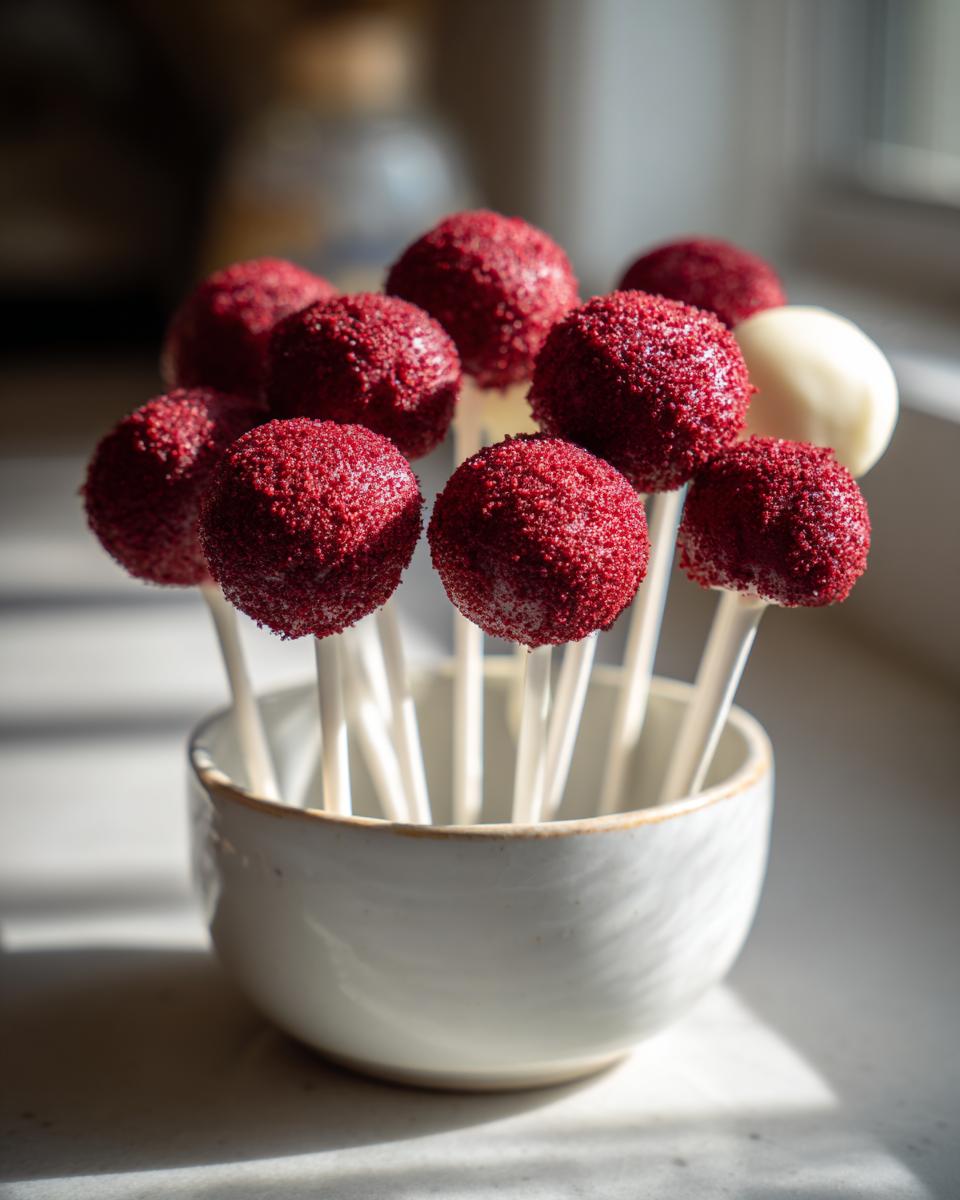
If you ask me, there’s just something magical about a dessert you can pop right in your mouth, right? They’re perfect when you want indulgence without the fuss of slicing a huge cake. That’s why these **red velvet cake pops** have earned a permanent spot in my repertoire. Forget those complicated, dry versions you might have tried; this is hands-down the ultimate easy and moist recipe, packed with that tangy cream cheese frosting magic and wrapped in a flawless white chocolate shell. Back when I was learning on the road, I figured out fast that the best flavors—the ones folks really remember—don’t require a dozen fancy kitchen gadgets. This recipe proves it! We’re taking rich red velvet, mixing it just right, and making sure even the busiest home cook can nail these gorgeous **red velvet cake pops** every single time. You deserve a treat that looks professional but comes together simply. If you love the flavor foundation here, you have to check out my full recipe for a moist and fluffy homemade southern red velvet cake! Check out how easy it is to get that perfect bite!
- Why This Easy Recipe Makes the Best Red Velvet Cake Pops
- Gathering Your Ingredients for Vibrant Red Velvet Cake Pops
- How to Prepare Your Red Velvet Cake Pops: A Homemade Cake Pops Tutorial
- Mastering the White Chocolate Dipped Cake Pops Coating Technique
- Tips for Success Making Red Velvet Cake Pops
- Storage and Keeping Your Red Velvet Cake Pops Fresh
- Variations for Bite Sized Red Velvet Treats
- Frequently Asked Questions About Red Velvet Cake Pops
- Share Your Perfect Red Velvet Cake Pops Creations
Why This Easy Recipe Makes the Best Red Velvet Cake Pops
Listen, I’ve seen too many people get frustrated trying to make those perfect little spheres. The secret to making these the best **red velvet cake pops** isn’t complicated; it’s just about respecting the ratio. This method is designed to be incredibly straightforward, relying on high-quality components, not complex baking gymnastics. If you’re looking for an easy cake pop recipe that actually delivers moisture, you’ve landed in the right spot. We’re keeping things fun and accessible, just like we do here at YumDrizzle!
Achieving the Perfect Moist Cake Pop Method
The structure of these treats is everything. We are using a no-bake assembly here, meaning that after the cake is baked and cooled, we turn it into dough. To hit that ideal texture, you need the right balance of cake crumbs and frosting—too little frosting, and you get dry balls that crack when dipped. Too much, and you end up with a gooey mess that won’t stick to the pop stick. Getting this ratio dialed in is the foundation for that successful **moist cake pop method**.
Cream Cheese Frosting Cake Pops Flavor Profile
You simply cannot skip the cream cheese frosting when making these! The vibrant red velvet cake is rich and slightly earthy from the cocoa, especially if you use a good quality mix. The tanginess of the cream cheese cuts right through that richness perfectly. This combination is why everyone goes wild for these **cream cheese frosting cake pops**; it elevates them way beyond just a simple sweet treat.
Gathering Your Ingredients for Vibrant Red Velvet Cake Pops
Okay, let’s get our supplies lined up. For these **red velvet cake pops**, we keep things really straightforward, relying on mostly pantry staples, which is right up my alley! You’ll need that boxed red velvet mix—don’t worry, it’s the secret weapon for speed here. Then we mix it with softened cream cheese and powdered sugar for that essential binding dough. Check out my guide on the best cream cheese frosting recipe if you’re making yours from scratch!
The most important part, ingredient-wise, is the coating. You want to grab good melting wafers or white chocolate meant for dipping. Using a quality coating means you get that beautiful, crisp shell on your **vibrant red desserts** without fighting cracks later on. Don’t forget the sticks, obviously!
How to Prepare Your Red Velvet Cake Pops: A Homemade Cake Pops Tutorial
Alright, this is where the real fun begins! We’re turning that baked cake into the perfect foundation for our amazing **red velvet cake pops**. Remember, texture is key, so follow these steps carefully. If you want a fantastic overview on getting everything done smoothly, my general guide on how to make cake pops guide has all the basics. We’re going to break this down into three critical phases: prepping the cake, mixing the dough, and that essential chill!
Baking and Crumbing the Cake Base
First things first, bake that cake mix according to the box—but here’s a trick: use a 9×13 pan. We want a thinner layer so it bakes evenly and cools faster. Once it’s out of the oven, you have to let it cool completely. I cannot stress this enough! You want it totally cold before you move on. Once cooled, crumble it up finely in a big bowl. Don’t be shy; you want fine crumbs, almost like sand, so we can avoid any hard spots or those slightly burnt edges. Toss those crusty bits out; they won’t help our final texture one bit!
Mixing the Dough and Rolling the Red Velvet Cake Pops
Next up is the frosting and binding step. Beat your softened cream cheese until it’s silky smooth—no lumps allowed! Then slowly mix in your powdered sugar, vanilla, and salt until you have that fluffy **cream cheese frosting cake pops** mix we love. Now, add the frosting to the cake crumbs. This is hands-on time! You’ll want to use your clean hands to work everything together until it feels like a nice, moldable dough. If it holds its shape when you squeeze a handful, it’s perfect. Roll those uniformly into 1-inch balls and set them gently on parchment paper.
The Crucial Chill Time for Firm Cake Balls
If you’ve ever tried to dip a room-temperature cake ball, you know the catastrophe that follows—they literally melt into the coating! That’s why we must commit to chilling. I need you to put these perfect little spheres in the fridge for a minimum of two hours. You can even leave them overnight if you’re prepping ahead for a party. This chill time firms up that creamy center dramatically. Seriously, don’t rush this part! Chilling is the silent hero that prevents cracks and ensures your **celebration dessert balls** stay intact when they hit that warm chocolate.
Mastering the White Chocolate Dipped Cake Pops Coating Technique
Okay, we’ve got our perfectly chilled, firm, deep red spheres ready to go. This next part is where we transform them from tasty cake balls into amazing **white chocolate dipped cake pops**, and frankly, it’s where most people panic. Don’t! This technique is all about temperature control and knowing how to manage your melting chocolate. If you want that smooth, glossy finish that looks totally professional—the kind that makes people ask, “Did you buy these?”—then you need to pay attention to these little tricks. For more tips beyond this recipe, take a look at my guide on the best chocolate coated pops!
Simple Candy Coating Technique for Smooth Finish
First, you need to melt your white candy coating wafers or white chocolate. Please don’t try to melt this on high heat; you’ll scorch it instantly, and we’ll end up with a chunky disaster. Melt it in short bursts—like 30 seconds at a time—stirring really well between each burst. If you want that coating to flow like silk off your **red velvet cake pops**, try adding about a tablespoon of vegetable shortening or coconut oil. It sounds weird, but trust me, it thins the chocolate just enough so it coats beautifully without dragging the cake surface.
Here’s a pro move for Step 8: Before you give the whole ball its final dip, take a chilled cake ball, dip just the very tip of the stick into the melted chocolate, and insert it about halfway into the ball. Pop the tray back in the fridge for about ten minutes to let that little chocolate ‘glue’ set up. This is non-negotiable! Once that stick is locked in tight, you can dip the whole thing confidently. Dip it in, swirl gently, lift it straight up, and then lightly tap the stick on the side of your bowl. That tapping lets all the excess coating drip back in, giving you a thin, even shell. Set them upright and let them work their magic!
Tips for Success Making Red Velvet Cake Pops
Making **red velvet cake pops** look easy takes a little know-how, but I promise you, these are the reliable secrets that keep me coming back to this recipe for parties and holiday baking. Remember that note about the cake being completely cool? That’s number one! If you try to mix warm cake with cold frosting, you’re just asking for soup.
Also, please, please do not skip that chilling step! It’s the difference between a gorgeous display of **celebration dessert balls** and a melted puddle on your counter. If you’re making these for gifting, think about keeping them chilled right up until you hand them off, especially if it’s a warm day. For extra flair in your next round, check out my tips on making fun dessert recipes perfect for gifting!
And when it comes to texture inside, I always make sure my cream cheese is truly softened—not even slightly cold. That ensures we get that lovely, uniform dough consistency we talked about earlier. That consistency is what lets us roll perfect spheres that don’t crumble apart.
Storage and Keeping Your Red Velvet Cake Pops Fresh
So, you’ve made approximately two dozen gorgeous, dipped **red velvet cake pops**. Congratulations! Now, how do you keep these beauties perfect until you serve them? Since we used genuine cream cheese frosting inside, we treat these like we would any dairy-containing dessert: they need the fridge, my friend. Don’t leave them sitting out all day before the party starts.
The best way to store them is in a single layer in a truly airtight container. If you stack them, that beautiful white chocolate coating might stick to the one above or below it, and that would be a crime! If you don’t have enough room for a single layer, pop a square of parchment paper between the layers, but be gentle when you take them out later.
When stored correctly in the refrigerator, these stay fantastic for about a week. That’s amazing shelf life for something so decadent! However, I never wait that long, ha! Now, here’s the small catch: chocolate coating tastes best when it’s not freezing cold. So, if you’re planning to serve them, pull that container out of the fridge about 20 to 30 minutes before you want to eat them. That little bit of warmth takes the hard edge off the white chocolate and lets the rich red velvet flavor truly shine. Enjoy every single bite!
Variations for Bite Sized Red Velvet Treats
The base recipe for these **red velvet cake pops** is seriously solid, but honestly, where’s the fun if you don’t mess with it a little bit? Once you’ve mastered the chilling and dipping on the white chocolate version, you can get really creative with your toppings and coatings. Think about making these for different holidays or just because you feel like it!
First up, let’s talk coating swaps. White chocolate is classic for that contrast, but have you ever tried dipping them in dark chocolate? Wow! The slightly bitter dark chocolate is amazing against the sweet, tangy center. It really lets that cocoa punch in the red velvet shine through. Speaking of dark chocolate, if you’re looking for more cocoa-forward goodness, you should definitely check out my recipe for red velvet cake balls; they lean a little deeper into that rich flavor profile, which pairs perfectly with dark coating.
Colored candy melts are your best friend for making these true **celebration dessert balls**! Need them for Christmas? Use bright green or deep red melts. For Easter, grab pastels! The technique is exactly the same as the white chocolate—just make sure they are thin enough before dipping. Melt them gently with that optional shortening, and you’re good to go.
Then there are the sprinkles! This is how you truly personalize your **velvet cocoa treats**. After dipping, but before the coating sets, hit them with anything you like: gold edible dust for elegance, crushed peppermint for winter, or festive sprinkles for birthdays. You aren’t just making a snack; you’re making miniature, edible art, and it all starts with that simple, moist cake base!
Frequently Asked Questions About Red Velvet Cake Pops
I totally get it—you’ve followed the steps, but questions always pop up when you’re making something new, or maybe you are thinking about making swaps! I’ve pulled together the things I hear most often about perfecting these **red velvet cake pops**. We want you to feel totally confident knocking these out for your next event!
Can I make red velvet cake pops without baking the cake first?
That’s a fantastic question, and it touches on a common confusion when people look at **no bake cake ball recipes**. Technically, the assembly process itself—mixing the cooled cake with the frosting and rolling the balls—is a no-bake method. But for *these* delicious **red velvet cake pops**, you absolutely must bake the red velvet cake component first. You need the structure and texture of that baked cake crumb before you can crumble it up and mix it until it forms a cohesive dough. You can’t just mix the frosting with batter; that would just be soupy! If you’re interested in recipes that skip the oven entirely, check out some great no bake cake ball recipes inspiration!
How do I stop my white chocolate coating from cracking on the red velvet cake pops?
Ah, the dreaded crack—it’s usually a temperature shock, my friend! The number one reason the coating cracks is that the cake balls are too warm when they hit the melted chocolate. Remember that crucial chilling step? Make sure those cake balls are ice cold! If you’re using true melting wafers, they generally don’t require complex tempering, but if you are using actual baking chocolate, melting it slowly is key. Seriously though, if your cake pops go straight from the fridge dip-to-coating, that shell sets so fast and tight onto the cold center that it locks in perfectly. A cold pop is a snag-free pop!
Are these good as festive dessert ideas for Valentine’s Day?
Are they ever! These are practically *made* for Valentine’s Day, birthdays, or any celebration where you need a vibrant pop of color! The deep, gorgeous red of the velvet cake combined with the bright, smooth white chocolate coating looks incredibly festive—they truly are one of my top **festive dessert ideas**. Plus, the slight tang of the cream cheese frosting just feels romantic and decadent. They look beautiful piled up on a platter, making them the perfect addition to any holiday spread, especially when you are looking for those eye-catching **vibrant red desserts**!
Share Your Perfect Red Velvet Cake Pops Creations
That’s it! You’ve done the work, you’ve chilled, you’ve dipped, and now you have a platter full of irresistible, **bite sized red velvet treats**! I am so excited for you to try these. Honestly, making food is only half the fun; the best part is seeing how you all bring these recipes to life in your own kitchens. That’s what this whole thing is about—sharing the passion and the flavor!
So, I really want to hear about it! Did everything go smoothly? Did you manage to keep your hands clean while dipping? (I usually fail that last part!) Leave me a comment right below this section. Tell me how the **homemade cake pops tutorial** worked for you, what you used for decoration, or if you had any tiny tweaks you think other readers should know about. Your feedback helps me keep these recipes the best they can be for everyone else looking for amazing **red velvet cake pops**.
If you snaps some photos of your finished, gorgeous **white chocolate dipped cake pops**, please tag me on social media! Seeing your creations fuels my fire to keep sharing these approachable, delicious recipes. Don’t forget to look around at our other favorites, too—you can check out all the wonderful dessert recipes collection anytime you need another dose of kitchen fun!
PrintThe Ultimate Easy & Moist Red Velvet Cake Pops with Cream Cheese Frosting

You can make these vibrant red velvet cake pops using simple steps. They combine moist red velvet cake with rich cream cheese frosting, all dipped in a smooth white chocolate coating. This recipe delivers a perfect bite-sized treat for any celebration.
- Prep Time: 45 min
- Cook Time: 30 min
- Total Time: 75 min
- Yield: 24 cake pops 1x
- Category: Dessert
- Method: No Bake Assembly
- Cuisine: American
- Diet: Vegetarian
Ingredients
- 1 box (15.25 oz) red velvet cake mix (plus ingredients listed on box, usually eggs, oil, water)
- 1 container (8 oz) cream cheese, softened
- 3 cups powdered sugar, sifted
- 1 teaspoon vanilla extract
- 1/4 teaspoon salt
- 1 pound white candy coating or white chocolate melting wafers
- 1 tablespoon vegetable shortening or coconut oil (optional, for smoother dipping)
- Cake pop sticks
Instructions
- Prepare the red velvet cake according to the package directions, using a 9×13 inch pan for a thinner cake layer. Let the cake cool completely.
- Crumble the cooled cake into a large bowl, removing any hard edges or burnt spots. You want fine crumbs.
- In a separate bowl, beat the softened cream cheese until smooth. Add the sifted powdered sugar, vanilla extract, and salt. Beat until fully combined and creamy.
- Add the cream cheese frosting mixture to the cake crumbs. Use your hands to mix thoroughly until a dough forms that holds together when pressed.
- Roll the mixture into uniform 1-inch balls. Place the balls on a parchment-lined baking sheet.
- Chill the cake balls in the refrigerator for at least 2 hours, or until very firm. This step is key for dipping.
- Prepare the candy coating: Melt the white candy coating wafers according to package directions, often in short intervals in the microwave. Stir in the shortening or oil if using, to thin the coating slightly.
- Dip the tip of a cake pop stick into the melted coating and insert it about halfway into a chilled cake ball. Return the sheet to the refrigerator for 10 minutes to set the stick.
- Dip the entire cake ball into the melted coating, rotating it to cover completely. Gently tap the stick against the side of the bowl to let excess coating drip off.
- Place the coated cake pop upright in a styrofoam block or stand to dry completely.
- Serve the red velvet cake pops or store them in an airtight container in the refrigerator.
Notes
- For the best texture, make sure your cake is completely cool before crumbling and mixing.
- If your coating is too thick, add a small amount of vegetable shortening or coconut oil to help it flow better when dipping.
- To achieve a vibrant red color, use a good quality red velvet cake mix or add 1-2 teaspoons of red gel food coloring to a standard chocolate cake mix if you make the cake from scratch.
- If you skip chilling the balls, they will likely fall apart when dipped. Do not rush the chilling time.
Nutrition
- Serving Size: 1 pop
- Calories: 250
- Sugar: 28g
- Sodium: 150mg
- Fat: 14g
- Saturated Fat: 8g
- Unsaturated Fat: 6g
- Trans Fat: 0.5g
- Carbohydrates: 30g
- Fiber: 0.5g
- Protein: 3g
- Cholesterol: 25mg