
Listen, I think we can all agree that a perfect slice of history, something truly iconic, is what we chase in our kitchens, right? Forget those dry, vaguely reddish cakes you see sometimes. We are absolutely making the Best Moist and Fluffy Homemade Southern Red Velvet Cake with Classic Cream Cheese Frosting from Scratch today. This isn’t just about hitting the right color; it’s about that unforgettable texture. When I started YumDrizzle, the whole point was ditching recipes that made you feel like you needed a culinary degree. That’s why I developed this absolutely foolproof red velvet cake—it honors those deep Southern traditions while being something you can whip up without a fuss. If you ever worried about making a classic like this, check out my tips for carrot cake recipe—it builds that same confidence. Trust me on this one; you’re going to love it.
- Why This is the Best Moist Red Velvet Cake Recipe
- Ingredients for Your Homemade Southern Red Velvet Cake from Scratch
- Step-by-Step Instructions for the Red Velvet Layer Cake
- Tips for a Vibrant Red Velvet Cake Every Time
- Assembling Your Red Velvet Layer Cake
- Storage and Making Ahead for Your Red Velvet Cake
- Frequently Asked Questions About This Red Velvet Cake
- Estimated Nutritional Data for This Red Velvet Cake
- Share Your Experience Baking This Red Velvet Cake
Why This is the Best Moist Red Velvet Cake Recipe
I hear people constantly asking how to get that truly luxurious, melt-in-your-mouth feel, and I’m here to tell you it’s all in the chemistry. This isn’t some dry, crumbly thing pretending to be a cake; this is a genuinely moist red velvet cake recipe. It’s designed for that gorgeous, tender crumb cake recipe everybody dreams about. Most recipes try to lean on butter, but we use oil here—that’s the secret sauce for keeping the crumb soft for days after baking.
Achieving the Signature Tender Crumb of a Red Velvet Cake
The real magic, though? It’s the reaction between the buttermilk, the vinegar, and the baking soda. When those acids hit, they create the most beautiful, delicate bubbles in the batter, which keeps the cake impossibly light despite using oil for moisture. See? It’s science, but it tastes like pure Southern heaven! You can check out how I keep moistness locked in my coffee cake too—same principle applies to keeping things velvety!
Ingredients for Your Homemade Southern Red Velvet Cake from Scratch
Keeping this authentic means using simple, quality things! You don’t need a pantry full of fancy supplies for the ingredient list for this southern red velvet cake from scratch. I’ve broken it down so you can easily check your stash. And trust me, the right coloring makes all the difference—don’t settle for pale!
For the Moist Red Velvet Cake Layers
- 1 1/2 cups vegetable oil
- 1 1/2 cups granulated sugar
- 2 large eggs
- 1 teaspoon vanilla extract
- 1 tablespoon unsweetened cocoa powder
- 1 teaspoon baking soda
- 1/2 teaspoon salt
- 1 cup buttermilk
- 1 teaspoon white vinegar
- 1 teaspoon red food coloring (Use a high-quality gel if you can—we need that color to POP!)
- 2 1/2 cups all-purpose flour
For the Classic Cream Cheese Frosting Recipe
This frosting is non-negotiable! It’s what makes the whole package work. You can grab my full tips for the best cream cheese frosting recipe later, but here’s what you need for the velvety topping right now:
- 8 ounces cream cheese, softened
- 1/2 cup (1 stick) unsalted butter, softened
- 4 cups powdered sugar, sifted
- 1 teaspoon vanilla extract
Step-by-Step Instructions for the Red Velvet Layer Cake
This is where the fun starts! I know seeing a list of steps can look daunting, but I promise this process for the red velvet layer cake is super straightforward. The whole batter part comes together in minutes, addressing that ‘easy to make’ search intent right away. Just stick close to these steps, work methodically, and you’ll have those gorgeous layers ready for the oven.
Preparing the Red Velvet Cake Batter
First thing, get that oven fired up to 350°F (175°C) and grease those two 9-inch pans—don’t skip that greasing! In a big bowl, whisk your oil and sugar until they look happy together. Then, the eggs go in one by one, followed by that vanilla. Now, we mix our dry stuff separately (cocoa, soda, salt), and our wet stuff (buttermilk, vinegar, and that bright red coloring). Here’s the key: Alternate adding the dry mix and the buttermilk mix into your wet base, starting and ending with the dry ingredients. Stop mixing the second it all comes together. Seriously, don’t overmix, or you’ll lose that velvet texture!
Baking and Cooling the Layers
Divide that beautiful, colorful batter evenly between your prepared pans. Pop them in the oven for about 30 to 35 minutes. You want to test them with a wooden pick right around the 30-minute mark. If it comes out clean, they are done! Let them hang out in those pans for about 10 minutes—this helps them firm up—and then flip them out onto a wire rack. They absolutely must be completely cool before you even think about touching them with frosting, or you’ll have a soupy, red mess!
Making the Cream Cheese Frosting
While those cakes are chilling out, let’s whip up the frosting. Take your softened cream cheese and butter and beat them together until they are totally smooth. No lumps allowed here! Then, slowly add that sifted powdered sugar—go slow, or you’ll be cleaning the ceiling! Keep beating until the whole batch looks noticeably light and fluffy. That texture is everything for spreading!
Tips for a Vibrant Red Velvet Cake Every Time
Okay, let’s talk color, because a red velvet cake that looks brown is just sad, right? We want that picture-perfect, vivid red. This is the easiest place to fail with this **no fail red velvet cake**, but I’ve got the trick that guarantees success.
Listen closely: ditch the standard grocery store liquid food coloring bottles. They just aren’t concentrated enough! To get that deep, gorgeous color that folks expect from a classic Southern dessert, you have to bite the bullet and buy the gel food coloring. You need way less gel, and it saturates the batter beautifully without adding extra liquid that messes up our perfect moisture balance.
Also, remember that little bit of cocoa powder you added? That’s why true red velvet has that faint, lovely chocolate undertone! Don’t try to hide it by adding more chocolate, or you just end up with a red chocolate cake, which isn’t what we want here. Trust the ratio on this one!
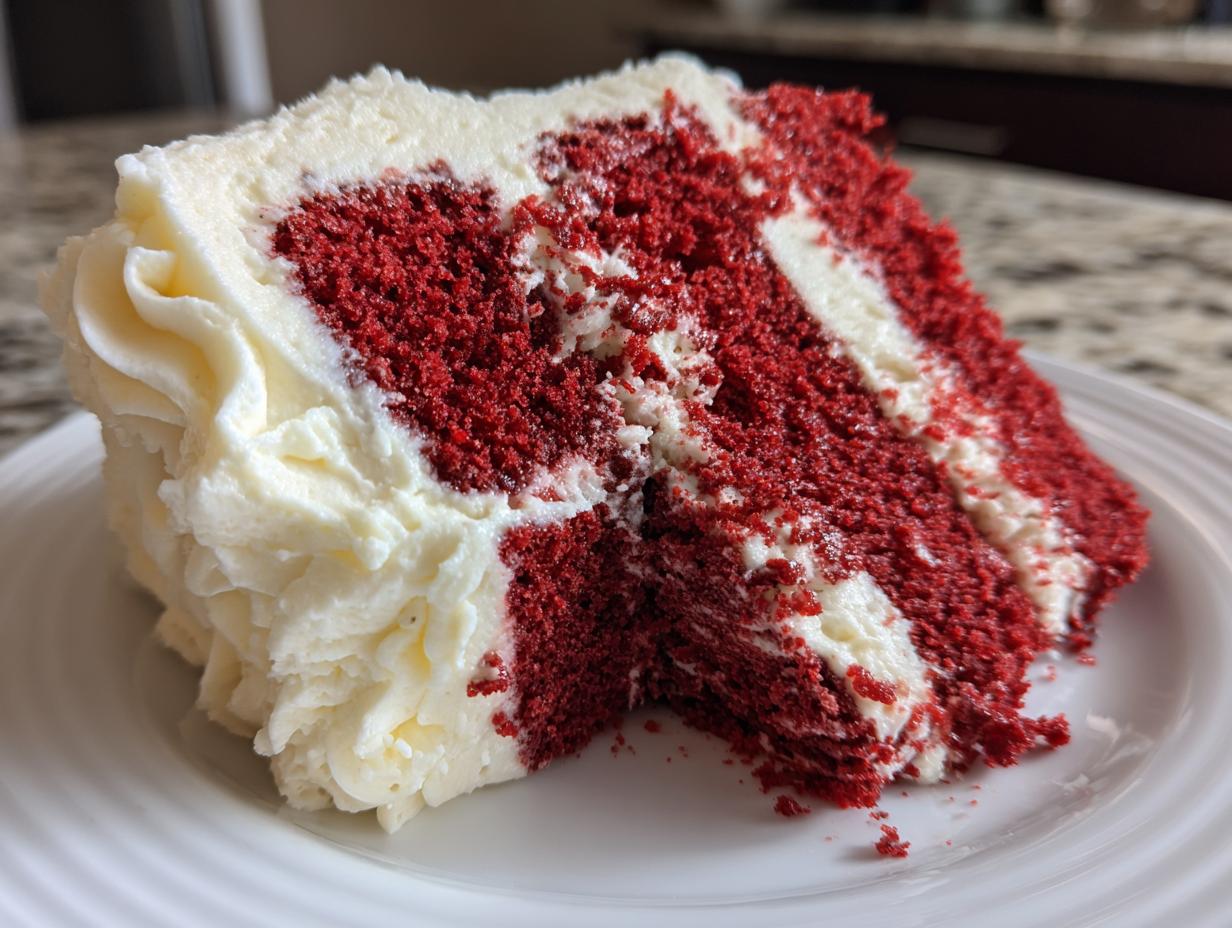
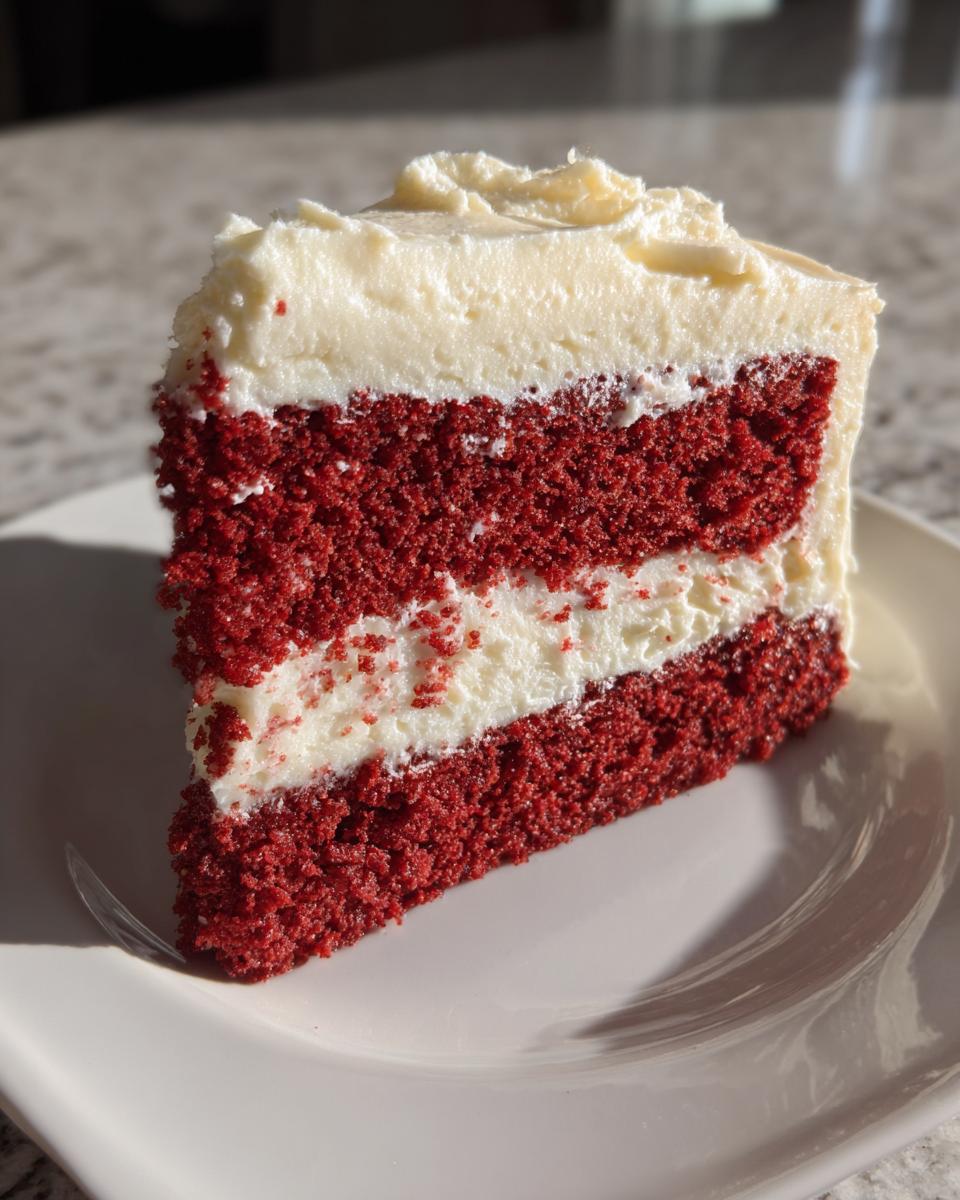
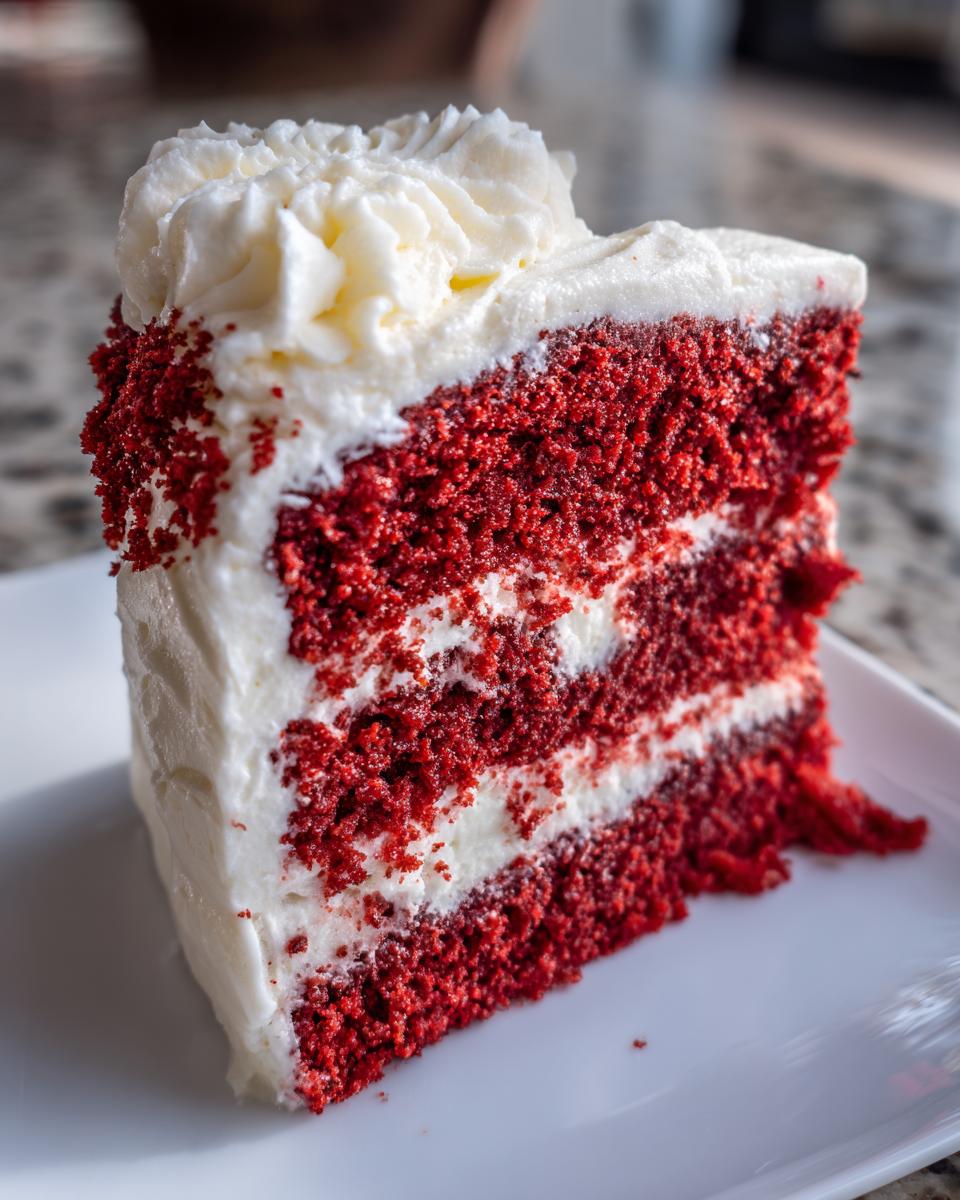
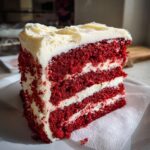
Assembling Your Red Velvet Layer Cake
Alright, the cakes are cool—this is my favorite part, putting it all together! Since we worked so hard on that fluffiness, now we focus on keeping it neat, which makes for a great presentation for your next event. Have your offset spatula ready; it’s your best friend for getting that smooth bakery look.
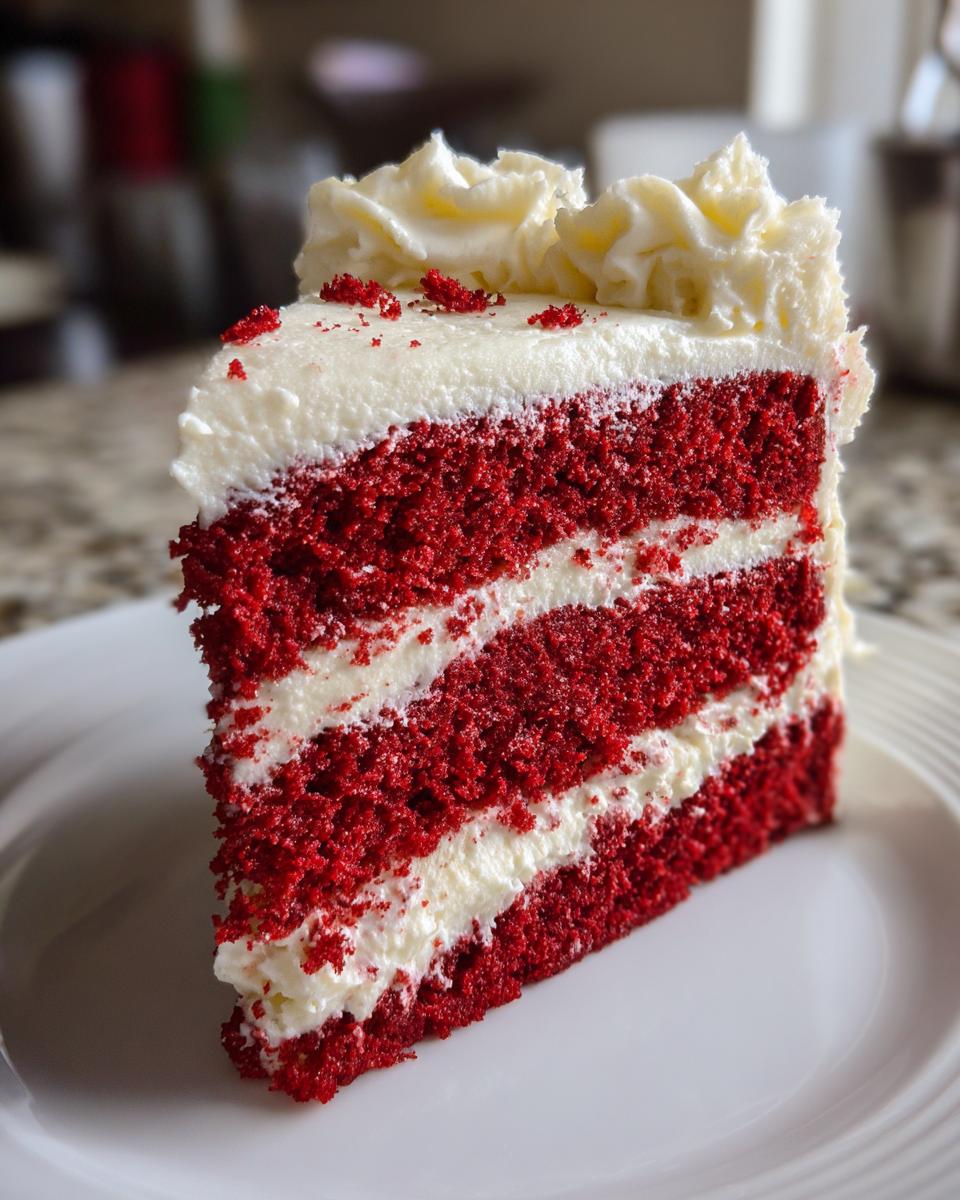
First, take about a third of that glorious classic cream cheese frosting recipe and spread an even layer over the top of your first cake layer. It doesn’t have to be perfect, just cover the surface! Then, gently place the second layer right on top. Once they’re stacked, it’s time to coat the whole exterior. Use the remaining frosting to cover the top and sides smoothly. It’s so satisfying watching that vibrant red peek out from under the white.

If you’re nervous about getting the sides smooth, check out my thoughts on baking layered cakes—a little chill time between the crumb coat and the final layer helps a ton!
Storage and Making Ahead for Your Red Velvet Cake
Since we are using that gorgeous cream cheese frosting, we’ve got to treat storing a little differently than a standard buttercream cake. If you aren’t planning on eating the whole red velvet layer cake right away, cover it loosely and definitely keep it in the fridge. It’ll stay perfect for about three days that way. Don’t worry about serving it cold, though; just pull it out about an hour before slicing so the frosting softens up a touch.
If you’re playing the long game, the un-frosted cake layers are heroes! Wrap them up tight in plastic wrap and you can freeze them for up to two months. When it’s time to decorate, thaw them overnight on the counter. Keep that planning in mind so you can relax when the big day arrives! For more tips on planning your sweets, have a peek at this red velvet cake recipe idea for inspiration!
Frequently Asked Questions About This Red Velvet Cake
I know you might have a few last-minute jitters, but honestly, this recipe is designed to answer all your questions already! Baking this red velvet cake should feel like a joy, not a puzzle. Here are the things I get asked the most about achieving that perfect texture and color.
Can I substitute buttermilk in this moist red velvet cake recipe?
Oh, absolutely! I know buttermilk isn’t always sitting in everyone’s fridge—it happens to me too sometimes! If you don’t have any on hand while making this moist red velvet cake recipe, you can make your own substitute in about five minutes. Just take a standard measuring cup, pour in a little under one tablespoon of white vinegar or fresh lemon juice, and then fill the rest of the way up with regular milk, making sure to reach your one-cup line. Give it a little stir and let it sit for five minutes. It will curdle slightly, and boom—you have the perfect acidic component we need to react with the leavening for that signature fluffy texture!
Is this recipe an authentic Southern red velvet cake from scratch?
That is such a great question! Yes, it definitely is! People think red velvet is just chocolate cake dyed red, but that’s not true for the real deal. An authentic Southern red velvet cake from scratch relies on only a very small amount of cocoa powder—just enough to give it that subtle, distinctive tang. The true flavor signature comes from the reaction between the buttermilk and vinegar, which tenderizes the cake and gives it that slight acidic backbone. If your cake tastes strongly of chocolate, you’ve probably got a chocolate cake recipe, not a *velvet* one!
What is the best way to store leftover red velvet cake?
Because we are using that incredible, tangy cream cheese frosting, we need to be careful about storage, especially if it’s warm in your kitchen. If the cake is fully frosted, cover it loosely—don’t wrap it tight, or it’ll steam up the frosting—and keep it in the refrigerator. It stays beautifully moist for a good 3 or maybe 4 days. If you’re worried about it being too cold when you serve it later, just remember to pull the cake out about an hour before slicing so the frosting can soften up wonderfully. Layer cakes freeze beautifully un-frosted, too, if you want to try making any of my cake recipes ahead of time!
Estimated Nutritional Data for This Red Velvet Cake
I always feel a little bad putting numbers next to something this glorious, but I know so many of you are counting things, so here’s the lowdown on what we’re looking at per slice for this incredible red velvet cake. Keep in mind, these figures are just my best guesstimate based on standard portion sizes and ingredient tracking. Your exact numbers might swing a tiny bit depending on what brand of oil or sugar you use, so take this as a good Guideline, not gospel!
This rich, creamy slice packs a punch, but it’s worth every single bite—especially when you factor in the joy of making it yourself! If you’re after something quick and fun, I’ve got a great chocolate pudding recipe from scratch that’s much lighter on the details, if you need a break!
- Serving Size: 1 slice
- Calories: 480
- Fat: 28g (with 12g Saturated Fat)
- Carbohydrates: 58g
- Protein: 4g
- Sugar: 55g
There you have it! A beautiful, honest look at what goes into this showstopper. Enjoy every bit of your hard work!
Share Your Experience Baking This Red Velvet Cake
Whew! Now that your kitchen smells incredible and you’ve got that stunning red, velvety centerpiece in front of you, I really want to hear from you! Did you nail that vibrant color we talked about? Are the layers as tender and moist as promised? Don’t be shy!
Baking is always a conversation between the recipe and the baker, and your feedback helps me keep these recipes perfect for everyone else out there attempting this classic. If you followed the buttermilk trick and it worked like a charm, please tell us below!
Go ahead and drop a rating right here—five stars if this brings true Southern joy to your table! If you snap any beautiful photos of your finished red velvet layer cake, tag me online! You can always reach out directly through my contact page if you have a super detailed question, but comments here are best for sharing general success stories!
Happy eating, and thank you for letting me share this piece of home baking history with you!
PrintThe Best Moist and Fluffy Homemade Southern Red Velvet Cake with Classic Cream Cheese Frosting
Make this authentic Southern Red Velvet Cake from scratch. It delivers a tender crumb, vibrant color, and is topped with a rich, classic cream cheese frosting. This no-fail recipe is perfect for birthdays or holidays.
- Prep Time: 25 min
- Cook Time: 35 min
- Total Time: 60 min
- Yield: 12 servings 1x
- Category: Dessert
- Method: Baking
- Cuisine: American
- Diet: Vegetarian
Ingredients
- 1 1/2 cups vegetable oil
- 1 1/2 cups granulated sugar
- 2 large eggs
- 1 teaspoon vanilla extract
- 1 tablespoon unsweetened cocoa powder
- 1 teaspoon baking soda
- 1/2 teaspoon salt
- 1 cup buttermilk
- 1 teaspoon white vinegar
- 1 teaspoon red food coloring (liquid or gel)
- 2 1/2 cups all-purpose flour
- 8 ounces cream cheese, softened
- 1/2 cup (1 stick) unsalted butter, softened
- 4 cups powdered sugar, sifted
- 1 teaspoon vanilla extract
Instructions
- Preheat your oven to 350°F (175°C). Grease and flour two 9-inch round cake pans.
- In a large bowl, whisk together the vegetable oil and granulated sugar until combined. Beat in the eggs one at a time, then mix in the vanilla extract.
- In a separate small bowl, combine the cocoa powder, baking soda, and salt.
- In a measuring cup, mix the buttermilk, white vinegar, and red food coloring together until the color is uniform.
- Alternate adding the dry ingredient mixture and the buttermilk mixture to the wet ingredients, beginning and ending with the dry ingredients. Mix until just combined. Do not overmix.
- Gently fold in the red batter.
- Divide the batter evenly between the prepared cake pans.
- Bake for 30 to 35 minutes, or until a wooden pick inserted into the center comes out clean. Let the cakes cool in the pans for 10 minutes before inverting them onto a wire rack to cool completely.
- Prepare the frosting: In a large bowl, beat the softened cream cheese and butter together until smooth. Gradually add the powdered sugar, mixing until fully incorporated. Beat in the vanilla extract until the frosting is light and fluffy.
- Once the cakes are completely cool, place one layer on a serving plate. Spread about one-third of the cream cheese frosting over the top. Place the second layer on top and frost the top and sides of the entire cake.
Notes
- For the most vibrant red velvet cake color, use a high-quality gel food coloring instead of liquid coloring.
- Buttermilk reacts with the cocoa and vinegar to create the signature slight tang and tender crumb. Do not skip it.
- For a simple cake assembly, use an offset spatula to spread the frosting evenly across the layers and sides.
Nutrition
- Serving Size: 1 slice
- Calories: 480
- Sugar: 55g
- Sodium: 350mg
- Fat: 28g
- Saturated Fat: 12g
- Unsaturated Fat: 16g
- Trans Fat: 0.5g
- Carbohydrates: 58g
- Fiber: 1g
- Protein: 4g
- Cholesterol: 65mg