

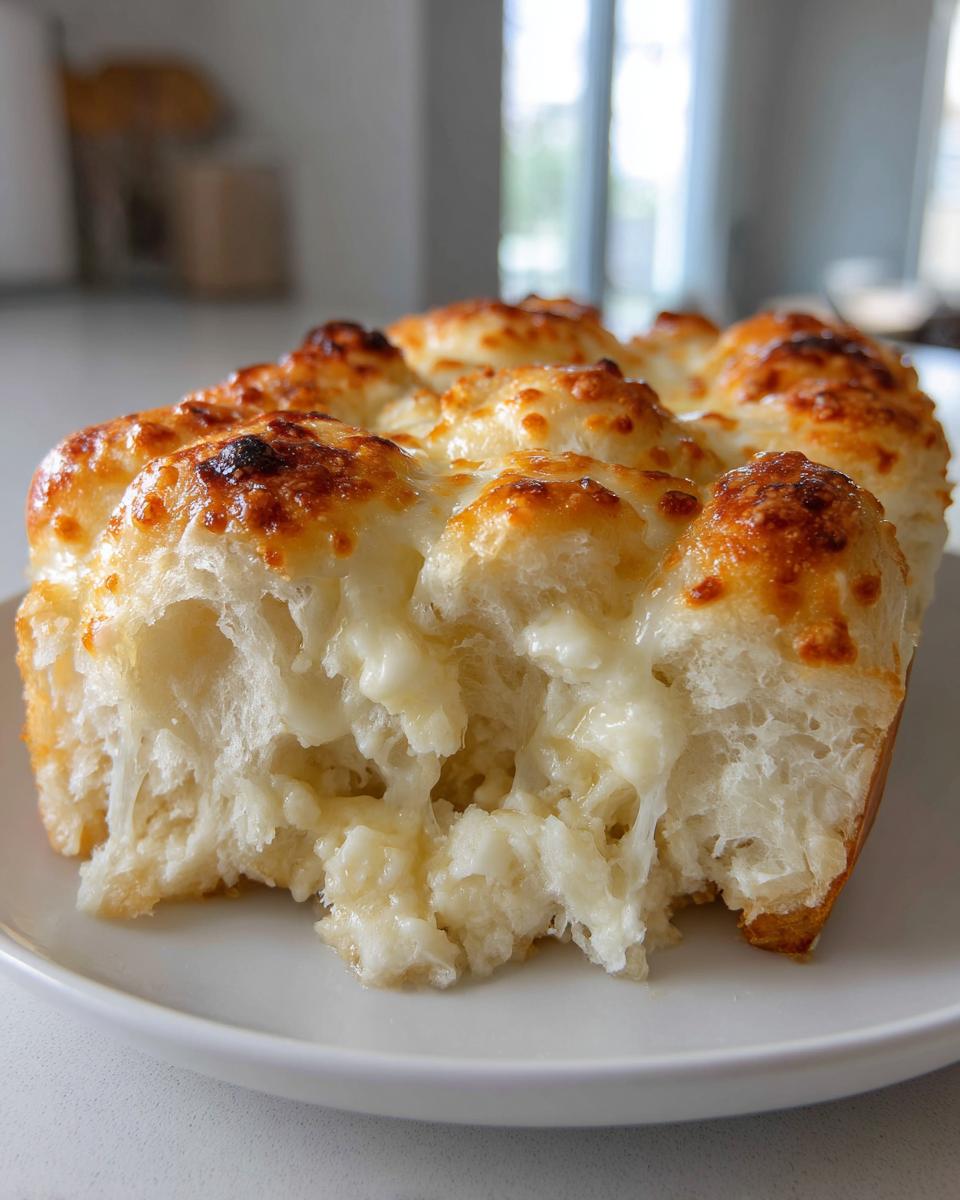
You know how sometimes the absolute *best* flavors come from the simplest, most resourceful tricks? When I was on the road, living out of a van and trying to make good food happen on a hot plate, I learned that resourcefulness is the secret ingredient. This amazing hack proves it. Forget spending hours on a huge loaf of artisan bread; we’re taking those sweet, pillowy King’s Hawaiian rolls and turning them into the most incredible, savory, cheesy hawaiian roll garlic bread you’ve ever tasted. Seriously, we’re talking about a game-changing side dish—or appetizer, let’s be real—that comes together start-to-finish in about 15 minutes. It’s proof that the best recipes often just involve a little switch-up and a lot of butter. If you need great weeknight dinner recipes that feel like a treat, stick around. This is comfort food made instantly accessible.
- Why This Cheesy Hawaiian Roll Garlic Bread Recipe Works So Well (Quick Side Dishes)
- Ingredients for Your Hawaiian Roll Garlic Bread
- How to Prepare Quick & Easy Hawaiian Roll Garlic Bread
- Ingredient Notes and Substitutions for Butter Garlic Rolls
- Tips for Making the Best Hawaiian Roll Garlic Bread (Expert Advice)
- Serving Suggestions for Your Hawaiian Roll Garlic Bread
- Storage and Reheating Instructions for Leftover Hawaiian Roll Garlic Bread
- Frequently Asked Questions About This **Cheesy Bread Appetizer**
- Estimated Nutrition for One Serving of Hawaiian Roll Garlic Bread
- Share Your **Sweet Roll Garlic Bread** Creations
Why This Cheesy Hawaiian Roll Garlic Bread Recipe Works So Well (Quick Side Dishes)
The reason this works so brilliantly is because we are playing two flavors against each other, and honestly, they are best friends! That slight sweetness from the King’s Hawaiian rolls cuts right through the richness of the heavy **butter garlic rolls** mixture. Trust me, it creates an addictive flavor profile. It’s amazing how something this easy becomes the first thing gone at any party; it’s the ultimate party food idea.
The Magic of Sweet Rolls Meeting Savory Garlic Butter
That pillowy soft texture we all love in those rolls? It soaks up that sharp, fragrant garlic butter like a sponge. It’s the perfect balance that makes this way better than standard bread. You get a savory punch, followed by that hint of sweetness, and then the cheese pull—it’s textural heaven.
Achieving the Perfect 15 Minute Recipes Timing
Since we are using rolls that are basically already baked, we skip all those long mixing and resting times. This recipe truly fits into the category of 15 minute recipes because the oven is just melting things together, not actually cooking the dough. It’s how we get that incredible **comfort food side** ready before the main course is even plated!
Ingredients for Your Hawaiian Roll Garlic Bread
Okay, the beauty of this recipe is that you probably have 90% of this stuff in your kitchen already, but we need to be specific about what goes where. When I was learning on the road, sloppy ingredient lists led to soggy messes! We need precision here, especially when dealing with the garlic butter, because that’s where all the huge flavor is coming from. Trust me on these measurements; they are what turn a packet of sweet rolls into legit **garlic Parmesan rolls**.
For the Savory Garlic Butter Mixture
This is the heart and soul of the operation. You can’t fake real garlic flavor here, folks.
- 1 package (12 count) King’s Hawaiian sweet rolls (Don’t substitute unless you absolutely have to—these are essential!)
- 1/2 cup unsalted butter, melted (Make sure it’s fully liquid before mixing!)
- 4 cloves garlic, minced (I mean really minced, not just smashed. We want that flavor everywhere.)
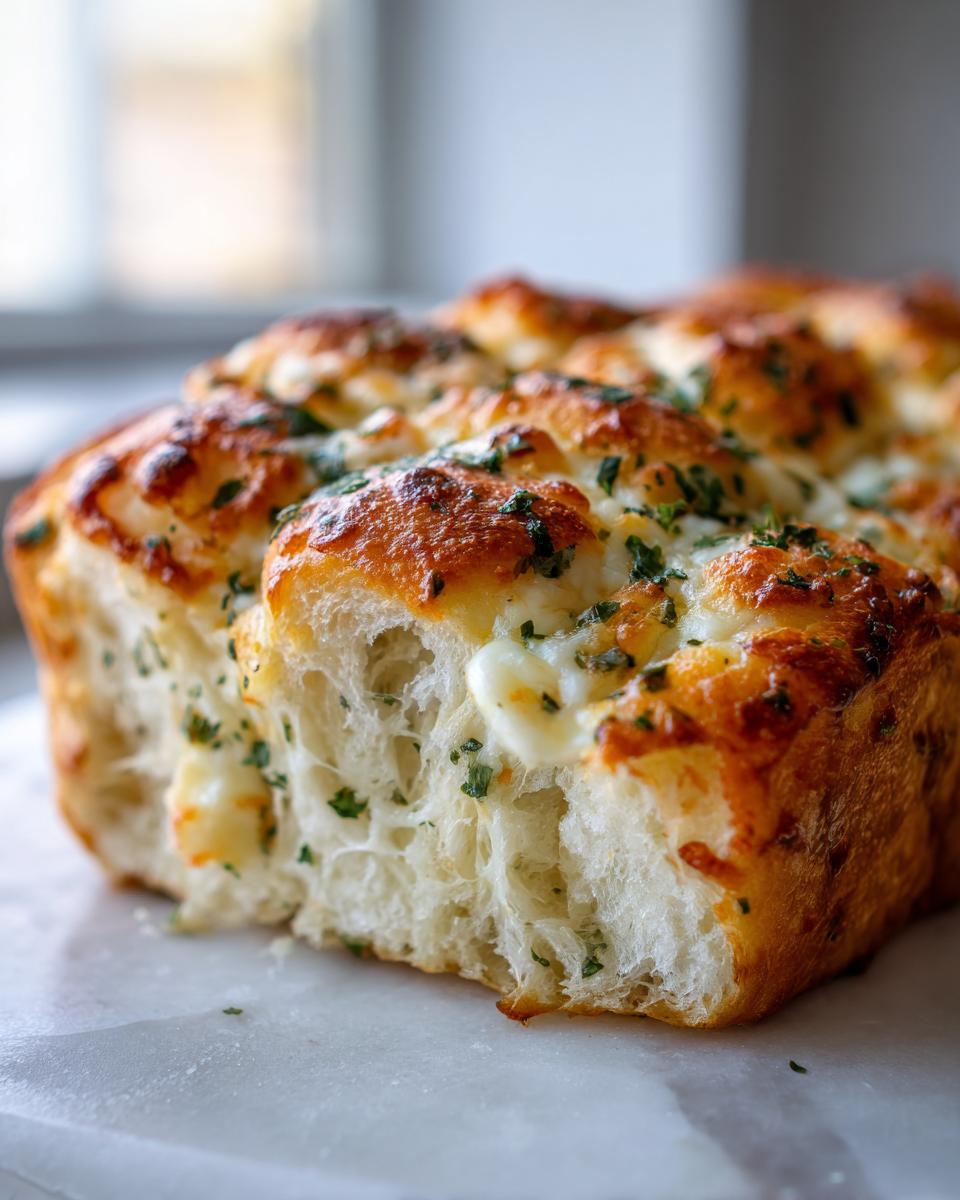
- 1 teaspoon dried parsley (For color and that classic Italian-American side dish taste.)
- 1/4 teaspoon salt
- 1/4 teaspoon black pepper
For the Cheesy Topping (Melty Cheese Bread)
This is what takes it from simple garlic bread to that viral, gooey, crowd-pleasing appetizer everyone raves about. If you’re making this for game night, don’t skimp on the cheese!
- 1 cup shredded mozzarella cheese (Use the easy-shred bags, no judgment here!)
- 1/4 cup grated Parmesan cheese (Freshly grated is always better for melting, but pre-grated works in a pinch for this speed-focused recipe.)
If you’re looking for even more cheesy goodness, check out my recipe for easy beer cheese dip—same vibe, just thicker!
How to Prepare Quick & Easy Hawaiian Roll Garlic Bread
This is where the magic happens, and it’s so fast! You’re going to look at the oven clock and blink, and suddenly you’ll have the best **quick side dishes** ready to serve. My goal here is maximum flavor penetration with minimum effort. If you’re using this alongside my garlic butter rice recipe, timing is everything, so let’s be systematic.
Prep Work: Oven and Rolls Setup
First thing: crank that oven up to 350 degrees Fahrenheit a little early. While it heats, lightly grease a 9×13 inch baking dish. I like to keep the rolls nestled together in their original plastic tray if it fits, or just arrange them snuggled up tight in the pan. They need to be touching so they bake into that perfect **pull apart bread** structure.
Infusing Flavor: Poking and Butter Application
This is the expert move that separates the newbies from the pros. Take a toothpick or a small skewer (don’t be shy!) and poke the top of every single roll, several times. We’re creating little hidden tunnels for the butter! Once poked, drizzle that glorious garlic butter mixture we made—just pour it right over the top and let gravity do the work, watching that liquid seep down into all those little caverns.
Baking Instructions for Perfect **Pull Apart Bread**
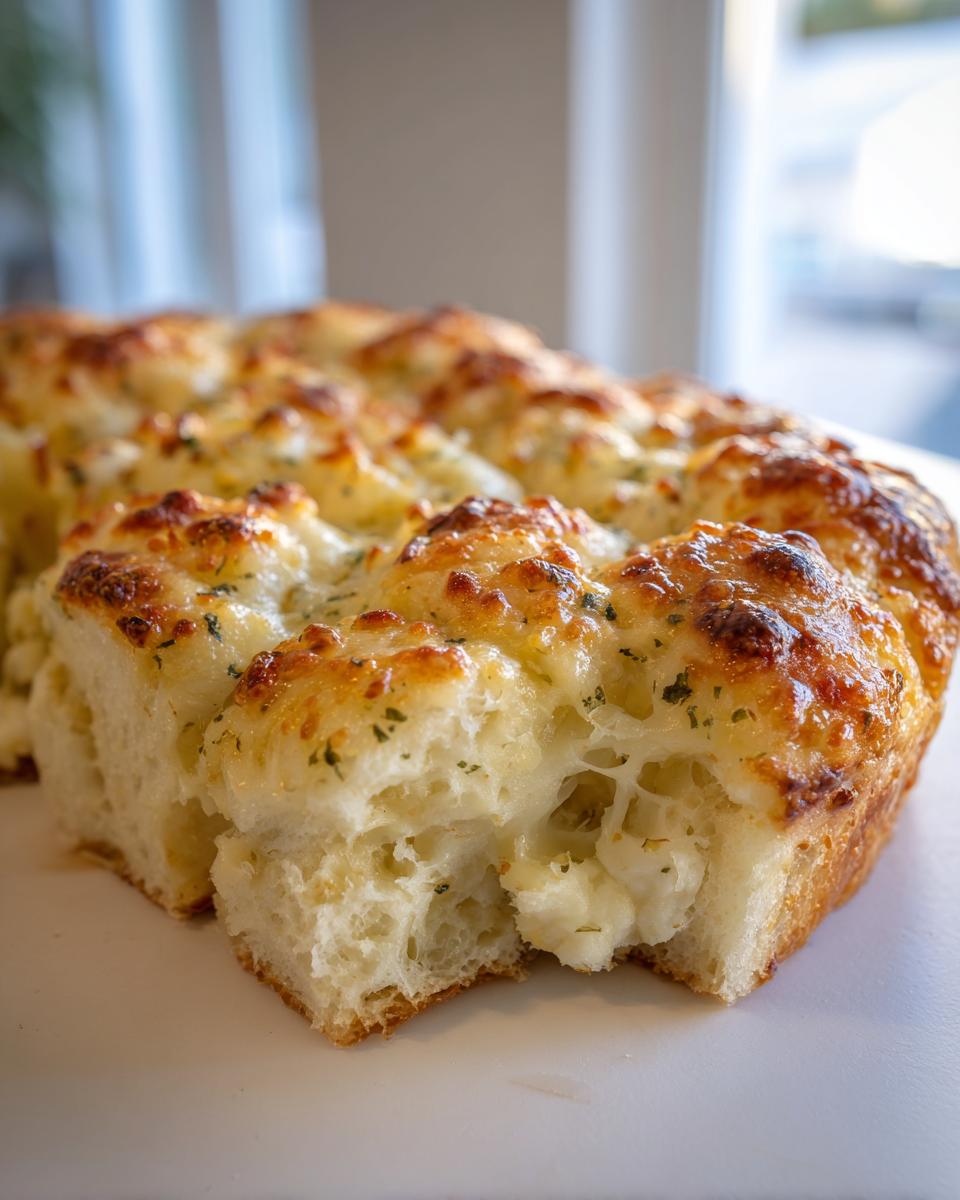
Now for the cheese! Sprinkle your mozzarella and Parmesan right over the butter-soaked tops. Cover the entire dish tightly with foil—this steams the rolls slightly and melts the cheese beautifully without burning the garlic. Pop it in for exactly 10 minutes. After that time, pull that foil right off! Bake uncovered for just 3 to 5 more minutes, watching closely until that **melty cheese bread** is bubbly and golden brown. Head over to this link here if you want to see another great take on this easy side!
Ingredient Notes and Substitutions for Butter Garlic Rolls
Look, when you’re trying to get a great side dish on the table fast, sometimes you have to work with what you’ve got. That was my life on the road! But I want to give you the expert scoop on what makes the absolute best flavor and what you can swap out if you’re in a pinch. Getting the right ratio of garlic to butter is key here for building that savory crust on top of our sweet King’s Hawaiian rolls. This isn’t just about throwing things in a bowl; it’s about strategy!
Garlic Flavor Adjustments
Fresh minced garlic is the gold standard, no question. It pops when you bake it and gives you that spicy, pungent kick we love. However, if you had a rough day and didn’t want to stand there mincing four cloves, don’t sweat it! You can absolutely substitute with garlic powder. I found that 1 teaspoon of powder gives you about the same punch as those four fresh cloves scattered in the melted butter. Another thing I sometimes sneak in, especially if I’m making these for a big game day spread, is just a tiny pinch of onion powder. It adds such a subtle depth that makes people wonder what your secret is.
Choosing King’s Hawaiian Roll Recipes Brands
Let’s be honest: this recipe relies heavily on the specific sweetness and structure of the King’s Hawaiian rolls. They are designed to be pillowy and slightly sweet, which is the whole point of the contrast! So, yes, grab that standard 12-count package. Now, if you happen to have a different brand of soft dinner rolls on hand—say, you grabbed a different package on sale—they will still work wonderfully. That’s a great little dinner roll hack for when you’re in a bind. Just know that the flavor profile might shift slightly since other brands aren’t quite as sweet as the classic ones. But hey, homemade savory rolls are better than no rolls at all!
Tips for Making the Best Hawaiian Roll Garlic Bread (Expert Advice)
I learned the hard way that just pouring butter over bread isn’t always enough, especially when you’re dealing with something as absorbent as these soft rolls. I remember one disastrous batch—we were trying to save time, probably rushed heading out to a gig, and I just dumped all the butter mix on top without poking. The top layer was perfect, buttery, cheesy gold, but the bottom rolls were weirdly damp, almost gummy. That’s when I realized we had to engineer the flavor delivery!
My system now is all about making sure every single part of that **pull apart bread** gets the love it deserves. It’s about building authority in the small stuff, which pays off huge in the final bite. You want golden crusts, not soggy bottoms, and perfect cheese meltiness, not burnt garlic.
Preventing Soggy Bottoms When Making Garlic Parmesan Rolls
If you see that your dish is really shallow, or if you just tend to use a *lot* of butter (which, honestly, I usually do), the bottom layer can get overwhelmed. The trick here is twofold. First, when you drizzle that butter mixture, try to focus it toward the center rolls where there’s more room to soak up. But here’s the real hack: If you have a minute before you cover it with foil, I sometimes pop the dish in the oven, still uncovered, for just 3 or 4 minutes before adding the foil. This flash of dry heat evaporates just a little surface moisture from the bottom layer so it toasts instead of steams. It’s a simple step that makes the whole experience better.
Achieving Golden Brown Cheese
Remember how we cover it with foil for the first 10 minutes? That’s crucial for melting the cheese without crisping the parsley too fast. But sometimes, even after the foil comes off, that mozzarella only gets shiny, not golden. If you’re anything like me and *need* that beautiful, slightly crispy, golden-brown cheese top for your appetizer, here’s what you do as the final step. Once the 15 minutes is up, if the cheese isn’t quite there, just switch your oven to BROIL for 60 to 90 seconds. Keep the door open a crack so you can watch it like a hawk! That high heat will hit the cheese perfectly and give you that amazing color. You can find some great inspiration for next-level sides like this garlic butter skillet recipe.
For even more ideas on making irresistible sides, check out this detailed article on buttery Hawaiian roll garlic bread. They have some fantastic tips on presentation!
Serving Suggestions for Your Hawaiian Roll Garlic Bread
We all know this flavorful, cheesy bread is fantastic just sitting on the counter as a stand-alone **simple appetizer**, but I think making it part of a larger meal is when it really shines. When I was road-tripping, we often just ate entire trays of this stuff with maybe a side salad, but back home, I like to integrate it properly into dinner. It’s so quick that it rarely adds any stress, making it the ultimate **weeknight side recipe** when you need something comforting without the fuss.
Ideal Pairings for This Savory Side
Because this bread is rich with garlic butter and cheese, you want to pair it with something that can stand up to that flavor, or something that acts as a great delivery mechanism for dipping! You honestly can’t go wrong here, but here are my top three go-to pairings that always get rave reviews:
- Classic Spaghetti Night: Forget boring table bread. Dunking a piece of this sweet and savory roll into a hearty red sauce? Unbeatable comfort.
- Chili or Hearty Stews: If I’m making a big pot of beef chili or a thick lentil stew, this is mandatory. It’s perfect for scooping up every last bit at the bottom of the bowl.
- Soup Nights: This is especially good with lighter, broth-based soups where you need something starchy and flavorful to dip. I often make it alongside my recipe for easy creamy chicken tortilla soup because the sweetness of the roll is such a nice contrast to the spice in the soup.
Honestly, if you’re feeding a crowd for any of your **party food ideas**, just make a double batch of this and set it near the main dish—it disappears!
Storage and Reheating Instructions for Leftover Hawaiian Roll Garlic Bread
If you are somehow blessed with leftovers of this incredible **cheesy bread appetizer**—and I mean, *how*?—you need to treat them right. These soft rolls go stale fast if you just leave them sitting out on the counter, especially with all that garlic butter poured in. We want to bring back that pillowy softness and the gooey cheese effect, not turn it into a savory crouton!
The absolute best way to store any leftovers is to keep them covered tight. I usually use the plastic wrap the rolls came in if I can re-seal it, or move them right into an airtight container. You can keep them at room temperature for about a day, but if you have more than that, you should definitely pop them in the fridge to keep them fresh longer. Don’t forget, the fat in that butter mixture can go rancid if left out too long, so cover them well before chilling!
Reheating is the crucial step to bring back the magic. You want to use the oven, not the microwave, if you care about texture—the microwave will just make them tough and soggy, trust me. Wrap the leftover portion tightly in aluminum foil. Foil traps the moisture in and ensures the rolls steam slightly while the cheese melts back into place. Pop that foil package into a 300-degree oven for about 8 to 10 minutes. Once it’s heated through and soft, pull the foil off for the final minute or two if you want the cheese that was on top to get that nice, bubbly look again. Instant, fresh-tasting **butter garlic rolls** without all the work!
Frequently Asked Questions About This **Cheesy Bread Appetizer**
I get so many great questions about this recipe—it’s clearly a reader favorite! Since it’s such a simple hack that packs a huge flavor punch, people always want to know the tricks to making it perfect for their schedule or for a big crowd. We want this to be your go-to for **party food ideas**, so let’s clear up any last-minute questions about timing and setup!
Can I make this **hawaiian roll garlic bread** ahead of time?
That is such a smart question, especially if you’re hosting! Yes, you can totally do some prep work in advance. I wouldn’t let them sit assembled for more than a few hours because the rolls will start getting soggy from the butter soaking in unevenly. What I recommend is mixing up that amazing garlic butter mixture and keeping it covered in the fridge for up to two days. When you’re ready to bake, melt it slightly, poke your rolls, pour the butter, add the cheese, and bake as directed! If you want to assemble the whole thing—rolls, butter, and cheese—just assemble it, cover it tightly with plastic wrap, and put it in the fridge. When you bake, you’ll need to add an extra 5 minutes to the covered baking time.
Is this recipe similar to the **Viral TikTok food** version?
Oh, absolutely! This flavor combination—sweet bread meeting super savory garlic and cheese—is what made that trend blow up. I think people were so tired of heavy, dense garlic bread and wanted something softer and slightly sweet to balance out rich pasta sauces. Our version relies on that same concept: maximum gooey cheese pull and rich garlic flavor, all in a super fast bake. If you want to see the original buzz behind it, check out how they made it go viral right here!
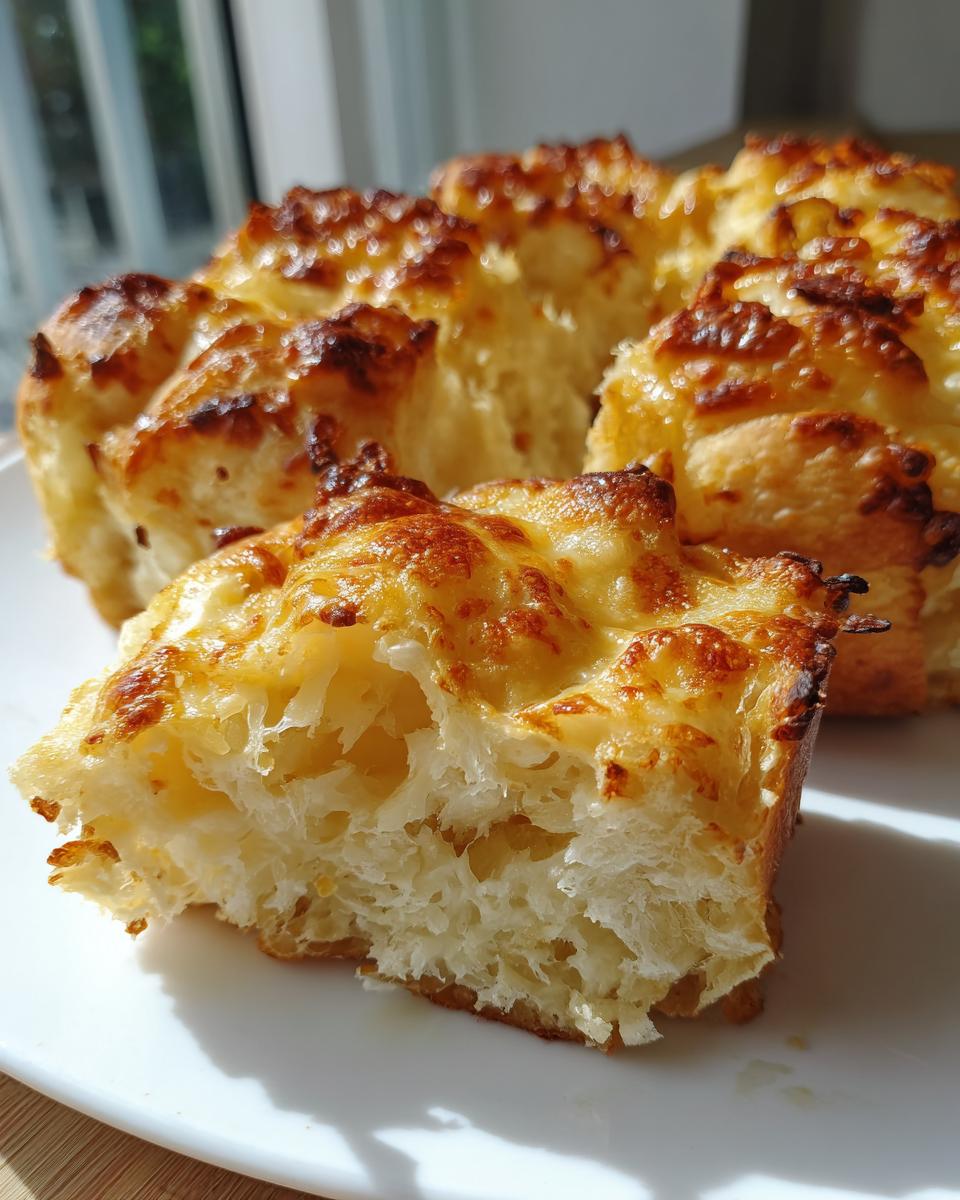
What is the best way to serve this as a **Simple Appetizer**?
Since these rolls are already connected, they naturally want to pull apart, which is awesome for easy serving! When I take this out of the oven, I let it sit for just two minutes—long enough so the cheese cools slightly so you don’t burn your mouth off! Then, I just cut straight down between sections, making four big squares. People can just grab a section. For even easier serving at a big gathering, you can use toothpicks right in the middle of each roll square. That way, people don’t have to touch the cheesy middle section when they grab theirs. It’s perfect for potlucks or as a starter before you serve up something heavier like my stuffed mushroom dip!
Estimated Nutrition for One Serving of Hawaiian Roll Garlic Bread
Now, when we’re talking about something this delicious that involves a whole package of sweet rolls, butter, and cheese, we know it’s not exactly “health food.” But listen, that’s okay! Food is about joy, comfort, and memory, and this is pure comfort on a sheet pan. Knowing what’s in it just helps you balance the rest of your weeknight menu, right? I plugged all the ingredients into my favorite calculator, and here is what we are looking at per roll, assuming you get 12 servings out of the whole package.
Please remember that these are estimates! I used standard King’s Hawaiian rolls for this, and brands of mozzarella can really change the sodium content. This is just a ballpark idea for our amazing **comfort food side**.
- Serving Size: 1 roll
- Calories: 210
- Fat: 12g
- Saturated Fat: 7g
- Carbohydrates: 22g
- Sugar: 8g (That’s the roll’s natural sweetness shining through!)
- Protein: 6g
- Sodium: 350mg
See? Not too wild for a side dish packed with flavor! Since this is such a quick win, you can afford to be a little decadent. It pairs perfectly with something lighter, like a big salad, which helps balance the richness of the cheese and butter perfectly. It’s all about balance, just like finding the right flavor contrast we talked about earlier!
Share Your **Sweet Roll Garlic Bread** Creations
And there you have it! We’ve gone from a simple package of sweet rolls to the most epic, cheesy, savory **Hawaiian roll garlic bread** you’ll want to make every single week. Isn’t it amazing how a 20-minute snack can feel like the star of your dinner table? This is exactly what I mean when I talk about making food fun and accessible again—no complicated techniques, just pure flavor payoff.
Now that you’ve made this incredible **pull apart bread**, I really, truly want to hear about it! Did you add extra Parmesan? Did you sneak in that onion powder I mentioned earlier? I learned everything I know by sharing and trying new things, so please don’t keep your successes (or your funny little disasters!) to yourself.
Drop your star rating for this recipe right down below. It helps other cooks know that this is worth their 15 minutes! And if you snapped a picture of your tray, covered in that glorious melted cheese, tag me on social media! I love seeing this **comfort food side** show up on everyone’s dinner tables. Seriously, seeing your versions makes my entire day. Happy baking, and I can’t wait to see what you whip up next!
If you want to know a little more about the philosophy behind YumDrizzle and why we focus on these accessible, real-life recipes, check out our About Page!
PrintCheesy Hawaiian Roll Garlic Bread in 15 Minutes

Transform sweet Hawaiian rolls into savory, pull-apart garlic bread loaded with butter and melted cheese. This quick recipe is perfect for a crowd-pleasing side dish or appetizer.
- Prep Time: 5 min
- Cook Time: 15 min
- Total Time: 20 min
- Yield: 12 servings 1x
- Category: Side Dish
- Method: Baking
- Cuisine: American
- Diet: Vegetarian
Ingredients
- 1 package (12 count) King’s Hawaiian sweet rolls
- 1/2 cup unsalted butter, melted
- 4 cloves garlic, minced
- 1 teaspoon dried parsley
- 1/4 teaspoon salt
- 1/4 teaspoon black pepper
- 1 cup shredded mozzarella cheese
- 1/4 cup grated Parmesan cheese
Instructions
- Preheat your oven to 350 degrees Fahrenheit. Lightly grease a 9×13 inch baking dish.
- Keep the Hawaiian rolls connected in their original packaging or arrange them tightly in the prepared baking dish.
- Use a toothpick or skewer to poke holes all over the tops of the rolls. This helps the butter mixture soak in.
- In a small bowl, combine the melted butter, minced garlic, dried parsley, salt, and pepper. Mix well.
- Drizzle the garlic butter mixture evenly over the tops of the rolls, making sure the liquid seeps into the poked holes.
- Sprinkle the mozzarella cheese and Parmesan cheese over the top layer of the rolls.
- Cover the dish tightly with aluminum foil.
- Bake for 10 minutes.
- Remove the foil and bake for an additional 3 to 5 minutes, or until the cheese is fully melted and lightly golden brown.
- Serve immediately while warm and pull apart the rolls.
Notes
- For extra flavor, you can add a pinch of onion powder to the butter mixture.
- If you want a richer garlic flavor, use garlic powder instead of fresh minced garlic, using 1 teaspoon of powder.
- This recipe works well as a simple appetizer for parties or a side dish for pasta night.
Nutrition
- Serving Size: 1 roll
- Calories: 210
- Sugar: 8
- Sodium: 350
- Fat: 12
- Saturated Fat: 7
- Unsaturated Fat: 5
- Trans Fat: 0.3
- Carbohydrates: 22
- Fiber: 1
- Protein: 6
- Cholesterol: 30