
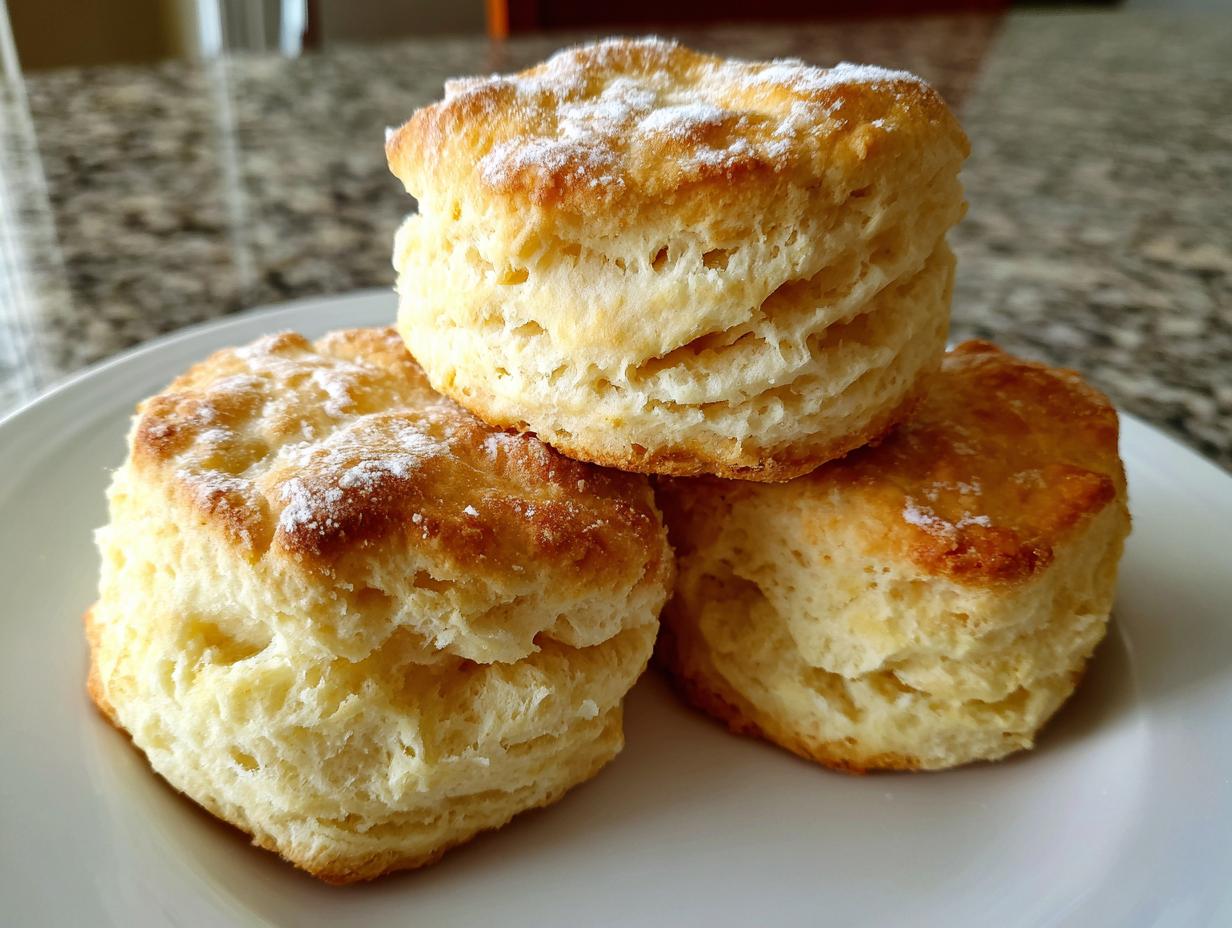
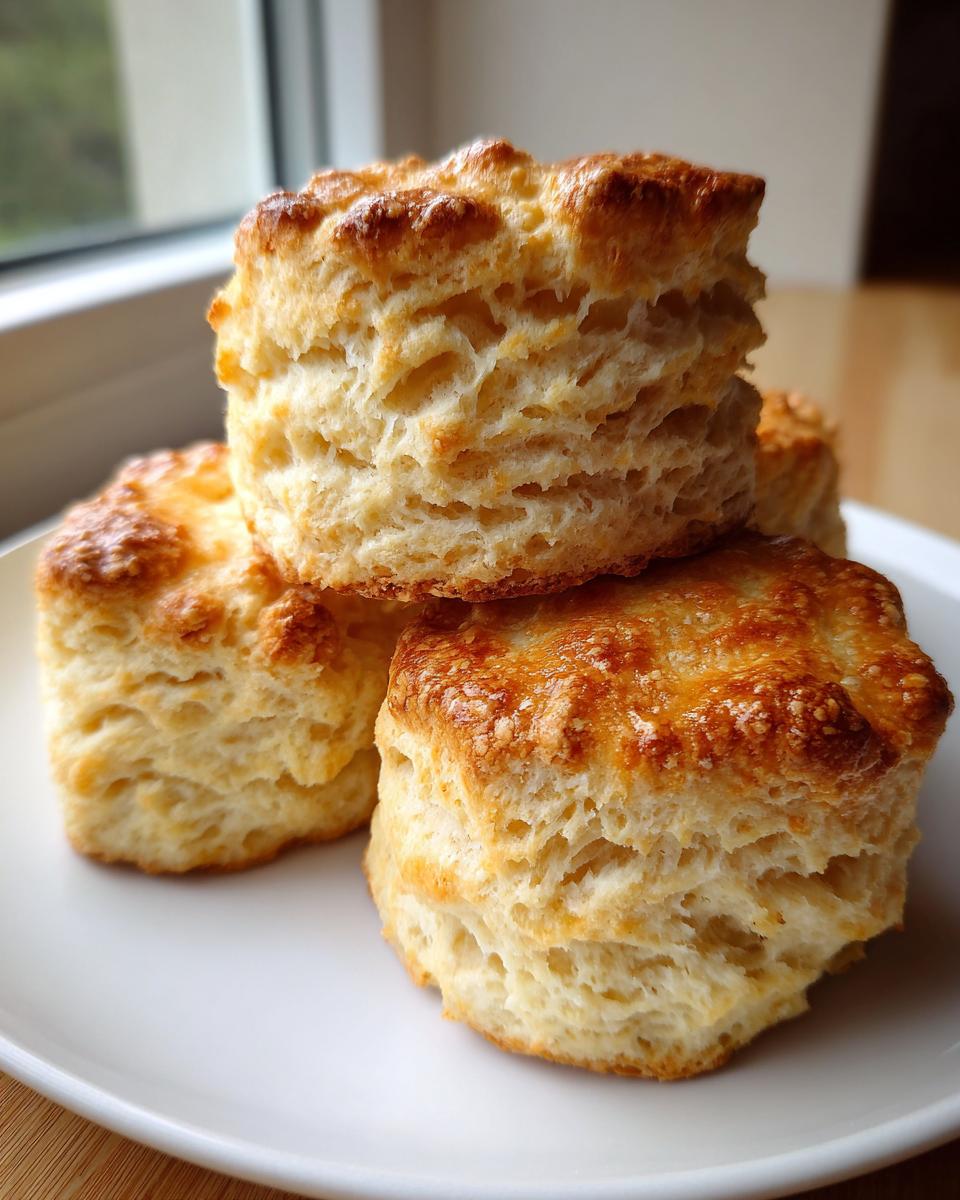
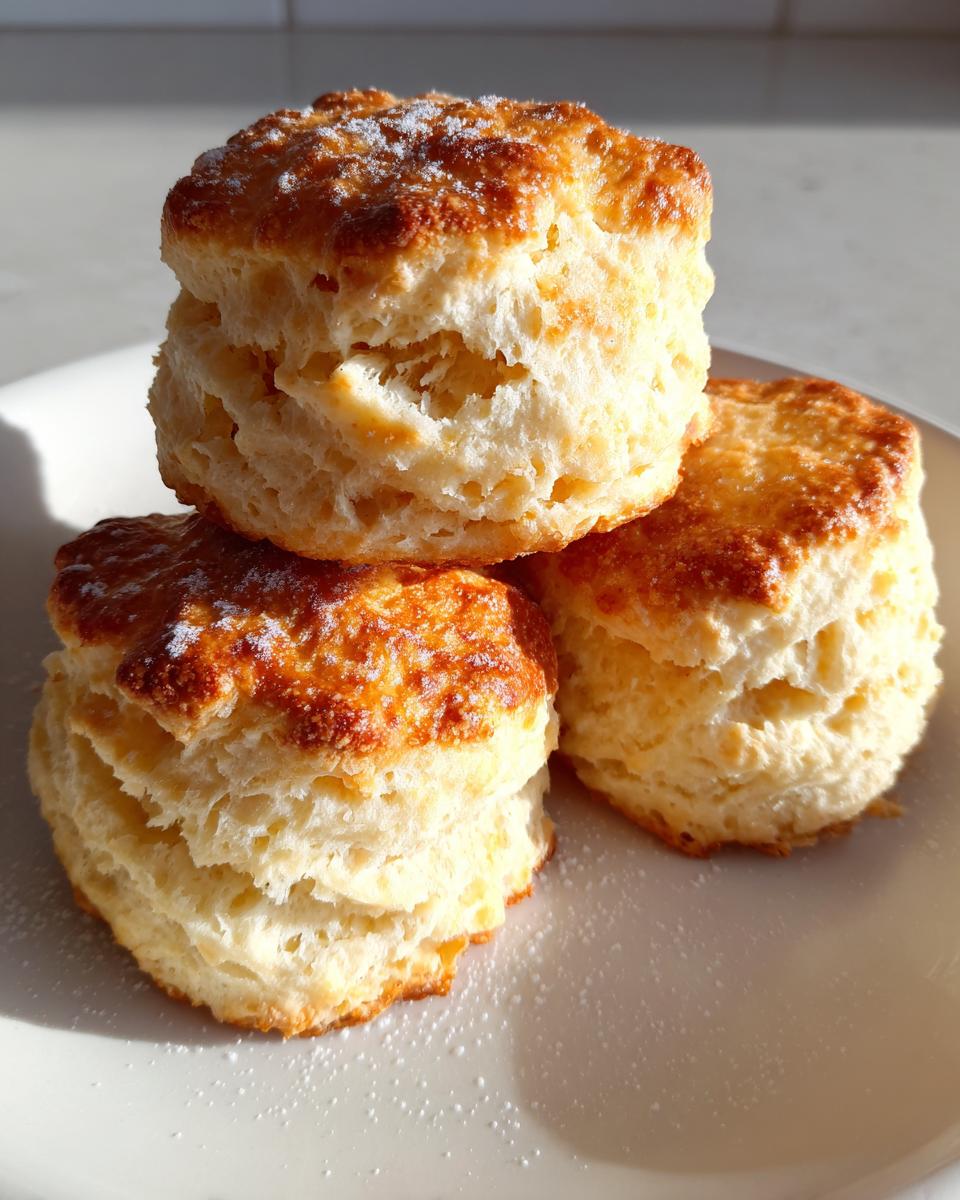
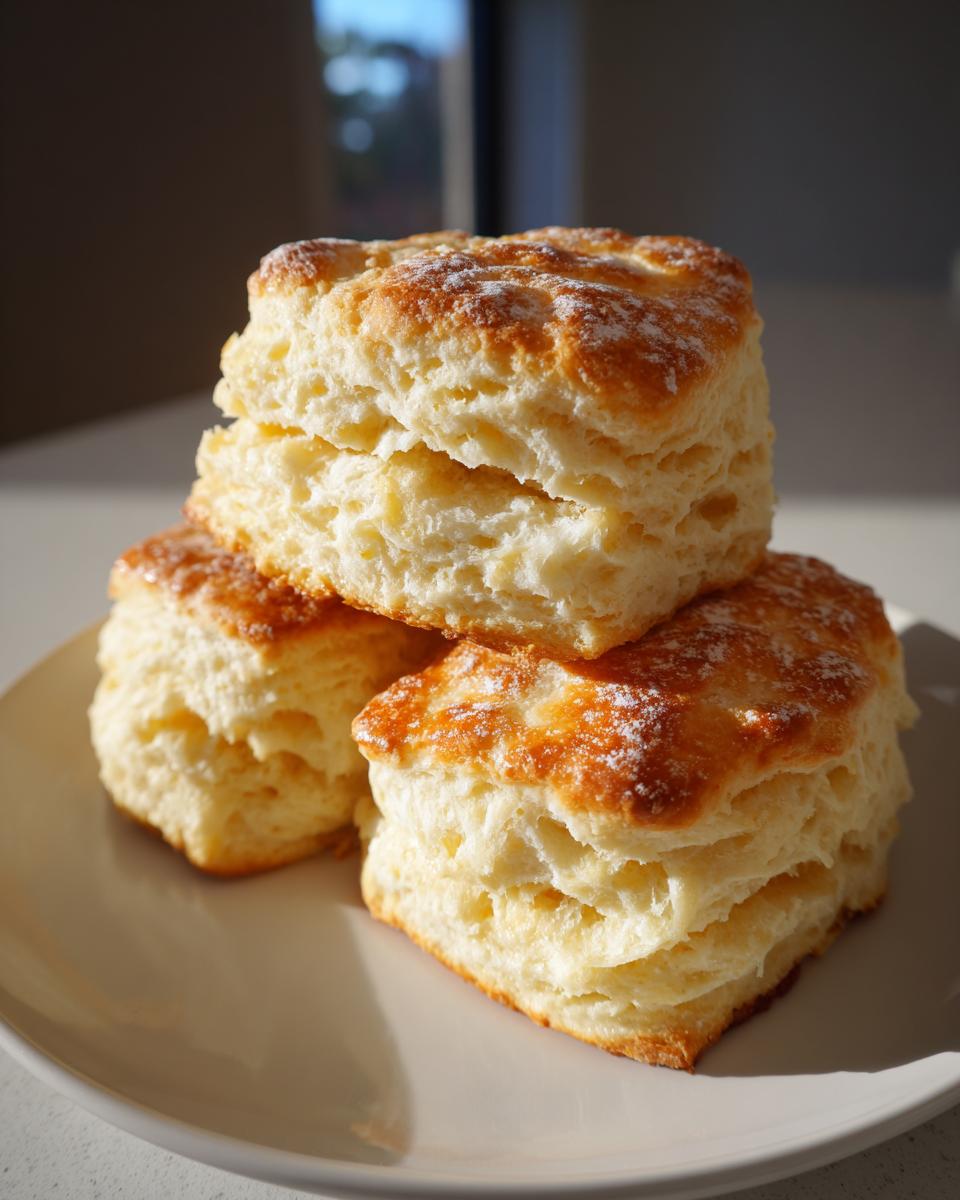
Oh, is there anything better in the world than a perfectly baked biscuit? Seriously, that first crackle when you pull it apart, steam rushing out, showing off those glorious, buttery layers? It’s the taste of real comfort, isn’t it? When I was finding my footing, traveling the country and searching for the heart of regional American cooking, the biscuit was always the test. You can’t fake a good one! That’s why I’m sharing my recipe for what I genuinely believe are the Ultimate Fluffy Southern Buttermilk Biscuits. Forget flat, dry crumbs; we are aiming for tall, tender perfection. Trust me, mastering the technique here, which I picked up chasing authentic home cooking across the South—you can read more about my philosophy over at YumDrizzle—is what makes all the difference.
- Why These Are the Best Buttermilk Biscuits You Will Ever Make
- Gathering Your Ingredients for Classic Buttermilk Biscuits
- Essential Equipment for Perfect Buttermilk Biscuits
- Step-by-Step Instructions for Fluffy Buttermilk Biscuits
- Baking Tips for Golden Brown Buttermilk Biscuits
- Comparing Techniques: Quick 3-Ingredient Buttermilk Biscuits
- Serving Suggestions for Your Homemade Buttermilk Biscuits
- Storage and Making Ahead Buttermilk Biscuits
- Frequently Asked Questions About Biscuit Making
- Baking Tips for Golden Brown Buttermilk Biscuits
- Comparing Techniques: Quick 3-Ingredient Buttermilk Biscuits
- Serving Suggestions for Your Homemade Buttermilk Biscuits
- Storage and Making Ahead Buttermilk Biscuits
- Frequently Asked Questions About Biscuit Making
- Baking Tips for Golden Brown Buttermilk Biscuits
- Comparing Techniques: Quick 3-Ingredient Buttermilk Biscuits
- Serving Suggestions for Your Homemade Buttermilk Biscuits
- Storage and Making Ahead Buttermilk Biscuits
- Frequently Asked Questions About Biscuit Making
Why These Are the Best Buttermilk Biscuits You Will Ever Make
Look, I’ve tried the lazy ways, but if you want that melt-in-your-mouth moment, you have to commit to the classic method. These buttermilk biscuits aren’t just good; they’re the ones that disappear first at any brunch. They have that incredible buttery flavor we all crave.
- They rise unbelievably high—we’re talking stackable height!
- The texture is all tender crumb, zero toughness.
- They stay incredibly soft for hours after baking.
If you’re worried about dry results, check out what others have made, like this amazing salad recipe for balance: Best Crunchy Broccoli Salad with Bacon and Cranberry.

Achieving Tall Flaky Biscuits Through Technique
It all boils down to two things, really: temperature and touch. You need ingredients that are absolutely ice-cold—we’re talking butter that feels like rock. When you mix those cold chunks into the flour, they create tiny pockets of steam when they hit the hot oven. That steam pushes the layers apart, giving you those gorgeous, tall, flaky results. Keep your hands moving fast, too! Warm hands melt the butter before it even hits the oven, and that ruins the lift immediately.
Gathering Your Ingredients for Classic Buttermilk Biscuits
Alright, let’s get down to business. For truly incredible, melt-in-your-mouth buttermilk biscuits, the quality and temperature of your ingredients matter more than almost anything else. Think of this as setting the stage for success. You need things ice-cold and ready to go before you even think about turning on the oven. Don’t skimp here, please!
Here’s what you need for a fantastic batch:
- 2 cups all-purpose flour
- 1 tablespoon baking powder (for that immediate lift)
- 1 teaspoon salt
- 1/2 teaspoon baking soda (this loves the acid in the buttermilk!)
- 6 tablespoons unsalted butter, cut into tiny pieces—and yes, it must be cold!
- 3/4 cup buttermilk, also super cold
- 1 tablespoon melted butter (this is purely for drizzling the tops later—pure luxury, you deserve it)
Ingredient Notes and Substitutions for Buttermilk Biscuits
The buttermilk is our secret weapon because its acid reacts with the baking soda, creating those beautiful bubbles for fluffiness. If you run out, don’t panic! Just take one cup of regular milk and whisk in one tablespoon of white vinegar or lemon juice. Let it sit on the counter for five minutes until it curdles slightly. That’s a perfect substitute, and it gives you that necessary tang for the best texture.
Also, stick with unsalted butter if you can manage it. It lets you control the final salt level, which is key when you want that buttery flavor to shine through without being overly salty.
Essential Equipment for Perfect Buttermilk Biscuits
You don’t need a ton of fancy gadgets to make these, which I love! When I was working on the road, I learned you have to make magic with whatever cheap hotplate or basic mixer you have on hand. But a few simple tools really make the process smoother when you’re aiming for that Southern style perfection.
Here are the few things I always keep ready:
- A big, wide mixing bowl. You need space to toss everything around without making a huge mess.
- A pastry blender or even just two knives. You need this to cut that cold butter into the flour without warming it up with your hands too much.
- A sharp 2-inch biscuit cutter. This is vital! Having a clean edge lets the dough rise tall.
- A sturdy baking sheet. Parchment paper on the bottom is a must for super easy cleanup later!
That’s pretty much it! No stand mixer needed for these, just some good old elbow grease and careful measuring. Enjoy how simple this setup is for such amazing, tender baked goods.
Step-by-Step Instructions for Fluffy Buttermilk Biscuits
Okay, buckle up, because this is where the magic happens! Making our classic buttermilk biscuits is faster than you think, but the technique is everything. First thing’s first: make sure your oven is up to temperature—425 degrees Fahrenheit. We want a nice hot blast right away to encourage that lift! Line a baking sheet with parchment paper; trust me, trying to scrape off baked-on dough later is just not worth it.
In a big bowl, whisk those dry ingredients—flour, baking powder, salt, and baking soda—just to make sure they are totally distributed. Now, add your cold butter pieces. You need to “cut” that butter in. I use my fingers for this part because I can feel when it’s right, but if your hands are warm, grab a pastry blender! You’re aiming for a coarse meal with some pea-sized pieces of butter still visible. Those little pieces are going to create your flaky layers later on. Don’t blend it all smooth!
When you add your cold buttermilk, pour it all in at once and grab a fork (not a spoon!). Stir gently until the dough just barely comes together—it’ll look shaggy. Do NOT overmix here, or you start developing gluten, and suddenly your lovely biscuit turns into tough little hockey pucks. We are making tender baked goods, remember!
Turn that shaggy mess onto a lightly floured surface. Gently pat it out into a rectangle about 3/4 of an inch thick. Now, we laminate! Fold the dough into thirds, like folding a business letter. Give it a quarter turn, pat it back down to 3/4 inch, and fold it again. Repeat that one more time. This stacking builds atmosphere between those layers.
The Secret to Tall Flaky Biscuits: Folding and Cutting
That folding process is what creates those incredible vertical layers you see in the best Southern style biscuits. Once you’ve folded it a couple of times, it’s time to cut. Grab your biscuit cutter and press straight down—hard and fast—through the dough. Here’s the absolute cardinal rule of biscuit making: Do not twist the cutter! Twisting seals the edges right back up, and that traps any steam trying to escape, leading to dense sides instead of a high lift. If you press straight down, those layers can expand freely!
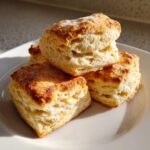
Place your cut dough onto the pan. If you want softer sides, push them close together so they bake into each other. If you like those crispy, slightly browned edges, give them a little space. Brush the tops with melted butter—it helps them get that gorgeous golden brown color—and pop them into that hot oven for about 12 to 15 minutes. You’ll know they’re done when they look tall and are perfectly golden brown on top!
Baking Tips for Golden Brown Buttermilk Biscuits
Getting that beautiful, buttery, golden brown biscuits technique down is all about timing that heat. Keep your oven hot! If the oven isn’t hot enough when the biscuits go in, the butter will melt before it steams, and you lose all your lift—flat biscuits guaranteed. Brushing the tops with that extra melted butter before they go in (and sometimes right when they come out) really boosts that rich, buttery flavor. This simple addition elevates these buttermilk biscuits from good to absolutely irresistible for breakfast or dinner.
If you want more inspiration for delicious sides while those are baking, check out how I make my Easy Homemade Garlic Herb Rice Pilaf; sometimes you just need something different to go alongside!
Comparing Techniques: Quick 3-Ingredient Buttermilk Biscuits
I totally get it—sometimes you need that quick comfort fix without all the folding and chilling. People love the Best 3-Ingredient Buttermilk Biscuits idea. That shortcut usually involves using self-rising flour instead of mixing together your own flour, baking powder, and soda. It’s super fast, and you can absolutely get a decent buttermilk biscuit that way.
But here’s the trade-off: the classic scratch method we just detailed gives you superior height and tenderness because you control the fat distribution and the structure through folding. The 3-ingredient versions are great for speed, but if you’re truly aiming for that tall flaky biscuit that screams Southern cooking staples, stick to the full recipe. You can learn more about other simple baking projects here: Easy 4-Ingredient Cheese Crackers Recipe.
Serving Suggestions for Your Homemade Buttermilk Biscuits
Now comes the best part: eating these warm, wonderful buttermilk biscuits! They are the ultimate comfort food baking project. Of course, the classic Southern way is soaking them in rich sausage gravy for hearty breakfast biscuits for gravy. But they are equally perfect split open with a smear of homemade jam or drizzled with honey.
If you’re serving them for dinner, they are fantastic alongside a big pot of stew or chili—they practically beg to sop up every last delicious drop. If you’re looking for the perfect pairing recipe that screams Southern, you have to check out my Authentic Southern Shrimp and Grits. Biscuits and grits? Yes, please!
Storage and Making Ahead Buttermilk Biscuits
These are, without a doubt, best eaten piping hot right out of the oven. The texture is unbeatable then! If you have leftovers, store your buttermilk biscuits in an airtight container at room temperature for up to two days. To reheat them and bring back that fluffy texture, skip the microwave if you can. I usually wrap them loosely in foil and pop them back into a 350-degree oven for about 5 to 7 minutes.
Want to make the dough ahead? You absolutely can! Once you cut them, place them on your baking sheet, cover them tightly with plastic wrap, and chill them for up to 24 hours. When you’re ready to bake, just brush them with butter and add about 3 to 5 extra minutes to the baking time since they are starting cold. You can find more great make-ahead tips here: Make Ahead Biscuits.
Frequently Asked Questions About Biscuit Making
Can I use regular milk instead of buttermilk for these buttermilk biscuits?
If you absolutely must, yes, you can use regular milk, but you lose out on so much lift! Buttermilk is acidic, and that acid reacts perfectly with the baking soda we added, creating tons of bubbles for a tender, fluffy rise. If you use regular milk (or even whole milk), you should skip the baking soda entirely and use only baking powder, or mix a tablespoon of lemon juice or white vinegar into regular milk and let it sit for five minutes to mimic the acid. It won’t be quite as good for those breakfast biscuits, but it’ll work in a pinch!
How do I prevent my biscuits from becoming tough or dry?
This is the number one complaint people have with homemade biscuits! Two things cause tough biscuits: using warm ingredients (especially the butter) and overmixing the final dough. You want to handle that dough as little as humanly possible once you add the liquid. Mix it just until everything comes together into a cohesive mass, then stop! If you keep kneading or mixing it like bread dough, you develop gluten, and gluten equals toughness. Keep that butter cold and your hands light!
Baking Tips for Golden Brown Buttermilk Biscuits
Getting that beautiful, buttery, golden brown biscuits technique down is all about timing that heat. Keep your oven hot! If the oven isn’t hot enough when the biscuits go in, the butter will melt before it steams, and you lose all your lift—flat biscuits guaranteed. Brushing the tops with that extra melted butter before they go in (and sometimes right when they come out) really boosts that rich, buttery flavor. This simple addition elevates these buttermilk biscuits from good to absolutely irresistible for breakfast or dinner.
If you want more inspiration for delicious sides while those are baking, check out how I make my Fluffy Buttermilk Biscuits: A Butter Lover’s Dream; sometimes you just need something different to go alongside!
Comparing Techniques: Quick 3-Ingredient Buttermilk Biscuits
I totally get it—sometimes you need that quick comfort fix without all the folding and chilling. People love the Best 3-Ingredient Buttermilk Biscuits idea. That shortcut usually involves using self-rising flour instead of mixing together your own flour, baking powder, and soda. It’s super fast, and you can absolutely get a decent buttermilk biscuit that way.
But here’s the trade-off: the classic scratch method we just detailed gives you superior height and tenderness because you control the fat distribution and the structure through folding. The 3-ingredient versions are great for speed, but if you’re truly aiming for that tall flaky biscuit that screams Southern cooking staples, stick to the full recipe. You can learn more about other simple baking projects here: Easy 4-Ingredient Cheese Crackers Recipe.
Serving Suggestions for Your Homemade Buttermilk Biscuits
Now comes the best part: eating these warm, wonderful buttermilk biscuits! They are the ultimate comfort food baking project. Of course, the classic Southern way is soaking them in rich sausage gravy for hearty breakfast biscuits for gravy. But they are equally perfect split open with a smear of homemade jam or drizzled with honey.
If you’re serving them for dinner, they are fantastic alongside a big pot of stew or chili—they practically beg to sop up every last delicious drop. If you’re looking for the perfect pairing recipe that screams Southern, you have to check out my Authentic Southern Shrimp and Grits. Biscuits and gravy are great, but biscuits with shrimp and grits? That’s next level!
Storage and Making Ahead Buttermilk Biscuits
These are, without a doubt, best eaten piping hot right out of the oven. The texture is unbeatable then! If you have leftovers, store your buttermilk biscuits in an airtight container at room temperature for up to two days. To reheat them and bring back that fluffy texture, skip the microwave if you can. I usually wrap them loosely in foil and pop them back into a 350-degree oven for about 5 to 7 minutes.
Want to make the dough ahead? You absolutely can! Once you cut them, place them on your baking sheet, cover them tightly with plastic wrap, and chill them for up to 24 hours. When you’re ready to bake, just brush them with butter and add about 3 to 5 extra minutes to the baking time since they are starting cold. You can find more great make-ahead tips here: Make Ahead Biscuits.
Frequently Asked Questions About Biscuit Making
It’s totally normal to have a few questions when you’re aiming for that perfect, tender baked good! Baking biscuits from scratch is satisfying, but sometimes the texture doesn’t cooperate right away. Ask me anything about getting your homemade buttermilk biscuits just right!
Can I use regular milk instead of buttermilk for these buttermilk biscuits?
If you absolutely must, yes, you can use regular milk, but you lose out on so much lift! Buttermilk is acidic, and that acid reacts perfectly with the baking soda we added, creating tons of bubbles for a tender, fluffy rise. If you use regular milk (or even whole milk), you should skip the baking soda entirely and use only baking powder, or mix a tablespoon of lemon juice or white vinegar into regular milk and let it sit for five minutes to mimic the acid. It won’t be quite as good for those breakfast biscuits, but it’ll work in a pinch! You can find more great easy breakfast recipes here for backup plans!
How do I prevent my biscuits from becoming tough or dry?
This is the number one complaint people have with homemade biscuits! Two things cause tough biscuits: using warm ingredients (especially the butter) and overmixing the final dough. You want to handle that dough as little as humanly possible once you add the liquid. Mix it just until everything comes together into a cohesive mass, and then stop! If you keep kneading or mixing it like bread dough, you develop gluten, and gluten equals toughness. Keep that butter cold and your hands light for the best possible tender baked goods.
PrintThe Ultimate Fluffy Southern Buttermilk Biscuits: Achieve Tall, Tender Perfection Every Time
Learn the method for making tall, tender, and buttery Southern buttermilk biscuits from scratch. This recipe focuses on technique to give you fluffy results perfect for breakfast or dinner.
- Prep Time: 15 min
- Cook Time: 15 min
- Total Time: 30 min
- Yield: 8 servings 1x
- Category: Breakfast
- Method: Baking
- Cuisine: American
- Diet: Vegetarian
Ingredients
- 2 cups all-purpose flour
- 1 tablespoon baking powder
- 1 teaspoon salt
- 1/2 teaspoon baking soda
- 6 tablespoons cold unsalted butter, cut into small pieces
- 3/4 cup cold buttermilk
- 1 tablespoon melted butter (for brushing tops)
Instructions
- Preheat your oven to 425 degrees Fahrenheit. Line a baking sheet with parchment paper or lightly grease it.
- In a large bowl, whisk together the flour, baking powder, salt, and baking soda.
- Add the cold, cubed butter to the dry ingredients. Use a pastry blender or your fingertips to cut the butter into the flour until the mixture resembles coarse crumbs with some pea-sized pieces of butter remaining. This step is key for flaky layers.
- Pour in the cold buttermilk all at once. Use a fork to gently mix until the dough just comes together. Do not overmix.
- Turn the dough out onto a lightly floured surface. Gently pat the dough into a rectangle about 3/4 inch thick.
- Fold the dough into thirds, like a letter. Turn the dough 90 degrees and gently pat it down again to about 3/4 inch thickness. Repeat this folding and turning process one more time. This builds layers.
- Use a 2-inch biscuit cutter to cut straight down through the dough. Do not twist the cutter, as twisting seals the edges and prevents a high rise.
- Place the cut biscuits close together on the prepared baking sheet for softer sides, or further apart for crispier sides.
- Brush the tops lightly with the melted butter.
- Bake for 12 to 15 minutes, or until the buttermilk biscuits are golden brown on top and cooked through.
- Remove from the oven and brush the tops again with any remaining melted butter for extra flavor. Serve warm.
Notes
- Keep all ingredients, especially the butter and buttermilk, very cold for the best rise and fluffiness.
- For the tallest biscuits, press the cutter straight down without twisting.
- If you prefer a quick shortcut, you can substitute the flour, baking powder, salt, and baking soda with 2 cups of self-rising flour and omit the baking soda.
- These biscuits are excellent served with sausage gravy or homemade jam.
Nutrition
- Serving Size: 1 biscuit
- Calories: 220
- Sugar: 1
- Sodium: 350
- Fat: 12
- Saturated Fat: 7
- Unsaturated Fat: 5
- Trans Fat: 0
- Carbohydrates: 25
- Fiber: 1
- Protein: 4
- Cholesterol: 25