
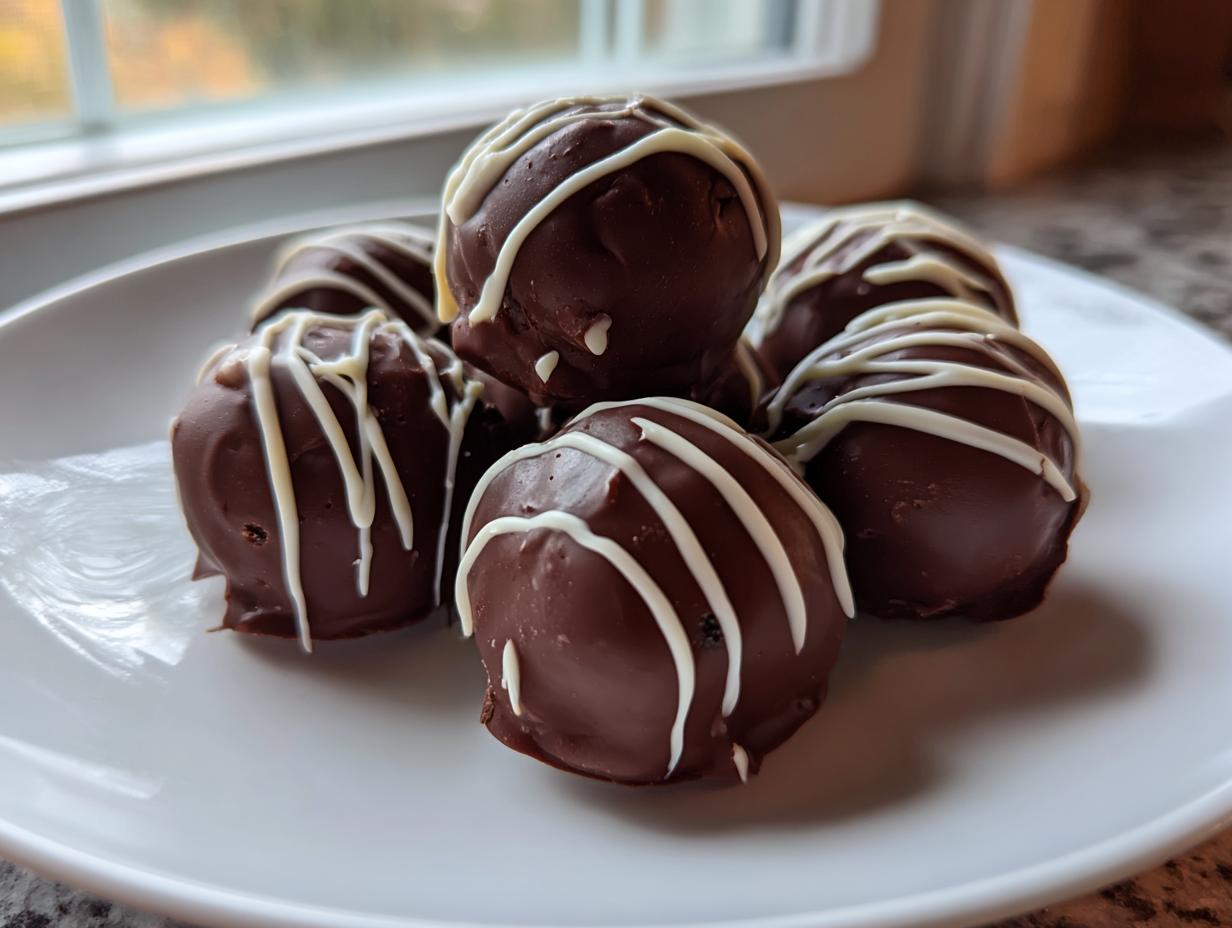
Look, when I was stuck on the road, eating gas station snacks and dreaming of something real, I learned that the most impressive things are often the simplest. You don’t need three different ovens or a week to prep a dessert that truly wows people. That’s why I’m obsessed with **oreo balls**. Seriously, these are the easiest, legit no-bake treats you will ever make. We’re talking intensely fudgy, chocolate-covered bites that signal “special occasion” but take maybe 20 minutes of actual work. Trust me, this classic recipe is a staple for guaranteed compliments, just like all the great treats I found on my travels. If you’re looking for amazing flavor without the fuss, stick around. You can find tons more easy recipes just like this one over in my [dessert recipes] collection!
- Why Our oreo balls Recipe Stands Out: The Quick Sweet Fix
- Gathering Your Supplies for Perfect oreo balls
- Ingredients for Cream Cheese oreo balls
- Step-by-Step Instructions for Making oreo balls
- Tips for Success with Your oreo balls Recipe
- Serving Suggestions for Party Snack Ideas Featuring oreo balls
- Storage & Reheating Instructions for oreo balls
- Frequently Asked Questions About oreo balls
- Estimated Nutritional Data for oreo balls
Why Our oreo balls Recipe Stands Out: The Quick Sweet Fix
We’ve all been there: you need a crowd-pleaser for a party or a holiday cookie exchange, and you can’t afford to babysit the oven. That’s where this recipe shines. Forget fussy cakes or temperamental pastries. This is the ultimate Quick Sweet Fix because it skips the baking entirely. When you’re making dessert, you want maximum impact for minimal effort, and these truffles deliver exactly that.
These treats truly earn their spot among Minimal Ingredient Desserts because you’re relying on the legendary flavor combination already perfected inside an Oreo. There’s no complicated chemistry here, just simple assembly that results in something that tastes gourmet.
No Oven Required: The Ultimate No Bake Oreo Truffles
If you see the word ‘bake’ and immediately start sighing, you’re in the right place! These are absolutely No Bake Oreo Truffles. We crush, mix, roll, and dip. That’s it. No preheating, no worrying about rising, and definitely no cleaning flour off your ceiling. This is the dream No Oven Dessert Recipe for busy people.
Minimal Ingredient Desserts for Maximum Impact
You’re basically using three main players: Oreos, cream cheese, and chocolate. That’s the magic trio! You don’t need fancy extracts or exotic spices to improve these oreo balls; the combo is perfect as is. It’s proof that the best things in life—and in the kitchen—are often the simplest ones.
Gathering Your Supplies for Perfect oreo balls
Before we dive into the mixing madness, we need our tools lined up. Since we skip the oven, we don’t need fancy pans, which is sweet! The most crucial item for crushing those cookies? A food processor makes this unbelievably quick. I mean, pure speed. But don’t stress if you don’t have one—a heavy-duty zip-top bag and a rolling pin work just as well; you just have to put a little elbow grease into it. You’ll also definitely need a sturdy mixing spoon, parchment paper to save your cleanup life, and maybe a sheet pan to host your chilly treats while they firm up. That’s all you need for fantastic oreo balls.
Ingredients for Cream Cheese oreo balls
Okay, step one in making these amazing oreo balls is gathering what we need. Since this is a no-bake recipe, we’re keeping the list short, but pay attention to the details here, because quality matters! You absolutely must start with one full package—that’s the standard 14.3 oz size—of those classic Oreo cookies. Don’t worry about picking out the filling; we want all of it for structure and flavor. Next up, your binder: the cream cheese. It needs to be a full 8 ounces, and I mean softened. Cold cream cheese will just leave you with frustrating lumps in your dough, and we want smooth sailing here!
Finally, the coating. You’ll need 12 ounces of good quality semi-sweet chocolate for the main dip. If you are feeling fancy, grab another 12 ounces of white chocolate for drizzling decorations later. That’s the core, folks. Four simple things make this easy oreo dessert!
Ingredient Notes and Substitutions for oreo balls
Variety is the spice of life, right? Maybe you swap half of your standard Oreos for peanut butter flavored ones—wow, talk about a tasty combo. Or go wild and use Golden Oreos if you really want a lighter color contrast with that dark chocolate shell.
Remember what I said about the food processor? If you went the rolling pin route, you’ll just need a lot more patience crushing those cookies. The texture needs to be fine crumbs, not chunky bits, so keep hammering away until you get there. If your dough ends up feeling a little soft before you roll, just pop the whole bowl in the fridge for an extra 15 minutes. It firms right up, no problem!
Step-by-Step Instructions for Making oreo balls
Now for the fun part—assembly! Don’t worry, this process is incredibly straightforward, but following these steps in order is how you get those perfect, fudgy oreo balls every single time. You’ll be amazed at how quickly these come together before they even hit the fridge.
Creating the Fudgy oreo balls Base
First things first: we need crumbs! Toss your entire package of Oreos right into your food processor and pulse until they look like fine, dark sand. Don’t leave big chunks—we want this to be smooth. Dump those crumbs into a sturdy bowl and bring in your softened cream cheese. Now, get your hands in there or use a strong spoon. You’ve got to mix this until everything is completely incorporated. Stop mixing when it all comes together like a thick, dark, beautiful dough. If you can squeeze a little bit and it holds its shape, you’re good to go!
Chilling and Rolling Your Simple Cookie Balls
This is a critical moment, so listen up! Before you try rolling anything, you need to chill the dough. Spread the mixture onto a parchment-lined baking sheet and stick it in the refrigerator for at least 30 minutes. If you skip this, the dough will stick to your hands like glue—and trust me, you want to avoid that sticky situation. Once chilled, scoop out small bits and roll them into balls about one inch across—nice and uniform for even dipping. Back onto the parchment sheet they go!
Mastering the Chocolate Coating for Decadent Chocolate Truffles
Time to melt that chocolate! I always melt mine in the microwave in short bursts—about 30 seconds at a time—stirring well after every blast. If you try to melt it all at once, you risk scorching it, and nobody wants seized chocolate on their beautiful oreo balls. Once your semi-sweet chocolate is silky smooth (and if you want to make a dipping sauce later, check out my guide on [chocolate fondue recipe]), grab one chilled ball with a fork.
Dip the ball completely under the chocolate, lift it out, and gently tap that fork on the side of the bowl to let the extra chocolate drip away. Pop it back onto the parchment. If you’re using white chocolate for decoration, drizzle it over the top immediately before the coating sets up. Now, just chill them again for a full hour until that coating is rock solid. These look so professional—they are truly Decadent Chocolate Truffles!
Tips for Success with Your oreo balls Recipe
You’ve got the process down, but let me drop a couple of travel-tested secrets to make sure your oreo balls are absolutely flawless. The biggest headache people run into is sticky dough; that’s why chilling the mixture for that full 30 minutes before rolling isn’t optional, it’s mandatory! Cold dough behaves. It’s reliable. It doesn’t fight you.
When melting your chocolate coating, remember that the microwave is a friend, but only if you treat it with respect. Stirring every 30 seconds prevents scorching. If your chocolate gets just a little too thick while you’re dipping, you can thin it out using a tiny bit of neutral coconut oil, which keeps the shiny finish. Don’t let that beautiful chocolate melt go to waste! For decoration guides and perfect dipping techniques, check out this great resource on [easy no-bake oreo balls]. Confidence in coating equals success with these bites!
Serving Suggestions for Party Snack Ideas Featuring oreo balls
The best part about making these oreo balls is how versatile they are! Because they are essentially perfect little bites of chocolatey goodness, they fit into almost any gathering you can think of. Seriously, these are the MVP of Party Snack Ideas because people just grab one and move on—no plates needed!
Around the holidays, especially Christmas, these are mandatory. They look so festive when dipped in dark chocolate and rolled in crushed candy canes or bright sprinkles. They make fantastic homemade gifts, too! You can package them up beautifully in small tins, and honestly, they keep so well in the fridge that you can make them ahead of time. That’s a huge relief before a big party, right?
If you’re not doing a holiday theme, they still disappear instantly. They are perfect for game nights, cookouts, or just when you need a major Quick Sweet Fix in the middle of the afternoon. Pair them with a big pitcher of something festive—I just posted a fantastic guide for a [crowd-pleasing Thanksgiving punch] that would go perfectly with these rich Bite Sized Desserts.
Because they are so rich, a little goes a long way. You don’t need huge platters of oreo balls; just a nice display on a tiered tray makes them look incredibly impressive. They vanish fast, so maybe make an extra batch just for yourself!
Storage & Reheating Instructions for oreo balls
One of the best things about these oreo balls—besides tasting amazing, of course—is that they keep incredibly well! Since we are dealing with cream cheese in the center, we can’t just let these sit on the counter all day like some hard candies. They belong in the fridge to stay happy and firm.
For everyday enjoyment, keep your finished, fully set oreo balls stored in an airtight container in the refrigerator. They stay perfectly fresh like this for a good week, maybe even ten days if you’re being super disciplined about letting everyone else have some! The chocolate coating locks in the moisture, so they won’t dry out, but the texture stays wonderfully dense and fudgy the whole time.
Now, if you’re planning ahead—and smart cooks always plan ahead!—they totally freeze like a dream. Place your tray of finished truffles in the freezer until they are hard, then transfer them into a freezer-safe bag or container. You can easily keep these in the freezer for about two months. When that sudden craving hits, just pull out as many as you need and let them thaw in the fridge for an hour or so. They come back to that perfect texture like magic. There’s no “reheating” needed, thank goodness, because that would melt all that beautiful chocolate coating!
Frequently Asked Questions About oreo balls
I know you might have a few questions buzzing around about your first batch of oreo balls. These are so simple that people often wonder if they missed a trick! Look, I’ve answered all the common ones right here so you can feel totally confident rolling these out for your next event.
Can I make oreo balls without cream cheese?
That is a tough one, and honestly, I have to say no if you want that classic, rich, slightly tangy flavor that makes these legendary. The cream cheese is what transforms the dry cookie crumbs into that perfect, dough-like texture; it acts as the binder and gives them that subtle “cake ball” quality. If you absolutely cannot use cream cheese, your next best bet for that firmness would involve using something thick like peanut butter or even melted white chocolate as the binder instead of the cream cheese. Just be aware that you are officially changing the recipe entirely when you do that, so the texture will be different!
What is the best chocolate for dipping No Bake Oreo Truffles?
For the absolute best, shiniest coating on your No Bake Oreo Truffles, you want good quality melting chocolate. I’m not talking about standard chocolate chips—those have stabilizers that make them thicker and sometimes dull looking when they set. Look for chocolate wafers or high-quality semi-sweet bars designed for dipping or candy making. If you want them to look *super* professional and snap perfectly when you bite in, a little bit of tempering is what you need, though it’s totally optional. For 99% of situations, just melting good chocolate slowly until it’s smooth will give you gorgeous results!
How long do these Quick Holiday Treats last in the fridge?
Since these are such amazing Quick Holiday Treats and keep so wonderfully, you can make them ahead of time, which I fully recommend! Because they contain that cream cheese, they need to stay chilled. Stored properly in an airtight container in the refrigerator, these oreo balls are fantastic for about a week to ten days. They seriously taste just as good on day seven as they did on day one. If you want to keep them even longer, freezing works great, but be sure to refer back to my storage tips for the best texture when thawing!
If you’re looking for some incredible breakfast ideas to balance out all this chocolate, check out my straightforward [easy breakfast recipes] page when you get a minute!
Estimated Nutritional Data for oreo balls
Now, I know my kitchen philosophy is all about flavor not fuss, but sometimes you just want to know the numbers, right? Since these oreo balls are so rich and decadently chocolatey, it’s good to know what you’re working with. Remember, what I give you here is just an honest estimate based on the standard ingredients listed, and it’s based on that serving size of just one little ball.
When you make these, you’re going to get an intense, truly satisfying treat. Here’s the quick breakdown per simple cookie ball:
- Calories: About 180 little powerhouses!
- Fat (Total): Around 11 grams.
- Carbohydrates: 19 grams.
- Protein: A smaller boost at 2 grams.
Since we throw in 8 ounces of cream cheese and plenty of chocolate, we’re definitely on the higher side for fat content, but that’s what makes them taste so unbelievably fudgy and satisfying—it’s the texture you pay for! Trust me, the payoff is worth every single gram when you bite into that perfect, smooth chocolate shell.
PrintEasy No-Bake Oreo Balls Recipe

Make rich, fudgy Oreo Balls using just a few simple ingredients. This no-bake dessert is perfect for holiday cookie exchanges or quick party snacks.
- Prep Time: 20 min
- Cook Time: 0 min
- Total Time: 1 hour 20 min
- Yield: About 24 servings 1x
- Category: Dessert
- Method: No-Bake
- Cuisine: American
- Diet: Vegetarian
Ingredients
- 1 package (14.3 oz) Oreo cookies
- 8 ounces cream cheese, softened
- 12 ounces semi-sweet chocolate, melted
- 12 ounces white chocolate, melted (optional, for dipping/decorating)
Instructions
- Place the entire package of Oreo cookies, filling included, into a food processor. Pulse until you have fine crumbs.
- Transfer the Oreo crumbs to a medium bowl. Add the softened cream cheese.
- Mix the crumbs and cream cheese together using a sturdy spoon or clean hands until the mixture is fully combined and resembles a thick dough.
- Roll the mixture into small balls, about 1 inch in diameter. Place the balls on a baking sheet lined with parchment paper.
- Chill the Oreo balls in the refrigerator for at least 30 minutes to firm them up. This step is important for easy dipping.
- Melt the semi-sweet chocolate in a microwave-safe bowl in 30-second intervals, stirring well after each interval until smooth. If using white chocolate for decoration, melt it separately.
- Dip each chilled Oreo ball into the melted chocolate, ensuring it is fully coated. Use a fork to lift the ball out, tapping the fork gently on the side of the bowl to let excess chocolate drip off.
- Place the coated balls back onto the parchment-lined sheet. If desired, drizzle with melted white chocolate or add sprinkles immediately before the coating sets.
- Refrigerate the finished Oreo Balls for at least 1 hour, or until the chocolate coating is completely firm.
Notes
- For a different flavor, substitute half the Oreos with vanilla wafers or use peanut butter flavored Oreos.
- If you do not have a food processor, place the cookies in a large zip-top bag and crush them thoroughly with a rolling pin.
- If the dough feels too soft before rolling, chill it for an extra 15 minutes.
Nutrition
- Serving Size: 1 ball
- Calories: 180
- Sugar: 18
- Sodium: 105
- Fat: 11
- Saturated Fat: 6
- Unsaturated Fat: 5
- Trans Fat: 0
- Carbohydrates: 19
- Fiber: 0
- Protein: 2
- Cholesterol: 15