
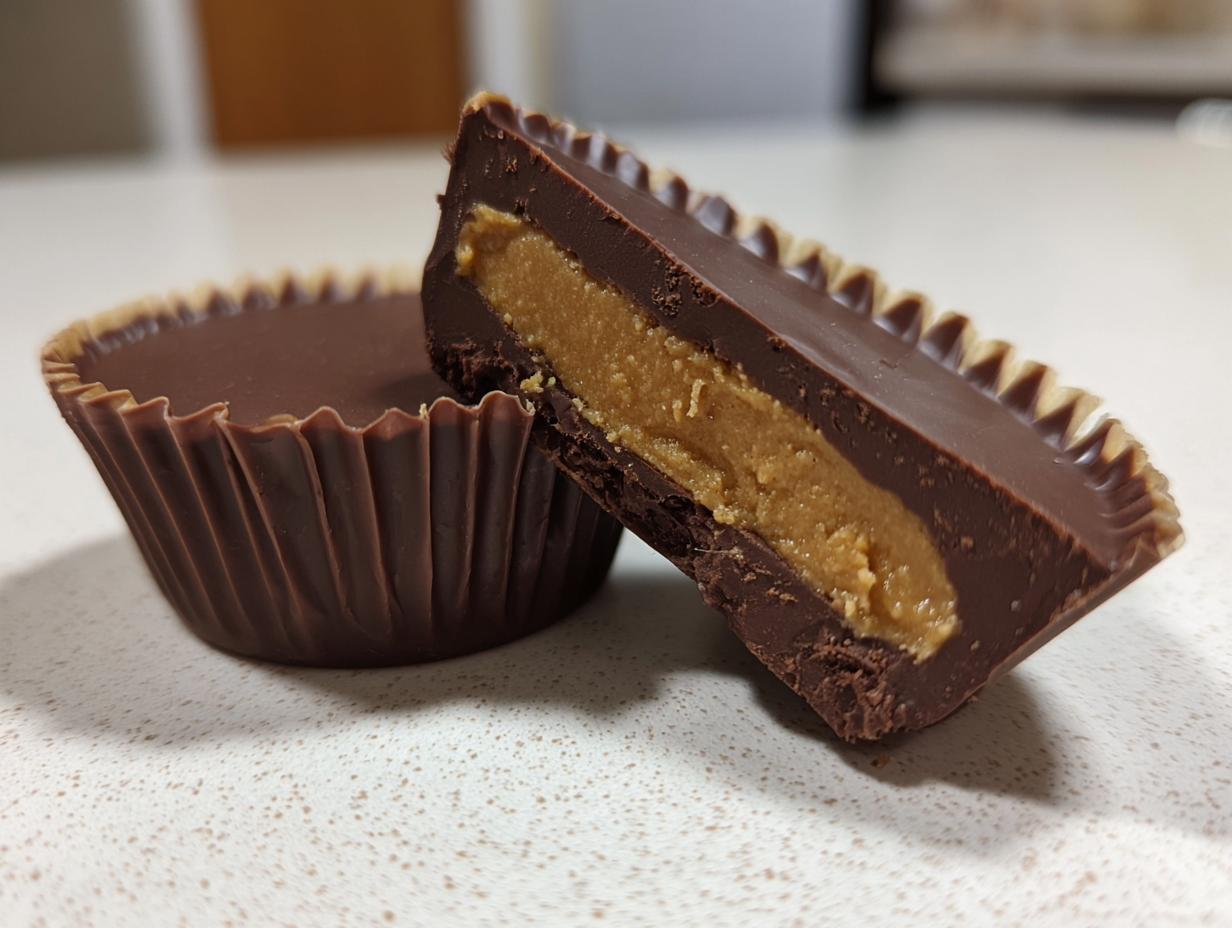
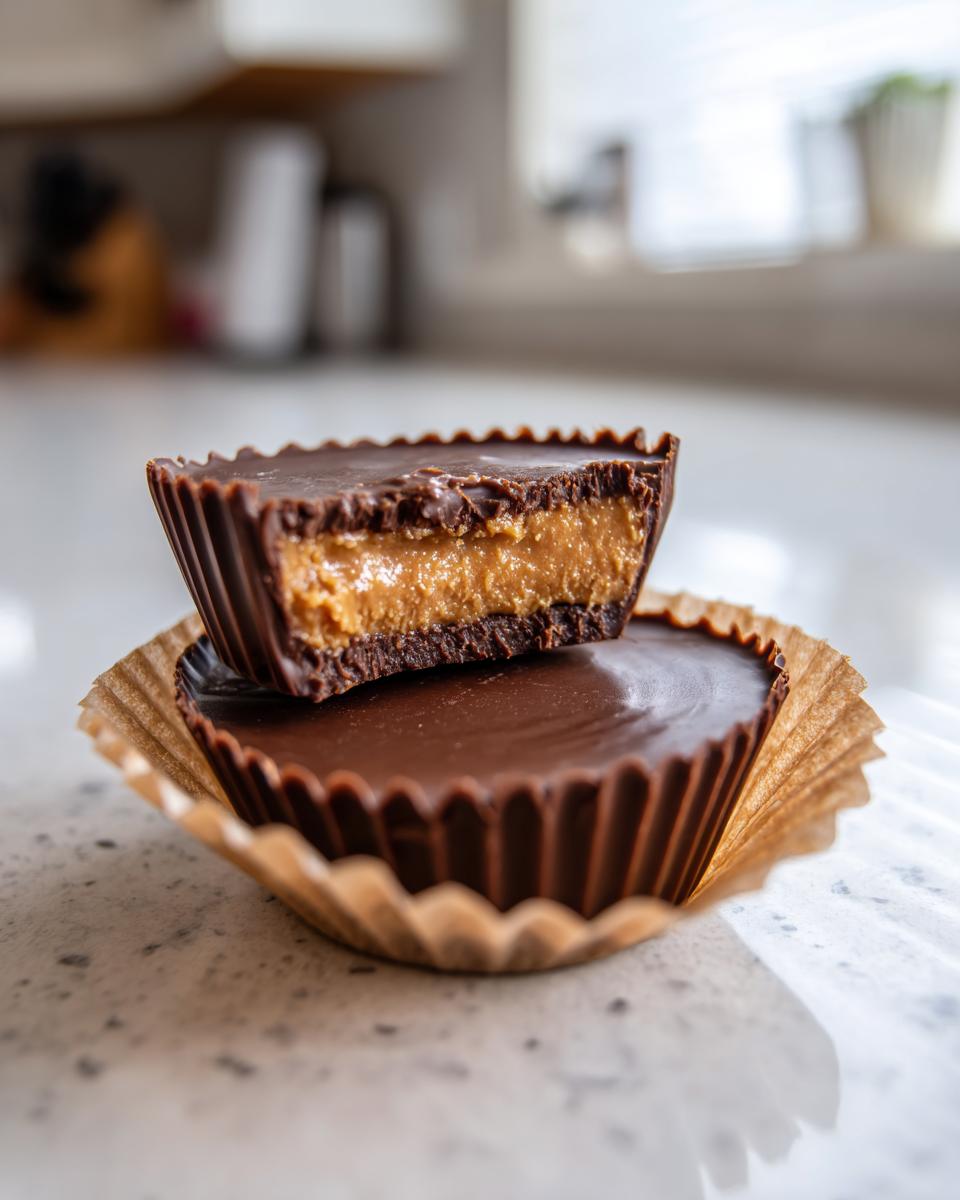
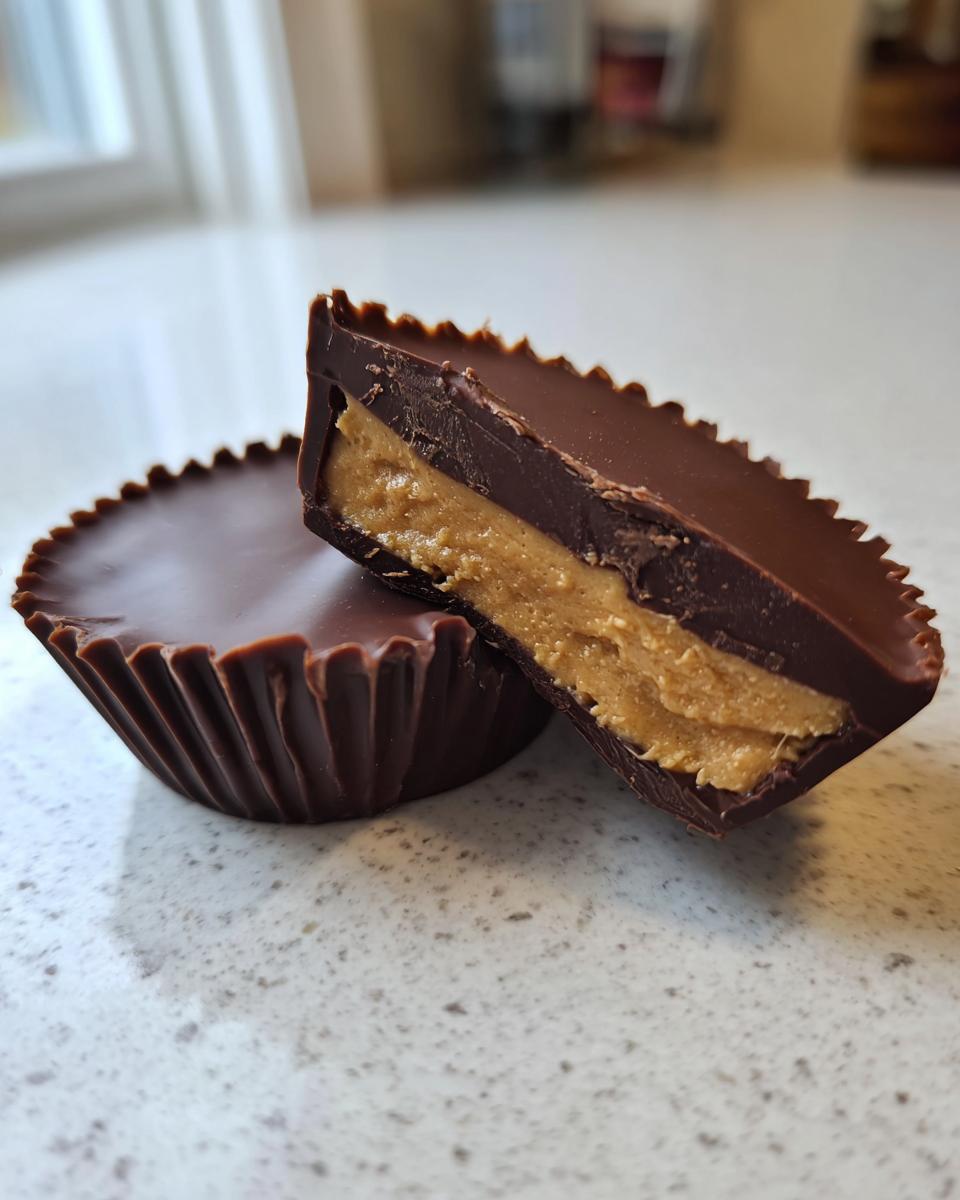
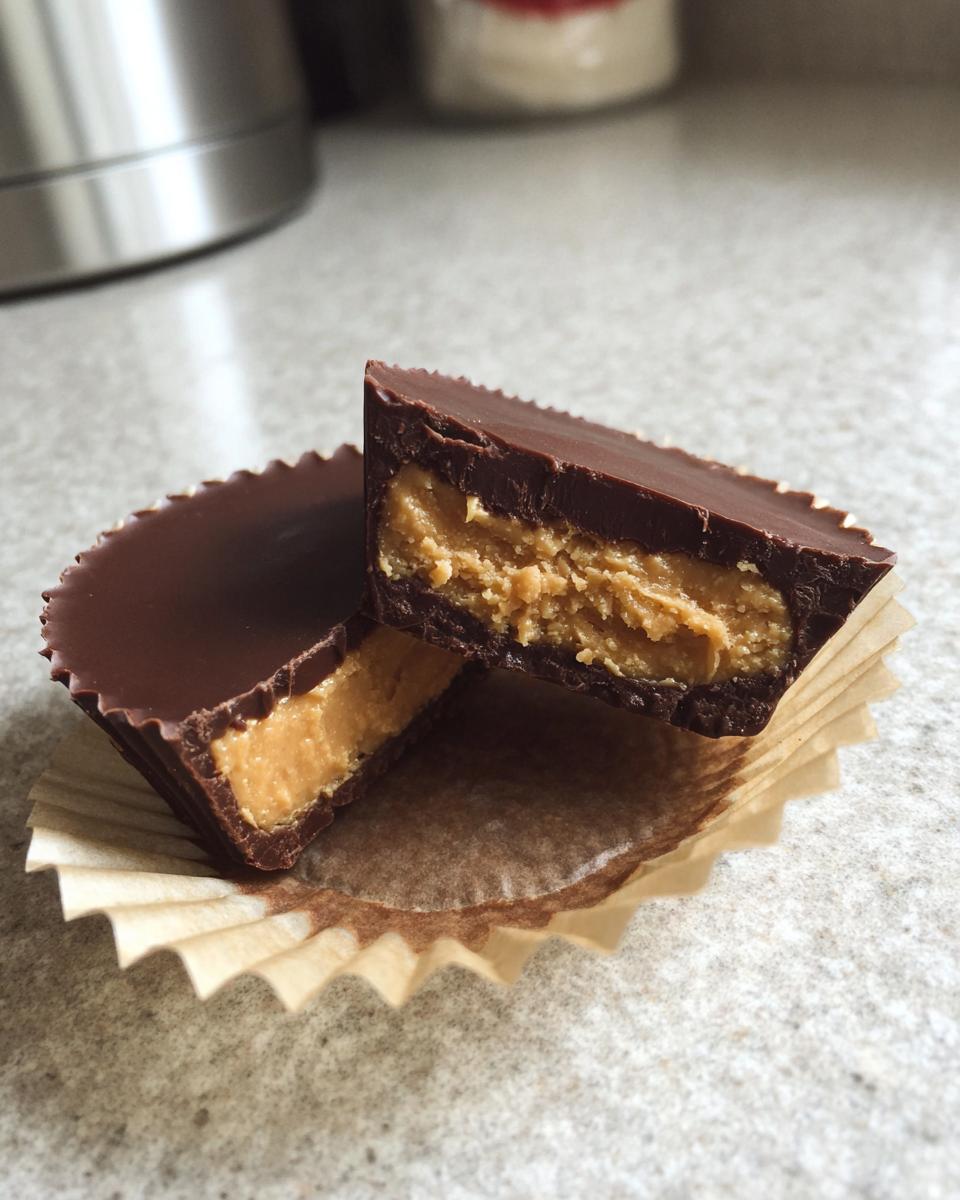
Look, some things just shouldn’t be complicated, right? Especially when it comes to that perfect combination of smooth, salty peanut butter hugged by rich, crisp chocolate. I learned on the road, scrambling for something quick and satisfying in hotel rooms, that the best sweet treats rely on simple ingredients and sheer passion. Forget those endless, fussy recipes! We’re making homemade peanut butter cups here—no oven required. This is my copycat candy recipe, and trust me, it beats the store-bought version every single time because we control the quality. If you’re craving a serious fix, this no bake peanut butter cups recipe is your new secret weapon for quick sweet treats. You’ll feel like you cracked the code to amazing chocolate peanut butter dessert making, just like I did, and it’s easier than waiting in line at the checkout!
If you loved this simple approach, you absolutely have to try my recipe for Cookie Butter Cheesecake Cups – pure, decadent magic made easy!
- Why You Will Love These Easy Peanut Butter Cups
- Essential Ingredients for Perfect Homemade Peanut Butter Cups
- Step-by-Step Instructions for No Bake Peanut Butter Cups
- Expert Tips for Making Amazing Peanut Butter Cups
- Variations on Classic Peanut Butter Cups
- Storing and Serving Your Freshly Made Peanut Butter Cups
- Frequently Asked Questions About Homemade Peanut Butter Cups
- Nutritional Estimate for These Peanut Butter Cups
- Share Your Homemade Candy Making Creations
Why You Will Love These Easy Peanut Butter Cups
I developed this recipe because life is too short for complicated candy making, especially when you crave something *now*. These aren’t just *good* peanut butter cups; they nail that nostalgic flavor profile you know and love. They are made for real life, which means maximizing deliciousness while minimizing effort.
- Quick Sweet Treats Ready Fast: Seriously, you’re looking at 15 minutes of active prep time and maybe 5 minutes of hovering over the microwave. That’s it! They set up fast in the fridge, so you aren’t waiting around forever.
- Copycat Candy Recipe Perfection: If you’ve been hunting for that unmistakable salty-sweet blend that reminds you of your favorite store-bought cup, this is it. We nail the flavor balance because we use simple, strong ingredients that shine together.
Essential Ingredients for Perfect Homemade Peanut Butter Cups
When you’re making a classic like this, you can’t skimp on the core components. It’s what separates a good treat from one that tastes genuinely nostalgic. We only need a handful of things, but how we treat them is what matters most. If you enjoyed making my quick fudge, you already know the power of simple mixing!
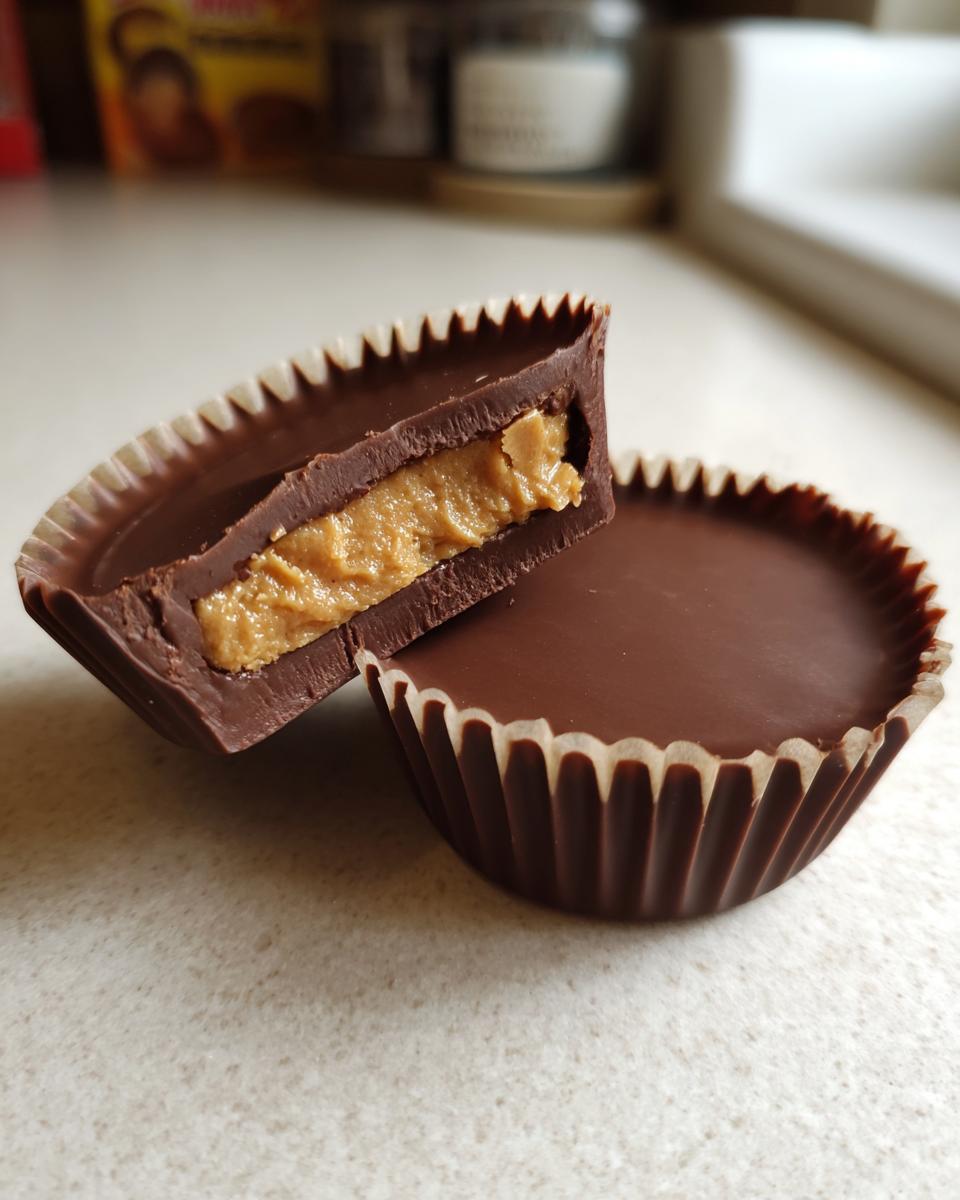
For the Decadent Chocolate Peanut Butter Filling
This is the heart of your candy, so don’t rush the texture here. You need 1 full cup of creamy peanut butter—I stress creamy because crunchy changes the whole mouthfeel. We soften 1/2 cup of unsalted butter until it’s perfectly yielding, then combine it with 2 cups of powdered sugar and 1 teaspoon of vanilla. Beat this until it becomes one blissful, smooth, uniform mixture. No lumps allowed!
For the Chocolate Coating on Your Peanut Butter Cups
For the coating, grab 12 ounces of milk or semi-sweet chocolate chips; whatever makes your heart sing. Here’s the pro tip: throwing in 1 tablespoon of coconut oil is optional but totally changes the game. That little bit of oil helps the melted chocolate stay incredibly smooth and glossy when it sets up, giving you that beautiful, clean snap when you bite in.
Step-by-Step Instructions for No Bake Peanut Butter Cups
Okay, this is where the magic happens, and honestly, it’s so satisfying watching this process come together without ever turning on the oven. Because these are no bake peanut butter cups, we are relying on the freezer and fridge to do the heavy lifting. If you’ve ever made my avalanche cookies, you know how crucial that chilling time is! Follow these steps exactly, and you’ll have perfect candy.
Preparing the Base Layer of Your Peanut Butter Cups
First things first: set up your stage. Line a standard 12-cup muffin tin with either paper liners or foil liners—this makes cleanup a breeze and helps release your beautiful candy later. Now, take that creamy peanut butter filling we mixed up. You are only going to use about two-thirds of it for this first layer. Press that goodness down firmly and evenly into the bottom of each liner. It needs to be a solid base! Once they are snug, pop the whole tin into the freezer for exactly 15 minutes. Don’t skip the freeze time; this step keeps our layers distinct!
Melting Chocolate and Layering the Peanut Butter Cups
While that base is setting, melt your chocolate chips—and that optional coconut oil if you have it—in a microwave-safe bowl. The key here is patience: microwave in 30-second bursts and stir really well after every interval until it’s completely glossy and smooth. You don’t want scorched chocolate! Once smooth, spoon the melted chocolate over your chilled peanut butter bases, making sure to cover that base layer completely. Now, take the remaining peanut butter mixture and gently press small dollops right into the center of that wet chocolate. Finally, spoon a thin layer of the remaining melted chocolate over the top to seal it all shut—it should look totally covered now. Back into the refrigerator they go for at least an hour. Seriously, let it chill until it’s firm!
Expert Tips for Making Amazing Peanut Butter Cups
Look, following the steps gets you a good result, but these little nudges are what elevate your homemade peanut butter cups from ‘nice try’ to ‘holy cow, you bought these, didn’t you?’ This is the stuff I picked up watching pros and messing up my own chocolate batches hundreds of times. I want you to bypass my mistakes! If you love this kind of simple, satisfying treat, you should definitely check out how I make my Buckeye Graham Crackers—same great flavor chemistry, different delivery system!
Achieving the Best Texture in Your Peanut Butter Cups
I know some people love texture, but if you are aiming for that iconic, melt-in-your-mouth commercial experience, you absolutely need the creamy peanut butter. Crunchy just changes the whole dynamic inside, and it won’t hold together quite the same way against the chocolate shell. Also, don’t be afraid to play with your chocolate type! If milk chocolate is too sweet for your taste, swapping in a good quality dark chocolate or even semi-sweet gives you a much richer counterpoint to the sweet filling. It makes these peanut butter candy recipe treats feel way more grown-up.
Finishing Touches for Your Homemade Candy Making
When you are spooning that final layer of chocolate on top, don’t let it just sit there naked! If you want that little ‘pop’ of flavor—and I highly recommend this—sprinkle the tiniest pinch of sea salt over the wet chocolate before you put them in the fridge. It seriously cuts the richness perfectly. Now, this should be a given because we talked about it, but make sure those cupcake tin candy liners are snug. Dealing with chocolate that has oozed out the bottom is the fastest way to ruin your day. I always give the tin a little gentle shake before chilling just to make sure those liners are seated properly for easy removal later!
Variations on Classic Peanut Butter Cups
So, you’ve nailed the classic, better-than-the-original recipe, but maybe your sweet tooth needs a little twist next week, or maybe you’re trying to make these guilt-free for meal prep. That’s the beauty of learning how to make your own peanut butter cups—you get to customize! I love showing off that flexibility because cooking should fit your life, not the other way around. If you’re looking for something creamy but different next time, definitely look over my recipe for Kiss Cookies; it uses that classic PB flavor in a new way!
Making Healthy Peanut Butter Cups Swaps
If you’re trying to lighten things up, you have a few great paths to take here. Instead of relying solely on powdered sugar, some folks swap half of it out for a finely ground alternative sweetener they prefer, like erythritol or monk fruit blend. You can also experiment with the nut butter base; using almond butter or sunflower seed butter completely changes the flavor profile while keeping that essential texture. It won’t taste exactly like Reese’s, but it’s a fantastic, slightly more wholesome route to a great chocolate peanut butter dessert.
Protein Peanut Butter Cups for Fuel
This is where things get really interesting if you need a post-workout hit or just a more filling snack. The filling base is surprisingly robust, so it handles additions really well. I suggest using a vanilla or unflavored protein powder—start small, maybe 1/4 cup—and mix it right in with the peanut butter, butter, and sugar. You might need to add an extra splash of vanilla or a spoonful of peanut butter to keep it from getting too dry, but adding protein powder turns these simple treats into something that actually works for fuel. They still chill up beautifully!
Storing and Serving Your Freshly Made Peanut Butter Cups
Once you’ve perfected these homemade peanut butter cups, the next big question is how to keep that perfection going! Since they are totally no-bake and rely on that lovely butter and chocolate combination, storage is pretty important for maintaining that satisfying, crisp shell and the creamy center. I learned years ago that leaving them out on the counter means messy fingers and melted chocolate disasters, so you need a strategy.
The best place for these is definitely airtight. You want them totally sealed in a container—I use Tupperware or sturdy plastic containers—and kept in the refrigerator. They hold up beautifully in the fridge for a good week, sometimes even longer if your pantry is extra warm. If you plan on making a massive batch (which you totally should, these disappear fast!), the freezer is your friend.
Wrap them tightly first, maybe even wrap the whole container in foil, and they freeze perfectly for up to two months. When you want one, just pull it out. Seriously, they taste fantastic straight from the fridge or freezer, but if you need them softer, just let them sit on the counter for about 10 to 15 minutes. That little bit of time softens the chocolate just enough to give you that perfect, decadent melt. If you’re looking for other easy make-ahead staples, check out my secrets for Homemade Tartar Sauce—easy prep means less stress later on!
Frequently Asked Questions About Homemade Peanut Butter Cups
I know sometimes even the easiest recipe can leave you with a random question popping up. That’s fine! I get so many messages about these because everyone wants their peanut butter cups to be absolutely perfect. Think of this like a quick chat over the counter while we wait for them to chill. For more amazing easy dessert ideas, make sure you bookmark my page for Chocolate Pudding!
Can I use crunchy peanut butter in these peanut butter cups?
You certainly *can*, but I really wouldn’t if you’re trying to mimic that classic store-bought texture. The whole point of this copycat candy recipe is that soft, creamy filling that sort of melts against the shell. Crunchy peanut butter turns it into a slightly different candy altogether—more textural, less smooth. If you use it, expect a grittier experience inside. Keep the creamy stuff handy for the best results!
What is the best way to get the chocolate coating smooth?
Smoothness is key to that satisfying snap! The easiest trick, which I mentioned, is that tiny bit of coconut oil mixed right into the chocolate chips before microwaving. It lowers the melting point just enough to keep things silky. If you absolutely hate coconut oil, your next best bet for super smooth chocolate is using a double boiler method instead of the microwave. That gentle, indirect heat prevents scorching, which is what causes chocolate to seize up and look dull or grainy. Nobody wants grainy chocolate on their homemade candy making masterpiece!
Nutritional Estimate for These Peanut Butter Cups
Okay, let’s talk fuel for a second. I know when I’m making a batch of these peanut butter cups, I’m not exactly aiming for diet food—these are meant to be an indulgence! But I always try to give people a general idea of what they are diving into. After running the numbers for an average serving size (one cup, made according to the recipe card), here’s what we are looking at. Remember, this is just an estimate, a ballpark figure, because the brand of peanut butter and the percentage of fat in your chocolate chips can change these numbers slightly.
This is based on a 12-cup yield, which is great for portion control, even if we usually end up eating two right away! If you decide to make healthy peanut butter cups using lighter ingredients, your numbers will obviously shift quite a bit.
- Serving Size: 1 cup
- Calories: 280
- Fat: 18g
- Saturated Fat: 7g
- Carbohydrates: 28g
- Sugar: 25g (Yes, that’s the fun part!)
- Protein: 6g
See? Not too bad for a decadent homemade candy treat! The protein comes mainly from the peanut butter, which helps balance out all that glorious sugar. Enjoy them responsibly, which is another way of saying: hide a few from the rest of the family before they disappear!
Share Your Homemade Candy Making Creations
Now that you’ve made the absolute best peanut butter cups known to humankind, I really want to hear about it! My mission here at YumDrizzle is to make sure *you* feel confident heading into the kitchen, and nothing proves that better than seeing your finished products. Did you manage to keep your hands off them until they were totally set? Did you try the sea salt sprinkle? I want to know all the details!
Please take a second and leave a rating right below this box—it truly helps other folks who are looking for a solid, easy peanut butter cups recipe know that this one is the real deal. And hey, if you snapped a picture of your perfect little candy creations cooling on the counter, tag me on social media! Seeing your successes—especially when you’re conquering homemade candy making for the first time—is what keeps me inspired to share more road-tested, real-life recipes.
If you want even more simple indulgences that deliver big on flavor without needing fancy techniques, you can always browse through all my guaranteed-to-work Dessert Recipes!
PrintEasy Homemade Peanut Butter Cups: Better Than The Original

Make these simple, no-bake peanut butter cups at home. This copycat recipe delivers the classic chocolate and peanut butter flavor you crave using just a few common ingredients.
- Prep Time: 15 min
- Cook Time: 5 min
- Total Time: 20 min
- Yield: 12 servings 1x
- Category: Dessert
- Method: No-Bake
- Cuisine: American
- Diet: Vegetarian
Ingredients
- 1 cup creamy peanut butter
- 1/2 cup unsalted butter, softened
- 2 cups powdered sugar
- 1 teaspoon vanilla extract
- 12 ounces milk chocolate chips (or semi-sweet chocolate chips)
- 1 tablespoon coconut oil (optional, for smoother chocolate)
Instructions
- Line a 12-cup muffin tin with paper or foil liners.
- In a medium bowl, mix the peanut butter, softened butter, powdered sugar, and vanilla extract until you have a smooth, uniform filling.
- Press about two-thirds of the peanut butter mixture evenly into the bottom of each liner, forming the base layer.
- Place the muffin tin in the freezer for 15 minutes to set the base.
- In a microwave-safe bowl, combine the chocolate chips and coconut oil (if using). Microwave in 30-second intervals, stirring well after each, until the chocolate is completely smooth.
- Spoon the melted chocolate over the chilled peanut butter base in each liner, covering it completely.
- Take the remaining peanut butter mixture and gently press small amounts onto the center of the melted chocolate layer in each cup.
- Top with a final thin layer of melted chocolate to seal the peanut butter layer.
- Return the muffin tin to the refrigerator and chill for at least 1 hour, or until the chocolate is firm.
- Peel off the liners and serve your homemade peanut butter cups.
Notes
- For a richer flavor, use dark chocolate instead of milk chocolate.
- If you want a slightly salty finish, sprinkle a tiny pinch of sea salt on top of the final chocolate layer before chilling.
- You can use any type of nut butter, but creamy peanut butter gives the closest texture to the commercial version.
Nutrition
- Serving Size: 1 cup
- Calories: 280
- Sugar: 25
- Sodium: 110
- Fat: 18
- Saturated Fat: 7
- Unsaturated Fat: 11
- Trans Fat: 0
- Carbohydrates: 28
- Fiber: 1
- Protein: 6
- Cholesterol: 15