
Oh my gosh, is there anything better than walking into your kitchen and being hit by the warm, yeasty cloud coming off a freshly baked loaf? Seriously, that smell knocks me out every single time! I’m so excited to show you how we nail that incredible bakery-style crusty italian bread right here at home. After years on the road, seeing what real people cook with basic stuff, I learned that amazing flavor doesn’t need fancy tricks. This recipe proves it! We’re using simple pantry ingredients to get that golden, crunchy exterior and the soft, chewy interior everyone fights over. If you’ve been intimidated by bread before, trust me, this is the one that’s going to give you huge confidence. It just *works*.
- Why This Easy Crusty Homemade Italian Bread Recipe Works
- Gathering Ingredients for Your Italian Bread
- Step-by-Step Instructions for Perfect Italian Bread
- Tips for Achieving Bakery Style Italian Loaf Success
- Serving Suggestions for Your Homemade Italian Bread Recipe
- Storage and Reheating Instructions for Italian Bread
- Frequently Asked Questions About Making Italian Bread
- Estimated Nutritional Data for Italian Bread
- Share Your Fresh Baked Bread Aromas
Why This Easy Crusty Homemade Italian Bread Recipe Works
So, why is this my absolute go-to for italian bread? Because it delivers on the biggest promise: that hard-to-achieve texture without the fuss! My entire philosophy here at YumDrizzle, which I learned spending years making simple food taste amazing on the road, is making things accessible. This recipe is the definition of beginner bread making success.
You get exactly what you want:
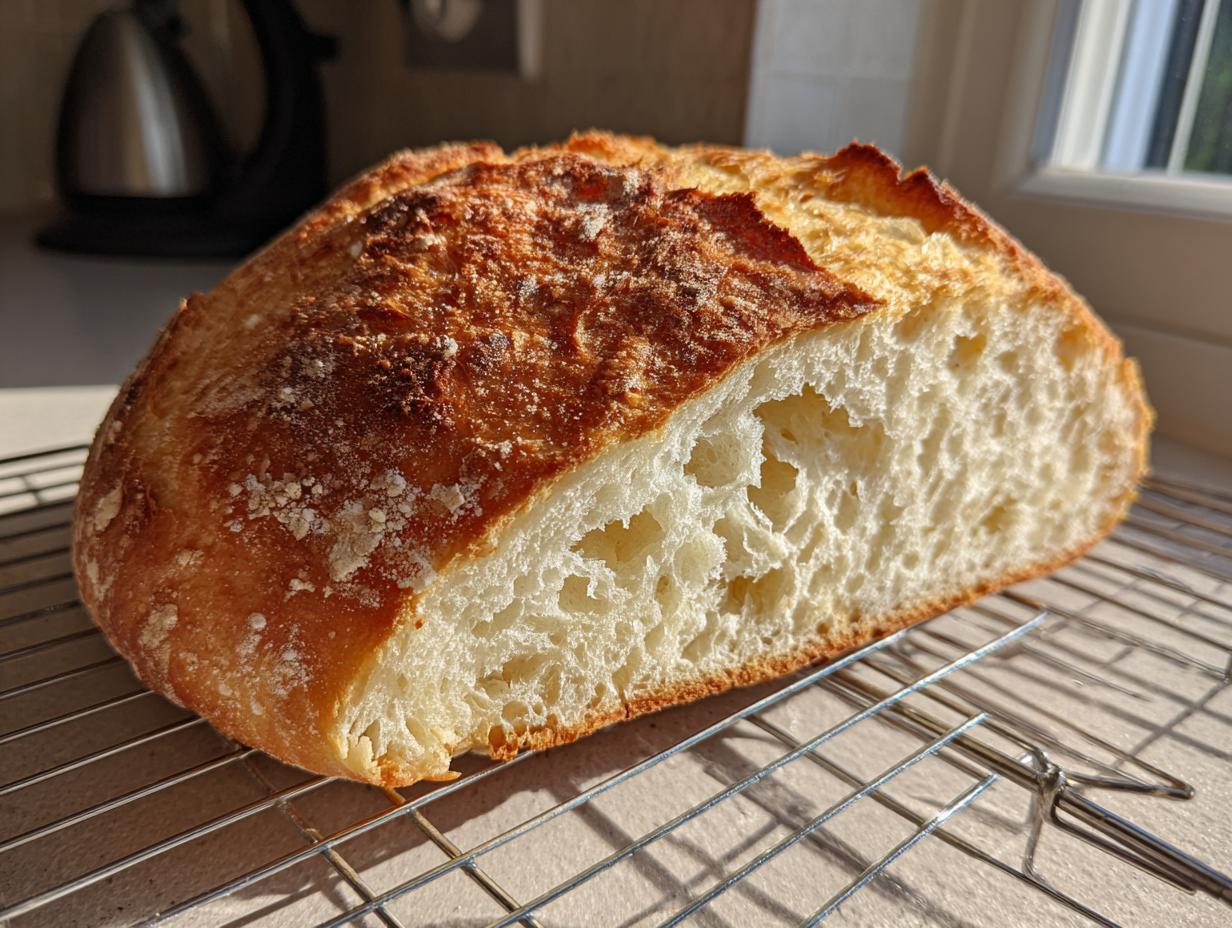
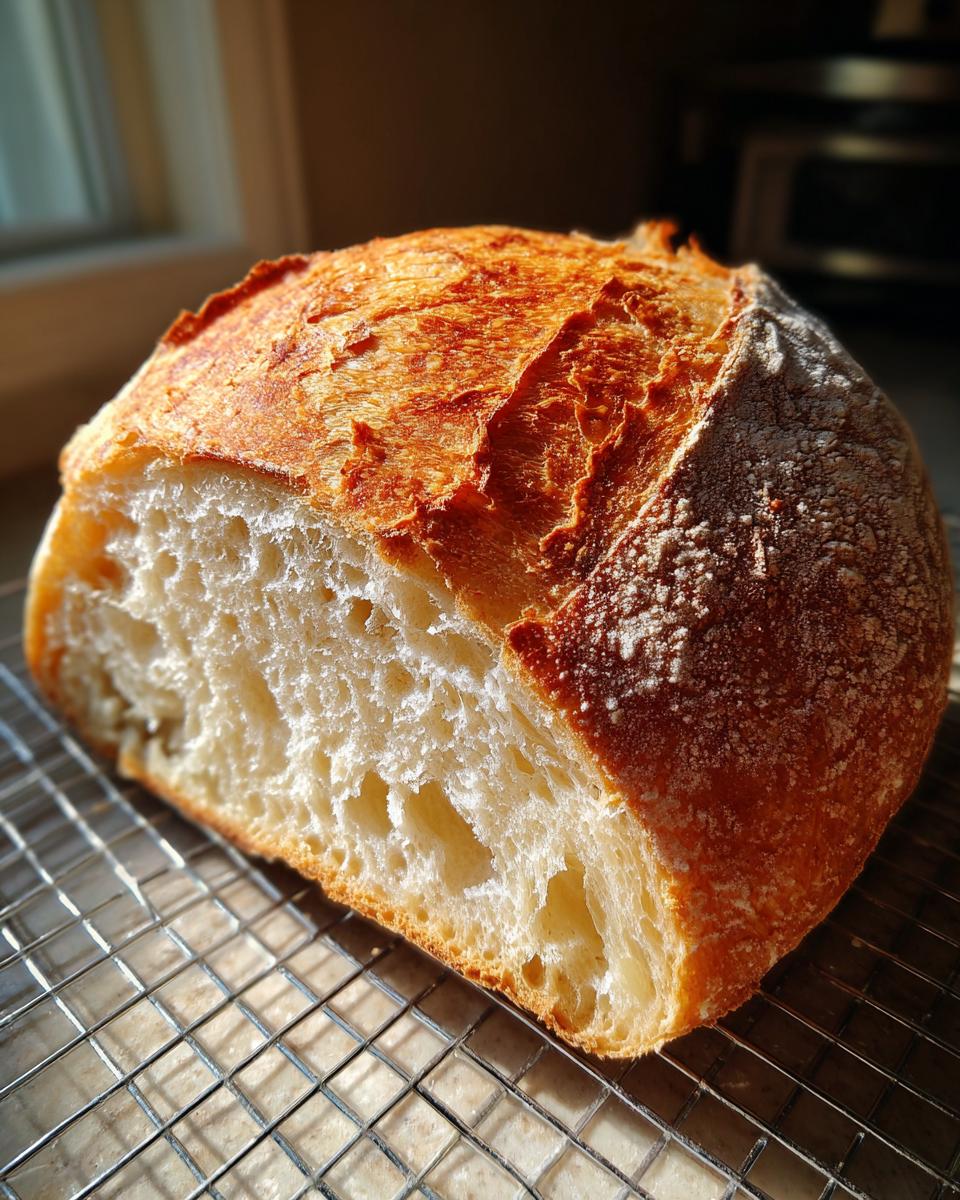
- A crust that snaps when you slice it—that beautiful golden brown crust bread look.
- An interior that stays wonderfully soft and chewy italian loaf style, not dense or flat.
- The technique is straightforward; we’re not messing around with complicated overnight fermentation for this one. It’s designed for weeknight dinners!
This formula creates that perfect soft inside crusty outside bread combo every single time. Check out our story to see how we focus on resourcefulness in the kitchen: this recipe builds on that idea.
Gathering Ingredients for Your Italian Bread
For this homemade italian bread recipe, I kept the ingredient list super tight. Why? Because great bread shouldn’t require a trip to a specialty store! Everything listed below—flour, salt, sugar, yeast, oil, and water—should be sitting in your pantry right now. That’s the beauty of classic baking; we rely on technique, not exotic supplies. You’ll be amazed at the fresh baked bread aromas that come from these simple components.
Here is exactly what you need for one beautiful, rustic loaf:
Flour: 3 1/2 cups all-purpose.
Salt: 1 1/2 teaspoons.
Sugar: 1 teaspoon granulated.
Yeast: 2 1/4 teaspoons active dry yeast (that’s one standard packet).
Liquid: 1 1/2 cups warm water.
Fat: 1 tablespoon olive oil, plus a little extra for coating the bowl.
Ingredient Notes and Simple Substitutions
Listen, the yeast needs a little wake-up call, so make sure that water is truly warm—think bath water temperature, around 105°F to 115°F. If it’s too hot, you kill the little guys dead; too cold, and they sleep in! This recipe calls for active dry yeast, but if you have instant yeast, you can skip the proofing step where you wait for the foam; just mix it right in with the dry ingredients. It saves like five minutes!
Step-by-Step Instructions for Perfect Italian Bread
Okay, here’s where the magic happens in this Quick Italian Bread Tutorial. Don’t worry about rushing, though; bread respects patience! We’re going to move through this steadily so you get that perfect texture you’re craving. Remember that steam we talked about? It’s our secret weapon for that incredible crunch, but we’ll save that explanation for the baking step.
Mixing and Kneading the Italian Bread Dough
First up, we combine things gently. Toss all your dry goods—flour, salt, and sugar—into your biggest bowl. In a separate spot, proof that yeast in your warm water until it gets nice and foamy; five minutes max. Once it’s bubbly, pour everything—yeast water and that tablespoon of olive oil—into the dry stuff.
Mix it up until it really just looks like a messy, shaggy dough. Now, dump it onto your counter and get friendly with it! You need to knead this dough for about 5 to 7 minutes. Don’t stop until that dough transforms from sticky and rough into something smooth, slightly grippy, and elastic. When you poke it, it should slowly spring back at you. That’s how you know the gluten is happy!
The First Rise and Shaping Your Italian Bread Loaf
Grab that oiled bowl again. Give the dough a quick roll around so it’s coated in oil—this stops a dry skin from forming. Cover it up tight with plastic wrap or a clean towel. Find the warmest, draft-free spot in your kitchen for this. You’re waiting for it to double in size, which usually takes between an hour to an hour and a half. Don’t peek too much!
When it’s puffed up and looking proud, give it a gentle punch down—just deflate it slightly. Now, roll it out gently on that lightly floured surface into the shape of a classic loaf, maybe a nice oval. Place that shaped loaf on your baking sheet lined with parchment paper.
Baking for a Golden Brown Crust Bread
We need the oven hot, so crank it up to 400°F (200°C) while the dough rests for its final 30 minutes. This is crucial! While it’s resting, grab a shallow pan and put it on the bottom rack while the oven heats up. That pan is where the steam comes from later.
When it’s time to bake, brush the top of the loaf lightly with water—this encourages color and crispness. If you’re feeling fancy, grab a sharp knife and score the top once or twice. Pop the loaf in the oven, and immediately pour about a cup of hot water into that preheated bottom pan—watch out for the steam! Bake for 30 to 35 minutes until you have that incredible golden brown crust bread and the center hits about 200°F. Cooling it completely on a rack is the hardest part, trust me!
If you want to make sure you get that crispness just right, check out these extra pro tips for crust building: getting that perfect bakery crust is easier than you think!
Tips for Achieving Bakery Style Italian Loaf Success
Okay, let’s talk about conquering that bakery style Italian loaf appearance at home. Even after you think you’ve nailed the bake, the crust can sometimes be a little soft, right? The number one secret, and I cannot stress this enough, is the steam during baking. That pan of hot water on the bottom rack? It needs to be roaring hot when you splash in more water just as the bread enters the oven. That initial blast of moisture keeps the dough surface flexible so it can expand fully before the crust sets hard!
I remember the first time I tried that steam trick—I was so nervous I splashed water all over the oven door, not just the pan! But wow, when I pulled that loaf out, the crust actually *cracked* slightly as it cooled. It was the loudest, most satisfying sound! Don’t forget to cool it completely on a rack too; trapping steam underneath makes the bottom soggy, which ruins the whole effect. If you ever need to reach out with questions about humidity control, my virtual door is always open here: feel free to connect.
Serving Suggestions for Your Homemade Italian Bread Recipe
Now that you have this amazing, crackly loaf of homemade italian bread, what should you do with it? Honestly, sometimes I just stand over the cooling rack and tear off chunks plain! But if you’re serving it up for dinner, ditch the dried-out grocery store rolls. This loaf is begging to be used in some awesome dipping bread recipes.
Seriously, warm up some good quality olive oil with a little balsamic vinegar and maybe some crushed garlic—that’s basically heaven. It’s the perfect dinner side bread recipe to sop up every last bit of sauce from your favorite spaghetti or lasagna. And forget sandwiches; even simple turkey and provolone tastes gourmet stuffed inside this chewy interior!
If you want more ideas on how to serve up your crusty masterpiece, check out some inspiration here: serving crusty bread is an art!
Storage and Reheating Instructions for Italian Bread
Okay, so you baked the perfect loaf. High five! Now the real challenge: keeping that crust great for tomorrow. Don’t wrap it up tightly in plastic wrap right away! That traps moisture and makes the crust sad and leathery fast. Let it cool completely on a wire rack—this is non-negotiable for keeping the crunch.
Once that wonderful italian bread is totally cool, wrap it loosely in a clean kitchen towel or paper bag. Keep it on the counter. If you need to stretch it into another day, the best trick for reviving that bakery feel is a quick trip back to a hot oven (about 350°F) for just five minutes. Boom! Instant, fresh-from-the-oven crustiness returns.
Frequently Asked Questions About Making Italian Bread
I get so many questions about this recipe, which makes total sense because baking bread can sometimes feel like a science experiment! Here are some of the most common things folks ask when they dive into making their first homemade italian bread.
Can I make this Italian bread recipe without kneading?
You absolutely *can* skip the 5-to-7-minute knead, and it will turn into something closer to a rustic, slightly softer loaf often called No Knead Italian Bread. However, for the specific texture we are aiming for—that chewy crumb and structured shape—kneading is really important! It builds the gluten structure that gives that satisfying internal chew.
How long does this homemade Italian bread stay fresh?
Because this is a lovely, lean dough (meaning no added fats besides the olive oil), it’s best enjoyed the day it’s baked, of course! If you stored it correctly (loosely wrapped, not airtight), you can expect it to be pretty good for about 48 hours. After that, the crust definitely softens up, but that’s what reheating is for!
Why didn’t my dough double in size?
Ugh, the rising stage! This is usually due to water temperature if you didn’t proof the yeast correctly, or if your kitchen is just plain cold. Bread yeast needs happy warmth to wake up and get busy. If your kitchen is chilly, just try placing the bowl near a sunny window or even inside a turned-off oven with the light on. That little bit of warmth does wonders for a slow rise!
Is there a way to make this faster?
While this is already one of our faster methods—it’s a great quick bread baking option—you can speed up the rising time by using slightly warmer water (but still under 115°F!) and placing the dough somewhere toasty. Remember, rushing the rise is risky, though. You want that slow, gentle expansion for the best flavor in your artisan bread at home experience!
If you have any other specific troubleshooting questions about your bake that aren’t covered here, please feel free to check out our policy pages, or reach out!
Estimated Nutritional Data for Italian Bread
Look, I’m a baker, not a nutritionist! I learned that great food comes from satisfying your soul, and this italian bread definitely does that. Since we use basic ingredients, it’s not too heavy, but remember that these numbers are just estimates based on my measurements. Brands of flour and oil can change things, so take this as a general guide for when you’re serving this perfect loaf alongside your meal.
For one slice, here is what you can roughly expect:
- Calories: About 180
- Fat: About 1.5g
- Carbs: Around 37g
- Protein: Roughly 6g
Enjoy that warm, crusty goodness! That’s the real data that matters here!
Share Your Fresh Baked Bread Aromas
Now that you’ve got amazing, bakery-worthy italian bread cooling on the rack, I absolutely need to hear about it! Did that crust crackle perfectly? Did your kitchen smell incredible? Please leave a rating below and drop a comment telling me how your first loaf turned out. There’s nothing better than knowing you nailed that perfect homemade loaf. We stand by our terms of use, but more importantly, we stand by your baking success, so share your joy! You can check out our terms of use anytime.
PrintEasy Crusty Homemade Italian Bread
Bake bakery-style Italian bread at home with this simple recipe. You get a golden, crunchy crust and a soft, chewy interior using basic pantry ingredients.
- Prep Time: 20 min
- Cook Time: 35 min
- Total Time: 2 hours 25 min
- Yield: 1 loaf 1x
- Category: Baking
- Method: Baking
- Cuisine: Italian
- Diet: Vegetarian
Ingredients
- 3 1/2 cups all-purpose flour
- 1 1/2 teaspoons salt
- 1 teaspoon granulated sugar
- 2 1/4 teaspoons active dry yeast (1 packet)
- 1 1/2 cups warm water (about 105-115°F)
- 1 tablespoon olive oil, plus more for the bowl
Instructions
- In a large bowl, mix the flour, salt, and sugar.
- In a separate small bowl, dissolve the yeast in the warm water and let it sit for 5 minutes until foamy.
- Pour the yeast mixture and the olive oil into the dry ingredients. Mix with a wooden spoon until a shaggy dough forms.
- Turn the dough out onto a lightly floured surface. Knead for 5 to 7 minutes until the dough is smooth and elastic.
- Lightly oil a clean bowl. Place the dough in the bowl, turning to coat. Cover the bowl with plastic wrap or a clean kitchen towel.
- Let the dough rise in a warm place for 1 to 1.5 hours, or until doubled in size.
- Gently punch down the dough. Shape it into a loaf and place it on a baking sheet lined with parchment paper or a pizza stone.
- Cover the loaf loosely and let it rest for 30 minutes. Preheat your oven to 400°F (200°C) during this time. For extra crust, place a shallow pan on the bottom rack while preheating to create steam.
- Before baking, lightly brush the top of the loaf with water. Score the top of the loaf with a sharp knife if desired.
- Bake for 30 to 35 minutes, or until the crust is deep golden brown and the internal temperature reaches 200°F (93°C).
- Transfer the bread to a wire rack to cool completely before slicing.
Notes
- For a crispier crust, place a pan of hot water on the bottom rack of the oven during the first 15 minutes of baking to create steam.
- This bread is excellent for dipping in olive oil or serving alongside pasta dishes.
- If you want a faster rise, place the dough in a slightly warmer spot, but avoid direct heat.
Nutrition
- Serving Size: 1 slice
- Calories: 180
- Sugar: 0.5
- Sodium: 300
- Fat: 1.5
- Saturated Fat: 0.2
- Unsaturated Fat: 1.3
- Trans Fat: 0
- Carbohydrates: 37
- Fiber: 1.5
- Protein: 6
- Cholesterol: 0