
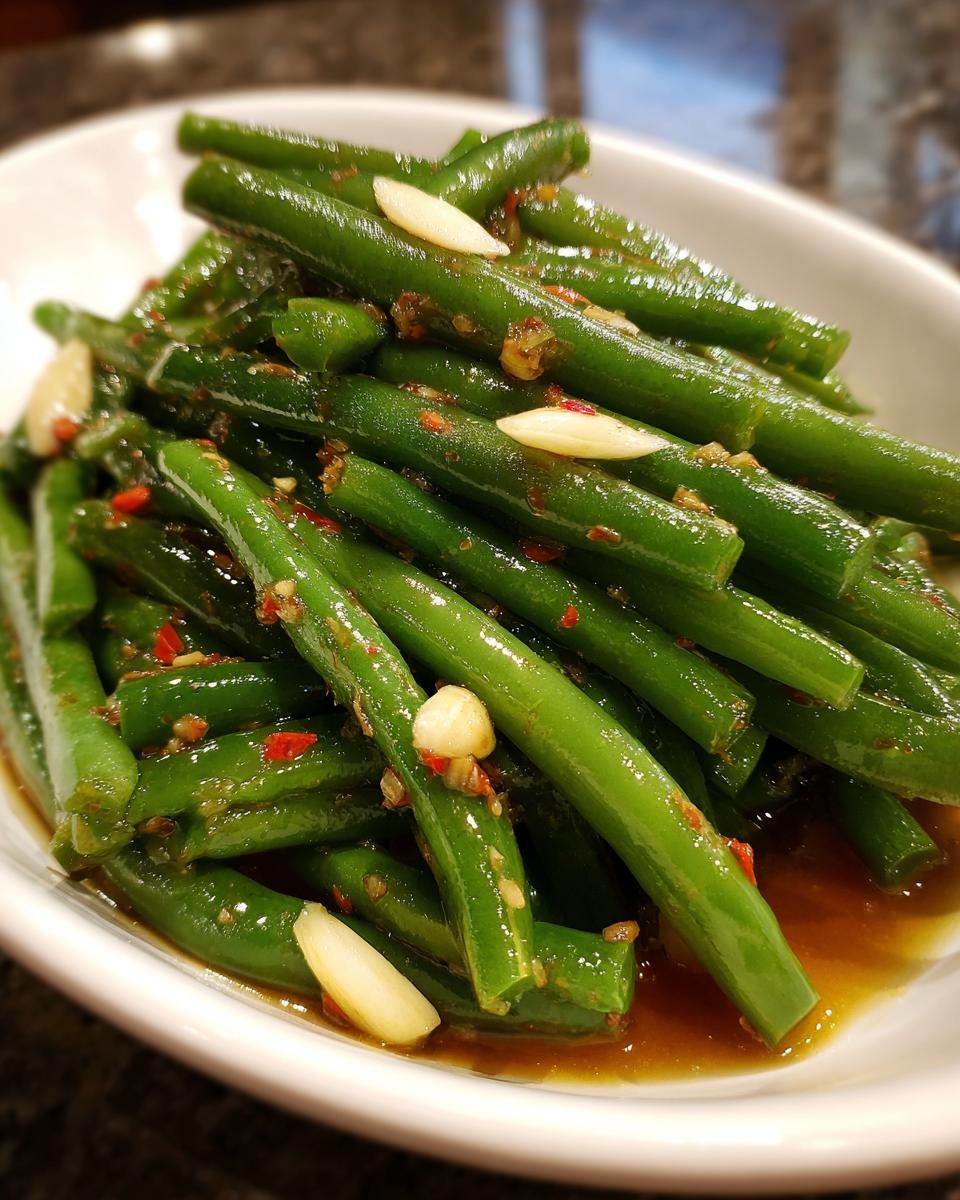
There is nothing—and I mean *nothing*—quite like that first bite of a perfectly crisp, tangy pickle. That snappy crunch vibrates right through you, right? For years, I searched for pickle perfection, and honestly, buying them just never hit the mark. That’s why I’m thrilled to share this absolute gem: the best way to make homemade dilly beans. Before I settled down and started YumDrizzle, I spent ages on the road, and let me tell you, resourcefulness is key when you live out of a van. That road life taught me you can make incredible flavor from simple, accessible pantry staples, and this recipe is proof!
Forget the long, complicated canning processes you might have heard about. We are focusing on the quick, no-fuzz refrigerator method today. These pickled green beans are ready ridiculously fast, giving you that satisfyingly crunchy, garlicky kick you crave without waiting weeks. Trust me, once you try these snack pickles, you’ll never go back to the jarred stuff!
- Why This Refrigerator Dilly Beans Recipe Delivers Crunch and Flavor
- Gathering Ingredients for Your Homemade Dilly Beans
- How to Make Dilly Beans: Step-by-Step Refrigerator Pickling Instructions
- Tips for Success Making the Best Dilly Bean Recipe
- Serving Suggestions for Tangy Dill Pickles
- Storage and Shelf Life of Refrigerator Dilly Beans
- Frequently Asked Questions About Pickled Green Beans
- Estimating Nutritional Data for Dilly Beans
- Share Your Homemade Dilly Beans Experience
Why This Refrigerator Dilly Beans Recipe Delivers Crunch and Flavor
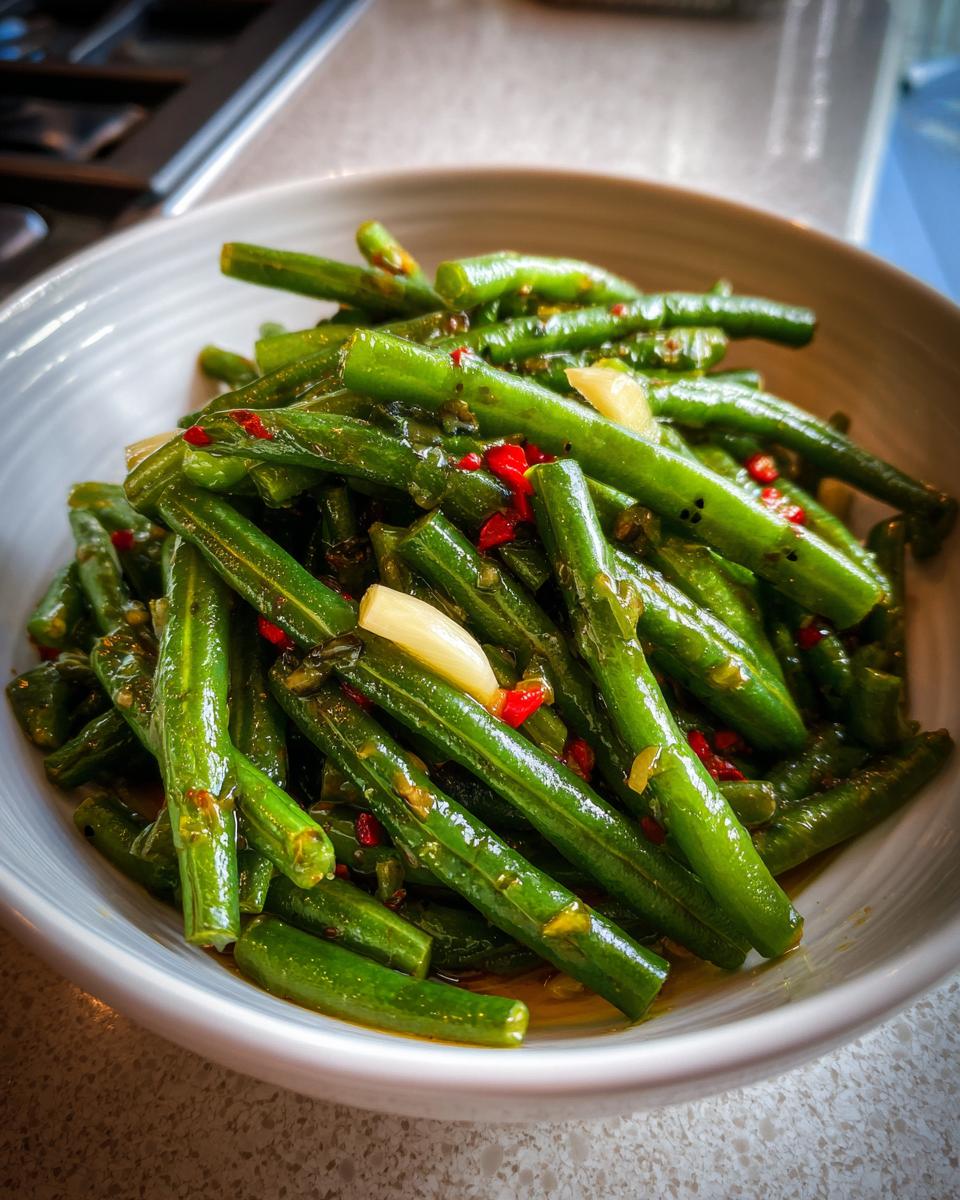
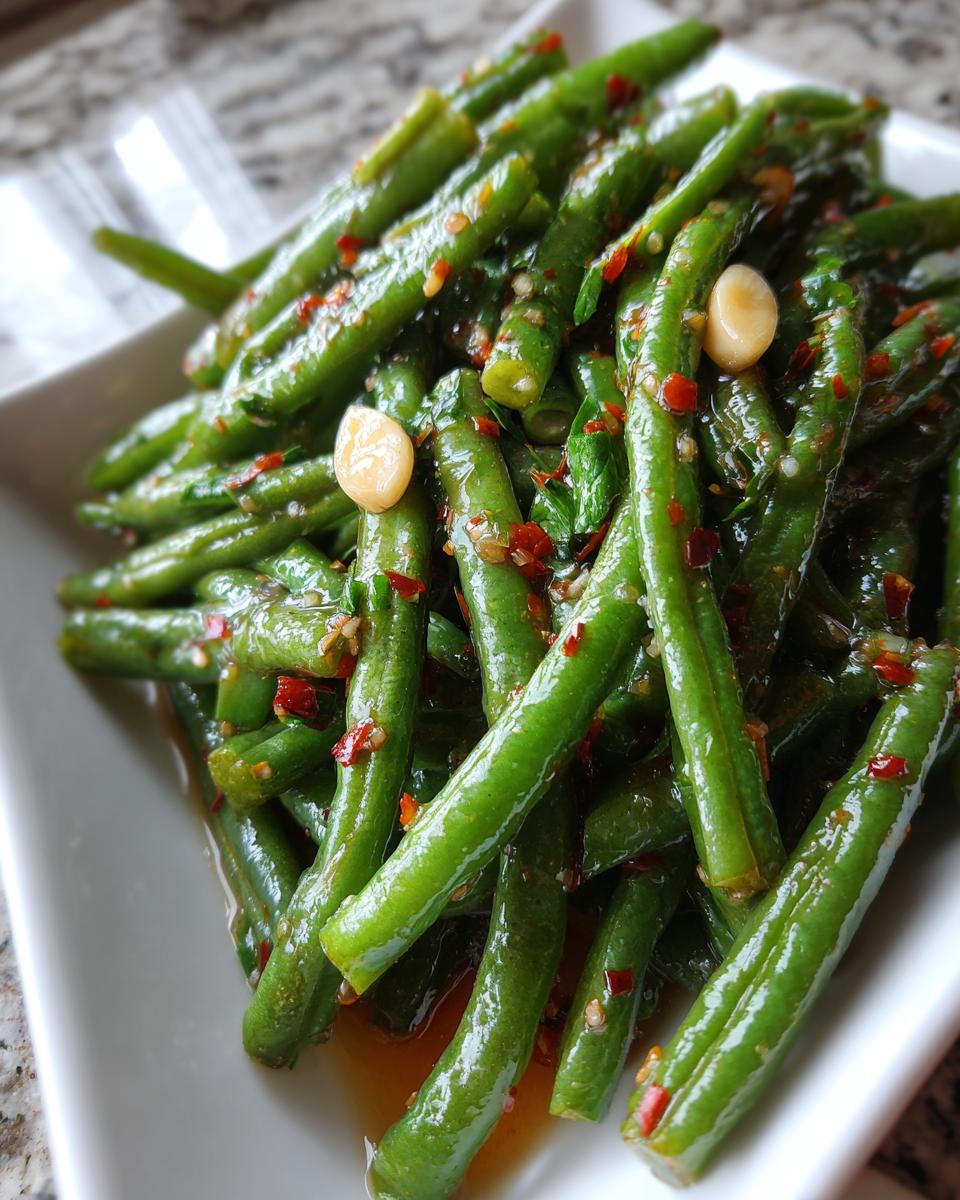
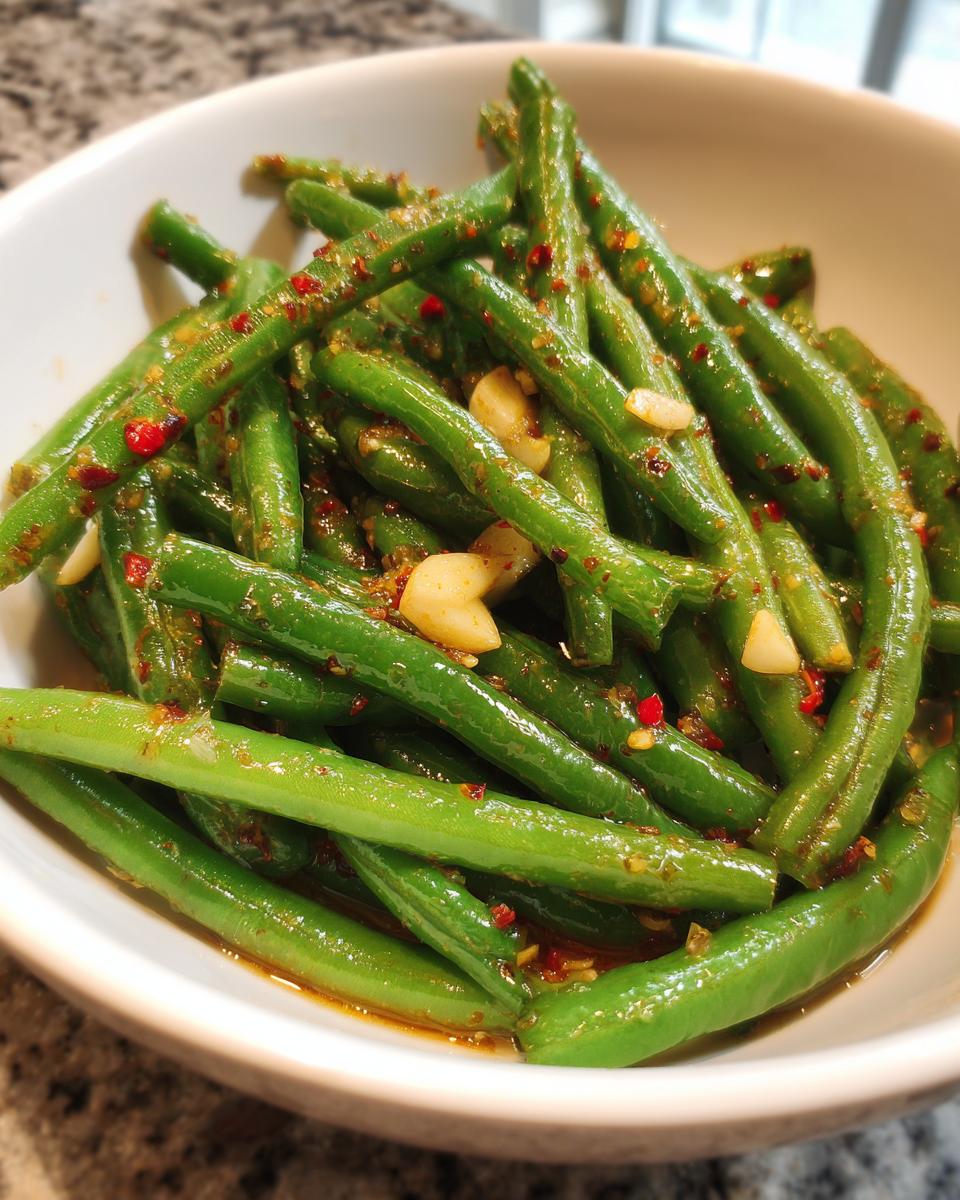
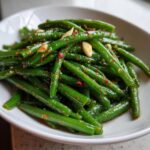
We all want pickles that *snap* when you bite them, right? That’s the magic of this approach. Since we aren’t water-bathing these babies, we preserve that fresh, vibrant texture that gets lost during heavy processing. This recipe is all about getting you the most satisfying dilly beans possible, packed with sharp garlic and fragrant dill.
Here’s the lowdown on why this homemade pickle shines:
- It’s simple—no pressure canner needed—which keeps the process stress-free.
- The flavor is bright and punchy; it really tastes homemade.
- We prioritize that perfect *crunch*.
Check out this easy dill pickle dip recipe if you love these tangy flavors!
Quick Pickled Green Beans Ready Fast
This is the best part about refrigerator pickles. You aren’t waiting weeks or messing with sealing jars hoping they hold up. We bring the brine to a boil, soak the beans, and bam—you’re into that delicious dilly bean flavor in about 24 hours. It’s instant gratification for your snack craving!
Achieving the Best Crunchy Pickled Beans
If you want truly crunchy pickled beans, you have to start with the best beans. Don’t use floppy ones from the bottom of the bag! Pick beans that feel stiff and firm when you handle them. Seriously, freshness makes all the difference here. If the bean snaps cleanly when you trim it, you’ve got a winner ready for that amazing tangy brine.
Gathering Ingredients for Your Homemade Dilly Beans
Alright, let’s get our supplies ready! Making great dilly beans is all about using fresh produce and good quality vinegar. Don’t panic about hunting down exotic spices; we keep it simple so you can make these whenever the craving strikes. Here is exactly what you need to have on hand for about four pint jars. It’s pretty straightforward, I promise!
- 2 pounds of fresh green beans, and make sure you get ’em trimmed!
- 4 cloves of garlic, peeled and then halved—we want that flavor to really wake up in the brine.
- 1 teaspoon of red pepper flakes—this is totally optional, but if you like things with a little kick, toss ’em in!
- 4 cups of sharp white vinegar (it has to be 5% acidity, that’s important).
- 4 cups of plain water.
- 4 tablespoons of pickling salt (don’t sub regular table salt if you can help it!).
- 2 tablespoons of plain white sugar.
- 4 heads of fresh dill, or if you can’t snag fresh, use 4 teaspoons of dried dill seed.
Ingredient Notes and Substitutions for Tangy Dill Pickles
For the dill part, fresh heads of dill are unbeatable—they give you that authentic, gorgeous flavor profile you expect from top-tier tangy dill pickles. If you’re using the seed, just toss that right into the jar with your other flavorings. If you’re dedicated to making Spicy Dilly Beans, feel free to bump those red pepper flakes up to two teaspoons. And for extra punch? Go heavy on the garlic! If you want serious Garlic Dilly Beans, add six or eight cloves—it won’t hurt a thing. Remember, this brine relies on that 5% acidity vinegar to properly pickle, so stick to that measurement for safety and taste.
If you love these flavors, you might also enjoy my recipe for a quick easy creamy dill dip recipe!
How to Make Dilly Beans: Step-by-Step Refrigerator Pickling Instructions
Okay, Jax here, let’s stop talking about how great they are and start actually making these amazing dilly beans! Since this is a refrigerator pickle, we don’t stress about sterilization like crazy canning people do, but we still want things clean. The whole process is really active, and you’ll go from a pile of beans to jars of deliciousness surprisingly fast. Just follow along, and you’ll be snacking in no time!
Preparing the Jars for Your Dilly Beans Recipe
First, give those green beans a good wash, then trim off the ends. This is the prep work! Next, you’re going to pack them tightly into your clean pint jars. You want them standing straight up and packed in there firmly—don’t be afraid to squish them a little. Now, distribute your flavor bombs. Divide those halved garlic cloves and any red pepper flakes you decided on evenly among the jars. This ensures every jar tastes just as good as the next. Remember, stand them upright for this!
Creating the Hot Brine for Vinegar Pickled Beans
Time for the magic potion! Grab a saucepan—medium-sized is perfect. Toss in your vinegar, water, pickling salt, and sugar. Put that over medium-high heat and stir it constantly until you can physically see that the salt and sugar have completely vanished into the liquid. It has to be boiling! Once it’s boiling and clear, you carefully pour that hot brine over the beans in the jars. Make sure the liquid covers the beans completely, leaving just a tiny bit of space—about half an inch—at the top. If you’re trying to make pickled green beans, this brine is absolutely essential!
Cooling and Storing Your Quick Pickled Green Beans
Once everything is submerged, grab a clean cloth dampened with water and wipe down those jar rims. Trust me, gunk on the rim means a weak seal. Put your lids and rings on, tightening them just until you feel resistance—fingertip tight is what we aim for. Now, let them sit right on the counter to cool down completely to room temperature, maybe an hour or so. Once they aren’t hot anymore, they must go straight into the fridge. Seriously, if you want that tangy flavor to develop, you must wait at least 24 hours before digging in. But trust me, these homemade pickles are worth the brief wait!
Tips for Success Making the Best Dilly Bean Recipe
Look, even though this is the *easiest* way to make dilly beans, a few small tricks can take them from good to absolutely legendary. I learned these little secrets not just from my time on the road trying to replicate great flavors, but by making batch after batch until it was perfect for sharing here at YumDrizzle. You want that beautiful, vibrant color and that unbeatable snap, right? Pay attention to these details!
First off, let’s talk about the green beans again, because this is crucial for getting those crunchy pickled beans everyone raves about. Always, always, *always* use beans that are as fresh as possible. If you can buy them the same day you plan to pickle, do it. Slim, firm beans work best. If you are trimming them and they feel limp or you have to bend them hard to break them, toss ’em. They won’t crisp up for you!
Another thing I learned when I was trying to make amazing sides for exhausted bandmates? Don’t skimp on the dill! If you have the fresh dill heads, use them! That fresh herb adds a depth that dried seeds just can’t replicate. That goes for the garlic too—freshly peeled and crushed slightly releases way more flavor into your brine than pre-chopped stuff does. This makes a huge difference in the final tang of your homemade pickles recipe.
When you are pouring that hot brine in, make sure you get it piping hot, right off the boil. That heat penetrates the structure of the bean instantly, which helps them keep their shape better in the fridge. If you’re playing around with adding something extra, like maybe some extra horseradish for a kick, make sure you aren’t adding too much volume, otherwise, the brine dilution won’t pickle them effectively. Simple vinegar ratios are your friend here.
And finally, the waiting game! I know it’s torture, but you really need that 24-hour chill time. Those first few hours are spent cooling down, sure, but the real magic happens when that cool brine saturates every fiber of that green bean. If you can stretch it to 48 hours, even better. Trust me on this; patience ensures you get the absolute best results when you finally open that jar for a snack or for your zesty side dish.
For even more inspiration on keeping things flavorful and fresh, check out some great tips on making your own dill pickled beans!
Serving Suggestions for Tangy Dill Pickles
So, you’ve got your jar of gorgeous, snappy, bright green dilly beans chilling in the fridge. Congrats! Now what? Honestly, the easiest way to eat them is straight out of the jar—don’t even tell anyone! They are the perfect low-calorie snack when you need that tangy flavor fix.
But these little preserved treasures are way more versatile than just grabbing them in passing. I learned this from seeing what folks served up on those amazing roadside barbecue platters back when I was touring. They seriously elevate anything they touch. You absolutely have to try them on a charcuterie board. They cut through the richness of the cheeses and give everyone a nice little palate cleanser between bites of salami.
And we can’t talk about snack pickles without mentioning cocktails. If you love a good Bloody Mary or a Caesar—and if you don’t, you should start—these are your *new* go-to garnish. Forget those floppy orange slices! A spicy, garlicky dilly bean sticking out of your glass? Yes, please! It’s so much better than a regular olive or celery stalk, and it adds that extra punchy flavor right into your drink. You can even just use the brine for an extra savory kick if you save your spears for later!
If you’re looking for other ways to bring that tangy flavor into your repertoire, try pouring the brine over some cream cheese for an instant spread, or chop them up small and mix them into tuna or chicken salad. They add texture and an incredible vinegar brightness. Seriously, try shaking up one of my apple cider Moscow Mules and use one of these spears as the garnish—it’s unexpected and delicious!
For more ideas on creative ways to use homemade preserves, take a peek at what the folks over at Vintage Kitchen Vixen suggest for their single-jar pickles!
Storage and Shelf Life of Refrigerator Dilly Beans
Okay, now for the hard part: waiting for the fridge to do its final magic trick! Because this is a refrigerator pickle recipe, remember that these dilly beans absolutely must stay cold. They don’t have that pressurized seal that traditional canned goods rely on for shelf stability, so that fridge door is their best friend.
The good news is the high vinegar content keeps them preserved and safe for quite a while under cold conditions. I’ve found that these crunchy gems stay vibrant and delicious for up to two full months in the back of the fridge. That’s plenty of time, but honestly, they usually disappear way faster than that!
Just make sure you are consistently keeping them below 40 degrees Fahrenheit. If you leave a jar sitting out on the counter for too long while you’re enjoying a backyard party, make sure to get it chilled again quickly. We are aiming for maximum crunch and flavor retention, and cold temperatures are key to that with this simple pickling method.
Frequently Asked Questions About Pickled Green Beans
Anytime I share a recipe, I end up with a flood of messages asking very specific things! That’s totally normal, especially when it comes to preserving food. I want to make sure you feel totally confident making these perfect dilly beans, so let’s tackle some of the most common questions I get about handling fresh green beans and pickling them up.
Can I use this recipe for long-term canning of dilly beans?
This is the big one! If you’re looking to make jars that sit on a pantry shelf for months, this specific dilly beans recipe isn’t set up for that. This is strictly a recipe for refrigerator pickles green beans. Why? Because we aren’t processing the jars in a boiling water bath to create a shelf-stable seal. If you want shelf-stable pickles that don’t require refrigeration, you need a recipe specifically tested and approved for water bath canning. Those recipes use different brine ratios and processing times for safety. Keep this batch cold, and they’ll be top-notch for snacking!
How long until my dilly beans are ready to eat?
I know, the anticipation is brutal when you smell that vinegar and dill mingling! You *can* technically eat them after they cool down, but trust me, you’ll hate yourself if you do. If you want that amazing, tangy, fully developed flavor where the brine has really soaked into the bean, you need patience. The absolute minimum time for these dilly beans to start tasting right is 24 hours chilling in the fridge. If you can hold out until 48 hours? You’ll be rewarded with the best flavor possible. Don’t rush perfection!
If you have trouble setting aside a jar, maybe try making a batch of my creamy dill dip instead—no waiting required there!
Estimating Nutritional Data for Dilly Beans
I always get questions about the ‘health’ side of things once the flavor is sorted out!
Since these are refrigerator pickles relying heavily on vinegar and salt—and very little sugar—they are delightfully low in calories. Remember, these numbers are just estimates based on my measurements, so you know what you’re working with while you snack. If you need some quick ideas for dinner later, swing by my collection of weeknight dinner recipes!
- Serving Size: 1/2 cup
- Calories: 25
- Sugar: 2g
- Sodium: 350mg
- Fat: 0g
See? Not bad for a totally addictive snack pickle!
Share Your Homemade Dilly Beans Experience
Alright, now that you’ve chopped your beans and heard my secrets for making the crispiest, most flavorful dilly beans on the block, I genuinely want to hear from you! Did you make the garlicky batch? Did you brave the red pepper flakes to get those spicy kicks? Cooking is a conversation, and I built this site to connect with folks who love food, just like me.
Don’t be shy! Drop a rating below—stars are great, but telling me *why* you loved them is even better. Did you use them as unbelievable cocktail garnishes pickles? Did they disappear before you even got them on a charcuterie board? Share your tweaks! Maybe you found a secret ingredient that made your batch of vinegar pickled beans unforgettable. That’s how we all learn and get better in the kitchen.
Pictures are the best, so if you snapped a shot of your jars looking gorgeous on the counter or hanging out next to a Bloody Mary, share it with me! Your feedback helps me know what kind of recipes—maybe more canning green beans experiments next time, or maybe more quick refrigerator options—you want to see next. Happy pickling, everyone! PrintCrunchy Refrigerator Dilly Beans: Easy Pickled Green Beans Recipe
Make the best homemade dilly beans with this quick refrigerator pickle recipe. These tangy, garlicky green beans require no canning and are ready fast for snacking or cocktail garnishes.
- Prep Time: 20 min
- Cook Time: 10 min
- Total Time: 30 min
- Yield: 4 pints 1x
- Category: Snacks
- Method: Refrigerator Pickling
- Cuisine: American
- Diet: Vegetarian
Ingredients
- 2 pounds fresh green beans, trimmed
- 4 cloves garlic, peeled and halved
- 1 teaspoon red pepper flakes (optional, for spicy dilly beans)
- 4 cups white vinegar (5% acidity)
- 4 cups water
- 4 tablespoons pickling salt
- 2 tablespoons granulated sugar
- 4 heads fresh dill, or 4 teaspoons dried dill seed
Instructions
- Wash the green beans thoroughly. Trim the ends off the beans.
- Pack the green beans tightly into four clean, pint-sized canning jars, standing them upright. Distribute the garlic halves and red pepper flakes evenly among the jars if using.
- In a medium saucepan, combine the vinegar, water, pickling salt, and sugar. Bring the mixture to a boil over medium-high heat, stirring until the salt and sugar dissolve completely. This is your hot brine.
- Carefully pour the hot brine over the green beans in each jar, ensuring the beans are completely submerged. Leave about 1/2 inch of headspace at the top of each jar.
- Add one head of fresh dill or 1 teaspoon of dill seed to the top of the brine in each jar.
- Wipe the rims of the jars clean with a damp cloth. Seal the jars with lids and rings, tightening them to fingertip tight.
- Let the jars cool to room temperature on the counter. Once cool, place the jars in the refrigerator.
- Allow the dilly beans to chill for at least 24 hours before eating for best flavor. They are ready to eat after 24 hours and will keep in the refrigerator for up to 2 months.
Notes
- For the crunchiest results, use very fresh, crisp green beans.
- If you prefer a classic dill flavor without heat, omit the red pepper flakes.
- These refrigerator dilly beans are perfect for adding to Bloody Marys or serving on a charcuterie board.
Nutrition
- Serving Size: 1/2 cup
- Calories: 25
- Sugar: 2
- Sodium: 350
- Fat: 0
- Saturated Fat: 0
- Unsaturated Fat: 0
- Trans Fat: 0
- Carbohydrates: 6
- Fiber: 2
- Protein: 1
- Cholesterol: 0