
When the weather starts turning cold and you just want to wrap yourself in a blanket and forget the world exists, there’s only one thing that truly hits the spot: a giant mug of rich, steaming hot chocolate. Well, I’m here to tell you that we captured that entire cozy experience and baked it into a cake! Trust me, this **hot chocolate poke cake** is pure magic. When I was learning to cook on the road, everything felt intimidating, but Jaxson Riley always pushed recipes that felt like a big warm hug—and this cake is exactly that. It proves you don’t need complicated steps to make something absolutely decadent. It’s time to make your kitchen the heart of comfort with this incredible dessert you can find more of over at our main dessert recipes hub!
- Why This Ultimate Cozy Hot Chocolate Poke Cake is Your New Favorite Dessert
- Gathering Ingredients for Your Hot Chocolate Poke Cake Recipe
- Step-by-Step Instructions for the Best Hot Cocoa Cake Idea
- Tips for Success with Your Hot Chocolate Poke Cake
- Making Your Easy Holiday Poke Cake Ahead of Time
- Storage and Reheating Instructions for Your Hot Chocolate Poke Cake
- Troubleshooting Common Issues with This Comfort Food Cake Inspiration
- Frequently Asked Questions About the Easy Hot Chocolate Poke Cake Recipe
- Nutritional Estimates for Your Hot Chocolate Poke Cake Slice
- Share Your Hot Chocolate Poke Cake Creations
Why This Ultimate Cozy Hot Chocolate Poke Cake is Your New Favorite Dessert
Look, I know winter calls for serious comfort food, and this cake delivers! It’s not just a chocolate cake; it’s a full-on, flavor-packed, cozy experience. We’re talking about something that tastes exactly like drinking a gourmet mug of hot cocoa. Don’t let the layers scare you, friends—this recipe is designed to be forgiving and fun, just like Jaxson taught us!
- The base is unbelievably moist—it practically melts in your mouth.
- It’s packed with puddles of gooey, sweet marshmallow filling.
- The topping tastes exactly like whipped hot chocolate. It’s a true **Crowd Pleasing Dessert Recipe**.
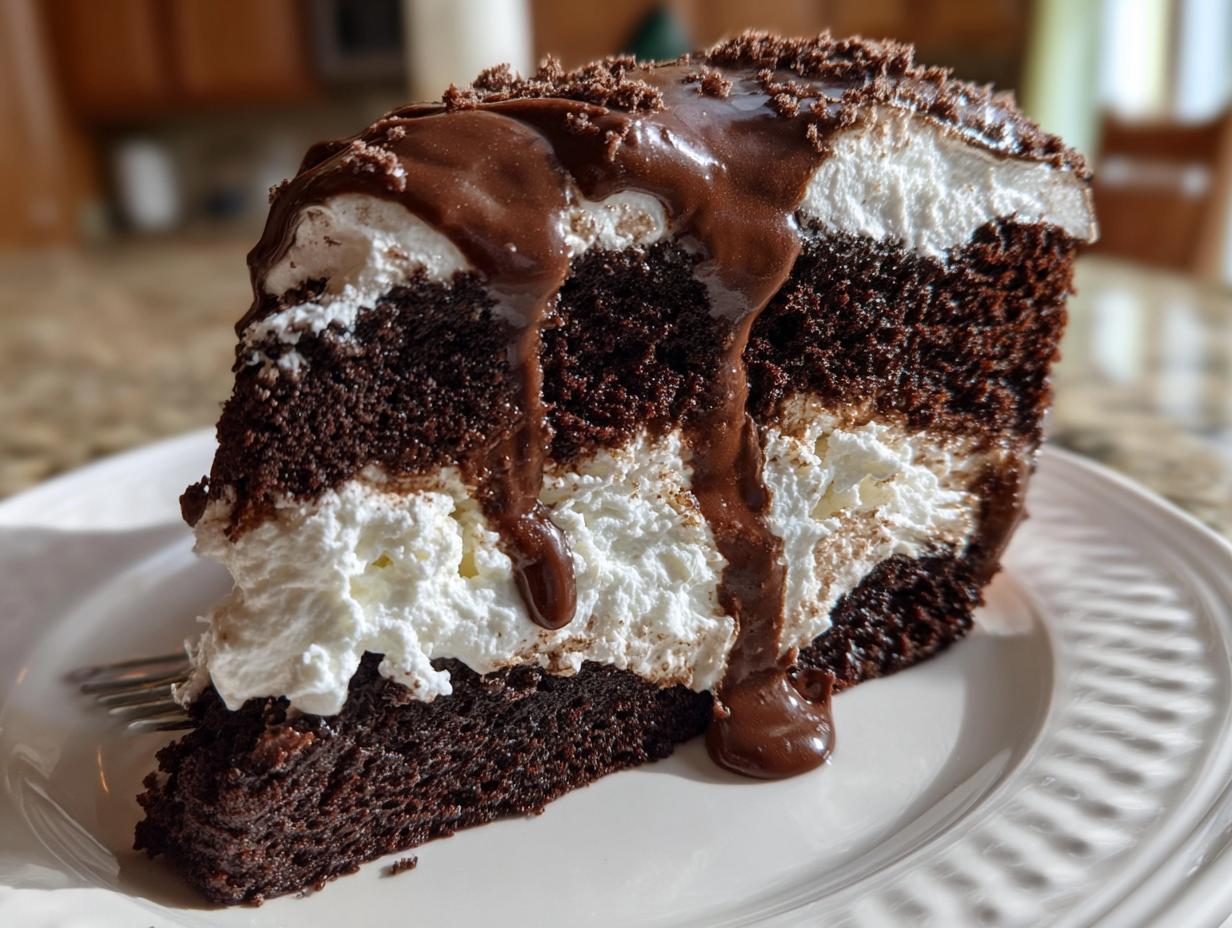
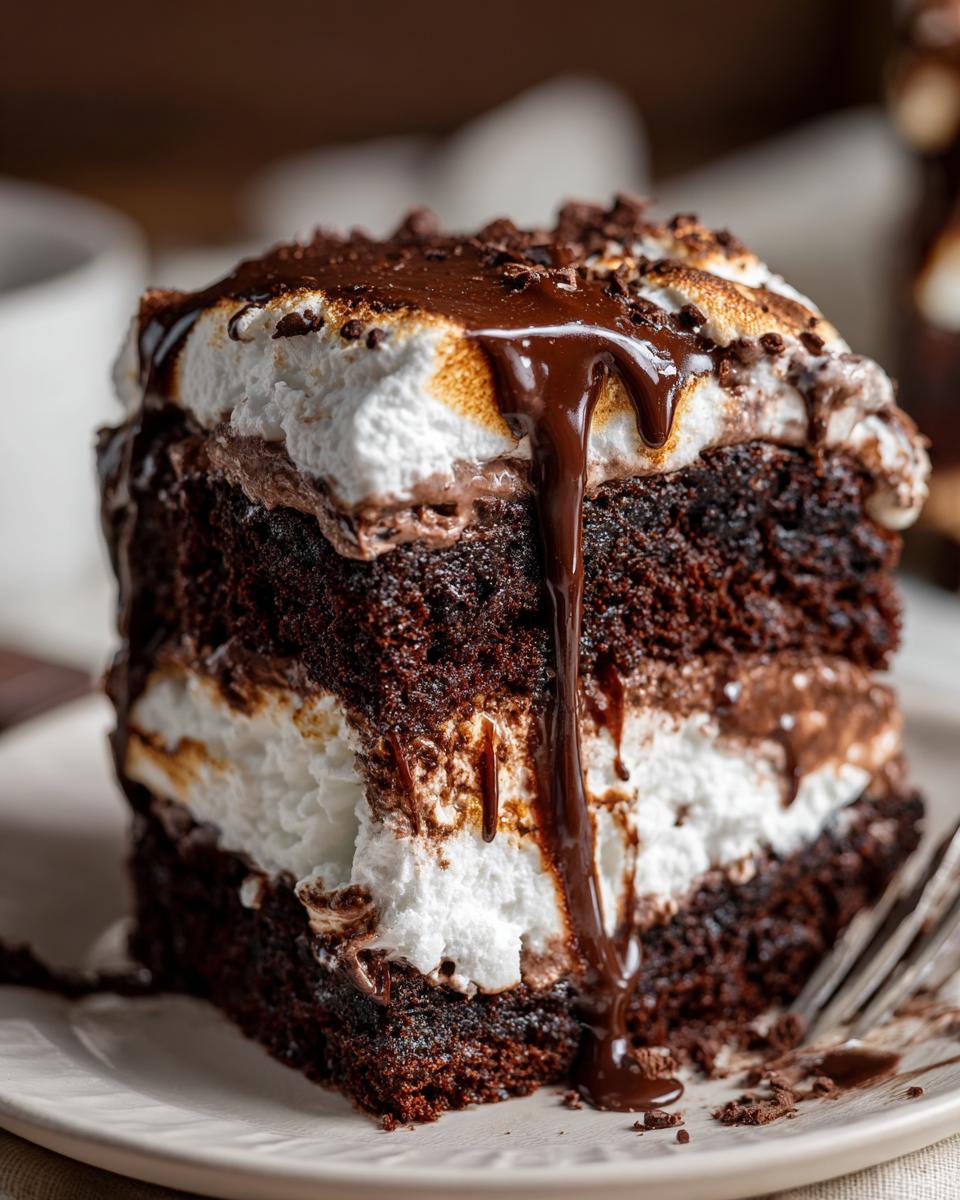
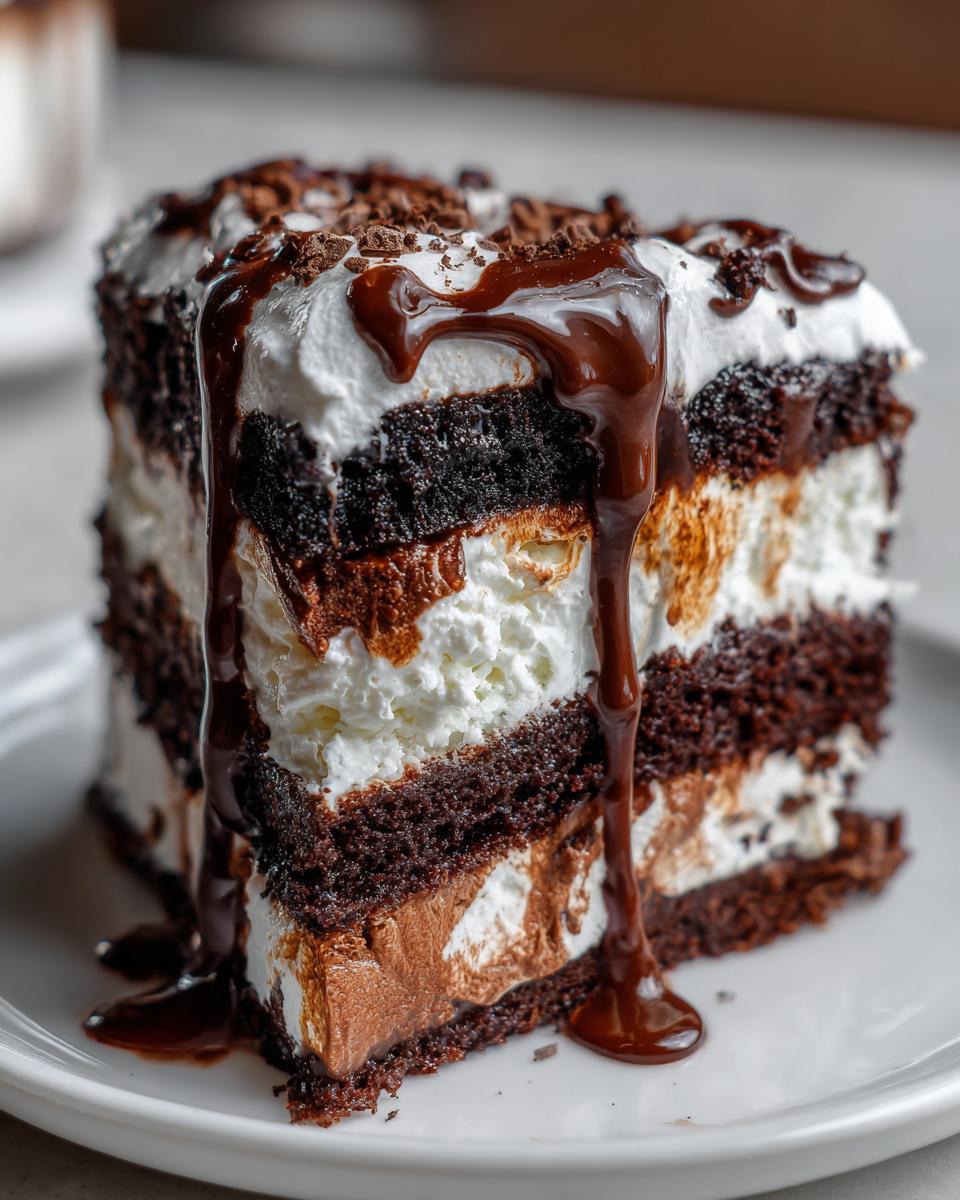
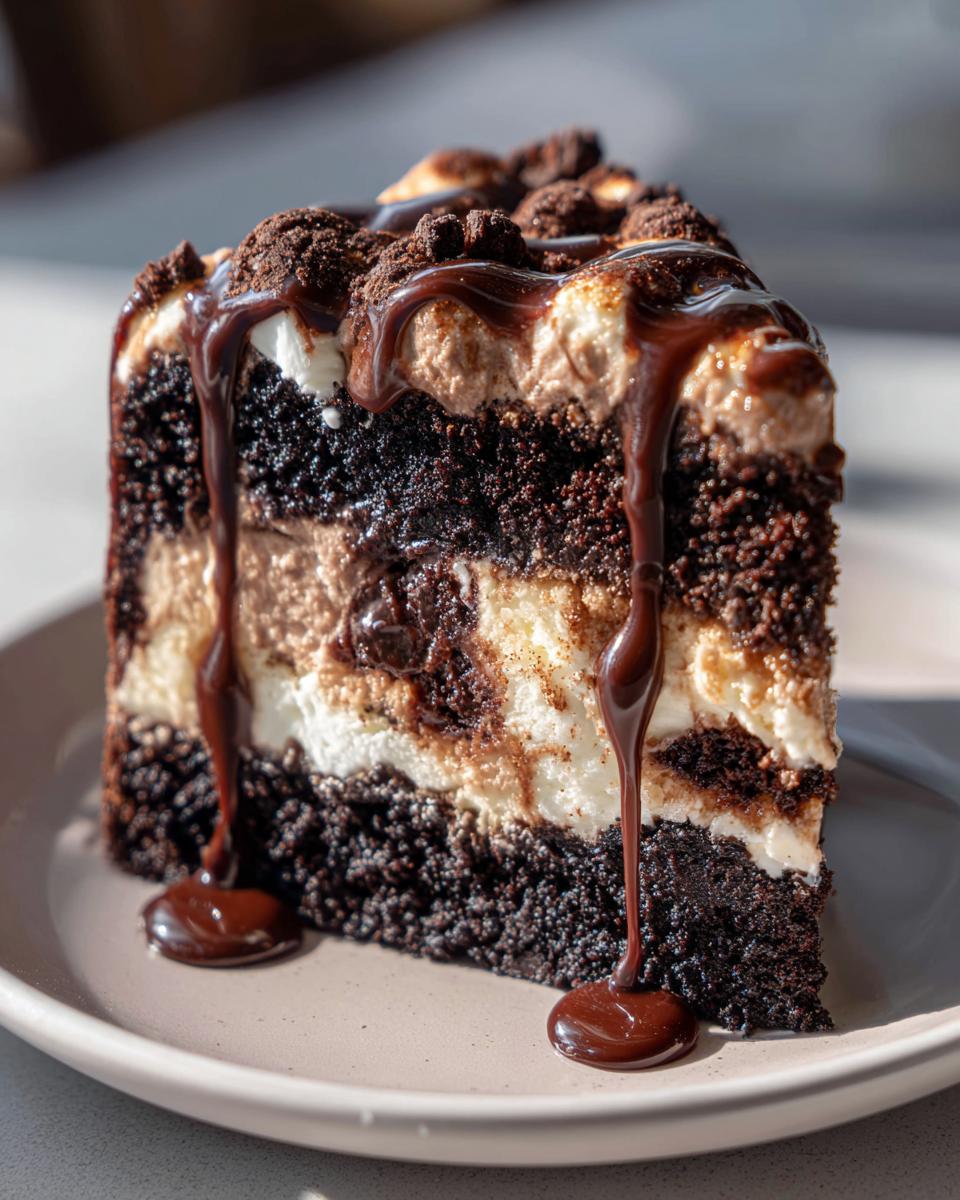
The Layers of Flavor in Our Hot Chocolate Poke Cake
What makes this the ultimate treat is the intentional layering that screams decadent chocolate dessert baking. First, you have the rich, dark cake base. Then, we push those little pockets full of melted marshmallow goodness right into the crumb. After that chills, we smooth on a rich, fudgy chocolate layer. Seriously, every bite has three textures going on before you even hit the cloud-like topping. It’s next level!
Simple Steps for a Gooey Marshmallow Poke Cake
You might be thinking, “Three layers? That sounds like a weekend project.” Nope! That’s the beauty of the poke cake design. We use shortcuts, like a great box mix, and simple microwave melting for the fillings. My whole point here is to get gourmet-level flavor without spending all day wrestling with fancy techniques. We’re using resourcefulness to make something truly spectacular here, so don’t stress!
Gathering Ingredients for Your Hot Chocolate Poke Cake Recipe
Okay, let’s talk ingredients! Since we want that rich flavor without spending forever in the kitchen, we’re leaning on some smart shortcuts paired with creamy, comforting additions. This list might look long because we have four distinct layers going on, but honestly, most of this is just measuring out things we probably already have. Remember Jaxson’s idea: great food from everyday stuff? This is it! If you’ve ever made one of our decadent cheesecakes, you know we love a rich base, and this one is no different. You can check out that triple-layer chocolate cheesecake if you want another showstopper!
For the Moist Chocolate Cake Base
We are keeping this super simple so we can focus our energy on the fillings. Get yourself:
- 1 box Devil’s Food Cake Mix
- 1 cup Water
- 3 large Eggs
- ½ cup vegetable Oil
For the Gooey Marshmallow Filling
This is what fills those little puddles we make! Don’t skimp on the fluff here. You’ll need:
- 2½ cups marshmallow fluff
- 2 tablespoons water (just a tiny splash to help it melt down nicely)
Pro Tip: When you microwave the fluff, make sure that bowl is big enough! Fluff puffs up huge when it gets hot, and we don’t want a sticky mess all over your counter.
For the Fudgy Chocolate Layer
This layer sets up slightly firm over the marshmallow, giving us that perfect fudgy resistance before the airy topping. Grab:
- 1¾ cups semi-sweet Chocolate Chips
- 14 oz (1 can) Sweetened Condensed Milk
- 3 tablespoons heavy whipping Cream
For the Whipped Hot Cocoa Topping and Garnish
This is where the actual “hot chocolate” flavor kicks in on top! Have these ready to go:
- 2 cups heavy whipping Cream
- 2 envelopes instant Hot Chocolate Mix
- 1 teaspoon vanilla extract
- 3 cups mini-Marshmallows
- Hot fudge sauce for drizzling (get your favorite jar!)
Step-by-Step Instructions for the Best Hot Cocoa Cake Idea
Alright, now that we have all our components ready, let’s put this masterpiece together! Don’t rush the chilling steps, that’s where the structure comes from. I promise, following these steps makes the whole process go smoothly, turning a box mix into something that tastes like you spent hours on it. If you want tips on making a truly moist chocolate cake from scratch normally, check out my other guide, but for this, we keep it moving!
Baking the Cake and Creating Holes
First things first, preheat your oven exactly as the cake mix package tells you to. Grease up that 9×13 pan really well! In a bowl, just stir together the cake mix, the 1 cup of water, your three eggs, and the oil. Mix it until it looks smooth—no need to whip it into oblivion—and pour it into your pan. Bake it according to the box, of course. Once it’s done, the *critical* part happens: let it cool on a wire rack for 20 minutes. Not less, not more! After 20 minutes, grab the round handle of a wooden spoon—the handle works perfectly for this—and poke holes all over the top, about an inch apart. You want to push them down about two-thirds of the way deep. We don’t want to hit the bottom of the pan!
Preparing and Applying the Marshmallow Filling
Time for the gooey part! Put your marshmallow fluff and the 2 tablespoons of water into a microwave-safe bowl. You’ll microwave this in short bursts—think 20 seconds at a time—stirring really well between each burst. It usually takes about 2 to 3 minutes total until it’s smooth and runny. Transfer that melted fluff into a piping bag, or just use a Ziploc bag with the corner snipped off—that’s my go-to kitchen hack! Pipe that warm, melted fluff right down into those holes you just made. Use any leftover fluff to just spread thinly over the entire surface of the cake. Then, pop that uncovered cake into the refrigerator until it gets nice and chilled—this helps everything firm up before the next layer goes on. You can see a fantastic example of how to handle a similar poke cake over at Semi Homemade Kitchen.
Setting the Fudge Layer for Your Fudgy Chocolate Poke Cake with Topping
Next up is the fudgy layer that really makes this an indulgent chocolate dessert baking experience. Take your chocolate chips, the can of sweetened condensed milk, and the 3 tablespoons of cream, and combine them in a microwave-safe bowl. Again, we’re using short bursts here—20 seconds at a time—stirring thoroughly after every zap until it’s totally uniform and silky smooth. This takes about 3 minutes. Once it’s smooth, take your chilled cake out, and lovingly spread this fudge evenly right over that set marshmallow layer. Back to the fridge it goes! You absolutely must let this fudge layer set up firmly before you try to top it, or you’ll just get one big chocolate mess.
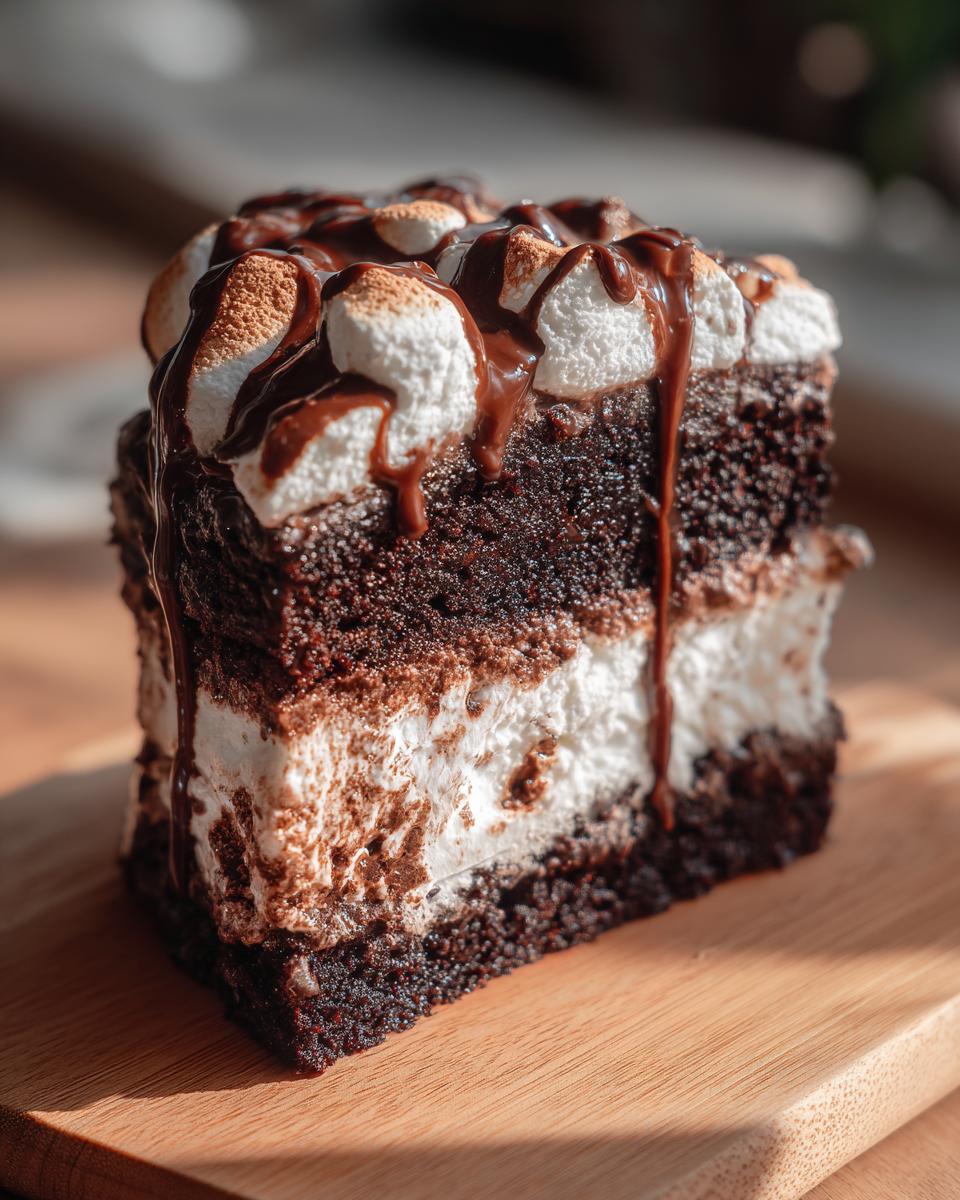
Finishing with the Whipped Hot Cocoa Topping
This is the final touch! Grab your 2 cups of cold heavy whipping cream, the hot chocolate mix envelopes, and the vanilla. Whip it all up with an electric mixer. Keep going until you see stiff peaks forming—you know, when you lift the whisk and the cream stands straight up without flopping over. Gently spread this heavenly whipped chocolate cream all over that set fudge layer. Don’t flatten it too much, you want that fluffy texture! Finally, sprinkle those 3 cups of mini-marshmallows right over the top, and finish it all off with a generous drizzle of warm hot fudge sauce right before you serve it. And that’s it! Pure comfort food cake inspiration, done!
Tips for Success with Your Hot Chocolate Poke Cake
I know this recipe has a few steps, but trust me, paying attention to the chilling and the timing is how you go from a good cake to the absolute *best* **hot chocolate poke cake** ever. We want maximum goo factor, right?
Achieving the Perfect Moist Chocolate Cake with Marshmallows Soak
Listen to me: do not overbake that initial cake layer! Seriously, pull it out when the toothpick just has moist crumbs clinging to it, not when it comes out totally clean. We need that slight under-baking because the fillings—the marshmallow and fudge—are going to keep cooking and softening the cake crumb as it chills. Also, make sure you poke those holes when the cake is still slightly warm, not piping hot, but definitely not fully cooled. That slight warmth helps the marshmallow fluff seep down nicely into those trenches.
Stabilizing the Whipped Hot Cocoa Topping
The whipped topping is light and airy, which is lovely, but sometimes if it sits out too long at a party, it gets a little sad and runny. If you know this cake is going to be hanging out on the buffet table for a while, try this trick: before you whip the cream, beat 2 ounces of softened cream cheese (yes, cream cheese!) until it’s totally smooth. Then, add your cold cream, hot chocolate mix, and vanilla and whip as normal. That small addition gives the topping the backbone it needs to stay glorious and fluffy longer. It keeps that **Dessert with Whipped Hot Cocoa Topping** looking fantastic!
Making Your Easy Holiday Poke Cake Ahead of Time
If you’re counting down the days until Christmas or a big family gathering, you know that timing is everything when hosting. Who wants to be scrambling in the kitchen when guests arrive? Good news: this **hot chocolate poke cake** is actually phenomenal when made ahead—it’s the perfect **Simple Christmas Potluck Dessert** solution! The best part about poking cakes is that the chilling time lets all those gooey layers really soak in and deepen their flavor. It’s like a slow-cooking process, but for dessert!
You can absolutely get most of the heavy lifting done a day before you need to serve it. In fact, I highly recommend it! Making it the day before means the cake has time to fully absorb the fillings, developing that incredible melt-in-your-mouth texture we’re aiming for. You can even prep components a day or two ahead, too.
Here’s my breakdown for timing this to keep things super stress-free:
- Day 1 (or up to 2 days ahead): Bake the cake base, let it cool slightly, apply the marshmallow fluff filling, and then pour on and smooth out that fudgy chocolate layer. Cover the entire thing tightly with plastic wrap (make sure the wrap isn’t touching the fudge layer—a couple of toothpicks stuck in the cake corners help create space) and tuck it into the fridge. It needs to stay chilled until it’s time to top it.
- Day 2 (Morning of serving): Take the cake out of the fridge about 30 minutes before you plan to top it, just so it loses that deep chill. Whip up that heavenly whipped hot cocoa topping—the recipe is over on ChocoWink if you need a refresher on that creamy topping! Spread it on quickly and get it back into the fridge.
- Just Before Serving: This is non-negotiable! You *must* wait until you are ready to bring this out to the table before you sprinkle on the mini-marshmallows and drizzle that warm hot fudge over the top. If you do this too early, the marshmallows will get sticky and start melting right into the cream topping, which just ruins the visual pop we worked so hard for.
Making those first few steps ahead of time saves me so much stress. It lets me focus on the main course or maybe even whip up one of my easy cranberry chicken dishes without worrying about dessert setting up properly. Trust me, a well-chilled poke cake base really helps those fillings stay perfectly structured!
Storage and Reheating Instructions for Your Hot Chocolate Poke Cake
So, you made the **hot chocolate poke cake**, it’s amazing, and there are leftovers—the best problem to have! Because we have that beautiful, fluffy whipped topping on this, storage is pretty straightforward, but reheating is a big no-no, so listen up!
Since this cake has layers of creamy filling (that marshmallow and fudge combo) and a dairy-based whipped topping, it really needs to stay cozy in the fridge. Cover the whole pan tightly with plastic wrap or use an airtight lid if you have one that fits. You want to make sure that wrap isn’t squishing down onto the whipped cream topping, because that will crush all your beautiful work!
This cake is designed to be served chilled, so there’s no need to warm it up at all. Honestly, warming it is a recipe for disaster: the whipped topping will melt into sad, soupy puddles, and the fudge layer might get too runny. It’s designed to be a **Melt in Your Mouth Chocolate Cake** when cold, not hot!
When you store it in the fridge, it should stay perfectly fresh and gooey for about three to four days. If you notice the very bottom cake layer starting to get a *little* too soggy after day four, that’s okay—it just means the fillings have done their job soaking in. If you want the topping to look its absolute freshest (especially if it’s been sitting for a couple of days), you can always just scrape off the top layer of whipped cream and replace it with a fresh batch before serving the leftovers. Trust me, this recipe tastes even better the next day!
Troubleshooting Common Issues with This Comfort Food Cake Inspiration
Okay, even the best recipes can throw a little curveball now and then. It’s totally normal! When you’re making something layered like this **hot chocolate poke cake**, sometimes the physics just don’t cooperate right away. But don’t panic! Every good baker—and heck, even Jaxson while he was mastering roadside chili—has run into moments that make you scratch your head. I want you to feel totally confident, so let’s talk about the two most common hiccups I hear about when folks make this **Comfort Food Cake Inspiration**.
Holes Collapsing in Your Cake
If you poke those holes and you come back after pouring your marshmallow, and it looks like the holes just sort of sighed and filled in with cake instead of holding a clean pocket of goo, I know exactly what happened. Usually, this means your cake was just too cool when you started poking. We want that cake to be warm enough that the spoon handle goes through easily but not so hot that it just crumbles. If the cake is totally cold, the crumb is too tight, and it resists the poking!
The other culprit is going too deep. Remember how I said push about two-thirds of the way? If you jab the handle all the way down and hit the bottom of that 9×13 pan, you’re basically just creating cake shrapnel and tearing the bottom layer. The cake layer underneath needs to stay intact to hold up all that sweet filling. If this happens, don’t worry! Just spread those fillings on top as best you can. It’ll still taste delicious—it just won’t have that signature surprise pocket of goo. If you needed more warming inspiration, maybe check out this easy turkey soup recipe to get you in that cozy headspace!
Why Your Whipped Topping Got Sad and Flat
The whipped hot cocoa topping is supposed to look like a fluffy snowdrift, right? If you look back later and it looks… defeated, here are the two main reasons why that happens.
First, did you over-whip it? When you’re whipping heavy cream, you hit stiff peaks, and then there’s the butter stage. You have to watch carefully! If you keep whipping after those stiff peaks form, you break down the fat structure, and it gets grainy. Sometimes it even starts turning into butter if you’re really going for it! Just remember: stiff peaks, then stop, scrape down the bowl, and move on to spreading it before you ruin it.
Second, and this is huge for holiday parties: temperature! If your kitchen is warm, or if you used cream that wasn’t ice-cold straight from the fridge, that topping will deflate fast, even if you whipped it perfectly. Always make sure your cream, and even your mixing bowl and whisk attachments, are cold. That cold temperature is what helps the air stay locked into the fat globules. Keep the finished cake chilled until the absolute last second before serving, and your topping will stay fantastic!
Frequently Asked Questions About the Easy Hot Chocolate Poke Cake Recipe
I always get tons of questions when a dessert becomes a family favorite, and this recipe is no exception! People want to customize, substitute, and make sure it fits their gathering schedule. That’s what real cooking is all about—making it work for *you*. Here are the top things folks ask me about making the ultimate **hot chocolate poke cake**.
Can I use store-bought chocolate pudding instead of the fudge layer in this Hot Chocolate Poke Cake?
Oh, absolutely you can! If you’re in a real rush, or maybe you just prefer that ultra-creamy texture over a slightly firmer fudge, just go for it. You can definitely swap out the chocolate chip/sweetened condensed milk layer for a store-bought instant chocolate pudding. Just make sure you prepare it according to the package directions—and maybe follow their instructions for making it slightly thicker than usual. That way, it won’t just immediately run into the marshmallow layer beneath it. If you do this, you officially have a true **Chocolate Pudding Filled Cake**! It’s a little softer, but still deeply delicious, I promise.
What is the best way to serve this Cozy Winter Chocolate Dessert?
Because this cake has so many creamy, rich fillings and that fluffy topping, I really think it shines when served chilled. It’s the best way to let those layers stay distinct and firm. Pop it in the fridge for at least two hours after the topping goes on. When you cut a slice, the cold temperature keeps everything neat! However, if you’re serving it right after you bring it in from the cold, you can leave it on the counter for about 30 minutes to take the chill off if you prefer a slightly softer bite. A small cup of warm chocolate sauce on the side for dipping or pouring is always a showstopper for this **Cozy Winter Chocolate Dessert**.
Can I make this Decadent Chocolate Dessert Baking recipe gluten-free?
Yes! This recipe is surprisingly easy to adapt if you need to keep things gluten-free! Since the main thing that would contain gluten is the cake mix itself, just swap that out for a high-quality, 1:1 gluten-free Devil’s Food Cake mix. All the other components—the marshmallow fluff, the chocolate chips, the condensed milk, and the heavy cream—are naturally gluten-free. Just give that marshmallow fluff a double-check to make sure there are no surprise additives. It’s a fantastic way to serve a truly **Decadent Chocolate Dessert Baking** option to all your guests. If you are looking for other easy meals, check out my easy breakfast recipes while you’re planning your next menu!
If you are looking for comparisons on other poke cakes, check out the great ideas over at My Heavenly Recipes!
Nutritional Estimates for Your Hot Chocolate Poke Cake Slice
Okay, let’s talk numbers for a second. Because this cake is packed with those rich fillings, it is definitely an indulgence, and that’s okay! We aren’t making diet food here; we are making legendary comfort food. Based on the ingredients listed, here are the rough estimates for one generous slice. Remember, this is just a guide since specific brands of mix and chocolate chips can change things!
- Serving Size: 1 slice (Usually 1/12th of the pan)
- Calories: 450
- Sugar: 55g
- Sodium: 350mg
- Fat: 24g
- Protein: 5g
Keep in mind that this is an estimate, like most of the recipes I share, but it gives you a good idea of what a truly decadent bite contains. Enjoy every minute of it!
Share Your Hot Chocolate Poke Cake Creations
Whew! We made it! You now have all the secrets to pulling off the coziest, most decadent **hot chocolate poke cake** that will make everyone think you spent all day fussing over it. But we know the truth—it was accessible, quick, and made with love!
Now, this is where you come in. When Jax started YumDrizzle, it was all about sharing that road-tested confidence, and that means I want to hear how it went for you! Did you serve this for Christmas Eve? Did your family devour it during the first snowstorm? Don’t keep that amazing dessert to yourself!
Please, please, please leave a rating below. Tell me in the comments how it went. Did you try to stabilize the topping like I suggested, or did you just slather it on and eat it right away? I love hearing which little tweaks folks make to fit their own style. And if you snap a picture of that gorgeous, drizzled top, share it on social media and tag us! We love seeing your successes in the kitchen. If you need to reach out for any other baking guidance, you can always find our contact page right here. Happy baking, and may your kitchen always smell like cocoa!
PrintUltimate Cozy Hot Chocolate Poke Cake

Make this rich, moist chocolate cake that tastes like your favorite winter drink. It features a gooey marshmallow filling, a fudgy layer, and a light whipped hot cocoa topping. This recipe is easy to follow and perfect for holiday gatherings or cozy nights.
- Prep Time: 30 min
- Cook Time: 35 min
- Total Time: 1 hour 5 min
- Yield: 12 servings 1x
- Category: Dessert
- Method: Baking
- Cuisine: American
- Diet: Vegetarian
Ingredients
- 1 box Devil’s Food Cake Mix
- 1 cup Water
- 3 large Eggs
- ½ cup vegetable Oil
- 2½ cups marshmallow fluff
- 2 tablespoons water (for marshmallow filling)
- 1¾ cups semi-sweet Chocolate Chips
- 14 oz (1 can) Sweetened Condensed Milk
- 3 tablespoons heavy whipping Cream (for fudge filling)
- 2 cups heavy whipping Cream (for topping)
- 2 envelopes instant Hot Chocolate Mix
- 1 teaspoon vanilla extract
- 3 cups mini-Marshmallows
- Hot fudge sauce for drizzling
Instructions
- Preheat your oven based on the cake mix package directions. Lightly grease a 9×13 baking pan.
- Combine the cake mix, water, eggs, and vegetable oil in a bowl. Stir until the batter is smooth, then pour it into the prepared pan.
- Bake the cake according to the package instructions. Remove the cake from the oven and let it cool on a rack for 20 minutes.
- Use the round handle of a wooden spoon to poke holes about one inch apart across the cake surface. Push the holes about two-thirds deep without touching the bottom of the pan.
- Prepare the marshmallow filling: Combine marshmallow fluff and 2 tablespoons of water in a microwave-safe bowl. Microwave in 20-second intervals, stirring between each, until the fluff is melted and smooth, about 2 to 3 minutes total.
- Transfer the melted marshmallow filling to a piping bag or a plastic bag with a corner snipped off. Pipe the filling into the poked holes. Spread any remaining fluff evenly over the top of the cake. Refrigerate the cake to chill.
- Prepare the chocolate fudge filling: In a microwave-safe bowl, combine the chocolate chips, sweetened condensed milk, and 3 tablespoons of heavy whipping cream. Microwave in 20-second bursts, stirring after each, until the mixture is melted and smooth, about 2 to 3 minutes. Spread this fudge mixture evenly over the chilled marshmallow layer. Return the cake to the refrigerator until the fudge sets.
- Prepare the whipped chocolate topping: Using an electric mixer, beat the 2 cups of heavy whipping cream, instant hot chocolate mix, and vanilla extract until stiff peaks form.
- Spread the whipped chocolate cream evenly over the set fudge layer. Top the cake with mini-marshmallows and drizzle with hot fudge sauce before serving.
Notes
- You can make this make-ahead chocolate poke cake by preparing the cake and chilling it overnight before adding the toppings.
- For a richer flavor, use a high-quality instant hot chocolate mix in the whipped topping.
- If you want a slightly firmer topping, you can use a stabilized whipped cream recipe instead of just the instant mix.
Nutrition
- Serving Size: 1 slice
- Calories: 450
- Sugar: 55g
- Sodium: 350mg
- Fat: 24g
- Saturated Fat: 14g
- Unsaturated Fat: 10g
- Trans Fat: 0.5g
- Carbohydrates: 58g
- Fiber: 2g
- Protein: 5g
- Cholesterol: 45mg