
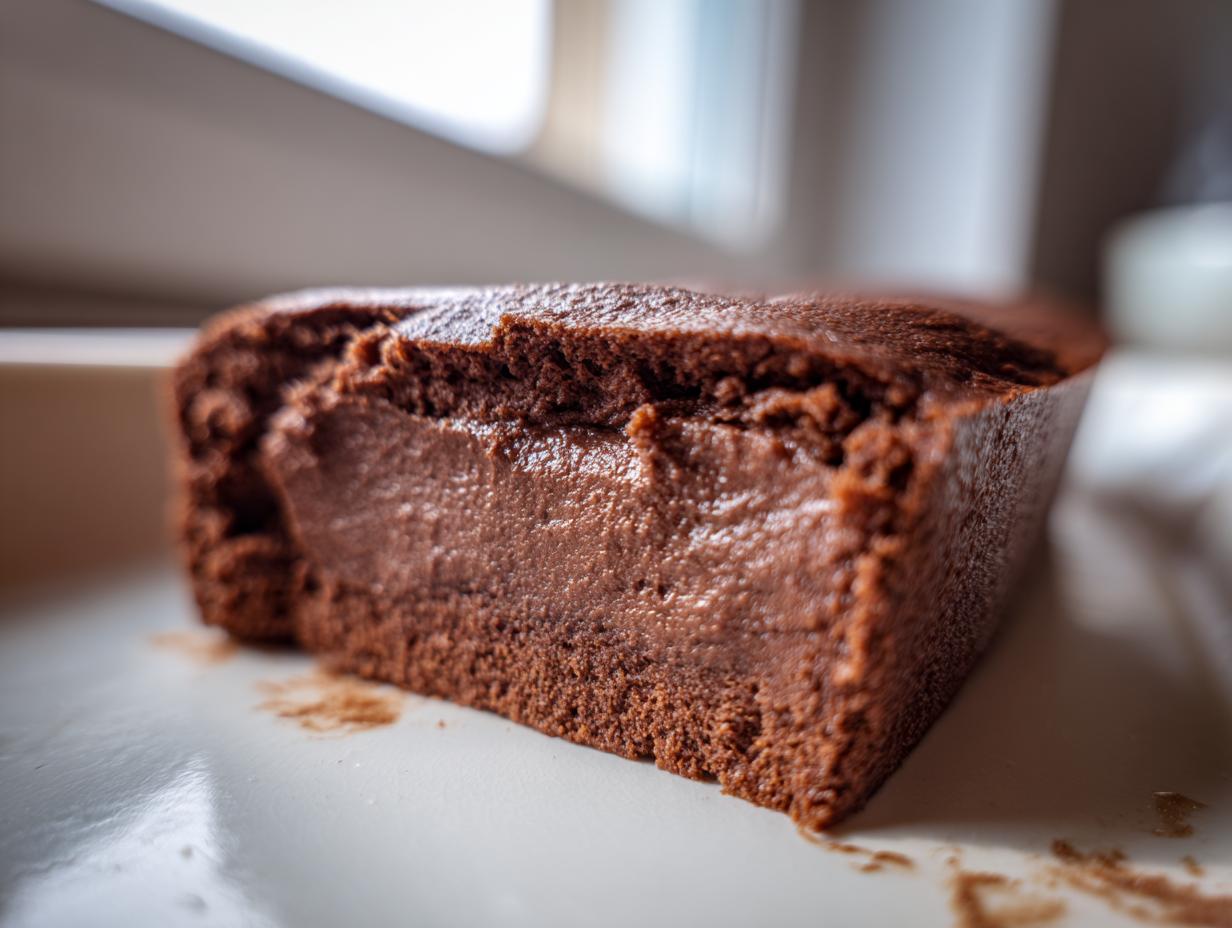
You know that feeling? The one where you just need something that tastes like pure, unbroken comfort? For me, that smell always takes me right back to searching for soul in a new city while on the road—always looking for that one local spot that just *gets* flavor right. That’s what YumDrizzle is all about: bringing that real, authentic flavor home without the fuss. Forget those sad, dusty boxes of mix you grew up with; we’re making the homemade chocolate pudding that tastes like memory itself!
This recipe, friends, is the one. It’s ridiculously rich, unbelievably creamy, and it comes together faster than you can even decide on delivery. It’s the best chocolate pudding you’ll ever make from scratch, I promise. When I started YumDrizzle, it was because I realized most people are juggling a thousand things and just need food that hits right without being complicated. This velvety chocolate dessert uses pantry staples and delivers decadence in under thirty minutes of active cooking time.
It’s flavor found on the open road, brought straight to your countertop. You can learn more about how we approach accessible home cooking over on our About Page if you’re curious!
- Why This Homemade Chocolate Pudding Recipe Is The Best Chocolate Pudding Ever
- Ingredients for Your Easy Chocolate Pudding Recipe
- How to Make Homemade Chocolate Pudding From Scratch
- Tips for the Best Homemade Chocolate Pudding Ever
- Serving Suggestions for Your Creamy Chocolate Dessert
- Storage & Reheating Instructions for Homemade Chocolate Pudding
- Variations on This Simple Dessert Recipe
- Frequently Asked Questions About Homemade Chocolate Pudding
- Estimated Nutritional Data for This Homemade Chocolate Pudding
- Share Your Experience Making This Homemade Chocolate Pudding
Why This Homemade Chocolate Pudding Recipe Is The Best Chocolate Pudding Ever
I spent years chasing down truly great desserts, and what I learned is that simple often beats complicated when it comes to comfort food. This isn’t some wimpy, watery stuff; this is the real deal. If you’re hunting for a Comfort Food Dessert that hits hard on flavor and quality, this is it.
- It’s genuinely From Scratch Pudding using ingredients you likely already have in the cupboard.
- The flavor is deep and indulgent—we’re skipping that artificial aftertaste you get everywhere else.
- It comes together faster than ordering pizza, making it a perfect Weeknight Dessert Idea.
Achieving That Velvety Smooth Pudding Texture
Texture is everything here; nobody wants lumps in their chocolate hug! The secret weapon is the cornstarch. It works magic alongside the egg yolks to create that incredible set while keeping everything light. My main tip, straight from the road-side kitchens I loved, is this: you must stir constantly while it’s on the heat.
Don’t walk away! Seriously, keep that whisk moving until it feels thick. That constant motion keeps things moving off the bottom of the pan and guarantees you get that gorgeous Silky Smooth Pudding texture we’re after. Plus, getting the tempering right means no scrambled egg bits, just pure velvet.
Ingredients for Your Easy Chocolate Pudding Recipe
Okay, let’s talk about what you need for this easy chocolate pudding recipe. Because this is from scratch, the quality of what you put in really counts, even though the list is short! These are all simple pantry staples, but I need you to be precise on a couple of these points so it sets up perfectly.
- 2 cups whole milk (Keep it whole, trust me, this is where the richness comes from!)
- 1/2 cup granulated sugar
- 1/4 cup unsweetened cocoa powder (You absolutely want to use Dutch process if you can for that deep color!)
- 2 tablespoons cornstarch (This is your magic thickener—don’t skip it!)
- 1/4 teaspoon salt
- 2 large egg yolks (Just the yolks, please!)
- 2 tablespoons unsalted butter (Room temperature is best for stirring in later)
- 1 teaspoon vanilla extract
Gather everything next to the stove before you turn on the heat. It moves fast once it starts cooking!
How to Make Homemade Chocolate Pudding From Scratch
Alright, deep breaths! This process is super straightforward, but taking your time in a couple of spots stops any disaster from happening. We’re aiming for that incredibly satisfying result: perfect homemade chocolate pudding that’s ready to chill. The whole active cooking time is maybe 15 minutes, which is amazing for how rich this is!
Combining Dry Ingredients and Milk for Homemade Chocolate Pudding
First things first: grab that medium saucepan and get your dry buddies in there—sugar, cocoa powder, cornstarch, and salt. Use a whisk and spend a minute making absolute sure they are fully acquainted. I mean it, *fully* mixed! If you skip this, you’ll end up with white streaks of cornstarch hiding later. Once you’re sure it’s blended, slowly pour in the whole milk while you keep whisking. You’re looking for a completely smooth, slightly grey liquid now. Make sure there are no hidden cocoa wads stuck to the bottom!
Tempering Egg Yolks for Silky Smooth Pudding
This next step is where we become masters of temperature control. Grab your two egg yolks in a separate little bowl. Now, turn your main saucepan onto medium heat. Once the milk mixture starts to get thin bubbles around the edge—that’s when you pause! Take about half a cup of that hot liquid very slowly, drop by precious drop, into the yolks while whisking the yolks furiously the whole time. This is tempering; it stops them from turning into little yellow scrambled bits when they hit the main batch. Once they look happy and warm, pour that warm yolk mixture right back into the saucepan.
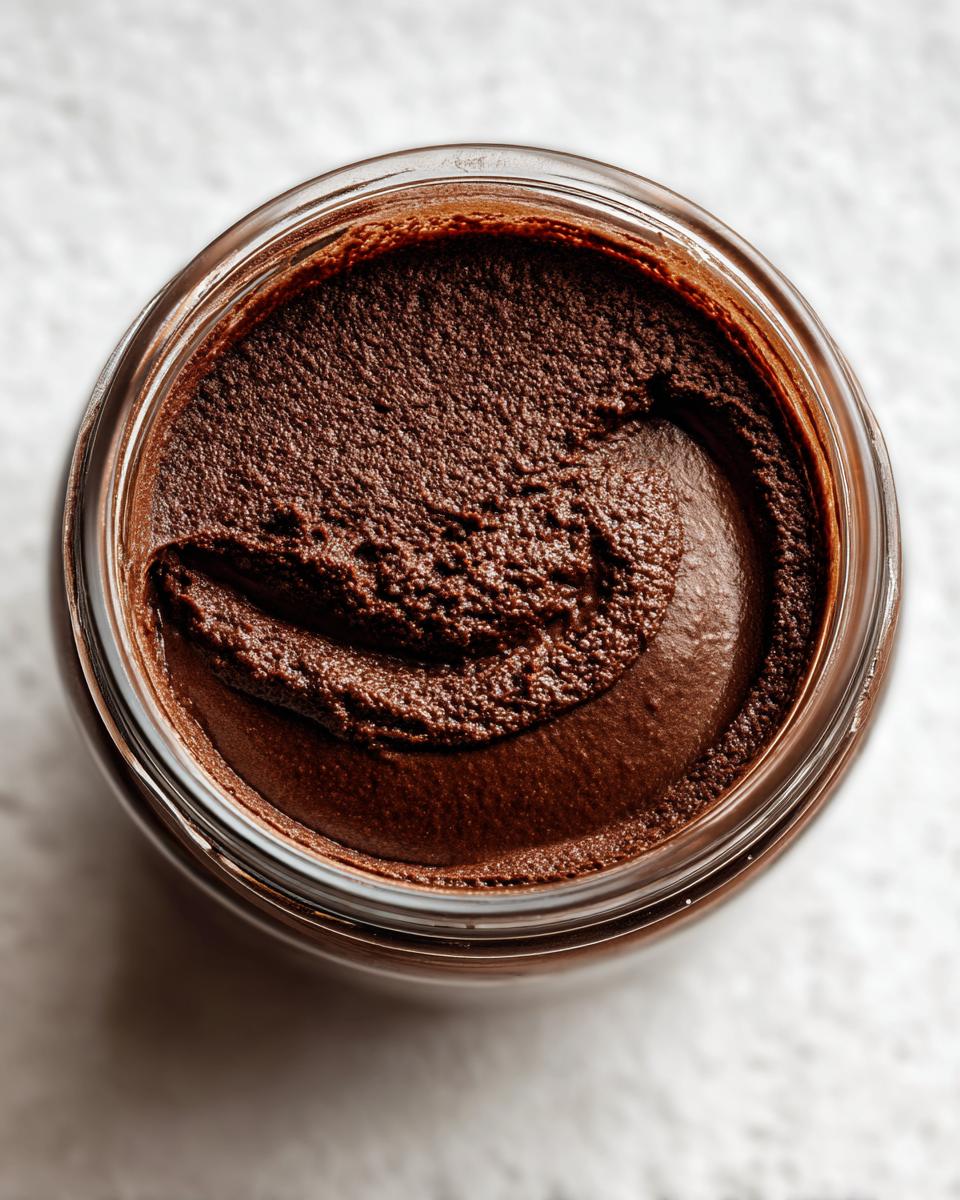
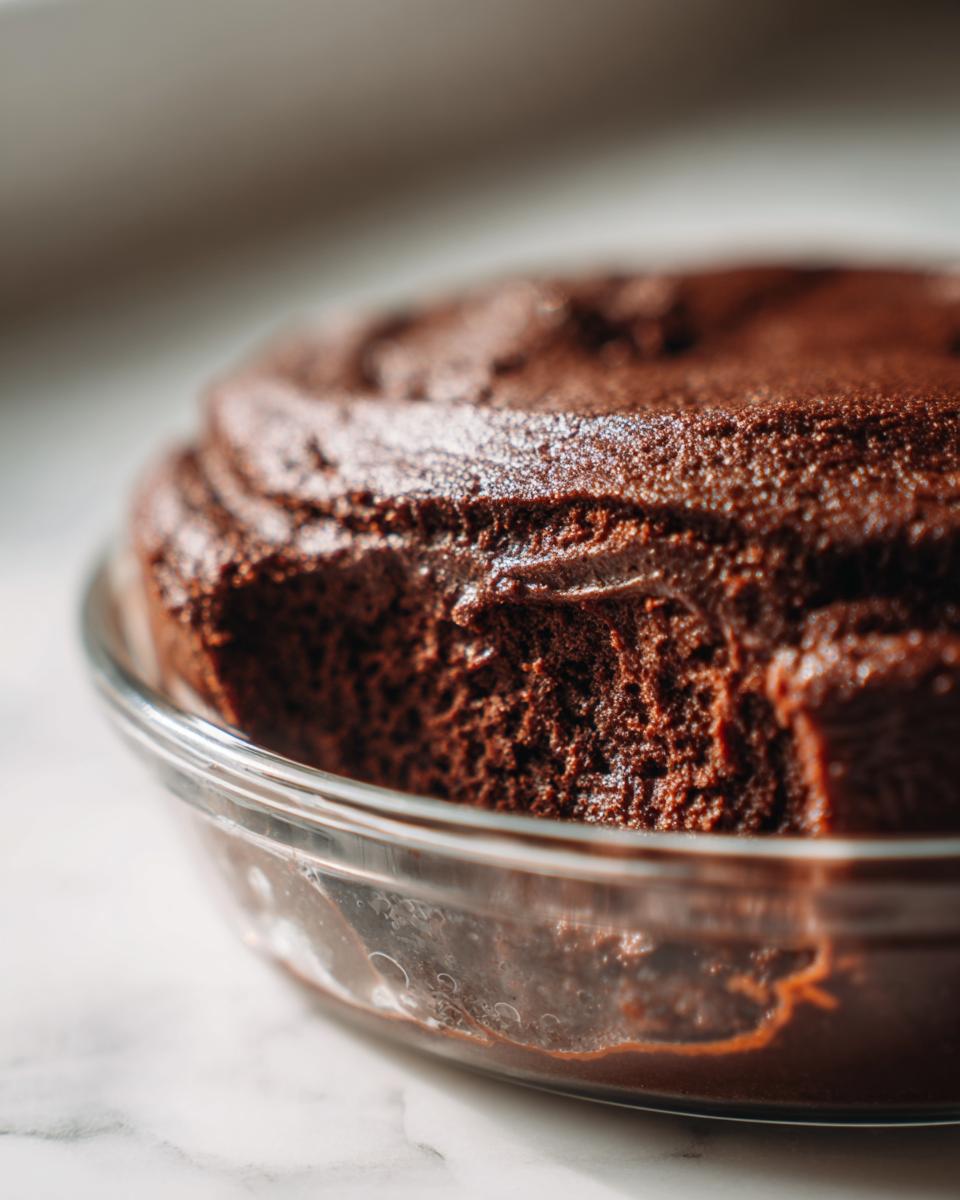
Finishing and Chilling Your Rich Cocoa Pudding
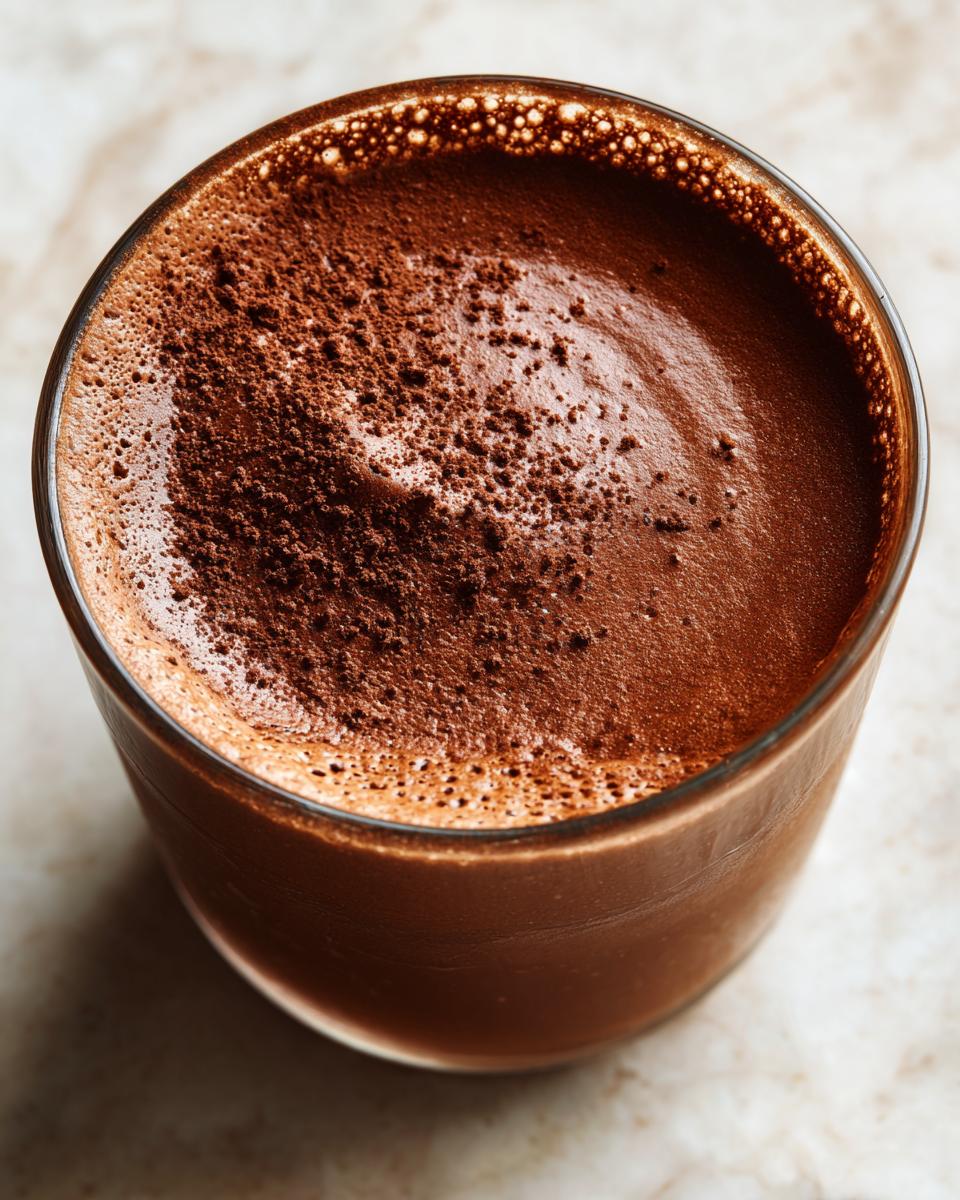
Once the yolks are in, keep stirring gently but constantly over medium heat. It will suddenly thicken up! When it’s bubbling gently and coats the back of a spoon nicely, pull it straight off the heat. Now, stir in your room-temperature butter until it melts right in—that adds shine! Then comes the vanilla. Pour your Rich Cocoa Pudding into individual cups or one big bowl. Here’s the non-negotiable trick to avoid that crusty top: grab a piece of plastic wrap and press it directly onto the surface of the pudding. It stops air from reaching it. Then, pop it in the fridge for at least two hours. You can check out our easy chocolate fondue recipe while you wait!
Tips for the Best Homemade Chocolate Pudding Ever
You’ve made it this far, which means you are serious about the texture and flavor of your homemade chocolate pudding! I have a few final thoughts that I picked up from cooks all over the country who insisted on doing things the right way.
First, don’t try to rush the chilling process. If you serve this warm, it’s just warm chocolate sauce, not pudding. It needs that two-hour chill time to set up nicely. Also, when it comes to milk, please use whole milk. Since the fat content is higher, it creates a far more luxurious, stable finish. Skim milk just doesn’t cut it for a truly decadent feel.
For an extra punch of flavor—especially if you are having this on a special occasion—try melting in about two ounces of finely chopped bittersweet chocolate right at the very end with the butter. That adds depth that cocoa alone just can’t reach. We always loved sneaking in those extra layers of flavor, even in our simple weeknight dessert ideas!
Serving Suggestions for Your Creamy Chocolate Dessert
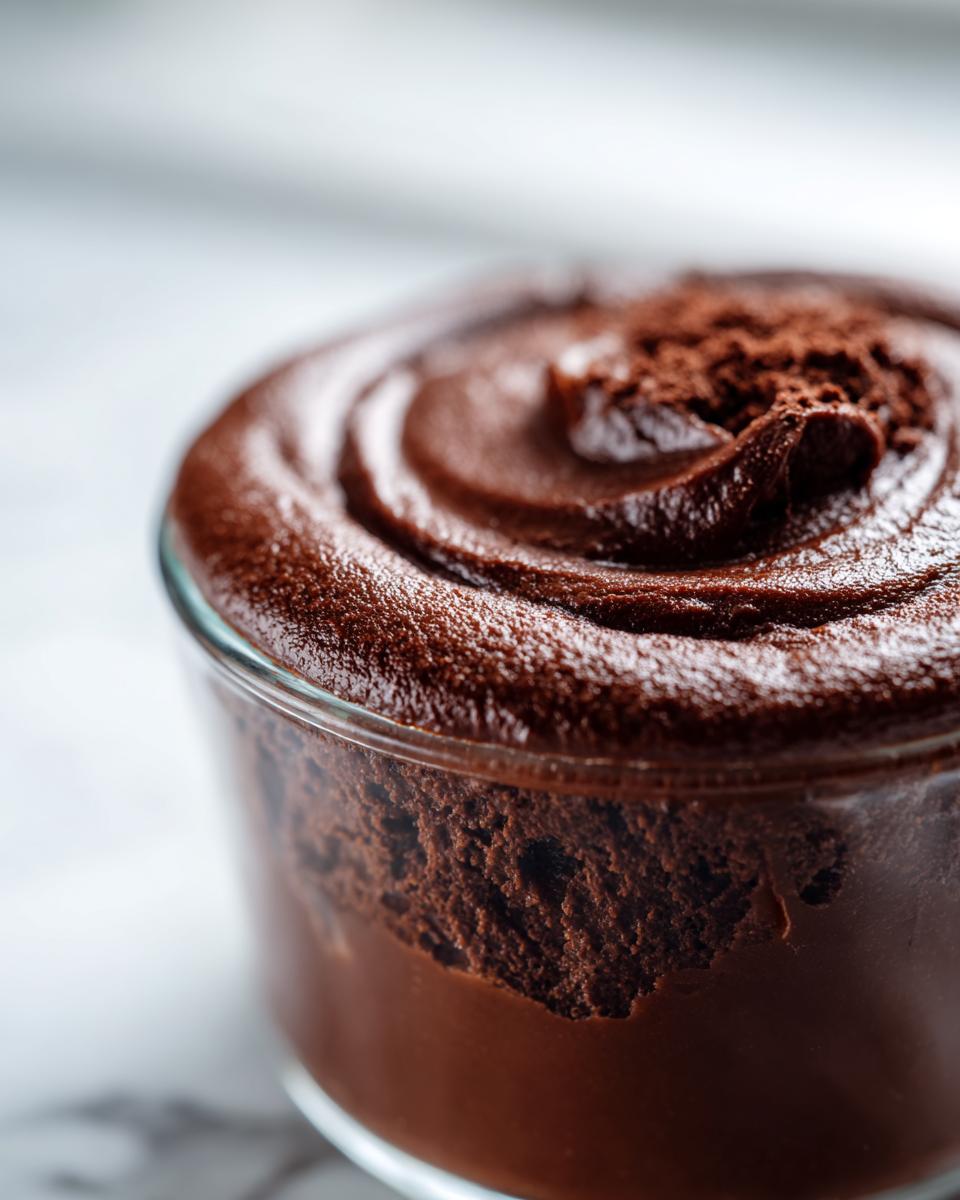
So, you’ve got this gorgeous, velvety chocolate dessert chilling in the fridge. Now what? Well, you could eat it straight with a big spoon right over the sink—and honestly, I won’t judge you! But if you’re putting this out for company, or maybe even just making a Tuesday night feel a little more special (hello, Weeknight Dessert Idea!), a little dressing up goes a long way.
The classic move, the one I always default to when I need something fast and foolproof, is just a big dollop of fresh whipped cream. You know, the kind you whip up yourself right before serving so it actually holds its peaks? That contrast between the cold, dense pudding and the airy, slightly sweetened cream is just fantastic.
If you want color, throw some fresh raspberries or strawberries on top. The slight tartness cuts right through the richness of the cocoa perfectly. Honestly, sometimes I grate a little block of fancy dark chocolate over the top—it adds a nice bitter crunch. If you’re a real chocolate fanatic, throw some chocolate shavings or maybe even a few of those classic soft and chewy peanut butter cookies crumbled on top. It’s all about making your food feel celebratory!
Storage & Reheating Instructions for Homemade Chocolate Pudding
You’ve nailed the cooking process, now let’s talk about keeping that perfection intact! The best part about this homemade chocolate pudding is that it actually tastes better the next day once all those rich cocoa flavors have truly melded together during the chill time.
You want to keep this tightly covered in the fridge. Remember that vital step of pressing plastic wrap directly onto the surface to stop air circulation? Keep that going! It should stay perfectly creamy and set for about 3 to 4 days. Don’t push it past five days, though; even though cornstarch helps it hold shape, it’s still a fresh dairy product.
Now, here’s the thing about pudding that has been chilled: sometimes when you pull it out, it can look a little sleepy or overly firm right in the center. That is totally normal! Don’t panic and think you ruined it.
Reviving Your Pudding Texture
If your pudding looks a bit dense or separated right out of the container, all it needs is a quick wake-up call. Take a regular kitchen whisk—not a fancy electric mixer—and just give it a good, vigorous whisking right in the bowl for about 30 seconds. You’ll be shocked how quickly that texture snaps right back into that beautiful, velvety smooth state we worked so hard to achieve.
If you’re serving it cold straight from the fridge without the whisk, make sure you’re using a dish deep enough to handle that set texture. But honestly, that 30-second whisk is the oldest trick in the book for bringing stovetop puddings back to life!
Variations on This Simple Dessert Recipe
Just because this recipe is perfect doesn’t mean we can’t play with it a little, right? That’s how the best comfort food recipes travel across generations—through little tweaks and experiments. Since we are using simple pantry staples, swapping out a flavor component doesn’t complicate the process one bit. You’ll still get that amazing, rich texture we worked on earlier.
If you’re a serious coffee drinker, you have to try the mocha route. Just dissolve about one teaspoon of instant espresso powder right along with your dry ingredients in Step One. That little bit of coffee enhances the deep notes of the cocoa powder without making the pudding taste like a cup of joe. It’s subtle, but wow, does it add complexity!
For the vanilla, don’t be afraid to experiment once you have the texture right. Try swapping the vanilla extract for a teaspoon of almond extract mixed in at the end with the butter. It gives the pudding a completely different, slightly floral note that is unexpected and delightful.
Another fun twist comes from the additions. If you want something bright, whisk in the zest of one orange when you add the vanilla. That citrus cuts through the deep chocolate flavor beautifully, making it feel a little lighter, maybe even perfect for spring. If you want something totally different, you can check out our easy homemade strawberry milk recipe for a different kind of sweet treat!
Remember, these swaps happen after the thickening stage, so your cooking technique stays exactly the same. You get maximum variety for minimal effort!
Frequently Asked Questions About Homemade Chocolate Pudding
I know sometimes the stovetop part looks a little intimidating, but that’s why we’re here to answer the little worries that pop up when you’re trying to perfect something new. Ask away, I’ve got the answers worked out from all my years on the road testing these kinds of things!
Can I make this a no bake pudding recipe?
That’s a great question! Since this recipe relies on the cornstarch and egg yolks cooking together to activate their thickening power, you do have to put it on the heat for about 15 minutes. So, technically, it’s a cooked dessert. However, once it hits the stove and thickens, the magic happens in the fridge! After chilling for a couple of hours, you end up with a perfectly set, delicious dessert that requires absolutely no further baking. It’s a No Bake Pudding experience once it’s off the heat, which is nearly as good, right?
What is the best milk to use for creamy chocolate pudding?
If you want that truly decadent, rich result, you should really stick with whole milk. That fat content is essential for giving your From Scratch Pudding the luxurious mouthfeel we are aiming for. When you use lower-fat milk, the pudding sometimes ends up feeling a little thinner, or it might even get a slightly grainy texture when it sets up cold. Whole milk gives you security and richness in every spoonful!
Is this truly the best homemade chocolate pudding recipe?
That’s what I’m aiming for! I truly think so because we use Dutch process cocoa for depth and we temper the eggs carefully to ensure that velvety texture—no one likes that powdery, lumpy stuff. This version of homemade chocolate pudding pulls flavors from the best classic diners without any of the complicated steps. It’s quick, it’s rich, and it’s all done on your stovetop. Give it a try, and if you don’t agree, come tell me about it in the comments section below! Maybe you can try our easy pizza sliders recipe next for dinner!
How quickly does this pudding set up?
You need a minimum of two hours in the fridge for it to set nicely. If you’re in a real hurry—and I get it, the craving hits hard—you can pop the individual serving cups into an ice bath right after you cover them. That speeds up the cooling process significantly, and you might be able to serve it in closer to an hour and a half. Just make sure it’s really, really cold before you dig in!
Estimated Nutritional Data for This Homemade Chocolate Pudding
If you’re counting things, I totally get it. Knowing what’s in your bowl is part of that ownership over your food that I love to see in home cooks—it brings respect for the ingredients! Since this is a rich, creamy dessert made with whole milk and real butter, the numbers reflect that decadence.
Here are the estimated nutritional facts for one serving based on the ingredients listed:
- Serving Size: 1 serving
- Calories: 280
- Sugar: 30g
- Sodium: 150mg
- Fat: 12g
- Saturated Fat: 7g
- Carbohydrates: 38g
- Protein: 7g
- Cholesterol: 75mg
Now, listen here. This is just an estimate, okay? I calculated this based on standard pantry white sugar and standard whole milk. If you swap the sugar for maple syrup or use a lower-fat milk, the numbers are going to change! Think of these figures as a good baseline, but don’t stress over them too much. The point of this incredible chocolate treat is comfort, not calorie counting!
Share Your Experience Making This Homemade Chocolate Pudding
Okay, now it’s your turn! This recipe came to life because I believe in sharing good food. Did this ultra-creamy dessert hit the spot?
Let me know down in the comments! Seriously, I want to hear how it turned out. Did you use whipped cream? Did the kids devour it? Drop a rating so others know this is the real deal for a satisfying, rich cocoa dessert. If you need to reach out for any reason, you can always find our contact form right here. Happy cooking, friends!
PrintThe Best Ever Homemade Chocolate Pudding: Rich, Creamy, and Made From Scratch

This recipe delivers a rich, velvety homemade chocolate pudding that tastes like comfort. It uses simple pantry staples and comes together quickly for a truly decadent, silky smooth dessert that beats any boxed mix.
- Prep Time: 10 min
- Cook Time: 15 min
- Total Time: 25 min
- Yield: 4 servings 1x
- Category: Dessert
- Method: Stovetop Cooking
- Cuisine: American
- Diet: Vegetarian
Ingredients
- 2 cups whole milk
- 1/2 cup granulated sugar
- 1/4 cup unsweetened cocoa powder (Dutch process recommended)
- 2 tablespoons cornstarch
- 1/4 teaspoon salt
- 2 large egg yolks
- 2 tablespoons unsalted butter
- 1 teaspoon vanilla extract
Instructions
- In a medium saucepan, whisk together the sugar, cocoa powder, cornstarch, and salt until combined.
- Gradually whisk in the whole milk until the mixture is smooth and there are no lumps.
- Place the saucepan over medium heat. Cook, stirring constantly with a whisk, until the mixture thickens and just begins to bubble. This usually takes 5 to 8 minutes.
- In a small bowl, lightly whisk the egg yolks.
- Temper the yolks by slowly pouring about 1/2 cup of the hot milk mixture into the yolks while whisking constantly.
- Pour the tempered yolk mixture back into the saucepan with the remaining milk mixture.
- Continue to cook over medium heat, stirring constantly, for 1 to 2 minutes more, until the pudding thickens significantly and coats the back of a spoon. Do not let it boil rapidly.
- Remove the saucepan from the heat. Stir in the butter and vanilla extract until the butter is fully melted and incorporated.
- Pour the pudding into individual serving dishes or a single bowl.
- Press plastic wrap directly onto the surface of the pudding to prevent a skin from forming.
- Chill in the refrigerator for at least 2 hours, or until completely cold and set.
Notes
- For the creamiest texture, use whole milk and stir constantly while cooking to prevent scorching on the bottom of the pan.
- If you want a deeper chocolate flavor, use bittersweet chocolate chips along with the cocoa powder; melt them in at the end with the butter.
- This is a classic comfort food dessert, perfect for a weeknight treat or a special occasion finish.
Nutrition
- Serving Size: 1 serving
- Calories: 280
- Sugar: 30
- Sodium: 150
- Fat: 12
- Saturated Fat: 7
- Unsaturated Fat: 5
- Trans Fat: 0
- Carbohydrates: 38
- Fiber: 2
- Protein: 7
- Cholesterol: 75