
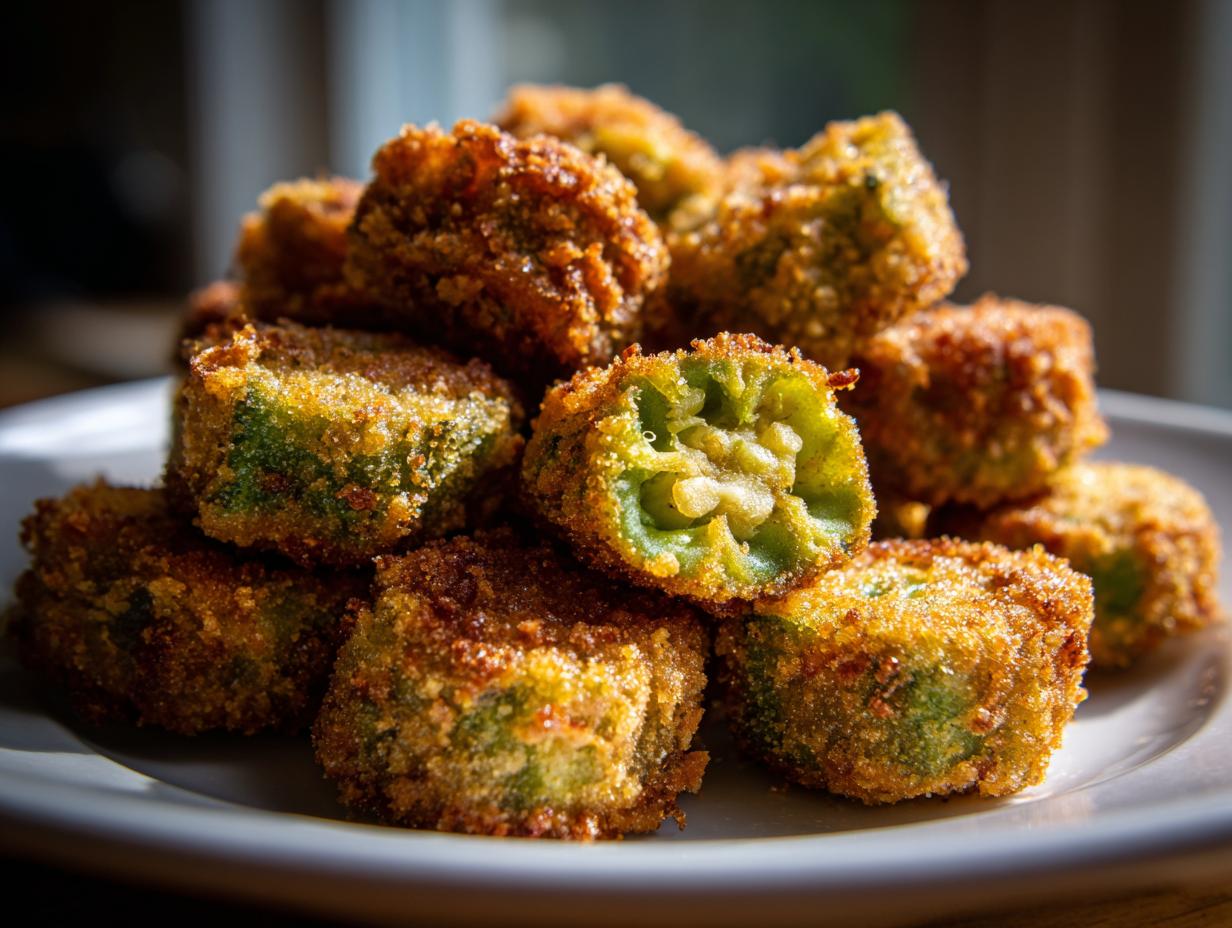
Man, there is nothing better than that first bite of genuine Southern comfort food—that audible *crunch* that tells you everything was done right. We chased that sound across the whole country when I was on the road, trying to pin down how folks achieved that perfect texture without that dreaded sliminess. This Ultimate Crispy Southern Fried Okra Recipe is our answer! It uses my tried-and-true buttermilk soak and the double-dredge method. Trust me when I say this fried okra recipe will give you pure, golden perfection every single time. It’s Nashville food truck magic brought right to your kitchen. If you love this level of crispiness, you absolutely have to check out my secrets for ultimate crispy juicy fried chicken wings too!
- Why This Is The Best Fried Okra Recipe: Achieving Ultimate Crunch
- Gathering Ingredients for Your Fried Okra Recipe
- How to Make Fried Okra: Step-by-Step Instructions
- Tips for the Ultimate Crispy Fried Okra Recipe Success
- Serving Suggestions for Your Easy Okra Side Dish
- Storage and Reheating for Crunchy Okra Snack
- Alternative Cooking Methods for Fried Okra Recipe
- Frequently Asked Questions About This Fried Okra Recipe
- Estimated Nutritional Data for Crispy Fried Okra
- Share Your Southern Fried Okra Success
Why This Is The Best Fried Okra Recipe: Achieving Ultimate Crunch
Look, I’ve seen folks fry okra straight out of the bag and wonder why they ended up with a pot of okra soup. That’s not right. We are making Crispy Fried Okra here, the kind that makes you want to yell it from the porch! I’m telling you, this method is the real deal because we attack the texture problem head-on, ensuring you get that satisfying, audible crunch. If you’ve given up on okra because of sliminess, this Best Fried Okra Recipe is going to change your mind forever. It’s all about preparation, not just the frying itself. If we nail the setup, the frying is a breeze. We’ve got two major steps here to guarantee success, and you can find some other great crispy ideas when you check out my crispy homemade potato chips recipe.

The Secret to No Slime Okra Cooking
That notorious slime in okra? It’s called mucilage, and it’s naturally in there. Buttermilk is our secret weapon against it. When you soak the sliced okra in that tangy buttermilk bath for 30 minutes, the acid starts doing some good work, breaking down that sticky stuff before it even hits the hot oil. It’s basically a gentle pre-tenderizing bath that calms the okra down so it’s ready to crisp up instead of turn gooey. Don’t skip that soak time—it’s non-negotiable for true No Slime Okra Cooking.
Mastering the Double Dredge for Southern Fried Okra
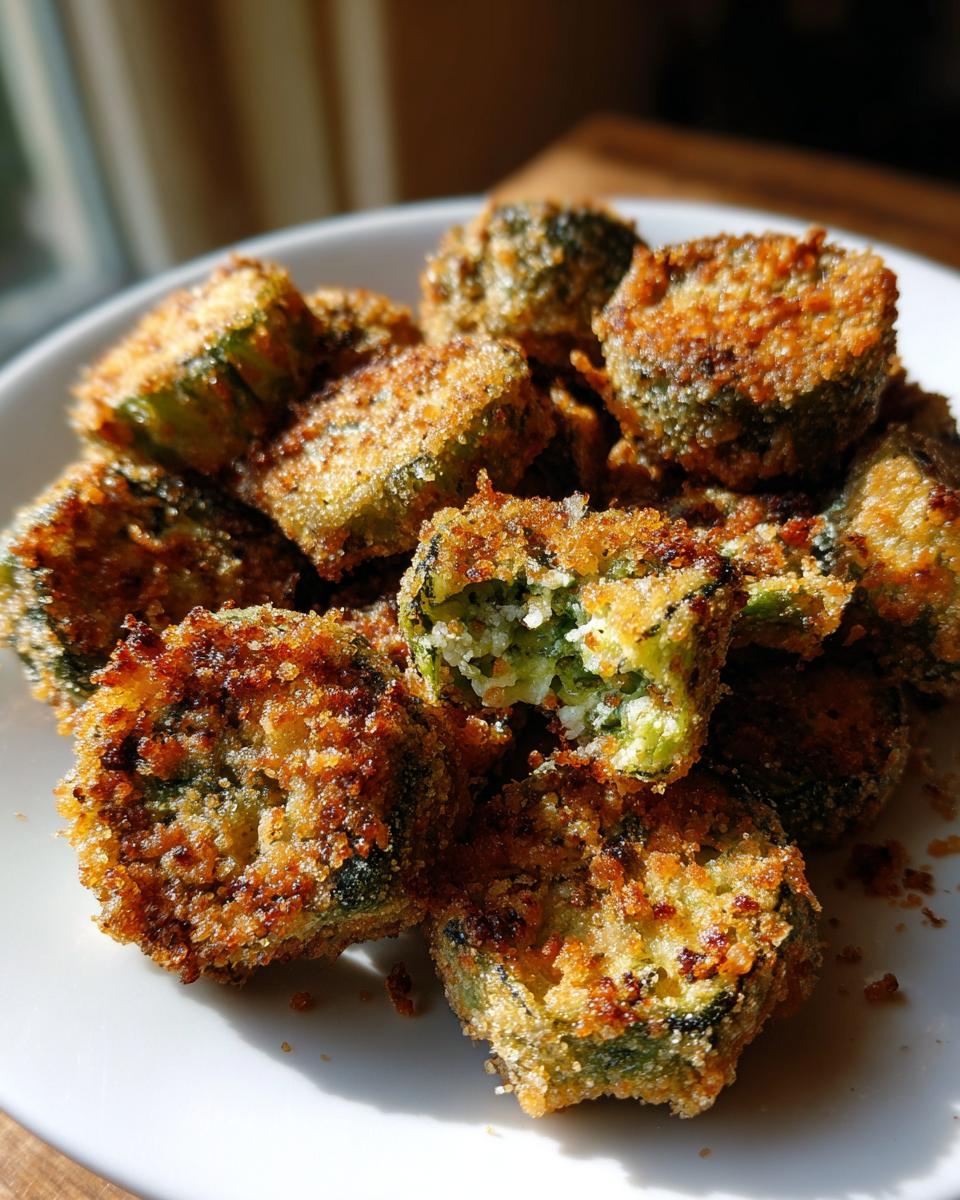
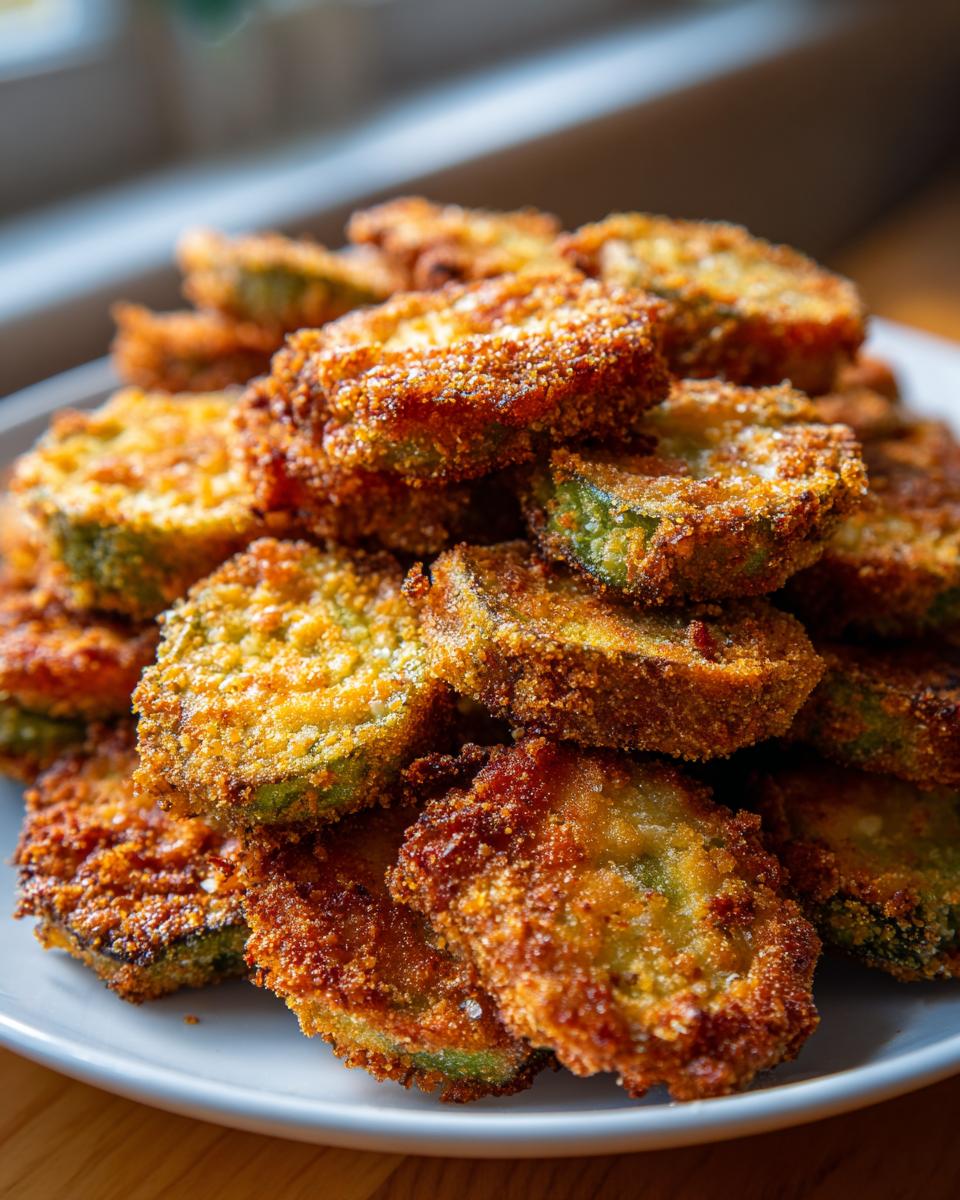
Once that okra is happy in the buttermilk, we move to the coating—and this is where that thick, shield-like crunch comes from. We’re not just dredging once! After the first coat of our cornmeal and flour mix, we dip it right back into the wet stuff for a second, quick dip, and then back into the dry mix. This double-dredge process builds layers, creating that thick, rugged, Cornmeal Crusted Okra finish. That heavy crust is what protects the inside and fries up shatteringly crisp.
Gathering Ingredients for Your Fried Okra Recipe
Alright, let’s talk about what you need to pull this off. When I was hunting down the best versions of this side dish, the cooks always stressed the quality of the starting materials. You can’t make magic happen with sad ingredients, right? This list is simple—it forces you to focus on technique, which is great. But the biggest thing you need to pay attention to is the okra itself. It’s what this whole operation is built around!
Ingredient Notes and Substitutions for Buttermilk Fried Okra
First up: the okra. Please, please, please use fresh okra if you can get your hands on it. Frozen okra is just too watery when it thaws, and that extra water fights against our goal of achieving maximum crispness. If you absolutely must use frozen, dry it out between a couple of layers of paper towels for ages, but honestly, the texture won’t be the same. This is where you’ll see the difference between good and great.
Now, buttermilk. It’s the star of the soak! If you open the fridge and realize you’re dry, don’t panic, I’ve got you covered. Just take about two cups of regular milk and whisk in a tablespoon of white vinegar or fresh lemon juice. Let that sit on the counter for about five or ten minutes until it looks just slightly curdled—that’s your DIY Buttermilk Fried Okra starter. It works in a pinch!
For the oil, you need something that can handle some serious heat without breaking down, like peanut oil or good old reliable vegetable oil. We need that temperature high (375°F!) to crisp the coating instantly. If you happen to be looking for a creamy accompaniment to this crunchy veggie, check out my homemade Alfredo sauce recipe. It’s a different kind of comfort!
How to Make Fried Okra: Step-by-Step Instructions
Okay, now that we’ve picked our ingredients and understood the magic of the soak, let’s get down to the actual cooking. This is where you transform those little green slices into pure gold. If you follow along carefully, you’ll master How to Make Fried Okra that stays crunchy, not rubbery or slimy. Don’t let the deep frying scare you; maintaining temperature is the key, and I promise it’s easier than it sounds. We’re aiming for that perfect texture that people rave about in old Southern kitchens.
Prepping the Okra and Buttermilk Soak
First things first: slice up that fresh okra into roughly half-inch rounds. You want consistency so everything cooks evenly. Place those rounds in a bowl and pour over the buttermilk mixture—the one we seasoned up nice. Give it a gentle toss, making sure every piece gets a nice slathering. Now, this is crucial: you have to let this sit for at least 30 minutes. I sometimes let it go closer to 45 if I’m busy prepping sides. This is your primary defense against gooiness, so respect the clock and give it that minimum soak time for the best No Slime Okra Cooking experience.
Dredging and Frying for Perfect Crispy Fried Okra
After the soak, it’s time for the protective shield! Take the okra out of the buttermilk—let the big drips fall back in—and press it hard into your cornmeal/flour mixture. Remember that double-dredge tip? Do that first coat, shake off the excess, dip it quickly back into the wet stuff just for a second like a quick handshake, and then shove it back into the dry mix to really pack that crust on. Seriously press it in!

Next, heat up your oil in a heavy skillet, like cast iron if you have one, to a steady 375°F. If you drop the coated okra in and the oil just sits there bubbling lazily, it’s too cool, and your okra will soak up the grease. You want it sizzling immediately! Work in small batches—do not overcrowd the pan, or the temperature drops instantly! Fry for just three to five minutes until it’s deeply golden brown. As soon as they come out, drop them onto a rack and hit them with a little extra salt instantly to make that Seasoned Fried Okra truly sing. You can find a fantastic dipping partner for this crunchy side here: easy homemade tartar sauce recipe. Also, for more ideas on getting that crunch, check out this resource on fried okra techniques.
Tips for the Ultimate Crispy Fried Okra Recipe Success
Getting this right consistently is what separates a good cook from someone who truly understands Southern technique, you know? I learned this when I was camping out trying to recreate roadside stand flavors. If you want this to be the Best Fried Okra Recipe you ever make, temperature control is key. That’s why I always preach using a good, heavy cast iron skillet (if you have one) because it holds heat so much better than thinner pans. Temperature drops are the enemy of crispness!
The second big tip is frying in small batches. Seriously, don’t cheat yourself by overcrowding the pan just to save five minutes. When you drop a huge pile of cold okra into hot oil, the temperature tanks immediately, and you just end up steaming the coating instead of frying it hard and fast. Work in single, uncrowded layers so that oil can spring right back to 375°F between batches. This dedication to detail is what makes the difference. If you want another side dish that requires the same attention to texture, my best classic creamy egg salad recipe is a must-try!
And finally, trust the color, not just the clock. Three minutes might be enough for a thin batch, but a lot of folks need closer to five minutes for a deep, satisfying golden color. If you’re curious about other ways folks are doing it, check out this original recipe over at CopyKat.
Serving Suggestions for Your Easy Okra Side Dish
Honestly, this crispy goodness isn’t just a vegetable; it’s a foundational component of any good comfort meal! I remember stopping in roadside shacks where the star wasn’t the main plate, but what came heaped on the side. This is the kind of addictive vegetable that disappears first, so plan on making a double batch if you’re feeding a crowd. This truly stands up as an Easy Okra Side Dish that steals the show.
Pairing with Classic Southern Sides
The crunch and subtle spice of this fried okra go perfectly against anything creamy or saucy. My immediate thought every time I fry a batch is to pair it with some slow-cooked goodness. It’s fantastic served alongside big helpings of tender pulled pork, or even just piled high next to a juicy, perfectly fried chicken breast. You need something luscious to cut through that crust!
I’m also a huge fan of serving this crunchy okra alongside something creamy, like a big bowl of slow-simmered grits or even some rich, flavorful greens. It’s such a textural contrast! When I make my creamy Southern black-eyed peas recipe, the fried okra is a mandatory addition scattered right on top. It just works, trust me. This is how we eat down South—everything tastes better when it has a little crunch!
Storage and Reheating for Crunchy Okra Snack
So, here’s the hard truth: like almost all deep-fried things, this okra is undeniably best eaten the second it comes out of the oil. That initial shatter is fleeting! But let’s be real, sometimes you have leftovers. If you plan on saving any of this Crunchy Okra Snack, you have to avoid the microwave at all costs. That machine is the enemy of crispiness; it just brings the steam right back out.
Instead, stash your leftovers loosely in the fridge for up to two days. When you’re ready to enjoy them again, you have two good options. My preference is quickly tossing them in the air fryer for about four minutes at 350°F—just long enough to shock that coating back into shape. If you don’t have an air fryer, spread them on a sheet pan and let the oven crisp them up for about 7 to 10 minutes at 400°F. They’ll regain most of that fantastic crunch. If you’re learning to use your air fryer for more things, check out my guide on air fryer frozen shrimp recipes!
Alternative Cooking Methods for Fried Okra Recipe
Listen, I champion deep-fried goodness because that’s the classic Southern way, but I also know that sometimes you want that great flavor without all the oil. If you’re looking to cut back a little or just don’t want to deal with the deep fryer today, we still have fantastic ways to make this fried okra recipe shine. Remember those notes I mentioned? They hold the keys to making a lighter version that still tastes amazing and keeps that crunchy coating we worked so hard to build.
Making Air Fryer Okra Recipe
The air fryer is a brilliant tool for getting that crisp texture with minimal fat. After you’ve got your okra perfectly coated in the buttermilk and cornmeal dredge, you need to load it into your air fryer basket. Don’t pile it up! They need space to breathe so the air can circulate and make the crust crispy. If you’re looking for another crazy good air fryer crunch, my crispy air fryer bang bang chicken easy dinner recipe is always a winner!
Here’s the kicker: right before you pop the basket in, give the coated okra a light, even spray with your cooking oil—I use a mister bottle for this. You’re not drowning it, just giving the coating a little fat to brown up nicely. Set your air fryer to about 380°F (or 400°F if your machine runs cool) and cook for about 15 to 20 minutes. You gotta shake the basket half way through, maybe even peek at the color around the 12-minute mark, to make sure we get that beautiful golden brown all around!
Baking the Okra for a Lighter Version
If you don’t have an air fryer, the oven works great too for a lighter finish. This is basically a roasted version of the same crust. You’ll prep the okra exactly the same way—buttermilk soak and double dredge apply! Lay the coated pieces out on a baking sheet that you’ve lined with parchment paper. Again, they need space; overlapping pieces will steam, and we want that crunch. Set your oven temperature to a nice and hot 400°F. Pop them in and let them bake for about 15 minutes. That 15-minute mark is just a guideline—you absolutely must flip every piece over carefully halfway through this time, maybe around the 7-minute mark, so both sides get that lovely golden color. Then let them finish until they look dried out and deeply browned. This lighter approach takes a little longer than deep frying, but you get a great, crispy coating thanks to the double dredge. You can see how popular these healthier adaptations are, but if you want to lean into the grease a bit, check out this classic crispy fried okra guide!
Frequently Asked Questions About This Fried Okra Recipe
I get so many messages about making sure this turns out perfectly! It seems like everyone wants that beautiful crunch and fears the dreaded okra slime. That’s totally fair. Let’s knock out some of the big questions I hear all the time so you feel totally confident heading into the kitchen. If you’re looking for a great dipping sauce for those crispy bites, don’t forget to check out my recipe for easy homemade tartar sauce recipe.
Can I use frozen okra for this fried okra recipe?
Oh, I strongly advise against it, friend. When frozen okra thaws, it releases a TON of moisture. We spent all this time with the buttermilk telling the okra to behave, and then you dump extra water in right at the end by using frozen! That extra water turns your nice cornmeal crust into soup, and you’re back to square one: slimy, soggy okra. For the absolute Best Fried Okra Recipe, use fresh okra that you slice yourself right before you start the soak.
What oil is best for achieving crispy fried okra?
When you’re deep frying, you need an oil that likes the heat. We’re cooking this at 375°F, so you need a high smoke point oil. Peanut oil is traditional and fantastic for flavor, but vegetable oil works just as reliably if you have that on hand. The key isn’t fancy flavor; it’s stability. Just make sure you have a good inch or so in your heavy skillet and that you’ve got a thermometer handy so you can verify that temperature before those coated pieces hit the oil!
How long can the buttermilk soak last?
The minimum time you *must* stick to is 30 minutes. That allows the buttermilk’s acid to get in there and start tackling that mucilage responsible for the slime. If you need to prep ahead, you can let it go a little longer, maybe an hour, but I truly wouldn’t push it past two hours. If the okra sits too long, it starts to break down too much in the bath, and your coating won’t adhere as tightly when you dredge it. It’s a balancing act to get that wonderful Crispy Fried Okra!
Estimated Nutritional Data for Crispy Fried Okra
Alright, let’s talk fuel for a second. I’m not one of those cooks who stresses over every single calorie when we’re cooking up real comfort food—you know, the kind of food you remember from childhood or grab at a fantastic country fair. This recipe delivers that incredible, satisfying crunch! Because we are deep-frying, these numbers are definitely higher than if we baked it, but that’s the cost of flavor sometimes!
Here are the estimated nutritional breakdown values based on what we put into the recipe. Remember, these are just estimates based on standard measurements for about 6 servings, so your results might tweak slightly depending on how much oil your okra actually soaks up and exactly how much seasoning you sprinkle on at the end. If you are watching sodium, be sure to monitor your final salt sprinkle!
- Serving Size: 1 cup
- Calories: 280
- Fat: 18g
- Saturated Fat: 3g
- Carbohydrates: 28g
- Fiber: 7g
- Protein: 5g
- Sodium: 450mg
- Sugar: 5g
Just consider this data a helpful guide. The nutrition is secondary when you’re eating something that tastes this good, but it’s good to have the info! Enjoy it for what it is—a perfect, crunchy Southern indulgence.
Share Your Southern Fried Okra Success
Now that you’ve got that unbelievably crispy, non-slimy okra in your hands, you have to let me know how it went! Did the double dredge hold up? Was that buttermilk soak the game-changer you needed? Jump down to the comments below, rate this fried okra recipe five stars if it blew your socks off, and share any great tweaks you made. Knowing your success helps the whole YumDrizzle family grow!
If you loved this taste of the South, you might want to check out my recipe for buttermilk pie classic Southern recipe next for dessert!
PrintThe Ultimate Crispy Southern Fried Okra Recipe (Buttermilk & Double-Dredge Method)

You make perfectly golden, crunchy fried okra every time with this classic Southern recipe. The buttermilk soak and double dredge stop the okra from getting slimy, giving you the best crispy fried okra for a side dish or snack.
- Prep Time: 15 min
- Cook Time: 15 min
- Total Time: 45 min
- Yield: 6 servings 1x
- Category: Side Dish
- Method: Deep Frying
- Cuisine: Southern American
- Diet: Vegetarian
Ingredients
- 2 lbs fresh okra, washed and sliced into 1/2-inch rounds
- 2 cups buttermilk
- 1 teaspoon salt
- 1/2 teaspoon black pepper
- 1/2 teaspoon garlic powder
- 1/4 teaspoon cayenne pepper (optional, for a little heat)
- 1 cup yellow cornmeal
- 1/2 cup all-purpose flour
- Vegetable oil or peanut oil, for frying
Instructions
- Prepare the okra: Slice the okra into 1/2-inch rounds. Place the sliced okra in a medium bowl.
- Soak the okra: Pour the buttermilk over the okra. Add the salt, pepper, garlic powder, and cayenne pepper (if using) to the buttermilk mixture. Stir gently to coat. Let the okra soak for at least 30 minutes. This step helps prevent sliminess.
- Prepare the dredge: In a separate shallow dish, whisk together the cornmeal and flour. This is your dry coating.
- Double dredge: Working in batches, remove the okra from the buttermilk, allowing excess to drip off slightly. Dredge the wet okra thoroughly in the cornmeal mixture, pressing gently to adhere the coating. Shake off any excess coating.
- Heat the oil: Pour 1 to 1.5 inches of oil into a large, heavy-bottomed skillet (cast iron works best) until it reaches about 3/4 inch deep. Heat the oil over medium-high heat until it reaches 375 degrees Fahrenheit.
- Fry the okra: Carefully add the coated okra to the hot oil in a single layer, ensuring you do not overcrowd the pan. Fry for 3 to 5 minutes, turning occasionally, until the coating is deep golden brown and crispy.
- Drain: Use a slotted spoon to remove the okra from the oil. Place the fried okra on a wire rack set over a baking sheet or on a plate lined with paper towels to drain excess oil.
- Season immediately: Sprinkle lightly with a little extra salt while the okra is still hot. Serve immediately for the best crunch.
Notes
- For extra crunch, you can perform a second dredge: After the first coating, dip the okra back into the buttermilk briefly, then back into the cornmeal mixture before frying.
- If you prefer a healthier option, you can bake this recipe at 400 degrees Fahrenheit for 15-20 minutes, flipping halfway, after spraying the coated okra lightly with cooking spray.
- Use fresh okra for the best texture; frozen okra often releases too much moisture.
Nutrition
- Serving Size: 1 cup
- Calories: 280
- Sugar: 5
- Sodium: 450
- Fat: 18
- Saturated Fat: 3
- Unsaturated Fat: 15
- Trans Fat: 0
- Carbohydrates: 28
- Fiber: 7
- Protein: 5
- Cholesterol: 15