
You know those desserts that just scream childhood fun? The ones that look a little goofy but taste absolutely incredible? Well, my absolute favorite in that category is the legendary dirt cake. Seriously, if you need a dessert that requires zero oven time but delivers maximum flavor and nostalgia, this is it.
It’s creamy, it’s loaded with crushed Oreos, and it’s so simple you won’t believe it. This philosophy of making truly delicious food fun and accessible is what guides us here at YumDrizzle. You can read more about our approach over on our About page! This dirt cake fits right into that philosophy. It’s easy, accessible, and honestly, who doesn’t love digging into pudding and cookies?
- Why This Creamy Pudding Dessert is the Ultimate Potluck Desserts Easy Pick
- Gathering the Ingredients for Your Classic Oreo Dirt Cake
- Step-by-Step Instructions for the Layered Oreo Dessert
- Assembling Your Chocolate Dirt Cake: Cups vs. Trifle Dish
- Tips for Success When Making No Bake Dirt Cake Recipe
- Storage and Make Ahead Dessert Instructions for Your Dirt Cake
- Serving Suggestions for This Fun Holiday Dessert
- Frequently Asked Questions About Oreo Dirt Cake
- Share Your Cream Cheese Dirt Cake Creations
Why This Creamy Pudding Dessert is the Ultimate Potluck Desserts Easy Pick
I swear, when I bring this creamy pudding dessert to a gathering, it disappears first. That’s because it hits all the right notes. It’s incredibly easy to make, which is why it lands squarely in my list of go-to potluck desserts easy to transport. Plus, let’s be honest, it’s spectacularly kid friendly desserts!
You don’t need to worry about oven space, timing layers perfectly using a mixer, or keeping it warm. It’s just pure, chilled indulgence. That’s the secret sauce to low-stress entertaining!
The No-Bake Dirt Cake Recipe Advantage
The biggest win here is the ‘no-bake’ factor. This means you can whip up the whole thing start to finish faster than it takes to preheat most ovens. Honestly, the most time-consuming part is waiting for it to chill. I usually make it first thing in the morning for an evening party, or even the night before. It sets up beautifully in the fridge, firming up that unbelievable creamy center.
Gathering the Ingredients for Your Classic Oreo Dirt Cake
Okay, let’s talk ingredients! Since this is a no-bake recipe, the quality and state of your ingredients really matter, especially for that amazing creamy texture. You’ll need about an 8-ounce block of full-fat cream cheese, and trust me, it has to be completely softened—like, leave it out for a couple of hours soft. Same goes for the butter; one cup should be soft, not melty, or your base will be runny!
You’ll also grab powdered sugar, one package of instant chocolate pudding mix (and you might want that extra packet for richer flavor!), three cups of cold milk, and your trusty tub of thawed whipped topping. And, of course, the star: the Oreos! You need a whole package ready to be turned into dirt.
Ingredient Notes and Substitutions for Perfect Dirt Cake
My biggest tip here is about the cookies. You can use any style of Oreo you like, but I always leave the cream filling *in* the cookies when I crush them. That little bit of extra sweetness and fat helps bind the ‘dirt’ a bit! If you want a deeper chocolate flavor, definitely use both pudding mixes I listed—it really amps up the chocolate payoff.
For the pudding, instant is non-negotiable because you need the stabilizers to help it set without cooking. If you’re feeling frisky, you could try using vanilla pudding instead of all chocolate for a cookies-and-cream vibe, but for a traditional dirt cake, stick to the dark stuff. Make sure your cream cheese is good quality; it forms the backbone of the filling!
Step-by-Step Instructions for the Layered Oreo Dessert
Alright, time to get messy! This is where the magic happens, transforming simple tubs and bags into that dreamy, scoopable layered Oreo dessert. Remember, the goal is smoothness in the base, but gentle handling when combining everything to keep it fluffy!
Creating the Cream Cheese Base for Your Dirt Cake
First things first: get your softened butter and cream cheese into one big bowl. Grab your electric mixer—or use a sturdy wooden spoon if you want a workout! Beat those two together until they are undeniably smooth. Don’t leave any lumps; we want zero resistance when we add the powdered sugar. Once smooth, slowly stream in that powdered sugar while mixing on low. After that’s incorporated, gently fold in the big tub of thawed whipped topping. Be patient here; you are folding, not whipping it fiercely! This creates the rich, creamy foundation for our dirt cake.
Mixing the Chocolate Pudding Filling for the Dirt Cake
Now for the chocolate layer! In a separate bowl, which should be nice and chilled, whisk together *both* your instant chocolate pudding mixes and the three cups of super cold milk. You whisk quickly, but not violently, for about two minutes. It thickens up fast because it’s instant pudding—that’s the secret to quick setting! Once it’s thick in that bowl, take about a third of the pudding mix and gently fold it into your cream cheese mixture. Keep folding until it’s just starting to blend. Repeat this process twice more! You absolutely must fold gently here so you don’t knock all the air out of your whipped topping. If it mixes too aggressively, your filling ends up denser than you want it.
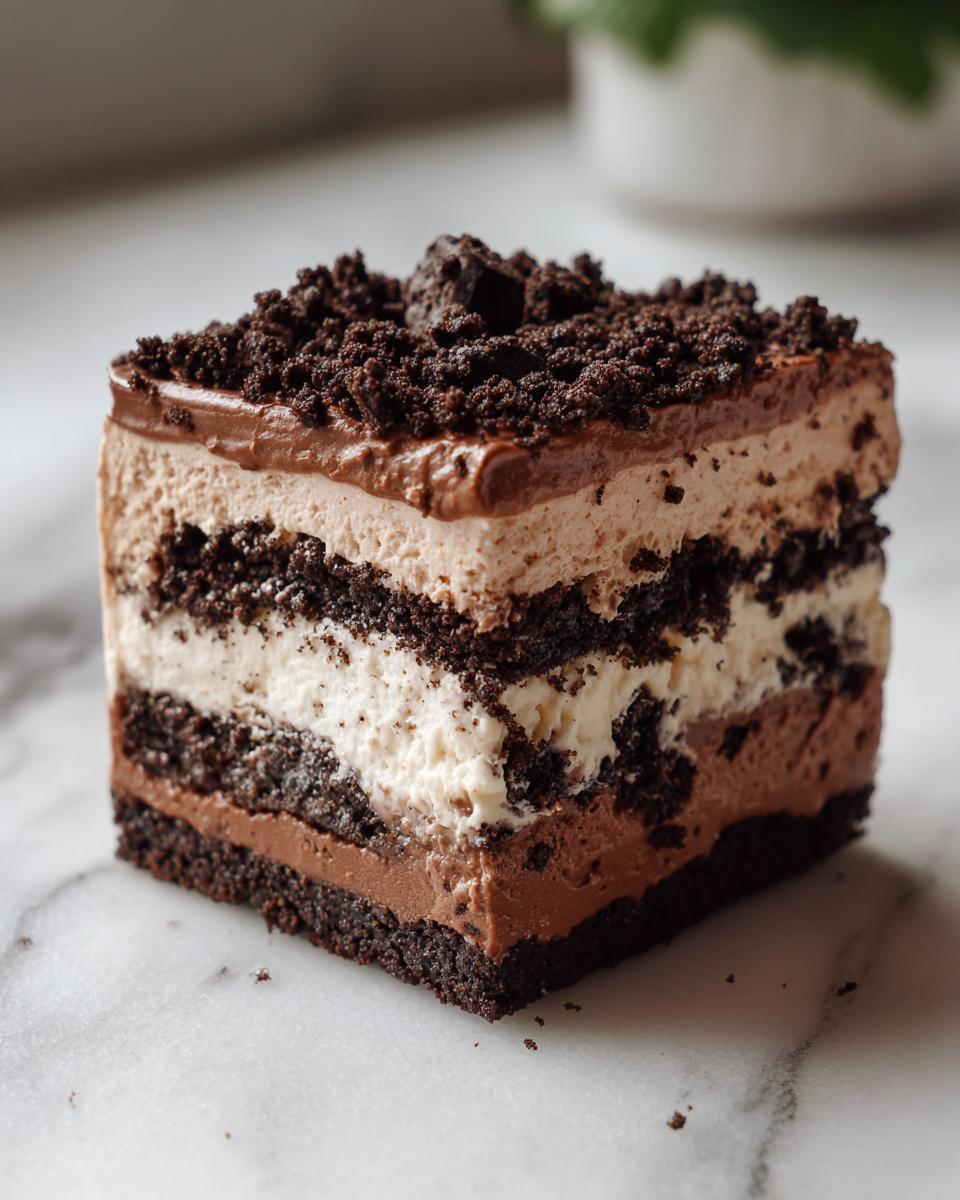
Assembling Your Chocolate Dirt Cake: Cups vs. Trifle Dish
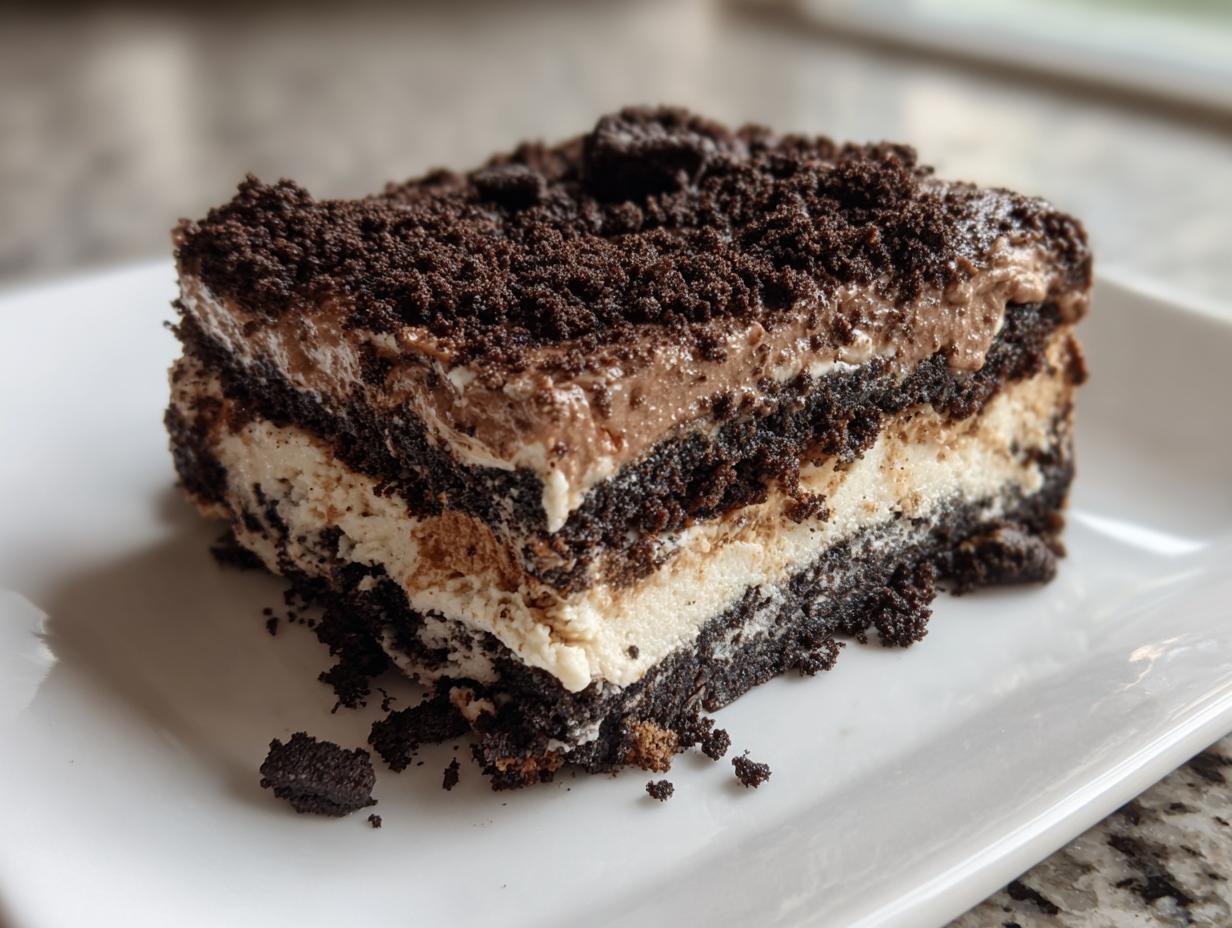
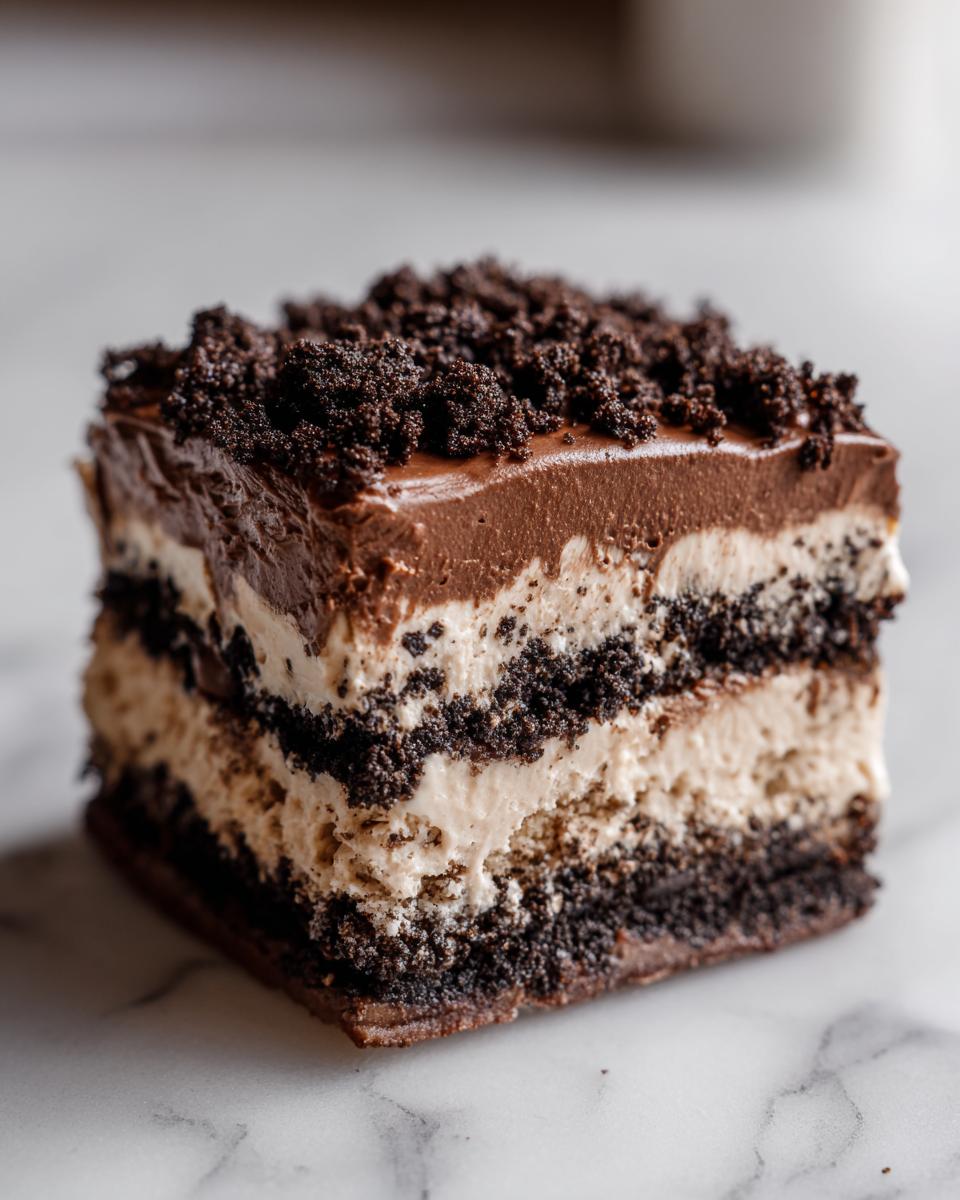
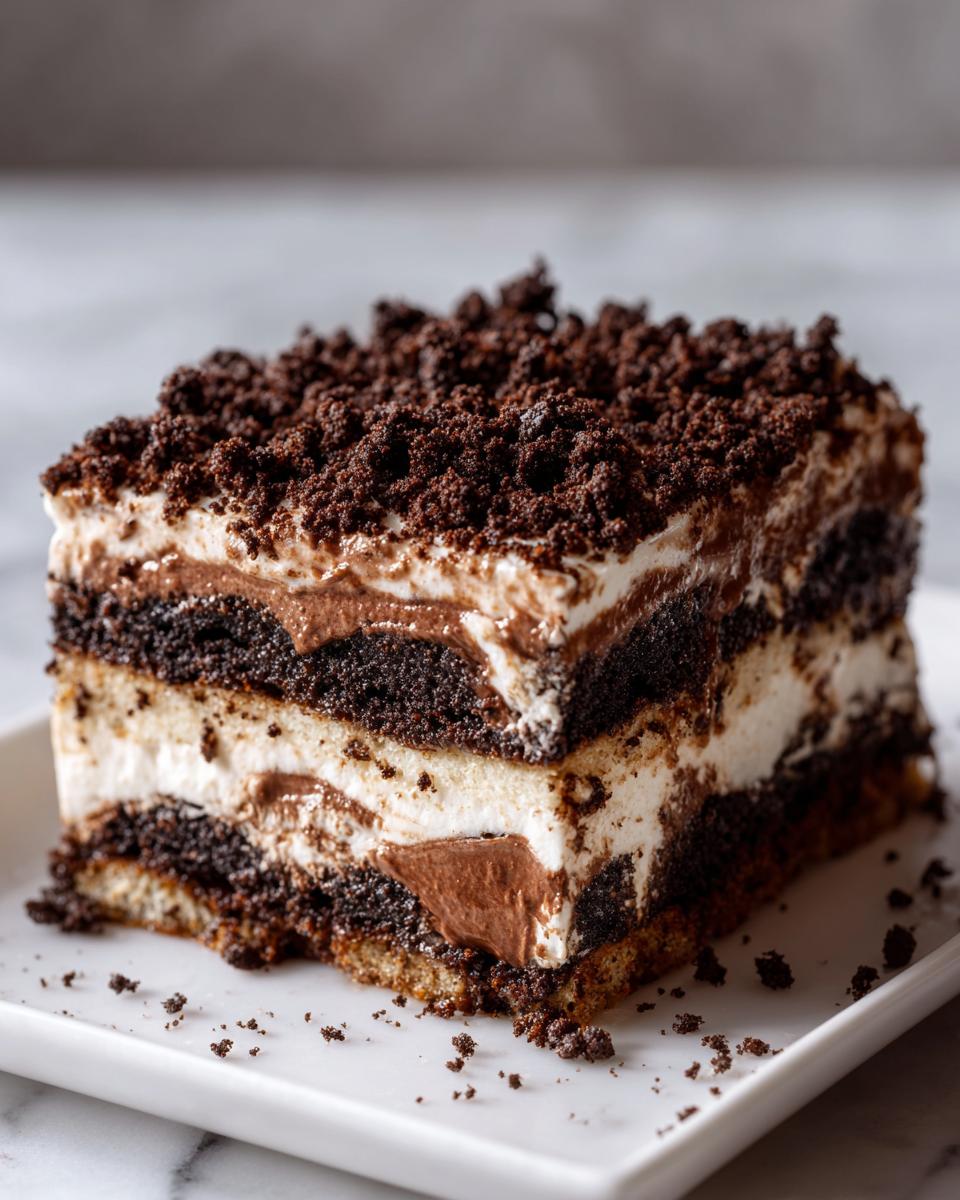
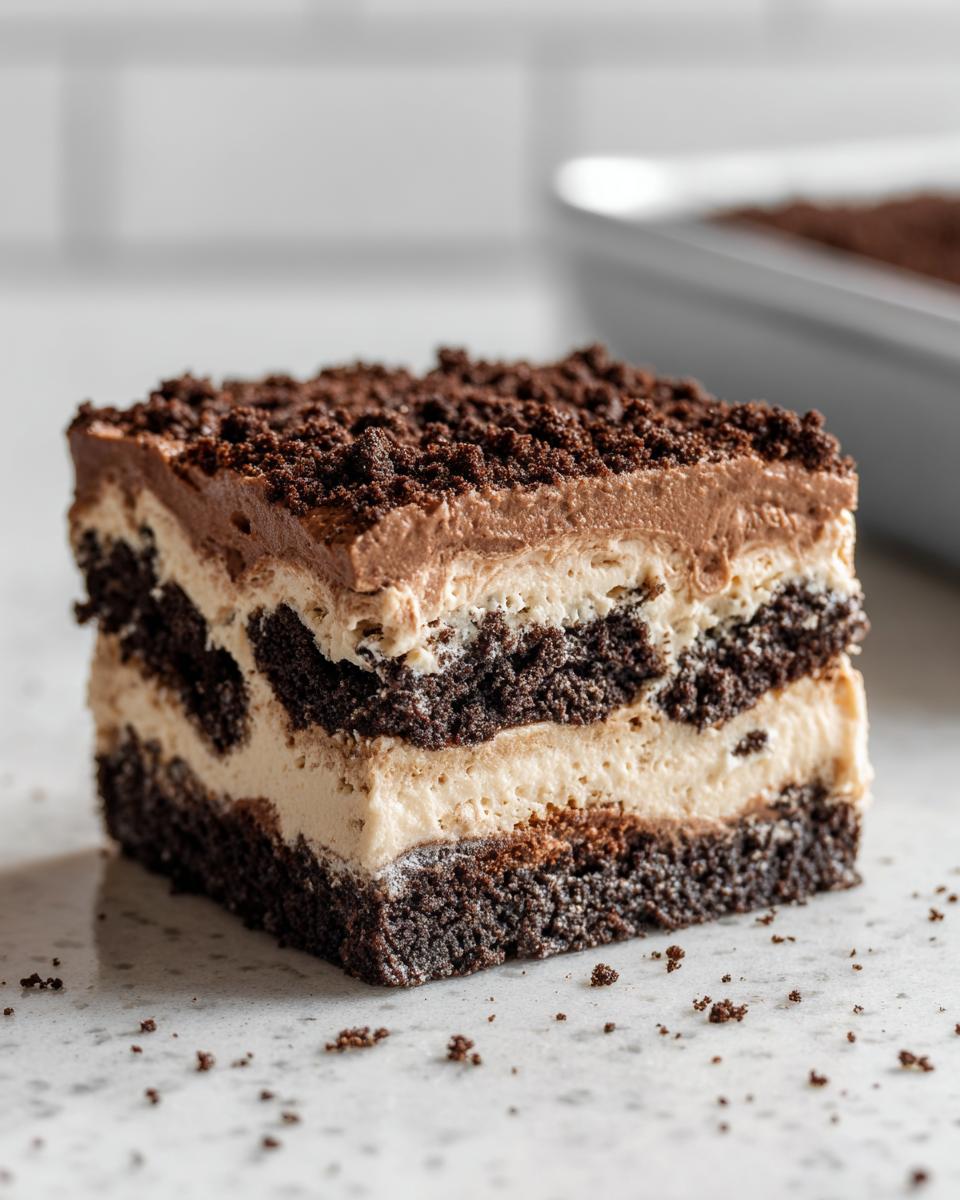
This is my favorite part because you get to decide how fancy—or simple—you want this delicious chocolate dirt cake to look! Whether you choose one big, beautiful trifle dish or go for individual Dirt Cups with Gummy Worms, the layering technique is the same simple concept. You’re creating beautiful, distinct layers of crushed cookie ‘dirt’ and creamy filling.
If you’re making a big dish, start by spreading about half of your finely ground Oreos across the bottom—this is going to absorb some moisture and make a wonderful base layer. Then, pour half of that glorious, pale brown pudding filling right over the top. Gently spread it out. Repeat! Another layer of cookies, another layer of filling. Make sure your absolute top layer is the creamy filling. This sets up the perfect landing spot for our final ‘dirt’ layer.
The Final Touches: Achieving the Perfect Crushed Oreo Dessert Topping
Now, don’t forget that reserved cup of crumbs! You want to sprinkle those reserved, extra fine cookie crumbs generously over that final layer of filling. This is what gives everyone that satisfying, earthy texture when they first dig in with their spoon. It really sells the whole ‘dirt’ illusion, doesn’t it?
This is also traditionally the time to introduce the wiggle factor: gummy worms! Stick a few worms popping right out of the ‘dirt’—it always makes the kids go wild. Once you have your topping just right, cover the whole thing tightly. And here is non-negotiable advice: the dirt cake needs time. Seriously, put it in the fridge for a minimum of four hours, but if you can leave it overnight, you’ll be rewarded with a filling that is perfectly set and utterly decadent.
Tips for Success When Making No Bake Dirt Cake Recipe
Since we aren’t actually using any heat to set this thing, the chilling time is where you earn your stripes! This is the most crucial step for any good no bake dirt cake recipe. If you try to serve it too soon, you’ll end up with a soupy mess where the layers slide everywhere. We need that cream cheese and whipped topping mixture to firm up beautifully around the pudding, and only cold temperatures can do that job right.
My expert tip? Don’t just aim for four hours—aim for overnight. Seriously, if you can make this creamy dessert the day before you need it, you will thank me later. When the dirt cake chills overnight, the flavors meld, the cookies soften ever so slightly from the moisture, and the whole thing turns into one cohesive, decadent slice. It’s like the difference between just okay and absolutely spectacular!
Also, remember how I mentioned using two different packets of the chocolate pudding mix back in the ingredients list? That might seem like overkill, but that little extra pudding powder is what ensures your filling isn’t just sweet cream. It gives you that deep, rich chocolate flavor that cuts through the sweetness of the cream cheese. Trust me, don’t skip that extra packet if you want a truly unforgettable dirt cake.
Another small thing that makes a huge difference: be gentle when you fold the pudding mixture into the cream cheese base. You want to keep as much air in that whipped topping as possible. We’re aiming for fluffy, not dense! Slow and steady wins this race.
Storage and Make Ahead Dessert Instructions for Your Dirt Cake
Since this spectacular dirt cake relies entirely on chilling to set up, it is truly one of the best make ahead dessert options out there. I actually prefer it when it sits a little longer than the minimum required time! You absolutely need that four-hour minimum chill time, but if you’re planning a party or big dinner, toss this into the fridge the night before. It just tastes better once everything has really settled together.
When properly covered—you have to use plastic wrap or a tight lid to keep those cookies from getting stale—this creamy dessert holds up great! It stays perfectly delicious for about three to four days in the refrigerator. I often find there are just enough leftovers for me and my partner to sneak a small portion each day afterward. Isn’t that the best feeling?
Just be aware that the cookie layers will soften over time. By day four, those bottom layers will be wonderfully soft and almost cake-like, blending completely into the filling, while the top layer might lose a tiny bit of its crisp crunch. That’s why I always sprinkle a fresh, small shower of crumbs right before serving if it’s been sitting for more than 24 hours. It gives you that little textural surprise right at the top!
Serving Suggestions for This Fun Holiday Dessert
The beauty of this dirt cake is how adaptable it is! Sure, it’s a classic kid-pleaser—and I love making it for birthdays—but it really shines at bigger gatherings, especially summer BBQs or even as a super fun, slightly goofy dessert for Halloween. If you’re serving it at a cookout, make sure it stays chilly!
When pairing this rich, sweet treat, you want something to cut through the creaminess. I find that coffee is the perfect companion. A nice strong cup of black coffee honestly balances out the intense chocolate and sugar perfectly. If you’re serving it to adults, a splash of espresso liqueur in their after-dinner drink doesn’t hurt either!
For holidays, especially if you make the individual dirt care Halloween recipe style cups, serve them right when you bring them out of the fridge. That initial chill factor just makes every bite of the creamy pudding feel so much more refreshing. It’s one of those simple party treats that never fails to deliver smiles!
Frequently Asked Questions About Oreo Dirt Cake
It’s funny how often I get asked the same few things about this dirt cake recipe! I figured if you had these questions, chances are a few other people did too. I’m always happy to share the little production secrets I’ve picked up over the years to make sure your dessert turns out perfectly every single time.
Can I use homemade pudding instead of instant pudding in the dirt cake?
Oh, you certainly *can* use homemade chocolate custard, and it will definitely give you a richer, more authentic chocolate flavor! But here’s the catch: homemade pudding needs to cool completely before hitting that cream cheese mixture, and completely means cold—like, chilled in the fridge for hours. Since this is a quick chocolate dirt cake recipe, instant pudding is our shortcut because it sets up so quickly when whisked with cold milk.
If you do use homemade, make sure it’s cooled down to near room temp before folding it in, otherwise, you’ll melt that beautiful whipped topping base and lose all your airy volume. So, for speed, stick to instant, but for pure indulgence, homemade works if you plan ahead!
What is the best way to crush Oreos for the dirt cake?
This is crucial for getting that authentic ‘dirt’ texture! Anything too chunky and you just have chunks of cookie, not dirt. My favorite, fastest way is absolutely the food processor. You pulse it a few times, and boom, you have perfect fine crumbs in seconds. Just watch it, because it goes from crumbs to powder really fast!
If the food processor is clean-up-free purgatory for you, the old-school vacuum sealer bag or heavy-duty ziploc bag method works just fine. Place all your Oreos in the bag, seal it tight—and I mean *tightly*!—and use a rolling pin or even the bottom of a heavy saucepan to bash them until they’re nice and fine. Just be careful not to break your counter!
Can I make this a make ahead dessert if I’m worried about sogginess?
Absolutely, this is a stellar make ahead dessert! As I mentioned, chilling overnight is best, and the moisture doesn’t really hurt the texture; it actually helps meld the flavors together. The bottom layers will soften up nicely, which most people prefer for this classic creamy pudding dessert.
If you are truly worried about the very top layer losing its crunch, just wait to spread that final decorative layer of Oreos on top the morning of your party. Keep the dirt cake covered but leave the final sprinkling of crumbs separate. You can add them right before you bring the dish out for serving, and that way, 100% of your topping stays perfectly crisp!
Share Your Cream Cheese Dirt Cake Creations
Now that you’ve conquered the world of no-bake desserts and made yourself a glorious helping of this cream cheese dirt cake, I really want to hear about it! Did you go classic with a big dish, or did you make adorable little dirt cups with gummy worms?
Please don’t keep your successes (or funny mishaps!) to yourself. Head down to the comments section below and tell me how it turned out. Drop a rating if you loved it—it really helps other folks see how good this simple treat really is.
If you snapped a picture of your perfectly layered dessert, tag me on social media! I absolutely love seeing my recipes come to life in your kitchens. Happy scooping!
PrintEasy No-Bake Oreo Dirt Cake Recipe

Make this simple, creamy Oreo Dirt Cake. It is a no-bake dessert layered with chocolate pudding, cream cheese, and crushed Oreos, perfect for parties or family gatherings.
- Prep Time: 25 min
- Cook Time: 0 min
- Total Time: 4 hr 25 min
- Yield: 12 servings 1x
- Category: Dessert
- Method: No-Bake
- Cuisine: American
- Diet: Vegetarian
Ingredients
- 1 package (8 ounces) cream cheese, softened
- 1 cup unsalted butter, softened
- 1 cup powdered sugar
- 1 container (12 ounces) frozen whipped topping, thawed
- 1 package (8 ounces) instant chocolate pudding mix
- 3 cups cold milk
- 1 package (14.3 ounces) Oreo cookies (about 36 cookies)
- 1 package (3.9 ounces) instant chocolate pudding mix (for extra flavor)
- Gummy worms for decoration (optional)
Instructions
- Crush all Oreo cookies until they resemble fine dirt. Set aside about 1 cup of the crumbs for the top layer.
- In a large bowl, beat the softened cream cheese and softened butter together until smooth. Gradually add the powdered sugar and mix until fully combined.
- Fold in the thawed whipped topping until the mixture is uniform and creamy.
- In a separate bowl, whisk together the instant chocolate pudding mix (both packages) and the cold milk until the pudding thickens, about 2 minutes.
- Gently fold the chocolate pudding mixture into the cream cheese mixture until just combined. Do not overmix.
- To assemble the dirt cake, you can use a large trifle dish or individual cups (dirt cups).
- If using a large dish, spread half of the crushed Oreos on the bottom. Top with half of the creamy filling. Repeat with the remaining Oreos and filling, ending with a layer of filling.
- If making dirt cups, layer the crushed Oreos and creamy filling in each cup, ending with the filling on top.
- Sprinkle the reserved 1 cup of crushed Oreo crumbs over the top layer to create the ‘dirt’ look.
- Press a few gummy worms into the top layer for decoration, if desired.
- Refrigerate the dirt cake for at least 4 hours, or preferably overnight, to allow it to set completely before serving.
Notes
- You can substitute the instant pudding with homemade chocolate custard for a richer flavor.
- For individual dirt cups, this recipe works well for 8 to 10 servings.
- Make this dessert a day ahead; it tastes better after chilling overnight.
Nutrition
- Serving Size: 1 slice
- Calories: 450
- Sugar: 45
- Sodium: 350
- Fat: 28
- Saturated Fat: 15
- Unsaturated Fat: 13
- Trans Fat: 0.5
- Carbohydrates: 48
- Fiber: 2
- Protein: 5
- Cholesterol: 55