
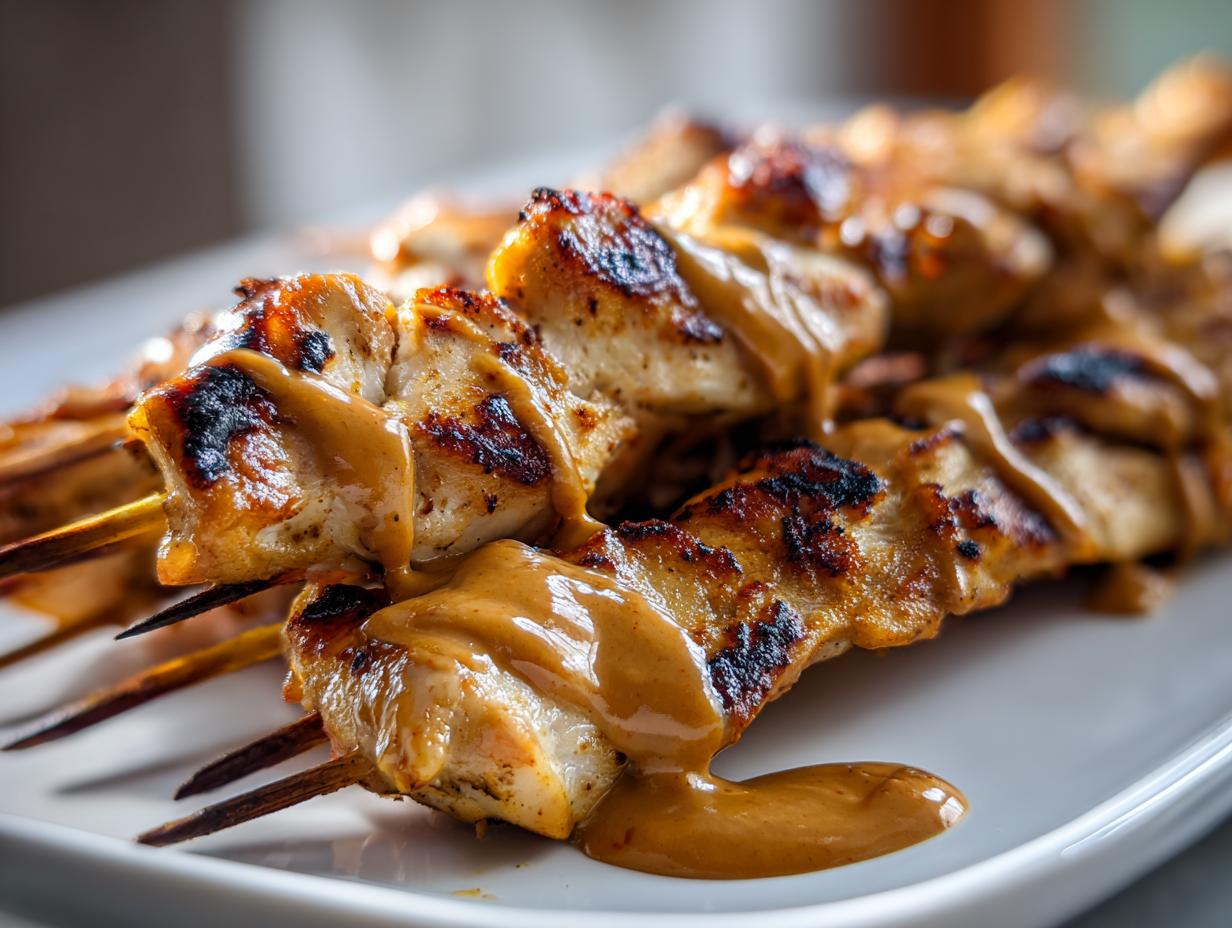
I don’t know about you, but sometimes I get that deep, gnawing craving for takeout—that amazing, complex flavor you pay good money for. Well, I figured out how to crush that craving right here in my own kitchen! This is, hands down, the best and most authentic chicken satay recipe you’ll ever use, and it comes with the creamiest, can’t-be-beat Thai peanut sauce. While I was out on the road chasing gigs years ago, I tried every street vendor possible, trying to crack this code. The secret isn’t complicated ingredients; it’s just knowing how to layer the spices. This recipe turns those roadside discoveries into a perfect, fast weeknight chicken dinner or appetizer. You can make incredible, restaurant-quality flavor work for your real life, trust me! If you’re looking for more ideas for fast meals, check out some of my favorites in the weeknight dinner recipes collection.
- Why This Authentic Chicken Satay Recipe Works for You
- Gather Ingredients for Chicken Satay and Creamy Satay Dipping Sauce
- Step-by-Step Instructions for Perfect Chicken Satay
- Expert Tips for Juicy Chicken Satay Every Time
- Variations: Making Your Chicken Satay Your Own
- Serving Suggestions for Your Chicken Skewers with Dipping Sauce
- Storage and Reheating Instructions for Leftover Chicken Satay
- Frequently Asked Questions About Making Chicken Satay
- Share Your Flavorful Chicken Bites Experience
Why This Authentic Chicken Satay Recipe Works for You
Look, I get it. You want big flavor without spending an entire Sunday slaving over the grill. That’s why I tweaked this recipe until it was perfect for a busy Tuesday night but still tasted like I found it on a little street corner in Thailand. We focused on a few non-negotiables here to make sure you get exactly what you’re looking for.
- Juicy Results Guaranteed: We’re using chicken thighs here because they don’t dry out, even if you accidentally leave them on the heat a minute too long.
- Authentic Thai Flavor: That beautiful turmeric and cumin combination wakes up the classic marinade profile—it’s bold and unmistakable.
- Dinner on the Table Fast: Seriously, the active prep time is minimal. Once the chicken marinates, you’re looking at maybe 15 minutes of cook time.
- The Peanut Sauce is King: This isn’t some watery, sweet mess. It’s the rich, creamy satay dipping sauce you dream about. Don’t forget to try this with other amazing appetizers too!
Gather Ingredients for Chicken Satay and Creamy Satay Dipping Sauce
Okay, setting up for success means having everything ready to roll before you start mixing. This isn’t a hard recipe, but if you don’t have the spices ready to go, you might miss that critical window where the chicken needs to get into the marinade. When you’re chasing that Authentic Satay Flavor, quality matters, especially with your coconut milk and peanut butter. Trust me when I say the full-fat stuff makes a huge difference in the sauce!
For the Juicy Chicken Satay Marinade
You’ll need about 1.5 pounds of chicken here—I always go for thighs because they hold up better to grilling, but breasts work if you prefer something lighter. Remember, if you’re using the grill, get those wooden skewers soaking in water right now, like for at least 30 minutes. If they aren’t wet, they’ll just burn to a crisp on the grates! Oops!
- 1.5 lb boneless, skinless chicken thighs or breasts, cut into 1-inch strips
- 120 ml full-fat coconut milk
- 30 ml soy sauce (or tamari if you’re keeping it gluten-free!)
- 1 tablespoon brown sugar
- 1 teaspoon ground turmeric (this is key for color!)
- 1 teaspoon ground cumin
- 1 teaspoon ground coriander
- 1 teaspoon salt
- 1/2 teaspoon black pepper
- 1 tablespoon vegetable oil
For the Best Creamy Satay Dipping Sauce
This is what takes it from good to unforgettable. We’re building layers of sweet, salty, and tangy right here. That fish sauce is optional, but if you have it, toss it in—it brings that deep, savory complexity that makes you think you ordered this from a real restaurant. That little bit of spice from the red pepper flakes adds a nice kick too.
- 1 cup creamy peanut butter
- 1/4 cup hot water (this helps it loosen up)
- 3 tablespoons lime juice
- 2 tablespoons soy sauce
- 2 tablespoons brown sugar
- 1 tablespoon fish sauce (optional, but highly recommended for depth!)
- 1 teaspoon grated fresh ginger
- 1 clove garlic, minced
- 1/2 teaspoon red pepper flakes (add more if you like it spicy!)
Step-by-Step Instructions for Perfect Chicken Satay
Alright, this is where the magic happens! We are moving fast here, which is why having all those ingredients measured out earlier really helps. We’re tackling the chicken first, getting it flavored up, and then we tackle that amazing peanut sauce. You’ll be surprised how quickly this comes together, especially if you’re using the grill for that perfect char. You can see my tips for getting great flavor when grilling on my outdoor grill recipes for chicken page, but for now, let’s focus on these skewers!
Marinating the Chicken for Authentic Satay Flavor
First things first: grab that bowl with your coconut milk and spices. I mean, just smelling the turmeric and cumin together is halfway to Thailand! Whisk all those marinade ingredients together until that brown sugar dissolves. Now, toss in your chicken strips. Make sure every single piece is swimming in that gorgeous marinade. Cover that bowl up, and honestly, try to let it sit for at least an hour in the fridge. Four hours is killer, but even an hour starts building that deep Authentic Satay Flavor we’re aiming for that tastes better than takeout.
Making the Easy Peanut Sauce Recipe on the Stovetop
While the chicken is chilling out, let’s get the dipping sauce ready. Pour the peanut butter, hot water, lime juice, and all those other sauce ingredients into a small saucepan. Set the heat to medium—we don’t want to scorch this! Whisk it constantly, and I mean *constantly*. It’s probably going to look chunky at first, but keep whisking, and it miraculously turns into that super Easy Peanut Sauce Recipe. Once it’s totally smooth, pull it right off the heat. If you need it thinner, stir in a tiny bit more hot water until it drizzles perfectly. Don’t overthink it; just keep whisking!
Cooking Your Grilled Chicken Appetizer
Time to cook! Get your grill screaming hot—medium-high heat is what we want. Brush those grates so nothing sticks. Thread your marinated chicken onto those soaked wooden skewers; don’t overcrowd them! Place the Grilled Chicken Appetizer skewers onto the hot surface. You’re looking for about 3 to 4 minutes per side. Keep an eye on them and turn them until you see those beautiful dark grill marks and the chicken’s cooked through. If the weather is bad, throw them on a hot grill pan or bake them at 400°F (200°C) for about 15 minutes, flipping halfway. For even more skewered ideas, check out my honey garlic chicken skewers recipe. Or read more about this technique over at The Comfort Spoon.
Expert Tips for Juicy Chicken Satay Every Time
When you’re aiming for that true, authentic taste, you have to know the little secrets—the things that separate a good home try from something you’d line up for. Think of these as ‘Chef Jaxson’s secrets’ to keeping your chicken juicy and packed with flavor!
My number one rule, which I mentioned earlier, is to use chicken thighs. They have the fat content that just prevents them from getting tough, even when you’re grilling outside. You can absolutely use breasts, but you absolutely cannot cook them for as long! For the deepest flavor boost, try swapping about half the coconut milk in the marinade for a tablespoon of curry paste. Wow, it really elevates the profile!
Also, don’t be shy about that marinade rest time. While an hour works in a pinch—gotta meet that weeknight schedule—letting it go for the full four hours lets those spices really penetrate the meat. If you want to see how I treat chicken thighs when I’m not skewering them, check out my guide on braised chicken thighs. For more depth on authentic flavors, I always appreciate the insights from Rasa Malaysia when I’m checking seasoning balance.
Variations: Making Your Chicken Satay Your Own
Look, recipes are just starting points, right? I learned that out on the road—sometimes you’re in a town that only has one kind of peanut butter, or maybe you’re cooking for someone who hates ginger. You shouldn’t have to skip out on amazing flavor just because you’re missing one tiny ingredient!
The marinade is super adaptable. If you want something completely different from the classic, skip the cumin and coriander and go heavy on fresh lemongrass and lime zest. That shifts it toward a more tropical flavor profile, which is amazing, especially if you’re grilling outside during the summer!
When it comes to adjusting the sauce, that’s where you can really play up the heat. If you want a proper Spicy Peanut Sauce Recipe that gets your attention, don’t just rely on the red pepper flakes. Sriracha works just as well, or even a dash of Sambal Oelek if you have it. Start with half a teaspoon and taste as you go. When I’m making this for a big game day spread, I usually double the spice level in the sauce!
And swapping proteins? Easy peasy. While this recipe is designed around chicken thighs, you can absolutely use firm tofu if you want a vegetarian option. Just press that tofu really well to get out the excess water before you toss it into the marinade! If you’re heading for a completely different protein, like shrimp, the cook time is way shorter, so keep an eye on those!
Serving Suggestions for Your Chicken Skewers with Dipping Sauce
So you’ve got these incredible, juicy chicken satay skewers, dripping with flavor and sitting right next to that glorious dipping sauce. Now what? You can’t just eat them standing over the sink, although I’ve certainly done that after a long night!
The beauty of this dish is how flexible it is. If you’re serving this as a party food appetizer, you need things that are easy to grab. I always serve them nestled over a bed of shredded cabbage and carrots—it gives a nice crunch and cools things down a bit. You can even top the skewers themselves with a sprinkle of chopped cilantro or chopped peanuts for texture, which always makes the presentation look fancier than the effort required.
If you’re turning these into a quick weeknight chicken dinner, you need some carbs on the side to make it satisfying. My favorite pairing is a bright, zesty rice dish, like my famous pineapple fried rice. That sweet and tangy rice balances the savory, earthy spices of the satay perfectly. If you want something even simpler, just steaming up some jasmine rice works beautifully as the base for those dipping juices.
Honestly, whatever you pair it with, make sure you have plenty of lime wedges on hand. A fresh squeeze of lime juice right before you bite in? That just wakes everything up. It’s the final, tiny step that makes this meal feel complete!
Storage and Reheating Instructions for Leftover Chicken Satay
The best part about making a big batch of Chicken Satay? Having leftovers for lunch the next day! Just like with any great meal prep, how you store the skewers matters a lot, especially if you want that incredible juiciness to stick around. I always separate the components because the chicken and the sauce have totally different needs.
For the peanut sauce, shoot for an airtight container and keep it in the fridge. Honestly, the flavor of that Creamy Satay Dipping Sauce seems to get even better overnight—all those ginger and garlic bits harmonize! It should be good for about 5 days easily. If you’re planning for a longer stretch, that sauce freezes surprisingly well, too, but you’ll need to whisk in a splash of hot water or lime juice when you reheat it to get that perfect pouring consistency back.
For the chicken skewers, it’s important to let them cool down completely before trying to store them. If you stick hot skewers into a container, you’re going to steam them, and steam breeds sogginess. Once cooled, put them in a sturdy, airtight container. If you removed the meat from the skewers before storing, that’s even better for ensuring they don’t dry out, but leaving them on works if you’re short on time. This is where a little effort during meal prep pays off! If you use these tips, you’re setting yourself up for success on your next round of simple dinner meal prep.
Now, when it comes to reheating to keep that tender texture, forget the microwave if you can swing it! Microwaving tends to make grilled chicken chewy. The best way to revive your leftover Grilled Chicken Appetizer is either on the grill again for just a minute on each side, or under the broiler for about 2 minutes until heated through. If you use the oven, keep it low, maybe 300°F (150°C), just to warm them up gently. A little spritz of water before heating can help, too!
Frequently Asked Questions About Making Chicken Satay
I always get questions after sharing this recipe because once people try it, they wonder how they ever lived without it! Cooking world-class food doesn’t have to be complicated, but sometimes the little differences make all the difference between good and *the best*. Here are the answers to the things I hear most often from folks trying this recipe for the first time. If you’re looking for more ways to set yourself up for success with meals, peek at my healthy lunch recipes for inspiration!
Can I make this Quick Weeknight Chicken Dinner recipe ahead of time?
Yes, absolutely! That’s one of the best things about this chicken satay. I almost always marinate the chicken overnight—you just can’t beat that deeper flavor. If you marinate for the full 4 hours or more, you save tons of time on a busy weeknight. You can also make the entire **Creamy Satay Dipping Sauce** up to three days ahead of time. Just keep it airtight in the fridge. When you’re ready to cook, all you have to do is thread the skewers and grill! It’s a perfect Quick Weeknight Chicken Dinner strategy.
What is the best way to get that Takeout At Home Chicken char?
That beautiful char we all crave is about heat management. If you’re using an outdoor grill, you want your grates medium-high to hot. Don’t be afraid to let the grill preheat for a good 10 minutes! If you don’t have a grill, the secret weapon is a cast iron grill pan on your stovetop over high heat. It mimics the intense, direct heat of a grill perfectly and gives you those dark grill marks that scream Takeout At Home Chicken flavor. Just make sure you brush that pan with a little oil first!
What if I don’t have fish sauce for the peanut sauce?
Don’t panic! Fish sauce is there to give you a salty, umami depth that mimics Southeast Asian complexity, but if you don’t want to buy a bottle for one recipe, you can honestly skip it. I’d recommend adding an extra 1/2 teaspoon of soy sauce to make up for the saltiness, or maybe a tiny splash of Worcestershire sauce if you have that on hand. It won’t be 100% traditional, but it will still be fantastic!
Can I use chicken breast instead of thighs?
You totally can! Chicken breast is a little leaner, which some folks prefer for Healthy Chicken Skewers. The biggest change you need to make is time. Chicken breast cooks faster and dries out quicker than thigh meat. Be rigorous with your turning, and really make sure you don’t cook them past the point where they are just showing moist crumbs. Aim for that 3-minute mark per side on a hot grill.
Share Your Flavorful Chicken Bites Experience
Okay, you’ve done the work! Your kitchen probably smells amazing right now, saturated with coconut, spice, and that sweet caramel from the peanut sauce. We learned on the road that food is best when it’s shared, and honestly, I thrive on hearing how you all adapt these recipes in your own worlds.
So, I want to hear about your skewers! Did you go full-throttle on the chili flakes for a spicy kick? Did you try grilling them over charcoal for that smoky flavor? Don’t be shy—tell me what worked for you, what you might tweak next time, and how quickly these Flavorful Chicken Bites disappeared from your plate!
Did you serve this up as a massive appetizer spread for a game day, or did it anchor your simple dinner meal prep for the week? Let me know in the comments below! Seriously, drop a rating for the chicken satay and the peanut sauce—it helps other folks see that this is the real deal. If you’re curious about how we built this community vision, check out the About Us page. Happy cooking, and I can’t wait to read your thoughts!
PrintAuthentic Thai Chicken Satay with The Best Creamy Peanut Sauce

Make tender, juicy chicken skewers using a simple marinade and grill them to perfection. This recipe includes step-by-step instructions for an authentic, creamy Thai peanut sauce that tastes better than takeout. It is a great choice for a quick weeknight chicken dinner or a flavorful party food appetizer.
- Prep Time: 20 min
- Cook Time: 15 min
- Total Time: 35 min
- Yield: 4 servings 1x
- Category: Appetizer
- Method: Grilling
- Cuisine: Thai
- Diet: Low Fat
Ingredients
- 1.5 lb boneless, skinless chicken thighs or breasts, cut into 1-inch strips
- 120 ml full-fat coconut milk
- 30 ml soy sauce (or tamari for gluten-free)
- 1 tablespoon brown sugar
- 1 teaspoon ground turmeric
- 1 teaspoon ground cumin
- 1/2 teaspoon ground coriander
- 1 teaspoon salt
- 1/2 teaspoon black pepper
- 1 tablespoon vegetable oil
- Wooden skewers (soaked in water for 30 minutes if grilling)
- For the Peanut Sauce: 1 cup creamy peanut butter
- 1/4 cup hot water
- 3 tablespoons lime juice
- 2 tablespoons soy sauce
- 2 tablespoons brown sugar
- 1 tablespoon fish sauce (optional)
- 1 teaspoon grated fresh ginger
- 1 clove garlic, minced
- 1/2 teaspoon red pepper flakes (adjust for spice)
Instructions
- Prepare the Chicken Marinade: In a bowl, combine the coconut milk, soy sauce, brown sugar, turmeric, cumin, coriander, salt, and pepper. Mix well.
- Add the chicken strips to the marinade, ensuring they are fully coated. Cover the bowl and refrigerate for at least 1 hour, or up to 4 hours, for the best flavor.
- Prepare the Peanut Sauce: In a small saucepan over medium heat, combine the peanut butter, hot water, lime juice, soy sauce, brown sugar, fish sauce (if using), ginger, garlic, and red pepper flakes.
- Whisk the sauce constantly until it becomes smooth and creamy. If the sauce is too thick, add water, one teaspoon at a time, until you reach your desired dipping consistency. Remove from heat and set aside.
- Assemble Skewers: Thread the marinated chicken pieces onto the soaked wooden skewers. Discard any remaining marinade.
- Cook the Chicken: Preheat your outdoor grill or grill pan to medium-high heat. Brush the grates lightly with oil.
- Place the skewers on the hot grill. Cook for 3 to 4 minutes per side, turning until the chicken is cooked through and has nice char marks. (Alternatively, bake at 400°F (200°C) for 12-15 minutes, flipping halfway).
- Serve the grilled chicken satay skewers immediately with the warm, creamy peanut sauce for dipping.
Notes
- For extra authentic flavor, substitute some of the coconut milk with 1 tablespoon of curry paste in the marinade.
- If you want a spicier peanut sauce, add a dash of sriracha or a pinch more red pepper flakes.
- You can substitute chicken thighs with chicken breast, but thighs stay juicier after grilling.
- This recipe is naturally gluten-free if you use tamari instead of standard soy sauce.
Nutrition
- Serving Size: 4 skewers
- Calories: 410
- Sugar: 12
- Sodium: 550
- Fat: 24
- Saturated Fat: 8
- Unsaturated Fat: 16
- Trans Fat: 0
- Carbohydrates: 18
- Fiber: 3
- Protein: 32
- Cholesterol: 95