
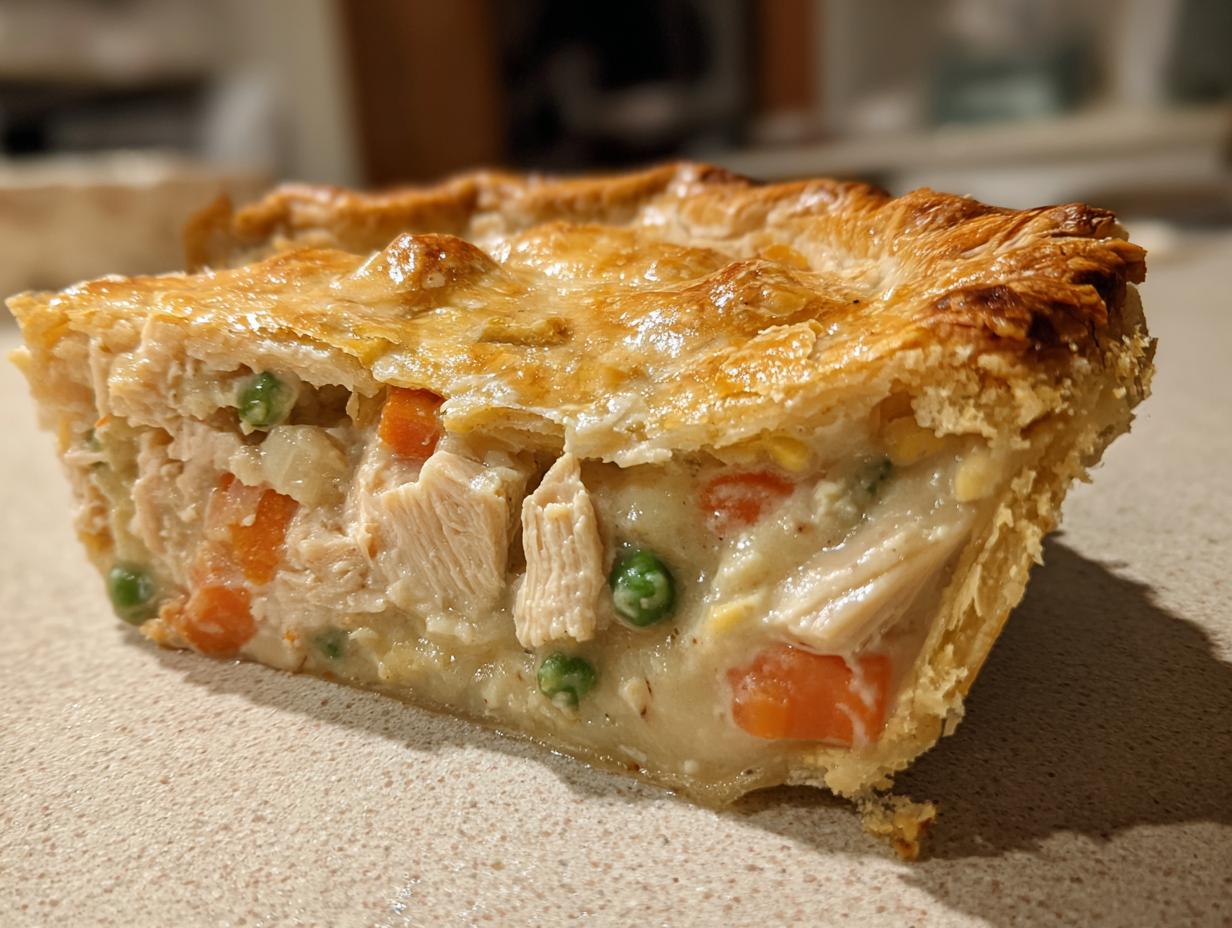
When the weather turns crisp or you just need a serious hug in a bowl, nothing beats a classic chicken pot pie, right? Forget those dry, depressing versions you get from a box. I’m talking about the real deal: that creamy, flavorful filling bursting with tender veggies, all tucked under a golden, unbelievably flaky crust. I learned long ago, bouncing around the country on that tour bus, that the best food tells a story, and it doesn’t need fancy tools. That’s why this recipe for homemade chicken pot pie is my go-to for a killer comfort food dinner on a weeknight. We’re skipping the fuss by using store-bought crust and rotisserie chicken, making this the easiest, most satisfying comfort meal you’ll get on the table!
- Why This Homemade Chicken Pot Pie Recipe Works for Your Family
- Ingredients Needed for the Best Chicken Pot Pie
- Step-by-Step Instructions for Your Chicken Pot Pie
- Tips for the Perfect Flaky Pie Crust on Your Chicken Pot Pie
- Variations on the Classic Chicken Pot Pie
- Storage and Reheating Your Chicken Pot Pie
- Frequently Asked Questions About Chicken Pot Pie
- Estimated Nutritional Information for This Chicken Pot Pie
- Share Your Favorite Chicken Pot Pie Moments
Why This Homemade Chicken Pot Pie Recipe Works for Your Family
I built YumDrizzle on the idea that good food should fit into your real life, not the other way around. When you’re slammed after work, you need genuine comfort, not a complex culinary project. This is why this chicken pot pie recipe is on heavy rotation at my place:
- Speed Demon: Honestly, we get this entire savory pie recipe done start-to-finish in under an hour. Perfect for a proper weeknight chicken dinner.
- Zero Soggy Bottoms (I Promise!): We focus on getting that filling just right so the bottom crust stays flaky and golden, not swimming in sauce.
- Maximum Flavor, Minimum Effort: Using good quality rotisserie chicken means you skip all the tedious cooking and shredding, setting you up for that seriously creamy chicken filling right away.
Ingredients Needed for the Best Chicken Pot Pie
Listen, I know finding time to cook is tough, especially when you want a full-on, made-from-scratch flavor. That’s why this recipe leans into smart shortcuts. If you’re looking for amazing ways to use that supermarket rotisserie chicken, you absolutely landed in the right place! Rotisserie chicken recipes save the day for this filling.
For the Creamy Chicken Pot Pie Filling
These are the building blocks for that rich, savory gravy. Make sure your veggies are chopped before you start melting butter—we move fast once things start heating up!
- 2 tablespoons unsalted butter (The good stuff, please!)
- 1 medium yellow onion, chopped
- 2 carrots, peeled and sliced
- 2 celery stalks, sliced
- 1/2 cup all-purpose flour
- 1 teaspoon salt
- 1/2 teaspoon black pepper
- 1/4 teaspoon dried thyme
- 2 cups chicken broth
- 1 cup whole milk
- 2 cups cooked, shredded chicken (Your rotisserie bird is perfect here!)
- 1 cup frozen peas
- 1 cup frozen corn
For the Flaky Pie Crust Topping
This is where we seal the deal and trap all that gorgeous creamy filling inside. Quick note: If you wanted to skip the top crust entirely for an even easier meal, you can drop biscuit dough right on top! But for this classic look, grab these two things:
- 1 box refrigerated pie crusts (You need both of them!)
- 1 large egg, beaten (This gives us that beautiful golden color.)
Step-by-Step Instructions for Your Chicken Pot Pie
Okay, so you’ve got your ingredients ready? Awesome! This is the fastest part, but you have to pay attention because we’re building that thick, luxurious filling that makes this the ultimate comfort food dinner. Remember, we need everything hot and ready to go. If you’re stressed about timing, check out these great tips on cooking times for pot pie!
Preparing the Base and Sautéing Vegetables
First things first, crank that oven up to 425 degrees Fahrenheit. While it’s heating, let those refrigerated crusts chill for 15 minutes if they’re too stiff. Grab a big saucepan and melt that butter over medium heat. Toss in your onion, carrots, and celery. We’re cooking these down until they’re softened up—that takes about 5 to 7 minutes. Don’t rush this part; we want them tender!
Making the Creamy Chicken Filling
Next up is our roux, the secret to that thick, glorious gravy! Sprinkle in the flour, salt, pepper, and thyme right over those cooked veggies, and stir like crazy for a full minute. This cooks out the raw flour taste. Now, switch to whisk mode! Slowly pour in the chicken broth and milk while whisking constantly. Keep stirring gently until the sauce starts bubbling and thickens enough to coat the back of a spoon—that’s usually about 5 minutes of simmering. Pull it off the heat immediately!
Once it’s off the heat, stir in your shredded chicken, frozen peas, and corn. We don’t want to cook the frozen stuff too long; they’ll finish cooking perfectly in the oven.
Assembling and Baking the Chicken Pot Pie
Now we piece this beauty together! Lay one crust in your 9-inch pie dish. Pour that amazing creamy chicken and vegetable filling right on top. Place the second crust over the filling. Trim the edges—you know, pinch them together nicely—to seal the top and bottom crusts. You HAVE to cut several steam vents in the top; otherwise, you’ll have an explosion! Finally, brush the top with that beaten egg wash for shine.
Bake this masterpiece for 30 to 35 minutes until it’s gorgeous and bubbly. Remember the absolute hardest part? Letting it rest for 15 minutes after it comes out! Trust me, slicing it too soon is just asking for soup instead of pie.
Tips for the Perfect Flaky Pie Crust on Your Chicken Pot Pie
Getting that *flaky pie crust* right is the difference between an amazing chicken pot pie and just an okay one. We’ve all dealt with that dreaded soggy bottom, and frankly, I won’t stand for it! My number one trick—pulled straight from the messy practice sessions I ran in hotel kitchens years ago—is simple heat management.
When you slide this into the oven, don’t just put it on the rack. Pop your pie dish onto a preheated baking sheet. This blast of direct heat underneath really wakes up the bottom crust and ensures it sets up fast, locking out that creamy filling moisture for at least the first 15 minutes. It’s a total game-changer for achieving that crispness we all crave!
Also, that egg wash on top? Don’t skip it! It’s not just for looks; it helps the crust brown evenly so you don’t end up with pale spots next to scorched ones.
Variations on the Classic Chicken Pot Pie
While I’m completely devoted to the double-crust perfection of a traditional chicken pot pie, I always want you to feel like you can tweak things for your lifestyle. If you are short on time, forget wrestling with that second pie crust! Just skip it entirely and use your chicken casserole recipe skills instead.
Instead of the top crust, just drop 6 to 8 rounds of refrigerated biscuit dough right on top of that hot, creamy filling before it goes into the oven. They bake up fluffy, golden, and soaking up all that delicious gravy from beneath. It’s totally hearty and satisfying. Or, if you are feeling fancy but still want easy, grab some store-bought puff pastry; it bakes up so beautifully flaky, too!
Storage and Reheating Your Chicken Pot Pie
Nothing lasts quite as long as leftovers when it comes to pure comfort food, but we gotta treat this gorgeous chicken pot pie right so the crust doesn’t turn sad overnight. If you happen to have any left—which, let’s be honest, is rare—the best way to store it is to let the whole thing cool down completely on the rack first. Don’t rush this step!
Once cooled, cover the entire dish tightly with plastic wrap and foil and tuck it into the fridge. It’ll keep nicely for about three days. Just make sure it’s sealed up well so it doesn’t soak up any weird smells from the fridge.
Now, when it comes to reheating, we have a choice to make, and it all comes down to that precious crust integrity. If you try to zap a whole slice in the microwave, that crust is going to get soft and chewy, and we just can’t risk that!
For the absolute best result? Go for the oven. Reheat individual slices right on a lined baking sheet at about 350 degrees Fahrenheit until everything is warmed through. This gives the bottom crust a chance to crisp back up. If you’re in a huge rush, the microwave is okay for a slice or two, but be ready for a softer texture.
Frequently Asked Questions About Chicken Pot Pie
I always get questions after people make this for the first time! It’s just such a classic American dish, and getting the little details right makes all the difference between good and truly outstanding. Don’t worry if you need to tweak things for your pantry; that’s what cooking is all about!
Can I make this chicken pot pie ahead of time?
Absolutely! This is a lifesaver for busy folks. You can assemble the whole thing—bottom crust, filling, and top crust—and wrap it very tightly in plastic wrap and foil. Keep it covered in the fridge for up to 24 hours. Just a heads-up though: when you bake it from cold, you’ll probably need to add about 10 to 15 minutes to the bake time. It’s also a great idea for a weeknight dinner prep session!
How do I prevent a soggy bottom when making chicken pot pie?
This is the eternal struggle of the savory pie recipes world, isn’t it? Remember the trick I mentioned earlier? That’s your best defense. Always bake your fully assembled pie right on a preheated metal baking sheet—don’t use glass for the initial bake if you can help it. That searing heat hitting the bottom crust helps it set instantly.
Secondly, make sure your creamy chicken filling isn’t swimming in liquid when you pour it in. If you step away from the saucepan for too long after taking it off the heat, the sauce can thin out a bit. You want it thick enough to coat the back of a spoon heavily before you add the chicken and veggies.
What is a good substitute for the double crust in this chicken pot pie?
If you’re in the mood for something faster, or maybe you just prefer a lighter top layer, swapping out the top crust is super easy. My favorite alternative, which turns it almost into a chicken casserole recipe hybrid, is using store-bought biscuit dough. Just drop spoonfuls of that dough over the filling before baking. They puff up into little soft pillows!
Another brilliant option—especially if you love incredible flakiness without making pastry—is grabbing a box of puff pastry sheets. It gives the top a professional, blistered finish that’s just heavenly on a homemade chicken pot pie.
Estimated Nutritional Information for This Chicken Pot Pie
Okay, so we’ve covered making this the ultimate comfort food dinner, but sometimes we want the full picture, right? I always tell people that since we are using store-bought crusts and the exact amount of butter/milk in the filling, these numbers are a really good benchmark for your homemade chicken pot pie.
Keep in mind, these are just estimates based on the ingredients I listed. If you use a lighter milk or extra-lean chicken, those numbers can shift a bit! But for a big slice of this deliciousness, here is what you can generally expect:
- Serving Size: 1 slice
- Calories: 450
- Fat: 25g (with 12g saturated fat)
- Carbohydrates: 35g
- Protein: 25g
- Sugar: 5g
- Sodium: 650mg
- Fiber: 3g
It’s a hearty slice, loaded with protein and flavor to keep you going! That’s the price of a truly satisfying, classic chicken pot pie!
Share Your Favorite Chicken Pot Pie Moments
Wow, we made it! You’ve conquered the chopping, mastered the creamy sauce, and now you have this incredibly satisfying, golden-brown chicken pot pie cooling on your rack. Doesn’t that smell just scream ‘home’?
When you finally slice into that flaky crust and serve up a bowl of this ultimate comfort food dinner, I really, truly want to know how it turned out for you! Did that bottom crust stay crispy? Did the family devour it?
Please, don’t be shy! Head down below and leave a star rating for the recipe so others know it’s worth a try. If you snapped a picture of your gorgeous, bubbly pie, tag us on social media—I absolutely love seeing how you bring these accessible recipes into your own kitchen adventures!
And hey, if you have a question about substituting the peas for green beans, or maybe you tried doubling the thyme, drop it in the comments. I’m always here hanging out, ready to troubleshoot or celebrate your cooking wins!
PrintEasy Homemade Chicken Pot Pie with Flaky Crust

Make this classic American pie for a comforting dinner. This recipe delivers tender chicken, mixed vegetables, and a creamy sauce under a golden, flaky crust. Using rotisserie chicken makes this family favorite quick for weeknights.
- Prep Time: 20 min
- Cook Time: 35 min
- Total Time: 55 min
- Yield: 6 servings 1x
- Category: Dinner
- Method: Baking
- Cuisine: American
- Diet: Vegetarian
Ingredients
- 2 tablespoons unsalted butter
- 1 medium yellow onion, chopped
- 2 carrots, peeled and sliced
- 2 celery stalks, sliced
- 1/2 cup all-purpose flour
- 1 teaspoon salt
- 1/2 teaspoon black pepper
- 1/4 teaspoon dried thyme
- 2 cups chicken broth
- 1 cup whole milk
- 2 cups cooked, shredded chicken (rotisserie chicken works well)
- 1 cup frozen peas
- 1 cup frozen corn
- 1 box refrigerated pie crusts (2 crusts total)
- 1 large egg, beaten (for egg wash)
Instructions
- Preheat your oven to 425 degrees Fahrenheit. If you are using a 9-inch pie dish, let the pie crusts sit at room temperature for 15 minutes while you prepare the filling.
- In a large saucepan, melt the butter over medium heat. Add the onion, carrots, and celery. Cook until the vegetables soften, about 5 to 7 minutes.
- Stir in the flour, salt, pepper, and thyme. Cook for 1 minute, stirring constantly.
- Gradually whisk in the chicken broth and milk until the mixture is smooth. Bring the mixture to a simmer, stirring often, until the sauce thickens enough to coat the back of a spoon, about 5 minutes.
- Remove the saucepan from the heat. Stir in the shredded chicken, frozen peas, and frozen corn.
- Place one pie crust into the bottom of your 9-inch pie dish. Pour the creamy chicken and vegetable filling evenly into the crust.
- Place the second pie crust over the filling. Trim and crimp the edges to seal the top and bottom crusts together. Cut several slits in the top crust to allow steam to escape.
- Brush the top crust lightly with the beaten egg wash.
- Bake for 30 to 35 minutes, or until the crust is golden brown and the filling is bubbling.
- Let the chicken pot pie cool on a wire rack for at least 15 minutes before slicing and serving.
Notes
- For a crispier bottom crust, place the pie dish on a baking sheet during the first 15 minutes of baking.
- If you prefer a biscuit topping instead of a double crust, skip the top crust and drop 6 to 8 biscuit dough rounds over the filling before baking.
- You can substitute frozen mixed vegetables for the peas and corn if you prefer.
Nutrition
- Serving Size: 1 slice
- Calories: 450
- Sugar: 5
- Sodium: 650
- Fat: 25
- Saturated Fat: 12
- Unsaturated Fat: 13
- Trans Fat: 0
- Carbohydrates: 35
- Fiber: 3
- Protein: 25
- Cholesterol: 85