
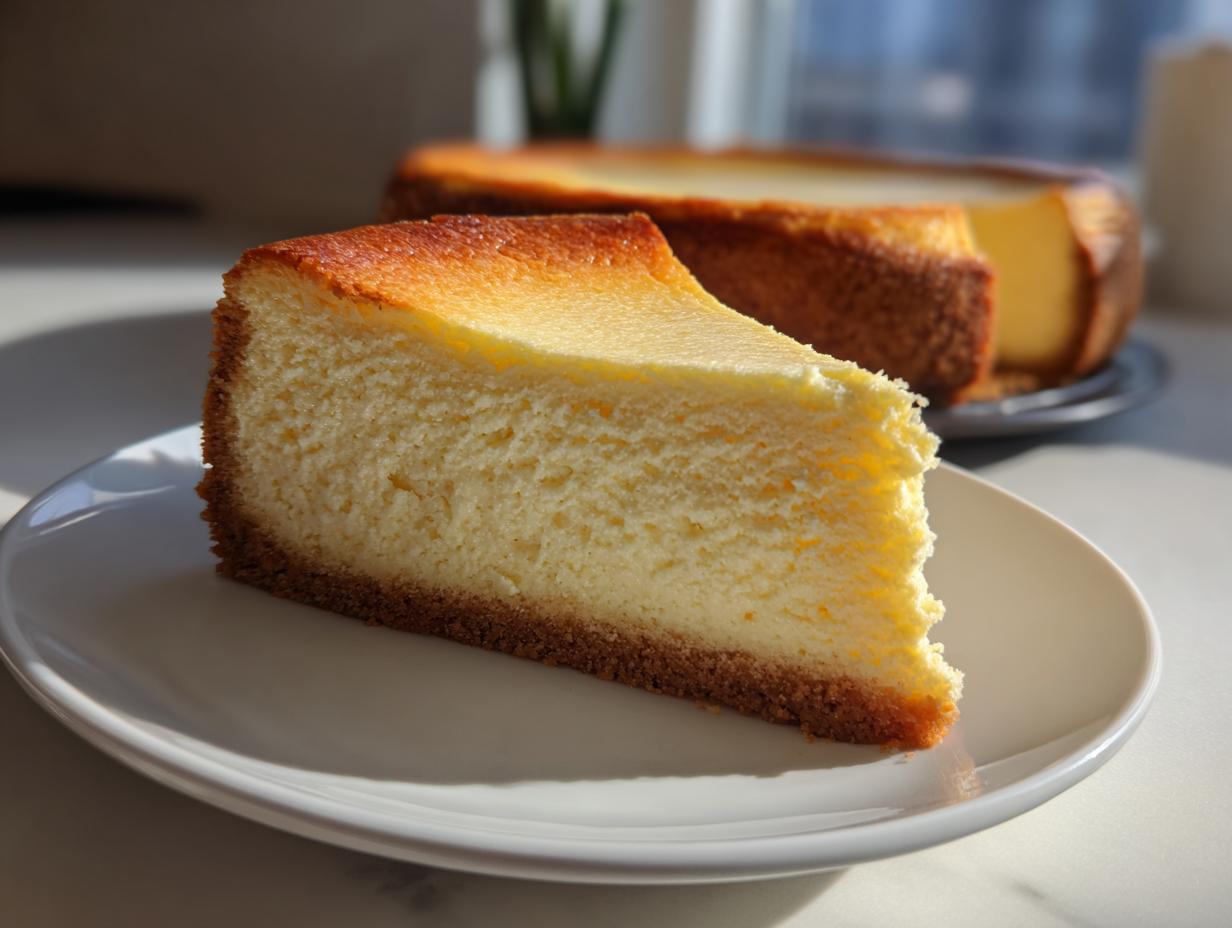
Listen, I know the word “cheesecake” can sound intimidating. It brings up images of massive cracks, sunken centers, and complicated water baths you might have seen on TV. But that’s the old way! When I was driving across the country with the band, finding that perfect, soul-satisfying slice in every new city was my vice. I figured out how to bring that **best ever creamy New York cheesecake recipe** magic right into your home kitchen without all the fuss. Here at YumDrizzle, we strip away the complexity, and this *cheesecake recipe* proves that truly rich, velvety, tall desserts are totally accessible to everyone.
- Why This is the Best Cheesecake Recipe You Will Ever Make
- Ingredients for Your Perfect New York Style Cheesecake Recipe
- How to Make Cheesecake with Graham Cracker Crust
- No Crack Cheesecake Tips: Mastering the Water Bath and Cooling
- Simple Cheesecake Guide: Chilling and Serving
- Ingredient Notes and Substitutions for This Cheesecake Recipe
- Storage and Reheating Instructions for Your Classic Dessert Baking
- Frequently Asked Questions About This Cheesecake Recipe
- Share Your Indulgent Dessert Ideas
Why This is the Best Cheesecake Recipe You Will Ever Make
If you’ve ever given up on making a proper New York Style cheesecake because the results were too thin or just a total disaster zone on top, trust me, I get it. My goal coming up with this *Best Cheesecake Recipe* was to nail that signature texture: tall, dense, unbelievably creamy, and perfectly smooth. We aren’t aiming for a delicate little thing; we’re aiming for a showstopper.
Here’s what you get when you follow these steps:
- You get a cake that stands at attention—tall, just like they serve it in the best Manhattan diners.
- It bakes evenly thanks to that water bath technique, meaning no weird hot spots!
- You end up with that rich, tangy flavor profile that screams classic indulgence.
We’re keeping the flavor classic but ditching the panic attacks. This approach to classic cheesecake is foolproof if you just respect the temperature changes.
Achieving That Velvety Cheesecake Filling
The secret to that melt-in-your-mouth sensation and the true *Velvety Cheesecake Filling* is less about magic and more about planning. Firstly, your cream cheese, sour cream, and eggs MUST be at genuine room temperature. If they aren’t, you’ll get lumps, and then you’ll naturally mix longer to break those lumps up.
And that’s the trap! Overmixing after the eggs go in traps air. Warm, smooth ingredients mix beautifully with almost no effort, so you add the eggs one by one only until *just* combined. That caution keeps your filling dense and smooth, not light and cracked.
Ingredients for Your Perfect New York Style Cheesecake Recipe
Okay, let’s get everything lined up. You know how I always preach about having your ingredients ready? For cheesecake, this isn’t just a suggestion; it’s survival! If you try to rush this, you risk lumps, and nobody wants a lumpy, *indulgent dessert idea*.
I want you to focus on temperature here. Seriously, if you pull the cream cheese straight from the fridge, you’re setting yourself up for battle. Give that dairy time to relax on the counter—it makes all the difference in creating a seamless, gorgeous final product.
For the Graham Cracker Crust
This crust is buttery, slightly sweet, and gives you that essential crunch against the smooth filling. You only need three things here:
- 1 1/2 cups graham cracker crumbs (I usually crush them myself so they aren’t too fine!)
- 1/4 cup granulated sugar
- 6 tablespoons unsalted butter, melted until runny
For the Creamy Baked Cheesecake Filling
This is where the magic happens. Remember: everything here needs to be room temperature unless stated otherwise. And please, don’t skimp on the amount of cream cheese; we want this tall and rich!
- 4 (8 ounce) packages full-fat cream cheese, absolutely softened
- 1 1/2 cups granulated sugar
- 1/4 cup all-purpose flour (this helps stabilize everything!)
- 1 teaspoon vanilla extract
- 1/4 teaspoon salt
- 1 cup sour cream, room temperature
- 4 large eggs, room temperature
Having your ingredients ready like this lets you move swiftly through the mixing steps, which is the key to this whole *cheesecake recipe* working out flawlessly.
How to Make Cheesecake with Graham Cracker Crust
Alright, you’ve got your ingredients lined up—hopefully they’ve been chilling out on the counter for at least an hour! We’re starting with the foundation: that beautiful *Cheesecake with Graham Cracker Crust*. This is where we get our oven set up and create a sturdy base for that heavy, creamy filling we’re about to make.
First things first, get your oven to 350 degrees F. Go ahead and mix up your crust ingredients—the crumbs, the tiny bit of sugar, and that melted butter. Push that mixture down super firmly into your 9-inch springform pan. I use the bottom of a measuring cup to really pack it in tight. Then, we bake that crust for just 10 minutes. It sets it up so it won’t get soggy later.
Once that crust is done its little pre-bake, take it out and let it cool while you get the filling ready. Now, drop your oven temperature down to 325 degrees F. We need it cooler for the long, slow bake ahead. Before you do anything else, wrap the outside bottom and sides of that springform pan tightly with heavy-duty aluminum foil. Wrap it twice! This is your first defense against the water bath seeping in!
Mixing the Rich Dessert Recipes Filling
This part demands a light touch! We are aiming for the creamiest texture possible, and that means we are working in stages and being gentle as soon as the eggs show up. We want to avoid incorporating air at all costs—air makes things puff up, and puffing up leads to cracking when it cools down. We are making *Rich Dessert Recipes* here, not soufflés!
In a big bowl, start by beating ONLY that softened cream cheese. Don’t add anything else yet! Beat it until you are 100% sure it’s perfectly smooth and no cream cheese lumps are surviving. Then, gradually mix in your 1 1/2 cups of sugar, the flour, vanilla, and salt until it’s *just* blended. Scrape the sides down really well.
Next, mix in the room temperature sour cream. Again, just until it’s smooth. Now comes the moment of truth for the eggs. Add them one at a time, mixing only until you see that yellow disappear into the white batter. Seriously, stop the mixer the second it combines. If you overmix here, you’re building air bubbles that will ruin your tall, *creamy baked cheesecake*!
Pour that beautiful, lump-free batter gently over your cooled crust. Now, get ready for the water bath setup, because that’s the next non-negotiable step for getting that unbelievably good result you’re looking for! You can find a great quick reference on how to mix dairy for the perfect batter over at this easy homemade cheesecake guide.

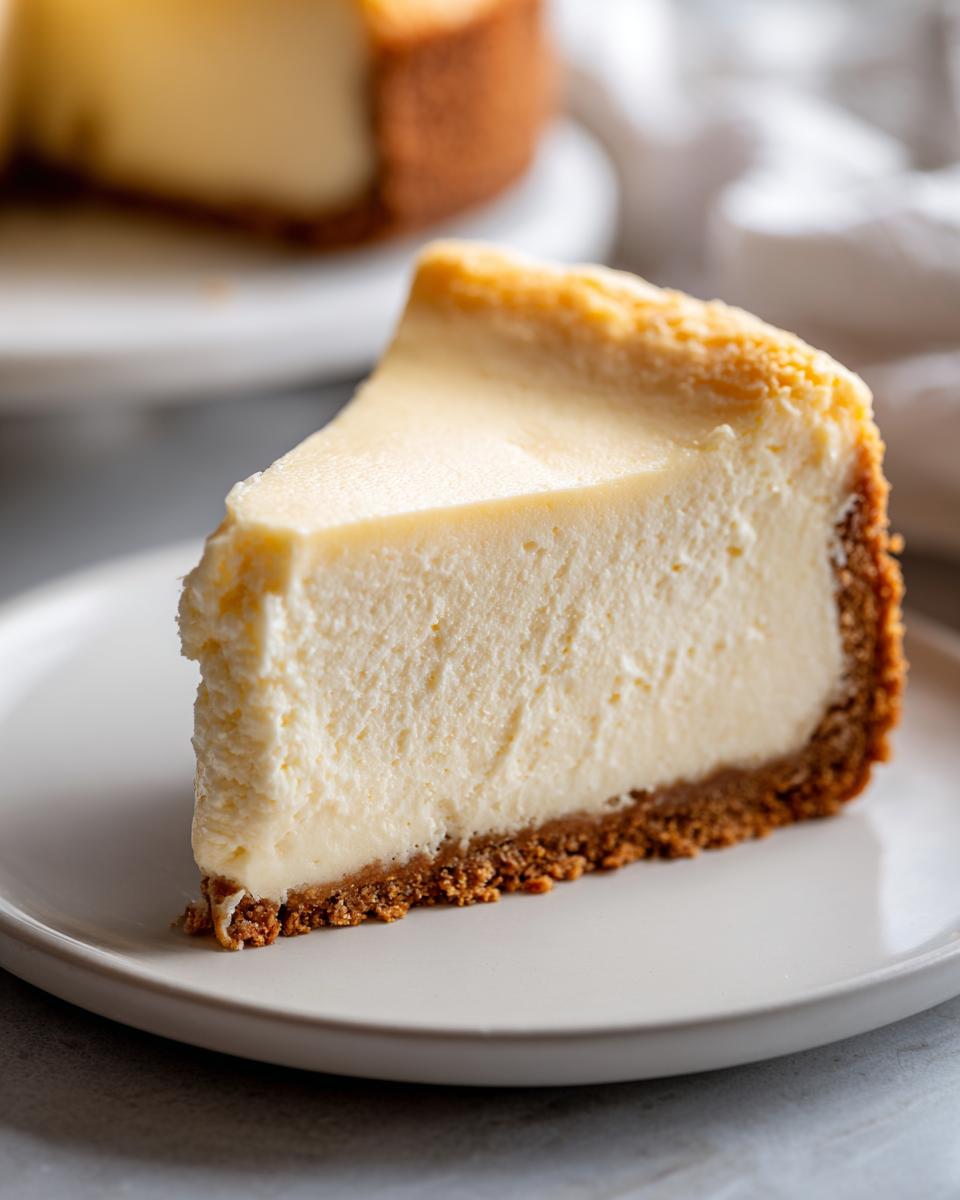
No Crack Cheesecake Tips: Mastering the Water Bath and Cooling
Okay, deep breath. We’ve mixed the perfect batter, and we absolutely cannot let it fall apart on us now. The number one thing people panic about when making this *cheesecake recipe* is the crack down the middle. Trust me, I have thrown out more cracked cheesecakes than I care to admit until I learned the two golden rules. These *No Crack Cheesecake Tips* are the reason our final product is so spectacular.
Rule number one is the water bath. I already told you to wrap that springform pan twice in heavy-duty foil, right? Good. Now, when you place that wrapped pan into the larger roasting pan, you pour hot water in until it comes about halfway up the sides of the cheesecake pan. This bath acts like a gentle insulator. It keeps the oven temperature incredibly stable and humid, preventing the edges of your cheese mixture from setting too fast while the center plays catch-up. That temperature shock is what causes the dreaded sinking and cracking!
Once that hour and fifteen minutes is up, and the center still has that gentle wobble, we move onto the most important part of this whole endeavor: the cool down. Do not, I repeat, DO NOT just pull this beautiful thing out and set it on the counter. That temperature drop sends shockwaves through your creamy filling.
The Importance of Slow Cooling for a Tall and Creamy Cheesecake
Think of your cheesecake like a nervous traveler getting off a very long flight. You can’t just throw them out into the cold air! You have to let them acclimatize slowly. When you shock a baked custard like this, it contracts too quickly, and boom—we have a massive crack, and your *Tall and Creamy Cheesecake* looks less majestic and more tragic.
Here is the exact sequence I swear by. When the time is up, turn the oven completely OFF. Don’t even leave the heat on low! Then, prop the oven door open just a tiny bit with a wooden spoon—just wide enough that steam can escape but the temperature drops gently. We leave it in there for a full hour like that. This hour lets the internal structure stabilize perfectly.
After that hour, take it out, peel off the foil wrapping so the sides don’t stay damp, and let it cool completely on a wire rack on the counter. That gentle transition from a warm oven, to room temperature, and finally to the fridge is the non-negotiable secret sauce for achieving the *Best Ever Cheesecake Flavor* without fail. If you want to learn more about getting those towering results, dive into the secrets shared!This guide on achieving height is fantastic!
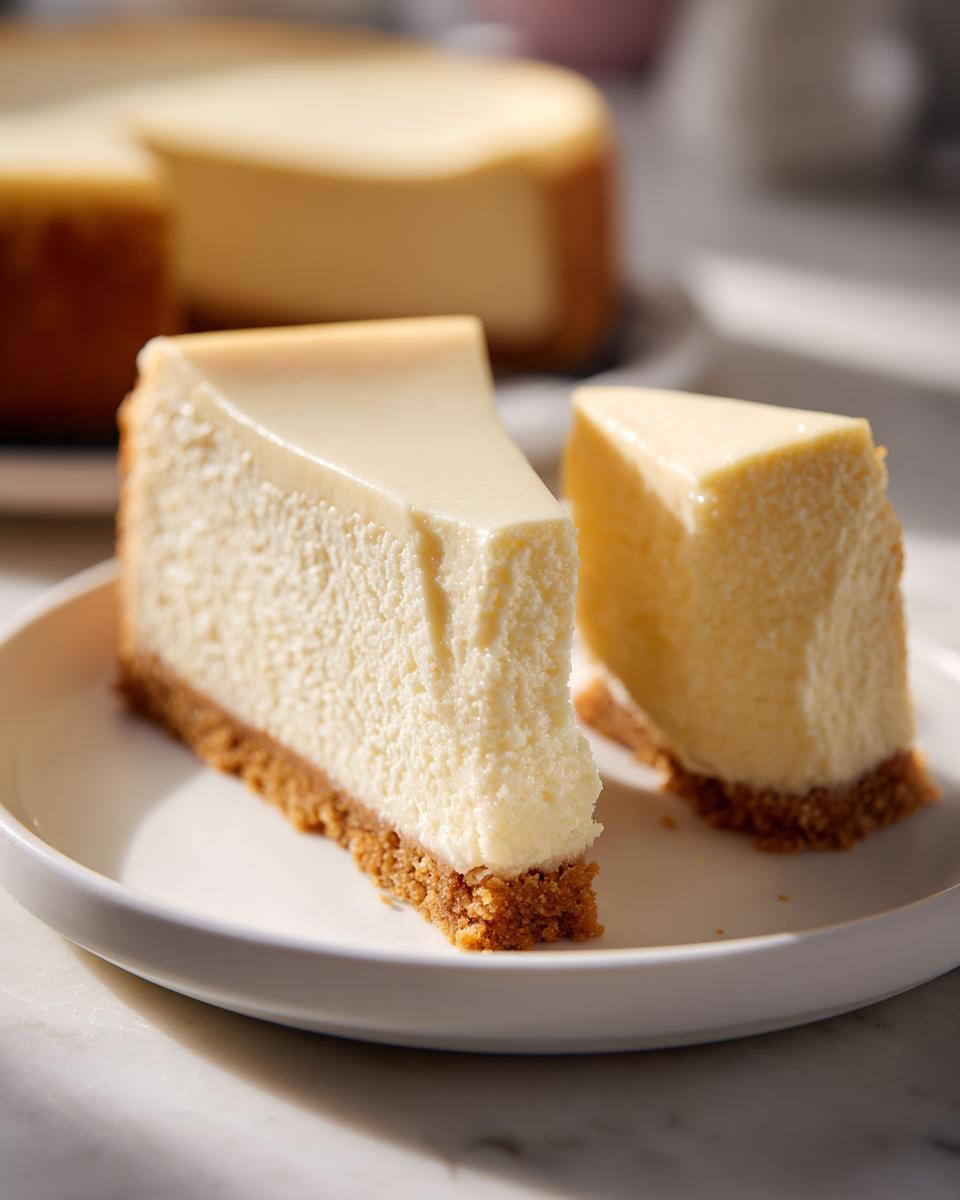
Simple Cheesecake Guide: Chilling and Serving
We made it! Our cheesecake is perfectly baked and (crucially) slowly cooled down. Now, the hardest part starts: waiting. This cheesecake needs a serious chill session to firm up completely so we can get those gorgeous, clean slices. You absolutely have to cover it loosely and stick it in the fridge for a minimum of six hours, but honestly? Over the top overnight chilling is the key to the best texture.
When you’re ready to serve, take the springform pan protector off. Before you try to unbuckle the sides, gently run a thin, sharp knife all the way around the edge. This cuts the seal between the cake and the metal, so when you release the latch, your pristine top doesn’t stick or tear. That’s the last step in your *Homemade Cheesecake Instructions* before you slice into that creamy treasure!
For more straightforward tips on timing everything out, check out this simple cheesecake guide for managing your timeline!
Ingredient Notes and Substitutions for This Cheesecake Recipe
Even though this recipe is designed to be the absolute gold standard for a classic New York style experience, I know people sometimes run into trouble at the grocery store or just want to experiment a little bit. Don’t worry, we can tweak things without ruining the texture or the flavor profile. My goal here, as always, is to give you the confidence to bake this masterpiece using ingredients you can actually find!
My roadside experience taught me that if you respect the main structure—the cream cheese—you can play around a bit on the edges. But remember, we’re making an ultra-rich dessert here. Using low-fat stuff is just going to lead to a texture fail, and we worked too hard on the slow cooling process to let that ingredient choice sabotage us!
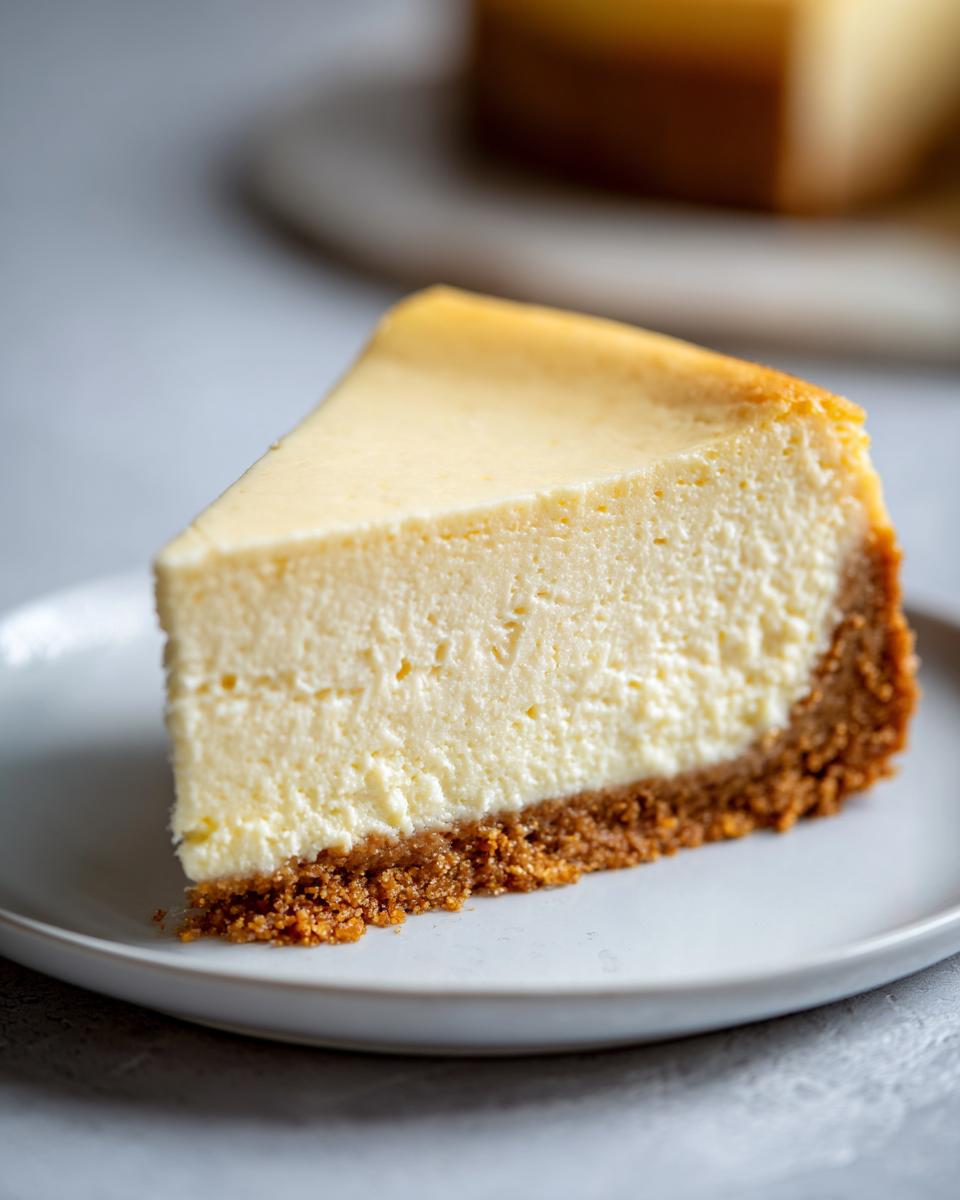
Achieving the Perfect New York Cheesecake Flavor
If you want that beautiful, tangy bite that distinguishes a true *Perfect New York Cheesecake* from just a sweet cream cheese pie, you need two main players: full-fat cream cheese and sour cream. Full-fat cream cheese has the right amount of stabilizers and fat content to create that dense, velvety structure that doesn’t collapse when handled.
The sour cream is non-negotiable for me, too. It brightens up the whole cake! Without that slight acidity, the rich dairy can taste a little flat. If you’re in a desperate pinch and absolutely must substitute the sour cream, you can use an equal amount of full-fat Greek yogurt, but you need to taste-test as you go. Greek yogurt can sometimes be startlingly tangy.
I’ve seen people try to swap out the graham crackers for vanilla wafers or even Oreo crumbs, which is fine if you want a different dessert! But for this classic build, the graham cracker gives you the right neutral, sandy texture that supports the filling perfectly. If you want to know more about what makes the New York style so unique, check out the details on this guide to classic cheesecakes. It’s all about that density and depth of flavor!
Storage and Reheating Instructions for Your Classic Dessert Baking
Wow, you made it! If you have leftovers from this amazing dessert—and honestly, sometimes I hide a slice just for myself—you want to treat it right. This isn’t like reheating a slice of pizza; we have to respect that creamy custard structure we worked so hard to perfect during the slow cool-down!
For beautiful, fresh slices tomorrow, refrigeration is your best friend. Get the cheesecake wrapped up! You need to cover it tightly with plastic wrap—I usually go for two layers just to be safe against any fridge smells. Then, give it a spot in the cold zone where it won’t get knocked around. Covered like this, your *Classic Dessert Baking* masterpiece stays perfect for about four or five days.
Now, about reheating? I gotta be upfront with you: I just don’t recommend it for this style. Heating up a baked cheesecake usually changes that gorgeous, dense texture we achieved through the water bath and slow cooling. It can soften it too much or risk sweating.
If you absolutely need to eat it cold but the whole cake is rock solid from the freezer—yes, you can freeze leftover cheesecake! Wrap it super tight in plastic wrap, then wrap it again in foil or put it in a freezer-safe bag.
To thaw it, just move it, still wrapped, into the fridge overnight. Let it come up to temperature slowly, just like we did when we baked it! Once thawed, eat it cold. For the best experience, though, you really want to enjoy this right out of the fridge. You can peek at Natasha’s tips for storing cheesecake if you need backup on keeping it fresh!
Frequently Asked Questions About This Cheesecake Recipe
I know when you get this deep into baking something truly *rich dessert recipes* style, you start getting nervous about the final result. Do you still have the recipe card handy? Don’t worry about it! I get asked the same questions every single time I bring this cheesecake to a gathering. Here are the big ones that pop up most often about getting that *creamy baked cheesecake* just right.
Can I skip the water bath in this Easy Cheesecake Recipe from Scratch?
Oh, that’s the million-dollar question, isn’t it? Look, if you want the easiest, fastest, most foolproof results—the kind of *cheesecake recipe from scratch* that guarantees that tall, velvety top—then no, you really shouldn’t skip it. The water bath is your humidity shield. It keeps the environment around that delicate filling gentle so the edges don’t bake hard and fast while the center tries to catch up. If you skip it, you are drastically increasing your risk of cracking, and we worked way too hard on getting those ingredients smooth to have a messy top!
What makes this a ‘New York’ style cheesecake recipe?
That’s a great question! When people talk about New York style, they are talking about texture and density. Think heavy, rich, and smooth—almost like a very dense custard. It’s usually baked low and slow, often with that water bath we talked about, which helps it rise tall. It relies heavily on full-fat cream cheese and sometimes includes sour cream or heavy cream for that distinct, slightly tangy finish. It’s totally different from those lighter, no-bake versions you see everywhere. This is the *ultimate cheesecake guide* version for true indulgence!
If you want to compare notes on how other people have handled their baking, you can see what they are doing over at this source on New York style cheesecakes. Sometimes seeing someone else’s process helps everything click!
Share Your Indulgent Dessert Ideas
Whew! We did it! You’ve conquered the cream cheese anxiety, you respected the temperature, and you managed the slow cooling like a champ. Now that you have this incredible, rich, and utterly perfect *cheesecake recipe* sitting in your fridge, I genuinely want to hear from you. Baking is a conversation, right? It’s not just about me shouting instructions from my kitchen to yours.
So, please, tell me how your first bite went! Did you serve it plain, or did you go wild with a cherry topping or a chocolate drizzle? Did you find that this *cheesecake recipe* made your dinner guests gasp with delight? I love seeing your successes, especially after you were nervous about the water bath!
Drop a rating below—five stars if it’s the best slice you’ve ever made at home—and share your results in the comments. Seriously, photos are encouraged! Knowing that I helped you create one of those stunning, show-stopping *Indulgent Dessert Ideas* is what makes all this recipe testing worthwhile for me. Don’t be shy, I’m out here cheering you on! And if you want to see what amazing toppings other people have created, peek at this collection of delicious dishes!
PrintThe Best Ever Creamy New York Cheesecake Recipe

You can make a rich, velvety, and tall New York Style Cheesecake at home. This recipe focuses on simple steps and tips to achieve that perfect, crack-free finish, making it a crowd-pleasing classic dessert.
- Prep Time: 25 min
- Cook Time: 75 min
- Total Time: 140 min
- Yield: 12 servings 1x
- Category: Dessert
- Method: Baking
- Cuisine: American
- Diet: Vegetarian
Ingredients
- 1 1/2 cups graham cracker crumbs
- 1/4 cup granulated sugar (for crust)
- 6 tablespoons unsalted butter, melted
- 4 (8 ounce) packages full-fat cream cheese, softened to room temperature
- 1 1/2 cups granulated sugar (for filling)
- 1/4 cup all-purpose flour
- 1 teaspoon vanilla extract
- 1/4 teaspoon salt
- 1 cup sour cream, room temperature
- 4 large eggs, room temperature
Instructions
- Prepare the crust: Preheat your oven to 350 degrees F. Mix the graham cracker crumbs, 1/4 cup sugar, and melted butter in a bowl. Press this mixture firmly into the bottom and about 1 inch up the sides of a 9-inch springform pan. Bake the crust for 10 minutes. Remove and let it cool while you prepare the filling. Reduce the oven temperature to 325 degrees F.
- Prepare the water bath: Wrap the outside bottom and sides of the springform pan tightly with heavy-duty aluminum foil. This keeps water out during baking. Place the wrapped pan inside a larger roasting pan.
- Make the filling: In a large bowl, use an electric mixer to beat the softened cream cheese until it is completely smooth and lump-free. This step is key for a velvety texture.
- Gradually beat in the 1 1/2 cups sugar, flour, vanilla extract, and salt until just combined. Scrape down the sides of the bowl.
- Beat in the sour cream until smooth. Add the eggs one at a time, mixing only until each egg is incorporated. Do not overmix the batter once the eggs are added; this introduces air that causes cracks.
- Pour the filling over the cooled crust in the springform pan.
- Bake using the water bath: Carefully pour hot water into the roasting pan until the water reaches about halfway up the sides of the springform pan. Bake for 60 to 75 minutes. The edges should look set, but the center 2 inches should still jiggle slightly when gently nudged.
- Cool slowly to prevent cracking: Turn off the oven, but leave the cheesecake inside with the oven door propped open slightly (use a wooden spoon). Let it cool in the oven for 1 hour.
- Remove the cheesecake from the water bath and foil. Let it cool completely on a wire rack at room temperature for another hour.
- Chill: Cover the cheesecake loosely with plastic wrap and refrigerate for at least 6 hours, or preferably overnight, before serving. Run a thin knife around the edge before releasing the springform side.
Notes
- Room temperature ingredients (cream cheese, sour cream, eggs) mix together much more smoothly, which helps you avoid overmixing.
- Do not skip the slow cooling process in the turned-off oven; this gradual temperature change is the best way to prevent cracks.
- For a taller cheesecake, use a 9-inch pan and ensure your cream cheese is fully softened.
Nutrition
- Serving Size: 1 slice
- Calories: 450
- Sugar: 35
- Sodium: 250
- Fat: 30
- Saturated Fat: 18
- Unsaturated Fat: 12
- Trans Fat: 0.5
- Carbohydrates: 40
- Fiber: 1
- Protein: 8
- Cholesterol: 120