
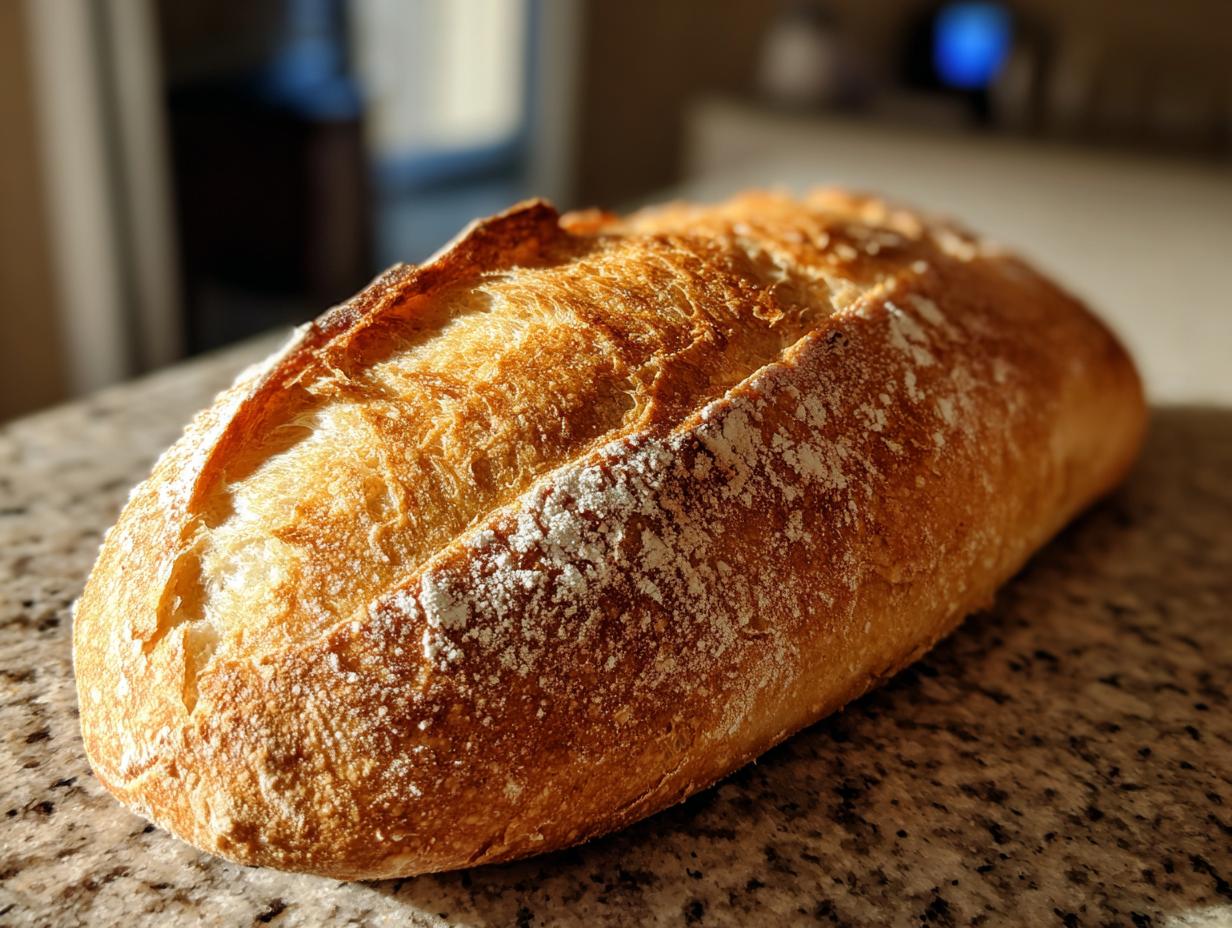
There is truly nothing on this planet that beats the smell of fresh bread baking, right? I mean, that warm, yeasty aroma filling your kitchen instantly makes everything better. That’s why I pushed hard to nail down this easy homemade French bread recipe. Forget those intimidating, hours-long processes you see everywhere. This is my roadmap for you—the busy home cook—to get that perfect bakery-style result: a crackly, shatteringly crusty outside hugging the softest, fluffiest interior you’ve ever managed without a professional steam injection system. Trust me, if I can get this right after years living on lukewarm tour bus coffee, anyone can!
- Why This Easy Homemade French Bread Recipe Works for You
- Gathering Ingredients for Your French Bread
- Step by Step Bread Making for Your French Bread
- Tips for Success: Achieving Artisan Bread at Home
- Serving Suggestions for Your French Bread
- Storage and Reheating Instructions for Leftover French Bread
- Frequently Asked Questions About Making French Bread
- Estimated Nutritional Data for This Recipe
- Share Your Homemade French Bread Creations
Why This Easy Homemade French Bread Recipe Works for You
I never want you to feel intimidated by yeast. That’s why this recipe is designed to respect your schedule while still delivering show-stopping results. This isn’t some overly fussy recipe that demands overnight proofing; we’re getting fantastic flavor and that perfect texture so you can serve incredible homemade French bread piping hot for dinner tonight. It’s about maximizing impact with minimal fuss, which is exactly what I learned cooking on the road.
Here’s why this loaf is your new weeknight hero:
- It’s truly a quick homemade bread—we’re under two hours total, hands-on time is minimal.
- It fits perfectly into the beginner bread baking comfort zone. Seriously, if you can make pancakes, you can make this!
- Every step is geared toward that contrast: crackle on the outside, puff on the inside.
Achieving that Perfect Crusty Bread Tutorial Texture
The trick to getting that amazing, restaurant-quality crunch isn’t some magic ingredient; it’s steam! We build a steamy little cloud in your oven right when this goes in. This short burst of humidity keeps the outside of the dough moist just long enough for the loaf to expand fully before the crust sets hard. That’s the biggest secret in any good crusty bread tutorial, and we nail it with just a pan of hot water.
The Secret to a Fluffy Interior Bread
For the inside to be wonderfully soft, we need happy gluten networks, but we don’t want to work them too hard. The 5-to-7-minute knead is just enough to develop structure. Then, we let time do the heavy lifting during the two rises. That slow, steady proofing process allows those air pockets to form gently, guaranteeing you get that airy, light crumb you want beneath that fantastic crust. That’s how you win the game of fluffy interior bread!
Gathering Ingredients for Your French Bread
Alright, gather ’round, because this is the easy part! You won’t need any fancy equipment or rare imports for this French bread. We are sticking to basics that make this a true weeknight wonder. When I was collecting recipes on the road, the best ones always used what folks already had on hand. Here is exactly what you need to pull off two beautiful loaves.
- 1 packet active dry yeast (that’s usually 2 1/4 teaspoons, don’t eyeball it!)
- 1 teaspoon granulated sugar (the yeast’s breakfast!)
- 1 cup warm water—this is critical: shoot for 105°F to 115°F. Too cold, the yeast sleeps; too hot, and you kill it.
- 3 cups all-purpose flour, plus whatever you need for dusting surfaces.
- 1 teaspoon salt (salt is flavor, my friends!)
- 1 tablespoon olive oil (just a little bit for structure).
- 1 egg white, lightly beaten (this is for our beautiful, shiny top later).
- Water for steaming the oven (just plain old tap water works great here).
Ingredient Notes and Substitutions for Soft French Loaf
A couple of quick notes so you get that gorgeous soft French loaf every time. If you happen to grab bread flour instead of all-purpose, you can swap it one-for-one, but expect the final loaf to be slightly chewier—it just has a higher protein content. Don’t sweat it, it’ll still be great.
Now, about that egg white wash. That’s what gives you that deep golden, glossy, bakery-style shine. If you really hate egg washes, or you’re worried about brushing it on without deflating the dough, you can skip it! Just brush the tops very gently with plain water right before they go into the oven. You’ll lose a little shine, but you’ll still get a nice brown crust. It’s just a visual thing; the crumb inside stays just as soft either way!
Step by Step Bread Making for Your French Bread
Okay, now we get down to the action. This is where we take those simple ingredients and turn them into something spectacular. Remember what I always preach: good cooking is about respecting the process, especially when we’re working with yeast. While this is an easy bread recipe, following these little details is what separates a flat hockey puck from a gorgeous, airy loaf of step by step bread making success!
Activating Yeast and Mixing the Dough for Quick Homemade Bread
Step one is waking up that yeast! Don’t skip this, even if you think your yeast is fresh. Mix your warm water, sugar, and the whole packet of yeast in a big bowl. You need to let it sit for about 5 to 10 minutes. What you’re waiting for is foam—big, bubbly foam on top, like the head on a beer. That means the yeast is alive and ready to work! If it doesn’t foam, your water was either too cold or too hot, and you need to start that part over.
Once foamy, toss in your flour and salt, plus that little bit of olive oil. Mix it up with a spoon until it’s too tough to stir—that’s when you’ve got a shaggy dough mass.
Kneading and First Rise for Your Yeast Bread Recipe
Time to get your hands dusty! Turn that shaggy mess out onto a lightly floured counter. Now, we knead. You need to punch, fold, and turn for a solid 5 to 7 minutes. You’re looking for the dough to stop sticking everywhere and feel smooth, firm, and elastic. It should bounce back a little when you poke it.
I remember once, I was trying to rush this part during a gig setup—bad idea! My dough barely rose because I didn’t knead it long enough. It ended up dense! So, take your time here. Once it looks right, put it in an oiled bowl, cover it tight, and stick it somewhere warm. I use the inside of my oven right after I turn the light on. Let it chill out for a full hour until it doubles—no cheating!
Shaping and Baking Your French Bread with Steam
Gently punch the air out of that beautifully risen dough. Divide it right down the middle. Now, for shaping: take each half and gently roll and tuck it until you have a long, thin cylinder, like a classic baguette shape. Lay those bad boys onto a baking sheet lined with parchment paper. Let them rest again for 20 minutes while you crank that oven up to 425°F. Make sure that shallow pan on the bottom rack is in there heating up!
Right before they go in, use a super sharp knife or a razor blade to make three quick, diagonal slashes across the top of each loaf—that’s called scoring! It controls where the bread expands. Brush them quickly with the beaten egg white. Then, the magic moment for that amazing bakery style bread result: quickly and carefully pour about half a cup of very hot water into that preheated bottom pan and slam the oven door shut. Bake for 20 to 25 minutes until they’re gorgeously golden brown.
Tips for Success: Achieving Artisan Bread at Home
Even though this is our quick and easy loaf, a few little tricks will launch you straight into artisan bread at home territory. Don’t sweat the oven temperature; inconsistent heat is the enemy of a beautiful crust. If you have an oven thermometer, use it! We need that 425°F to be honest.
When you score those loaves—making those diagonal cuts before baking—keep the blade angled, maybe about 30 degrees to the surface, not straight down like you’re chopping. You want the dough to peel open beautifully, not just crack randomly. Shallow, quick scores are better than deep, hesitant ones. That little bit of final attention is what gives your beginner bread baking effort that polished, professional look. Trust me, practice that scoring move on paper first if you need to!
Serving Suggestions for Your French Bread
Now that you have this amazing, crusty loaf, the question is: what are you going to do with it? Forget plain butter—though a thick slab of good salted butter melting into those warm holes is heavenly! This is genuinely the ultimate dinner bread idea because it soaks up everything.
You absolutely have to use it to mop up the broth from a hearty soup, like my Zuppa Toscana, or serve it alongside pasta dishes where you can scoop up every last bit of sauce. It’s also the key to making next-level French dip sandwiches. Slice it thin, toast it slightly, and pile on the roast beef. Honestly, this fresh French bread makes any standard weeknight meal feel like a special, cozy restaurant night!
Storage and Reheating Instructions for Leftover French Bread
Okay, let’s talk about the sad day after baking—when you have leftovers! Because this is real, honest-to-goodness crusty bread, it tends to get soft pretty quickly if you just leave it on the counter in a plastic bag. Don’t do that! To keep that crust fighting fresh, wrap the cooled loaf tightly in aluminum foil first, and then place it in a plastic bag. That foil keeps the moisture in the soft center but lets the crust breathe a little.
When you’re ready to eat it the next day, don’t just toast it! You need to reheat it to bring that crust back to life. Pop the foil-wrapped loaf right into a 350°F oven for about 10 to 12 minutes. If you want that *real* crispy crust quality back, unwrap it for the last three minutes and let it bask directly in the dry heat. It’ll taste practically baked again, I promise you!
Frequently Asked Questions About Making French Bread
I get so many questions after people try this recipe for the first time, which is awesome! It means you’re out there baking your hearts out. Most of the time, the questions revolve around saving time or fixing a dough issue. Here are my go-to answers for making your **homemade French bread** perfect, even on a busy night when you need **weeknight bread baking** success!
Can I make this French bread recipe without an oven rack steamer?
That hot water pan is the secret sauce for that crackly crust, but I totally get it—sometimes juggling two racks feels impossible, especially when you are first starting out. If you skip the steaming pan, you can still get a decent crust by using an empty, oven-safe skillet on the bottom rack. Once the oven is fully preheated to 425°F, carefully pour the hot water into that hot, empty skillet. You just have to be faster sliding the bread in so you don’t let too much heat escape! If that’s too much movement, just grab a spray bottle filled with water and spritz the oven walls aggressively a couple of times in the first five minutes of baking instead. It won’t be quite as good as the pan method, but it definitely helps!
What is the best flour to use for the Best French Bread Recipe?
When I developed this loaf, I wanted it to be something you could whip up using what you pulled out of your pantry five minutes ago. So, here’s the good news for making the **best French bread recipe**: all-purpose flour works wonderfully! It gives you that soft, slightly tender rise we are aiming for.
If you want to be *super* fancy, you could try splitting the flour 50/50 with bread flour, which has higher protein, and that will give you a little more chewiness in the crumb. But honestly, don’t let flour type discourage you. If you have AP flour, use it! This recipe is forgiving enough that you’ll get a fantastic loaf regardless.

Why is my French bread coming out flat instead of puffy?
This is usually a yeast issue, hands down. If your bread falls flat—meaning it didn’t double during that first rise—it means your yeast was either dead or your water was too hot when you proofed it. Dead yeast equals no bubbles, no lift! Make sure that water temperature is in that sweet spot (105°F–115°F). Or, if it rose perfectly but then deflated aggressively when you tried to shape it, you probably punched it down way too hard. You want to gently deflate it, not squish every single air bubble out!
How long do I need to knead the dough to ensure a good result?
I know kneading feels like a chore when you just want to eat your quick homemade bread, but don’t skimp on the specified time! For this specific **yeast bread recipe**, you need about 5 to 7 minutes by hand until the dough is smooth and passes the windowpane test slightly. If you stop too early, the gluten network won’t be strong enough to hold the gases made by the yeast, and your loaf will spread out instead of standing tall. It’s worth the arm workout, trust me!
Estimated Nutritional Data for This Recipe
I know some of you are counting macros while enjoying your fresh bake, and that’s totally fine! Remember, because this is homemade and we all use slightly different measuring spoons and flour brands, these numbers are just my best guess based on the ingredients listed. I used the standard serving size of 1/12 of the entire loaf for these estimates. Think of this as your helpful starting point!
It’s amazing how few calories are packed into something this delicious, especially when you consider how much flavor you get. Here’s the breakdown for a single serving:
- Serving Size: 1/12 loaf
- Calories: 185
- Fat: 2g
- Saturated Fat: 0.3g
- Trans Fat: 0g
- Cholesterol: 0mg
- Sodium: 250mg
- Carbohydrates: 37g
- Fiber: 1.5g
- Sugar: 1g
- Protein: 5g
See? Nothing scary there! It’s mostly complex carbs from the flour to fuel your day. Enjoy that second slice of your crusty bread guilt-free!
Share Your Homemade French Bread Creations
Seriously, that’s it! You’ve successfully navigated the world of yeast, steam, and scoring, and you now have two gorgeous, bakery-style loaves cooling on your rack. I want you to feel so proud of this accomplishment. Creating real, authentic French bread right on your own countertop is a huge win, and it’s the type of food magic I want everyone to experience.
Now, here’s where the YumDrizzle philosophy really kicks in: we share the joy! I would absolutely love to see what you created. Did your crust crackle perfectly? Did you serve it with that soup you made? Snap a photo!
Tag me on social media! When you post, use the hashtag #YumDrizzleBread so I can find it and cheer you on. And while you’re at it, come back here and drop a rating. Letting other home cooks know how easy and delicious this recipe was helps build up our kitchen community. Go enjoy that bread!
PrintEasy Homemade French Bread: Crusty Outside, Soft Inside
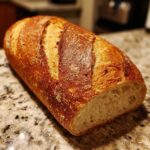
You can make bakery-style French bread at home with this simple recipe. It focuses on achieving a crackly crust and a soft, fluffy interior using basic ingredients and minimal hands-on time.
- Prep Time: 20 min
- Cook Time: 25 min
- Total Time: 1 hour 45 min
- Yield: 2 loaves 1x
- Category: Baking
- Method: Baking
- Cuisine: French
- Diet: Vegetarian
Ingredients
- 1 packet active dry yeast (about 2 1/4 teaspoons)
- 1 teaspoon granulated sugar
- 1 cup warm water (105°F to 115°F)
- 3 cups all-purpose flour, plus more for dusting
- 1 teaspoon salt
- 1 tablespoon olive oil
- 1 egg white, lightly beaten (for wash)
- Water for steaming
Instructions
- Activate the yeast: In a large bowl, mix the warm water, sugar, and yeast. Let this stand for 5 to 10 minutes until foamy.
- Mix the dough: Add the flour, salt, and olive oil to the yeast mixture. Mix until a shaggy dough forms.
- Knead the dough: Turn the dough out onto a lightly floured surface. Knead for 5 to 7 minutes until the dough is smooth and elastic.
- First rise: Place the dough in a lightly oiled bowl, turning to coat. Cover the bowl with plastic wrap and let it rise in a warm place for 60 minutes, or until doubled in size.
- Shape the loaves: Gently punch down the dough. Divide it into two equal pieces. Shape each piece into a long, thin loaf (like a baguette). Place the shaped loaves on a baking sheet lined with parchment paper.
- Second rise: Cover the loaves loosely with a clean kitchen towel and let them rest for 20 minutes. Preheat your oven to 425°F (220°C) during this time. Place a shallow pan on the bottom rack to heat up for steam.
- Score and wash: Just before baking, use a sharp knife or razor blade to make three diagonal slashes across the top of each loaf. Brush the tops lightly with the beaten egg white.
- Bake with steam: Carefully pour about 1/2 cup of hot water into the preheated shallow pan on the bottom rack to create steam. Immediately place the baking sheet with the bread into the oven. Bake for 20 to 25 minutes, or until the crust is deep golden brown.
- Cool: Transfer the finished French bread loaves to a wire rack to cool completely before slicing.
Notes
- For a crispier crust, spray the inside walls of the oven with water two times during the first 10 minutes of baking.
- If you want a softer crust, skip the egg white wash and simply brush the loaves with water before baking.
- This recipe is great for making homemade sandwiches or serving with soup.
Nutrition
- Serving Size: 1/12 loaf
- Calories: 185
- Sugar: 1
- Sodium: 250
- Fat: 2
- Saturated Fat: 0.3
- Unsaturated Fat: 1.7
- Trans Fat: 0
- Carbohydrates: 37
- Fiber: 1.5
- Protein: 5
- Cholesterol: 0