
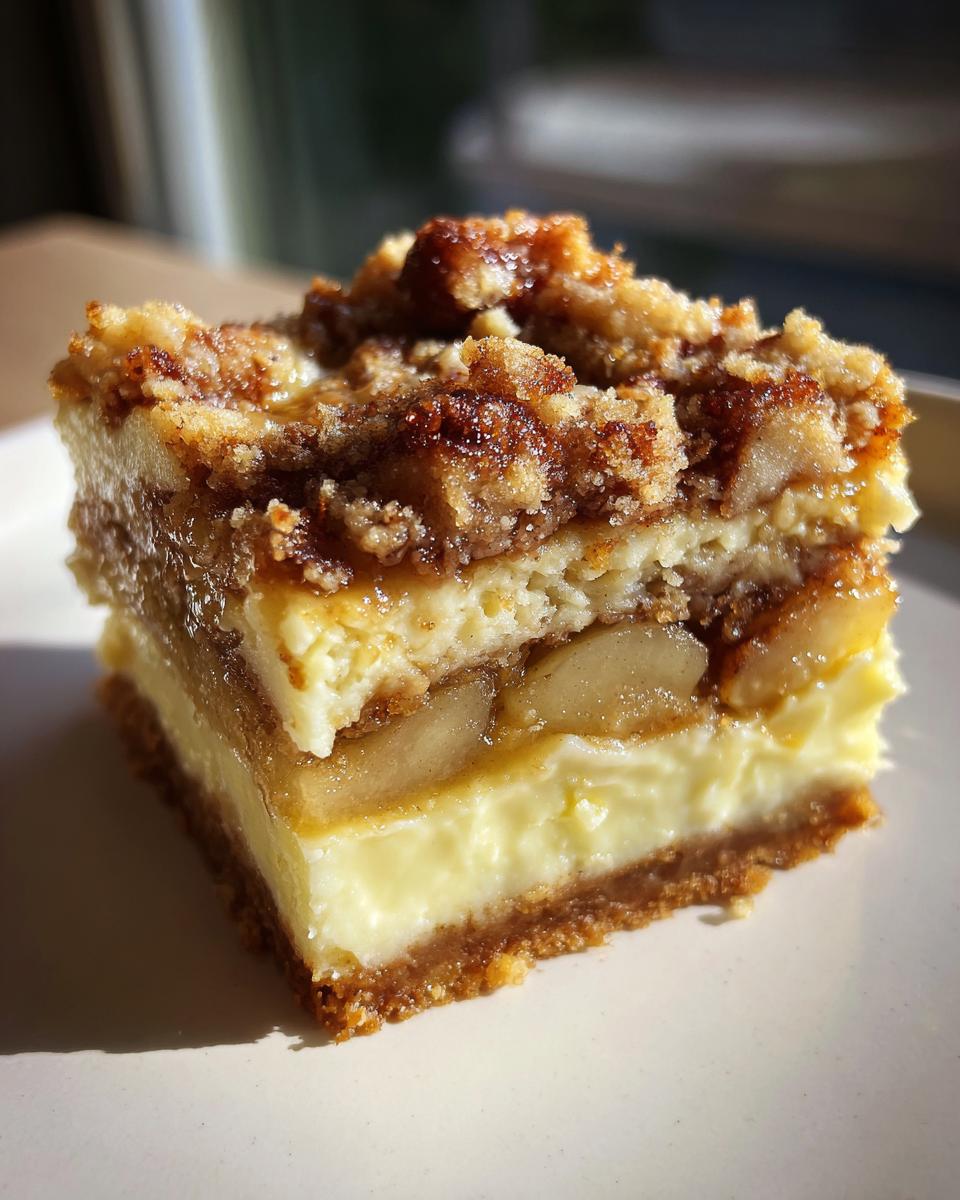
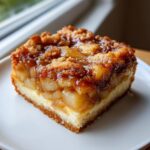
Man, when that first crisp autumn wind blows through, I stop thinking about light summer treats and crave something rich, spiced, and deeply comforting. I remember being on the road all those years; finding an amazing diner that served apple pie next to a slice of homemade cheesecake was pure magic. That’s the flavor memory I chased when I finally sat down to create these Caramel Apple Cheesecake Bars. Seriously, these apple cheesecake bars are the ultimate fusion—you get the flaky, buttery crust, that irresistible cream cheese tang, warm cinnamon apples, and a nutty streusel topping. It tastes like a whole Thanksgiving dessert condensed into one perfect, handheld square. Don’t let the layers intimidate you; they are easier than you think, and if you need a little something to sip alongside this heavy hitter, check out my favorite apple cider Moscow Mule recipe! They’re worth every minute!
- Why You Will Make These Caramel Apple Cheesecake Bars Again and Again
- Gathering Ingredients for Your Apple Cheesecake Bars
- Step-by-Step Guide to Making Apple Cheesecake Bars
- Expert Tips for Perfect Apple Cheesecake Bars
- Variations on Your Apple Crumble Cheesecake Squares
- Storage and Make Ahead Apple Cheesecake Tips
- Serving Suggestions for Autumn Dessert Bars
- Frequently Asked Questions About Apple Cheesecake Bars
- Nutritional Estimates for Homemade Apple Cheesecake Dessert
- Share Your Fall Baking Creations
Why You Will Make These Caramel Apple Cheesecake Bars Again and Again
Look, I get it. Life is busy, and sometimes you want dessert to feel special without requiring a full weekend commitment. That’s why these bars are winners! They deliver maximum flavor impact in a portable package. Trust me, once you nail the layers, you’ll be making these all through the Fall season.
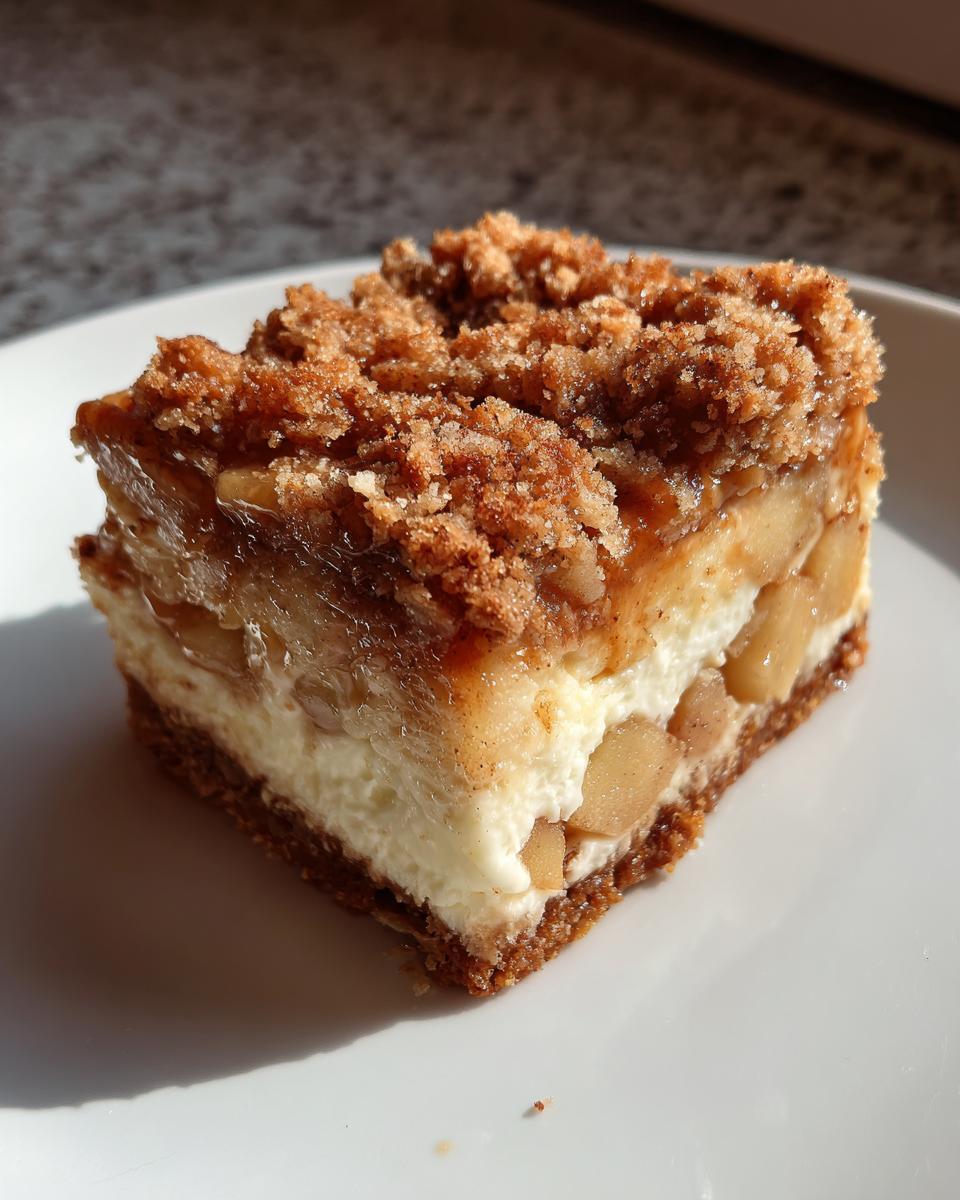
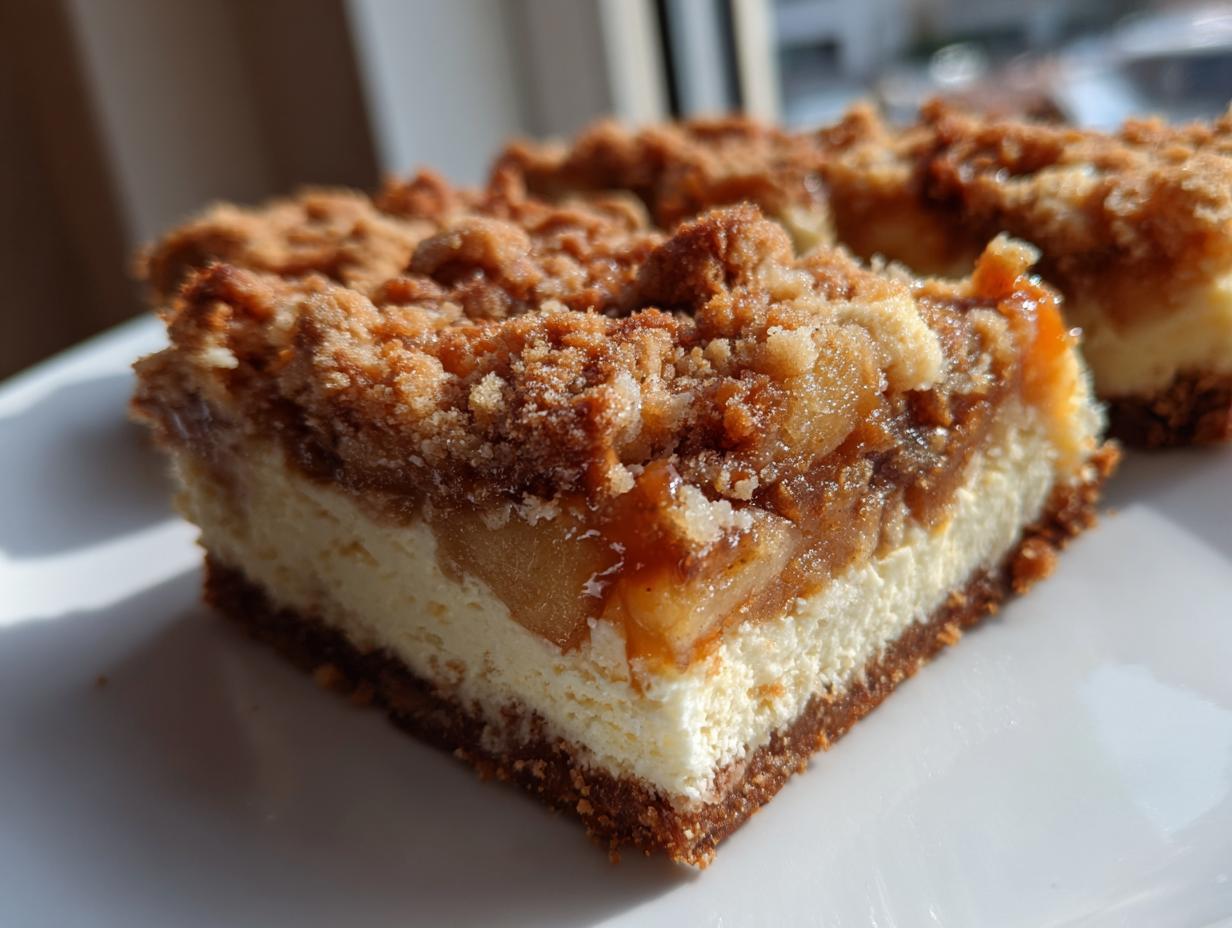
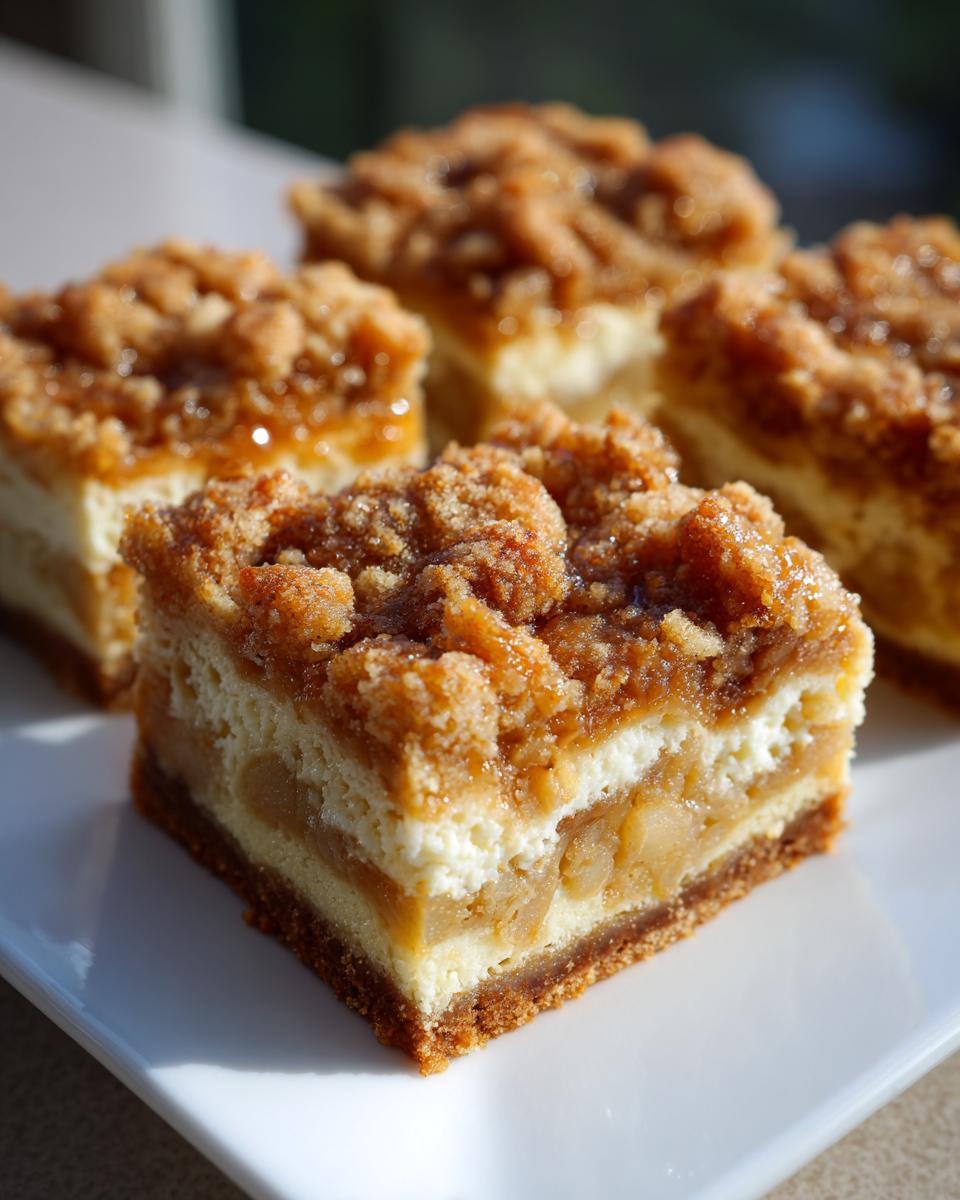
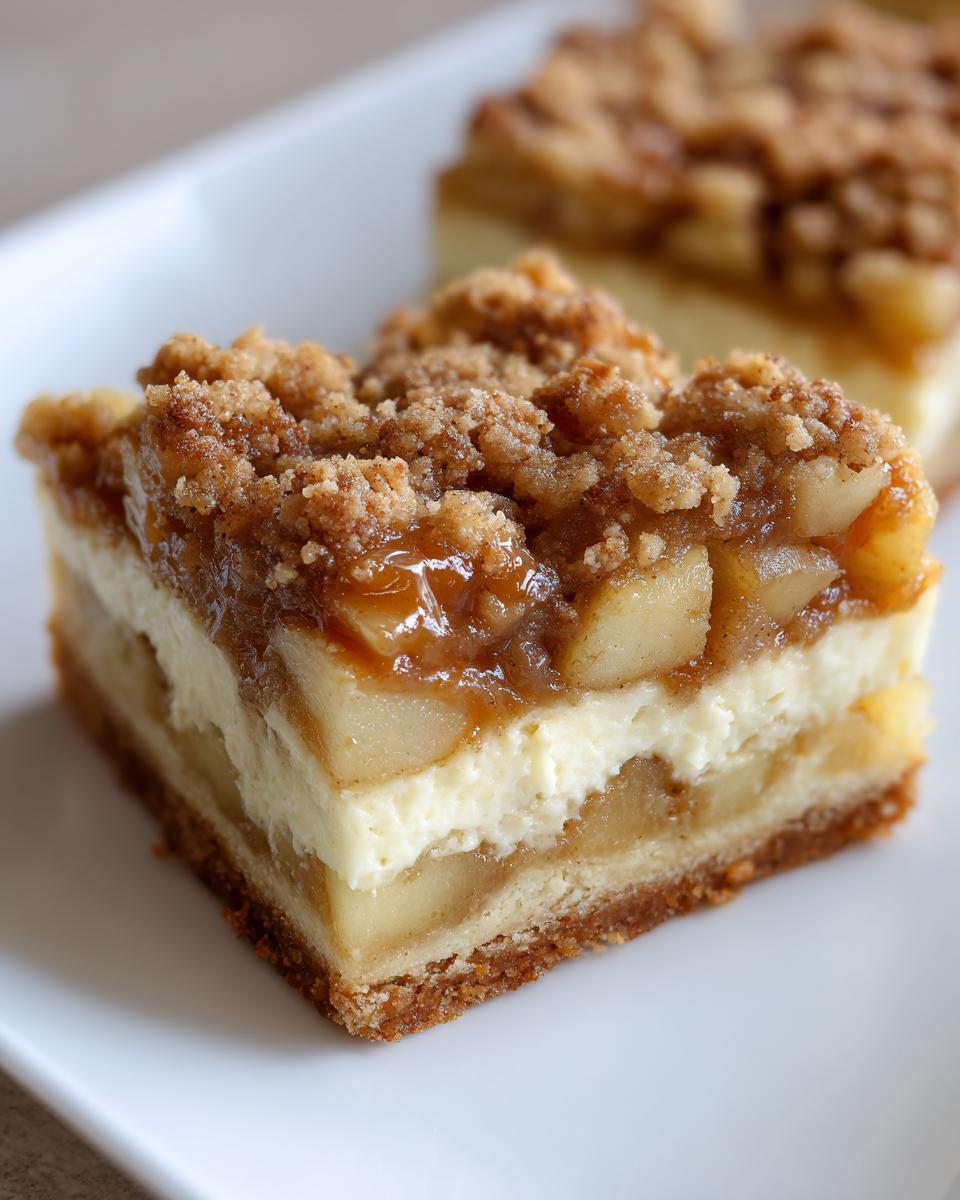
The Perfect Layered Apple Cheesecake Treats
- You get that deeply satisfying crunch from a buttery base layer.
- The middle is pure, smooth, slightly tart cream cheese perfection.
- That crunchy streusel topping brings everything together beautifully. These are truly Layered Apple Cheesecake Treats!
Simple Apple Dessert Bars for Any Occasion
Because they’re bars, clean-up is a breeze, and serving is totally casual. They’re sturdy enough for a potluck, a lunchtime dessert, or they look amazing piled high on a platter for your Thanksgiving table. They are just the easiest Simple Apple Dessert Bars you’ll ever meet.
Gathering Ingredients for Your Apple Cheesecake Bars
Okay, this recipe looks fancy because of the layers, but I promise we are using stuff I usually keep stocked in the pantry, save for maybe the cream cheese if I’m out. The real trick here is efficiency—we use one great base mixture to create two separate, essential parts of the dessert: the crust underneath and the crumbly topping. Planning ahead for your shopping list is crucial, especially grabbing those tart apples. Don’t forget, if you’re looking for something savory to balance all this sweetness later, my easy cranberry chicken recipe is always a hit!
For the Buttery Crust and Streusel Topping
This is where the golden color and that perfect crumble come from. Remember, we mix this all together first, then divide it. You’ll need:
- 1 1/2 cups all-purpose flour
- 1/2 cup granulated sugar
- 1/2 cup packed brown sugar
- 1/4 teaspoon salt
- 1 cup (that’s two full sticks!) cold unsalted butter, cut into small cubes
- 1/2 cup rolled oats (we add these only to the portion we save for the streusel later)
For the Spiced Apple Filling
You mustn’t skip the lemon juice here; it keeps those apples bright and stops them from turning muddy looking after baking. Use the tartest apples you can find!
- 3 medium apples (Granny Smith are my absolute favorite here) peeled, cored, and diced small
- 1/4 cup granulated sugar
- 1 teaspoon ground cinnamon
- 1 tablespoon lemon juice
For the Creamy Apple Cream Cheese Bars Layer
This layer has to be perfectly smooth, so make sure your cream cheese is actually soft—not just room temp, but slightly yielding. Cold cream cheese means lumps, and we don’t want lumpy Creamy Apple Cream Cheese Bars!
- 16 ounces cream cheese, softened
- 1/2 cup granulated sugar
- 1 large egg
- 1 teaspoon vanilla extract
Oh, and since we want max indulgence, keep 1/2 cup of caramel sauce handy—that’s our optional drizzle for the grand finale!
Step-by-Step Guide to Making Apple Cheesecake Bars
Alright, time to put the layers together! I know it looks like a lot of steps, but honestly, you’re just repeating a simple mixing rhythm. We’re building complexity in the best way possible—flavor-wise, not technique-wise. You’ll want to preheat your oven right now to 350°F (175°C) so it’s ready to go! If you need a quick tip on making other recipes ahead of time, I’ve got some great advice for easy Caesar chicken that follows similar principles.
Preparing the Pan and Buttery Crust Cheesecake Bars Base
First thing: line that 9×13 inch baking pan with parchment paper, but make sure to leave some overhang on the sides. Those paper handles are your best friend for lifting these out later! Now take the main crumb mixture we made—the flour, sugars, salt, and cold butter—and press it down *firmly* into the bottom of the pan. This needs to be compact. Pop that crust into the oven for just 10 minutes to set up before we move on to the apples.
Layering the Apples and Cream Cheese Filling
While that crust is warming up, make sure your diced apples are well-coated in their cinnamon-sugar mix, maybe a little squeeze of lemon too. Spread those spiced apples evenly over the warm crust—don’t worry if they sink a bit. Next, for the filling, beat that softened cream cheese and sugar until it’s totally smooth. Then, gently mix in the egg and vanilla. And listen up: Do NOT overmix once that egg is in there! Just until it disappears, or you might get cracks later. Pour that smooth filling right over the apples.
Adding the Streusel and Baking Your Apple Streusel Cheesecake Slices
Remember that reserved crumb mixture? The one with the oats mixed in? That’s our topping now! Sprinkle those lovely crumbs evenly over the top of the cheesecake layer. This is what gives us those wonderful crispy bits. Bake the whole thing for about 35 to 40 minutes. You’re looking for a center that barely wobbles when you gently shake the pan. These Apple Streusel Cheesecake Slices need patience now!
Cooling and Serving Your Homemade Apple Cheesecake Dessert
This is the hardest part, I know, but you absolutely must let these cool completely on a rack before you even think about slicing. If you try to cut them now, they’ll just melt into a beautiful mess! Once they are fully cool, transfer the whole thing into the fridge and chill it for a minimum of two hours. This chilling step is what makes your Homemade Apple Cheesecake Dessert slice perfectly neat. If you want extra decadence, drizzle on that optional caramel sauce right before you cut them into handheld squares.
Expert Tips for Perfect Apple Cheesecake Bars
Even though these bars are designed to be forgiving, a few little tricks I picked up over the years can take them from “really good” to “Oh my gosh, what is in this?” territory. Baking is science, sure, but adding a little personal touch makes it feel like home baking, right? We want those layers to shine beautifully when you cut into them.
Achieving the Best Flavor Balance in Apple Cheesecake Bars
Here’s the big secret: you need the tartness! If you go too sweet on the apple side, the whole bar tastes heavy, and you’ll miss that beautiful bright flavor cutting through the rich cheesecake. I always lean hard on Granny Smiths for that reason. If you happen to have Honeycrisp, they’ll work, but slice them thinner because they are sweeter. You absolutely need that tartness in your Apple Cheesecake Bars!
Making the Buttery Crust Cheesecake Bars Uniform
When you press that crust and streusel mix into the pan, you have to commit! Use the bottom of a flat measuring cup or even the side of a drinking glass to really compact it down. If you don’t press hard enough, that bottom layer starts to crumble away as soon as you try to lift a square out. A firm press means you get a solid anchor for all that delicious fruit and cream cheese sitting on top. This is key for a respectable, Buttery Crust Cheesecake Bars presentation.
If you want to see how I get incredible texture on something totally different, you should check out my notes on my broccoli salad recipe—it’s all about the texture contrast there too!
Variations on Your Apple Crumble Cheesecake Squares
Part of the fun of baking is making a recipe your very own, isn’t it? These Apple Crumble Cheesecake Squares are fantastic as is, but they also respond really well to little tweaks depending on what you’re craving or what spices you have left in the cupboard. We definitely want to keep the indulgent feel, but maybe switch up the spice profile a tiny bit.
Spice it Up: Cinnamon Apple Cheesecake Squares
If you want to lean harder into that cozy holiday feel, definitely boost the spice mix in the apples! Toss in about 1/8 teaspoon of nutmeg or even a tiny pinch of ground allspice along with the cinnamon. It adds such a warm, deep backdrop to the fruit. Suddenly, you’ve got intense Cinnamon Apple Cheesecake Squares that smell absolutely amazing while they bake. Try it next time!
Considering No Bake Apple Cheesecake Bars
Now, I have to be clear: this recipe is baked because that’s how you get that perfect crust setting and the light texture on the cream cheese. But I know some of you are looking for *super* quick fixes, and sometimes you just can’t deal with turning on the oven. If you’re really focused on speed, you can always search around for a proper no-bake version; they usually use a graham cracker crust and stabilized whipped topping. Sometimes you just need those No Bake Apple Cheesecake Bars!
When you’re ready for a different kind of apple treat, check out my favorite apple crisp recipe—it’s so easy!
Storage and Make Ahead Apple Cheesecake Tips
These bars are a baker’s best friend because they actually taste better the next day! I always make them a day ahead when I know I’m hosting a crowd, especially around Thanksgiving. They hold up so well because of that rich cream cheese layer, which is great news for busy holiday schedules.
How to Store Your Apple Cheesecake Bars
Once they are totally cool, you need to cover them up tight—plastic wrap works great, or put them in an airtight container. They need to stay chilled in the refrigerator, and you can count on them staying fresh and delicious for up to four days. That’s why they are great for your make ahead apple cheesecake planning!
Make Ahead Apple Cheesecake Success
Here’s the real secret to getting picture-perfect squares: never try to slice them while they are warm or even just room temperature! They need that full chill time—at least two hours, but overnight is even better. When they are properly chilled, the knife glides right through, giving you those clean, beautifully defined slices you want for serving.
Serving Suggestions for Autumn Dessert Bars
These Autumn Dessert Bars are so rich they nearly stand up on their own, but who doesn’t love a little something extra? If you’re serving these after a big meal, keep the sides simple but complementary. A little scoop of vanilla bean ice cream is always a classic partner since the coldness plays off the spiced apple so nicely. Or, if you’re looking for a fun drink option to cut through that cream cheese richness, you absolutely have to try my recipe for a crowd-pleasing Thanksgiving punch—it’s bright and refreshing!
Frequently Asked Questions About Apple Cheesecake Bars
I always get questions when I post these online because everyone wants to make sure they get that perfect texture! It’s easy to make little tweaks, but there are a few core rules you should follow to guarantee success, especially if you’re aiming for those fantastic Cheesecake Bar Recipes with Fruit.
What apples are best for these Creamy Apple Cream Cheese Bars?
Stick to tart! I know the temptation is to use those sweet, crisp apples, but trust me, the richness of the cheesecake layer needs something sharp to cut through it. Granny Smith apples are the reigning champions here for a reason. They hold their shape well while baking too, which keeps your Creamy Apple Cream Cheese Bars looking gorgeous!
Can I make these Quick Apple Bar Recipes ahead of time?
Yes, you absolutely can! In fact, I highly recommend it for ease. These are actually better the next day once they’ve set up fully in the fridge. You can bake them up to two days before you plan to serve them, just keep them well-covered in the pan in the cold air until you’re ready to slice and serve. They are great Quick Apple Bar Recipes for planning!
What if I want a simpler crust for my apple cheesecake bars?
If you’re in a major pinch and don’t want to mess with cutting in the cold butter for the flour/oat base, you can absolutely pivot to a graham cracker crust for your apple cheesecake bars. It’s a classic swap! Just use about 1 1/2 cups of finely crushed graham crackers mixed with 1/3 cup melted butter and a tablespoon of sugar. Press that in firmly, press it for 10 minutes, and you’re good to go!
If you’re interested in how I handle fruit when it’s not in a bar format, you should take a look at my poached pears in spiced red wine—another great autumn flavor!
Nutritional Estimates for Homemade Apple Cheesecake Dessert
Okay, let’s talk fuel, but remember these are just estimates because we all know baking at home is never an exact science! Since we’ve got buttery crusts, rich cream cheese, and sweet apples involved in this Homemade Apple Cheesecake Dessert, it’s definitely on the indulgent side. I always say, you need a little comfort food sometimes, right? These numbers are based on 24 squares, so keep that serving size tiny if you’re watching intake!
- Serving Size: 1 bar
- Calories: 320
- Sugar: 25g (Yep, that caramel drizzle adds up!)
- Fat: 19g
- Carbohydrates: 34g
For more ideas on easy meals that keep things simple in the morning, I’ve got a whole list of easy breakfast recipes you might like!
Share Your Fall Baking Creations
I really think you’re going to love these Caramel Apple Cheesecake Bars. They check every box for me: tart, creamy, buttery, and totally portable. Baking is way more fun when you get to share the results, so I want to see what you create in your kitchen!
When you give these a try, snap a picture of your gorgeous squares—especially if you managed that perfect drizzle of caramel, or if you cut them super neat for a party. If you loved how these apple cheesecake bars turned out, please leave a rating right here on the page. It helps other bakers know what’s worth making, and it fuels my own passion for sharing these recipes!
Got questions or just want to tell me how amazing these were? Don’t be shy! Head over to my contact page and send me a message. Happy baking, everyone!
PrintCaramel Apple Cheesecake Bars with Streusel Topping
You get the best of fall baking in one handheld bar: a buttery crust, creamy cheesecake, spiced apples, and a crunchy streusel topping. This recipe delivers indulgent flavor for fall treats.
- Prep Time: 25 min
- Cook Time: 40 min
- Total Time: 3 hours 5 minutes
- Yield: 24 servings 1x
- Category: Dessert
- Method: Baking
- Cuisine: American
- Diet: Vegetarian
Ingredients
- For the Crust/Streusel: 1 1/2 cups all-purpose flour
- 1/2 cup granulated sugar
- 1/2 cup packed brown sugar
- 1/4 teaspoon salt
- 1 cup (2 sticks) cold unsalted butter, cut into cubes
- 1/2 cup rolled oats (for streusel only)
- For the Apple Layer: 3 medium apples (like Granny Smith), peeled, cored, and diced
- 1/4 cup granulated sugar
- 1 teaspoon ground cinnamon
- 1 tablespoon lemon juice
- For the Cheesecake Layer: 16 ounces cream cheese, softened
- 1/2 cup granulated sugar
- 1 large egg
- 1 teaspoon vanilla extract
- For the Caramel Topping (Optional): 1/2 cup caramel sauce
Instructions
- Preheat your oven to 350°F (175°C). Line a 9×13 inch baking pan with parchment paper, leaving an overhang for easy removal.
- Prepare the crust and streusel: In a medium bowl, whisk together the flour, 1/2 cup granulated sugar, brown sugar, and salt. Cut in the cold butter using a pastry blender or your fingers until the mixture resembles coarse crumbs.
- Set aside 1 1/2 cups of this crumb mixture for the streusel topping. To the remaining crumbs in the bowl, add the rolled oats (if using oats in the crust base, otherwise skip oats here). Press this mixture firmly into the bottom of the prepared pan to form the crust.
- Bake the crust for 10 minutes. Remove from the oven.
- Prepare the apple layer: In a small bowl, toss the diced apples with 1/4 cup sugar, cinnamon, and lemon juice. Spread the spiced apples evenly over the warm crust.
- Prepare the cheesecake layer: In a separate bowl, beat the softened cream cheese and 1/2 cup sugar until smooth. Beat in the egg and vanilla extract until just combined. Do not overmix.
- Gently spread the cream cheese mixture over the apple layer.
- Sprinkle the reserved crumb mixture (the streusel) evenly over the cheesecake layer.
- Bake for 35 to 40 minutes, or until the cheesecake is mostly set but still has a slight wobble in the center.
- Let the bars cool completely in the pan on a wire rack.
- Once cool, chill the bars in the refrigerator for at least 2 hours before slicing.
- If desired, drizzle with caramel sauce before slicing into squares.
Notes
- Use tart apples like Granny Smith to balance the sweetness of the cheesecake and caramel.
- For an easier cleanup, use foil or parchment paper that extends over the sides of the pan, creating handles to lift the entire dessert out before cutting.
- You can make these ahead of time; they store well covered in the refrigerator for up to four days.
Nutrition
- Serving Size: 1 bar
- Calories: 320
- Sugar: 25g
- Sodium: 180mg
- Fat: 19g
- Saturated Fat: 11g
- Unsaturated Fat: 8g
- Trans Fat: 0.5g
- Carbohydrates: 34g
- Fiber: 1g
- Protein: 4g
- Cholesterol: 65mg