

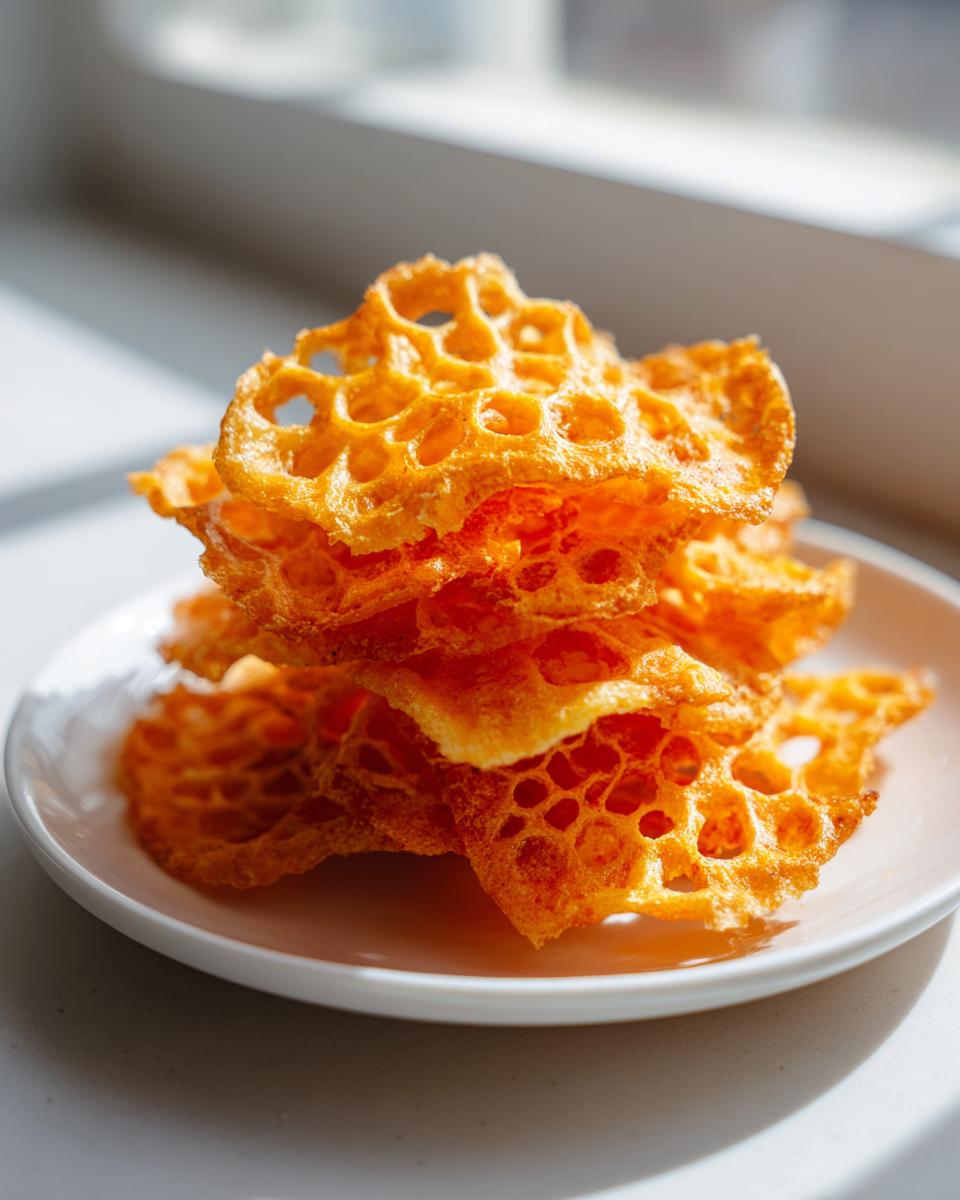
You can just about throw away the box of those bright orange, manufactured snacks right now. Seriously, stop buying them! I learned something crucial out on the road: the best flavor doesn’t need a crazy ingredient list or a Michelin chef. It just needs respect for the process. That’s exactly what we’re doing here with these incredible cheese crackers. We are making perfectly crispy, addictively cheesy homemade cheese crackers using just four basic ingredients. That’s it! It’s accessible, it’s fun, and frankly, there’s no comparison to the stuff that comes in long boxes. These teach you that real satisfaction comes from simple pantry staples mixed with a little bit of passion.
- Why You Will Love These Easy 4-Ingredient Cheese Crackers
- Gathering Ingredients for Your Homemade Cheese Crackers
- The Simple Steps to Make Crispy Cheese Crackers
- Tips for Success with Your Best Cheese Cracker Recipe
- Making Cheese Crackers for Different Diets (Keto and Low Carb)
- Serving Suggestions for Crunchy Cheesy Bites
- Storage and Reheating Instructions for Homemade Cheese Crackers
- Frequently Asked Questions About Making Cheese Crackers
- Share Your Crunchy Cheesy Bites
Why You Will Love These Easy 4-Ingredient Cheese Crackers
Why mess around when you can have cracker perfection this fast? These little bites are exactly what you need when a craving hits and you want something immediately satisfying that tastes way better than store-bought.
- Four Ingredients, Maximum Flavor: We keep it ridiculously simple so you can whip these up anytime.
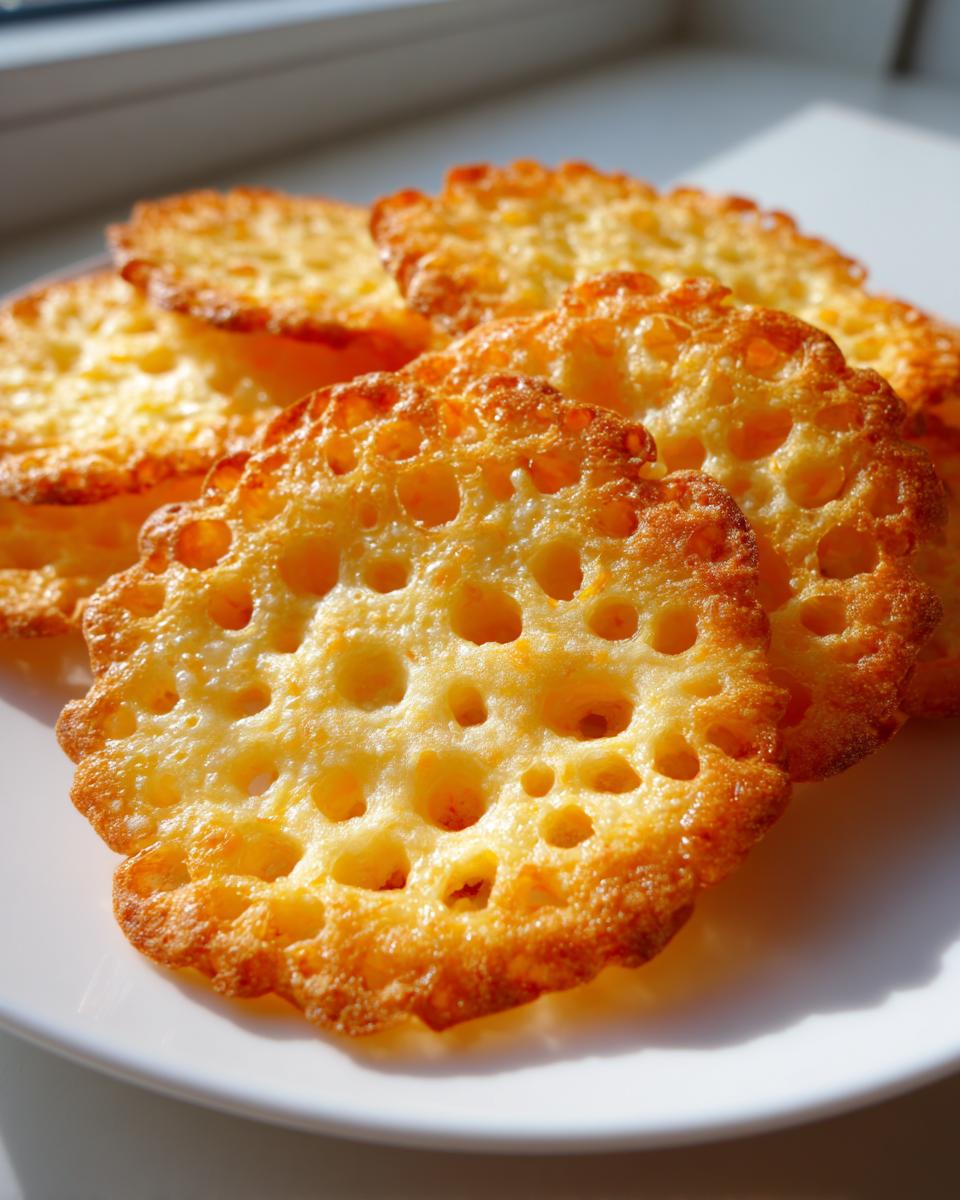
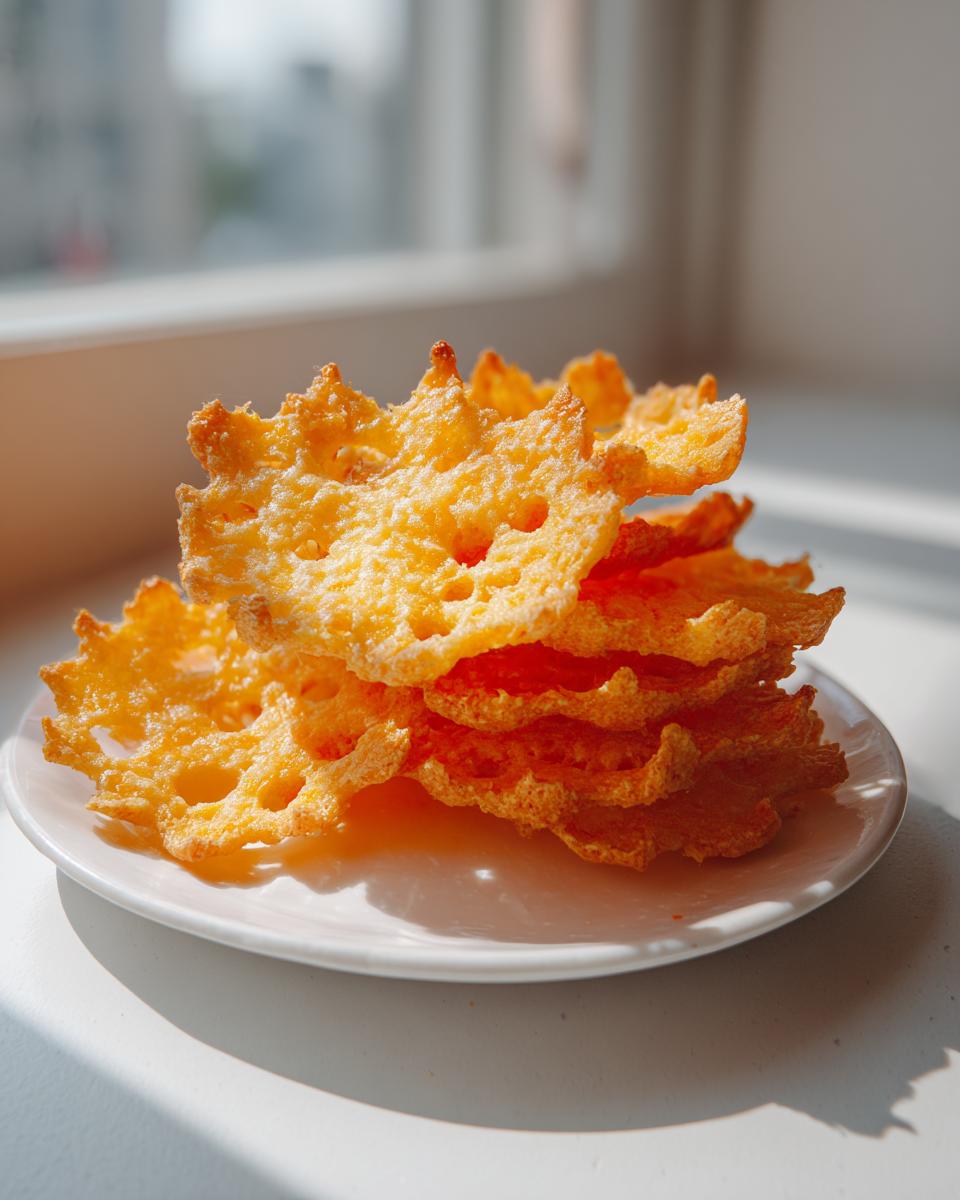
- That Crisp Factor: Roll ’em thin, and trust me, you get the absolute best crunch. Totally addictive!
- Sharp Cheese Taste: Using sharp cheddar means the cheese flavor actually punches through, not just vague yellow dust.
- Lunchbox Hero Status: They travel well and disappear fast, making them a perfect homemade lunchbox snack.
Gathering Ingredients for Your Homemade Cheese Crackers
The beauty of this recipe is right there in the title: four ingredients! We’re stripping things back to basics to make sure that sharp, cheesy flavor is the absolute star of the show. You don’t need fancy additives here; you just need good quality stuff, handled right. Remember what I learned on the road? Simplicity, handled with care, always wins.
Here is what you need to round up for your batch of irresistible cheese crackers:
- 1 cup all-purpose flour
- 1/2 cup cold unsalted butter, cut into small pieces
- 1 cup sharp cheddar cheese, shredded
- 1/4 teaspoon salt
See? Four things! When you’re working with so few items, ingredient quality really matters. Don’t skimp on the cheese. If the cheese tastes mild, your crackers will taste mild, and that’s just sad!
Ingredient Notes and Simple Substitutions
Let’s talk cheese first. I’m shouting here: SHARP cheddar is non-negotiable for a flavorful bite! Mild cheddar just doesn’t give you that punch we’re looking for in a homemade cracker. If you want to get a little gourmet, maybe swap out half the cheddar for something nutty like Gruyère or Parmesan the next time you make a batch.
The butter absolutely has to be cold, and it needs to be cut up small before hitting that flour. This is how we get the flaky, crumbly texture we need before we even touch the oven. Think of it like making tiny pockets of steam that make the cracker light and crispy, not dense like a brick.
If you’re trying to switch up the base, I’ve heard people have success subbing out some of the all-purpose flour for something like almond flour if they’re going low carb, but you’ll notice the texture changes quite a bit. Stick to the classic flour for perfection the first time around!
The Simple Steps to Make Crispy Cheese Crackers
Okay, now we get into the fun part—mixing! This is where we build the texture that makes these homemade cheese crackers so much better than anything boxed. Remember: cold butter is your best friend here. You want that mix of flour and butter to look like coarse cornmeal. I use my pastry blender, but honestly, just using your fingertips works great too; just move fast so the butter stays cold!
Mix in your sharp cheddar until it’s all happy, then we introduce just enough ice water—maybe two tablespoons—to bring the dough together. And here’s the huge rule: Do. Not. Overmix. Stop as soon as it forms a shaggy ball. If you work it too much, you’re developing gluten, and that means tough crackers, not crispy ones. Wrap that dough disc up tight and make it take a bath in the fridge for at least 30 minutes. That chilling time is non-negotiable! It sets the butter so it bakes up flaky. If you make these ahead of time, the perfect creamy dip to pair them with is my easy beer cheese dip!
Achieving the Perfect Thin Roll for Crunchy Cheese Crackers
This step is the absolute key to getting those superior homemade cheese crackers that snap when you bite them. If you roll thick, you get a soft, almost scone-like texture, which is nice, but if you want that store-bought crunch replicated perfectly, you have to go thin. I mean thin—I aim for about 1/16th of an inch. That sounds fussy, but trust me, it’s worth it for the crunch factor.

Use a good dusting of flour on your counter, but here’s my pro tip: roll it out directly between two sheets of parchment paper. That way, when you peel the top sheet off, the dough doesn’t stick or tear when you try to move it to the pan. Cut them into little squares, prick ’em with a fork so they don’t puff up like crazy balloons, and get ready for the oven!
Baking Times for Golden Homemade Cheese Crackers
We’re preheating the oven to 375°F (190°C). You’re looking for color, not just time. Set your timer for about 10 minutes, but check them then. They might need up to 14 minutes depending on how thin you managed to roll them. You want the edges to just start turning golden brown—that’s your visual cue that they are done baking.
When you pull those trays out, the cheese crackers will actually still feel a little soft in the center. Don’t panic! Seriously, they firm up like magic as they cool down on the baking sheet or a wire rack. If you pull them out when they are rock hard, they will be overcooked and bitter once cooled. Patience pays off, even for a simple snack!
Tips for Success with Your Best Cheese Cracker Recipe
Look, making these homemade cheese crackers is easy, but getting that ‘better than boxed’ crunch takes a couple of little nudges. The biggest thing I warn people about is overworking the dough. Once the water goes in, mix until it *just* hangs together. If you feel like you’re kneading it into submission, stop right there! That’s how you get tough crackers instead of crunchy ones.
For beautiful party snack ideas, try to keep all your cut squares the same thickness. If one is super thin and the next is thick, they won’t bake evenly. If you want to kick the flavor up like some of those Southern versions I heard about, mix in a teaspoon of smoked paprika or some Ranch seasoning powder right in with your flour. It adds a real depth without complicating this beautiful, simple recipe. If you ever need a heartier snack, check out my easy pizza sliders recipe!
Making Cheese Crackers for Different Diets (Keto and Low Carb)
I know not everyone eats gluten, and that’s totally fine! When I was traveling, you learned fast how to pivot a recipe based on what was available in someone’s weird little rental kitchen. So, if you’re aiming for Keto Friendly Cheese Crackers or just need a Low Carb option, we can totally shift this base recipe without losing that essential cheesy crunch.
The biggest change, obviously, is the flour. Since this is a high-fat, low-liquid dough thanks to the butter and cheese, it adapts well to some flour substitutes. For true Low Carb Cheese Crackers, you’ll need to swap out that cup of white flour for something like almond flour or maybe a coconut flour blend. Fair warning, though: these flours absorb moisture differently, so you might need an extra splash of water or egg yolk to get the dough to hold together.
If you’re not strictly Keto but just cutting back on carbs, an easier swap is using a good quality 1:1 gluten-free baking blend—those usually bake up closer to the original, but you still might need a little less liquid.
One thing that doesn’t change, no matter the diet, is the cheese. Stick with the sharp cheddar! And for those going Carb-Free, these crackers end up being mostly fat and protein, so they are super satisfying. If you get into the weeds with advanced bread-making and want to learn more about managing flours, check out my guide on making your own sourdough starter from scratch. For a truly verified no-flour version, take a peek at this guide for Keto Cheese Crackers—they nail that satisfying crunch!
Serving Suggestions for Crunchy Cheesy Bites
These cheese crackers are amazing all on their own, obviously. But they really shine when you dress them up a little. If you’re putting them out for game day or any gathering, think of them as the perfect vehicle for dipping. They stand up beautifully to thick dips because they are so sturdy!
Try serving them alongside my easy cranberry brie bites for a sweet and savory spread. They are also the best sidekick for a warm bowl of tomato soup—way better than soggy bread!
For lunchboxes, pack them next to some sliced apples or grapes. Honestly, these Crunchy Cheesy Bites are flexible enough for any time you need a quick, savory homemade snack. They disappear fast, so make a double batch!
Storage and Reheating Instructions for Homemade Cheese Crackers
One of the best parts about making your own cheese crackers is that you can bake them ahead of time! Unlike store-bought things that last forever, these are made with real ingredients, so they have a shelf life, but it’s a pretty respectable one!
You want to store them in an airtight container at room temperature—no need to worry about the fridge. If you sealed them up tight right after they cooled completely, they should stay perfectly fresh and crunchy for about a week. I’ve never quite managed to keep a batch that long, they disappear too quickly, but a full week is definitely possible!
Now, what if you made them two days ago and they’ve gone a little soft? Maybe they sat out on the counter when you had people over. Don’t throw them away! This is easy to fix. You just need to hit the reset button with a quick blast of dry heat.
Spread those slightly sad crackers back out onto a clean baking sheet. Pop them back into a medium-low oven—maybe 300°F (150°C)—for about 5 to 7 minutes. This gentle heat drives out any ambient moisture they might have absorbed. Pull them out, let them cool for literally two minutes, and BOOM, they should snap right back to their original crisp texture. It’s like reviving them!
Frequently Asked Questions About Making Cheese Crackers
When I started messing around with these cheese crackers, I had a million questions too! It’s one thing to make a great batch once, but figuring out how to keep the texture perfect every single time is what really matters. Here are the things I hear most when people try this best cheese cracker recipe for the first time.
Can I use pre-shredded cheese in this easy cracker recipe?
Oh, I know the temptation! Grabbing that bag of pre-shredded cheese is so fast. But honestly, for the absolute best results in this easy cracker recipe, grating your own sharp cheddar is worth the five minutes of effort. Pre-shredded cheese is coated in anti-caking agents—sometimes potato or corn starch—and that stuff interferes with the dough structure. It makes the crackers more likely to crumble weirdly and not melt evenly. Freshly shredded melts smoother, which means a better crunchy cheesy bite!
How do I make my cheese crackers extra savory?
If you want to move these from “great snack” territory to “you’ll eat the whole batch standing over the counter” territory, you need to boost that savory side! My favorite trick is to add dried spices right into the flour mixture before the butter goes in. You can’t go wrong with 1/2 teaspoon of garlic powder. If you’re feeling it, try 1/4 teaspoon of onion powder too. For a little kick that reminds me of my Southern-style adventures, a tiny pinch of cayenne pepper wakes everything up beautifully. Those little additions turn simple snacks into something special!
If you’re looking for more ideas on leveling up your weeknight cooking once you’ve conquered snack time, check out my tips for weeknight dinner recipes!
Share Your Crunchy Cheesy Bites
Now that you’ve got a batch of these ridiculously good homemade cheese crackers cooling on the rack, I want to see them! Seriously, the best part of cooking is seeing how people use my recipes in their own kitchens. Did you roll them super thin for extra snap? Did you add smokey paprika or maybe some black pepper?
I love hearing about your adventures, whether these became the star of a party or just disappeared within five minutes because your kids packed them for lunch! Head down to the comments and let me know your thoughts. Give this recipe a star rating if you followed the steps and ended up with those perfect, crunchy, cheesy bites.
And hey, if you snapped a picture of your haul—maybe piled high next to a big bowl of dip—tag me on social media! We’re all about building this community where good, accessible food is celebrated. Want to learn more about the philosophy behind making food fun and less intimidating? You can read all about our story here on YumDrizzle!
PrintEasy 4-Ingredient Homemade Cheese Crackers: Crispy Perfection

Stop buying the box! This simple recipe uses just four ingredients to create perfectly crispy, cheesy, and addictive homemade cheese crackers. They are far better than store-bought versions and are incredibly easy to make for snacking or lunchboxes.
- Prep Time: 15 min
- Cook Time: 14 min
- Total Time: 59 min
- Yield: About 4 dozen 1x
- Category: Snack
- Method: Baking
- Cuisine: American
- Diet: Vegetarian
Ingredients
- 1 cup all-purpose flour
- 1/2 cup cold unsalted butter, cut into small pieces
- 1 cup sharp cheddar cheese, shredded
- 1/4 teaspoon salt
Instructions
- Combine the flour and salt in a medium bowl.
- Cut the cold butter into the flour mixture using a pastry blender or your fingertips until the mixture resembles coarse crumbs.
- Stir in the shredded cheddar cheese until evenly distributed.
- Add 2 to 3 tablespoons of ice water, one tablespoon at a time, mixing until the dough just comes together. Do not overmix.
- Shape the dough into a flat disk, wrap it in plastic wrap, and chill in the refrigerator for at least 30 minutes.
- Preheat your oven to 375 degrees Fahrenheit (190 degrees Celsius). Line two baking sheets with parchment paper.
- On a lightly floured surface, roll the dough out very thinly, about 1/16 inch thick, for the crispiest result.
- Use a small cookie cutter or knife to cut the dough into small squares or desired shapes.
- Place the cut crackers onto the prepared baking sheets. Prick each cracker once or twice with a fork.
- Bake for 10 to 14 minutes, rotating the sheets halfway through, until the edges are lightly golden brown and the crackers are crisp.
- Let the homemade cheese crackers cool completely on the baking sheet or a wire rack before serving. They will crisp up more as they cool.
Notes
- For extra flavor, add 1/2 teaspoon of garlic powder or a pinch of cayenne pepper to the dry ingredients.
- If you want a softer cracker, roll the dough slightly thicker, about 1/8 inch.
- These crackers store well in an airtight container at room temperature for up to one week.
Nutrition
- Serving Size: 5 crackers
- Calories: 85
- Sugar: 0.2
- Sodium: 110
- Fat: 6.5
- Saturated Fat: 4.0
- Unsaturated Fat: 2.5
- Trans Fat: 0.1
- Carbohydrates: 5.5
- Fiber: 0.3
- Protein: 3.0
- Cholesterol: 18