
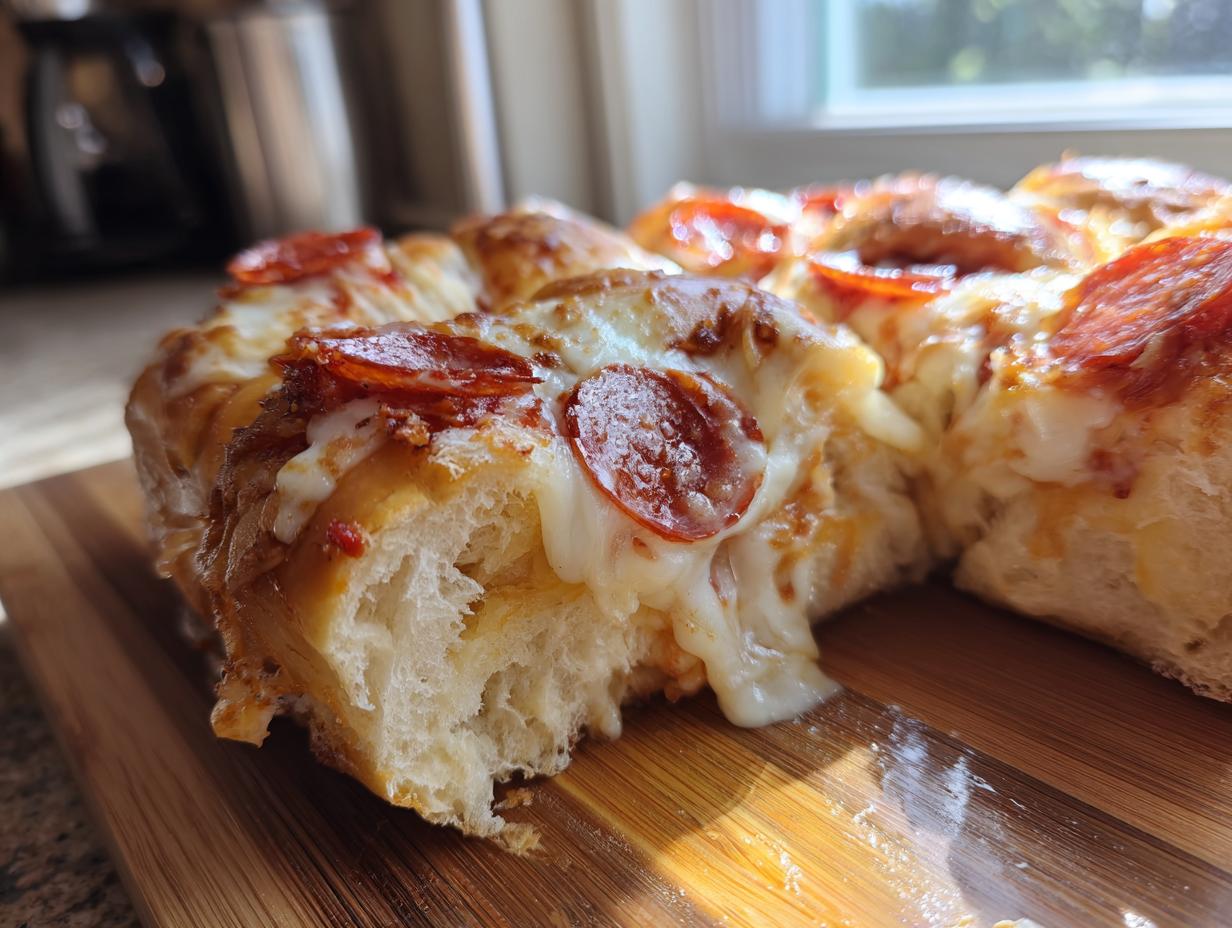
If you’re like me—and I bet you are—you sometimes need a spectacular appetizer that comes together faster than anyone can tell you they’re hungry. Forget fussy dips or juggling tiny plates; we need real food that people can grab and devour standing up! That’s where my absolute favorite discovery comes in: these easy, cheesy pizza sliders built right on squishy, sweet Hawaiian rolls. Seriously, cutting up a whole package of rolls and loading them up is the secret to effortless game day success or when you need a seriously quick family dinner idea. They come out of the oven gooey, warm, and ready to be pulled apart. Trust me, these are going to disappear first!
- Why These Hawaiian Roll Pizza Sliders Are Your New Favorite Crowd Pleaser
- Gathering Ingredients for Your Easy Pizza Sliders Recipe
- Step-by-Step Instructions for Oven Baked Pizza Sliders
- Tips for Success with Your Savory Slider Recipes
- Making Ahead and Storing Leftover Pizza Sliders
- Fun Variations for Your Pepperoni Pizza Bites
- Serving Suggestions for Game Day Sliders
- Frequently Asked Questions About Pizza Sliders
- Estimated Nutrition for Your Pizza Sliders
- Share Your Experience Making These Crowd Pleasing Appetizers
Why These Hawaiian Roll Pizza Sliders Are Your New Favorite Crowd Pleaser
Honestly, these pizza sliders are my secret weapon when company drops by unexpectedly. They do all the heavy lifting for you, which means less time stirring and more time chatting. I always know everyone—kids and grown-ups—will clean their plates.
- They are the definition of party appetizers that require almost zero effort.
- You get that beloved pizza flavor in a portable, pull apart pizza sliders format.
- Total prep time is lightning fast, making them a perfect quick family dinner idea for hectic nights when you need something delivered fast from the oven.
It’s a near-guaranteed win every single time. You can always find more speedy meals over in my section for weeknight dinner recipes, but these sliders hit different!
Gathering Ingredients for Your Easy Pizza Sliders Recipe
You won’t believe how simple the shopping list is for these incredible pizza sliders. We’re sticking to classic pizza flavors here, but it’s the foundation that really sets them apart. You must start with that sweet, soft package of King’s Hawaiian rolls—they are essential for that irresistible pull-apart texture we all crave. Don’t even think about swapping them out for plain white buns; the sweetness balances the savory filling perfectly!
The Essential Components for Perfect Pizza Sliders
For the main layers, grab your favorite pizza sauce—not too watery, please! Then, we need plenty of low-moisture mozzarella cheese because we are aiming for serious pull. Pepperoni, of course! Make sure you get the thin-sliced kind so it crisps up nicely when baked. Now, for the magic that elevates these into stellar garlic butter sliders: we need real unsalted butter, garlic powder, Italian seasoning, and just a sprinkle of Parmesan cheese for that salty finish on top. That’s it! Ten minutes of prep, tops.
Step-by-Step Instructions for Oven Baked Pizza Sliders
Alright, this is where the easy part really kicks in! Getting these oven baked pizza sliders assembled takes almost no time at all, which is why they are my go-to for everything from a last minute party to a hungry Tuesday night. The key to our success here, darling, is keeping the rolls connected as long as possible. That’s what gives you that satisfying, gooey pull later!
Preparing the Rolls and Layering the Pizza Sliders
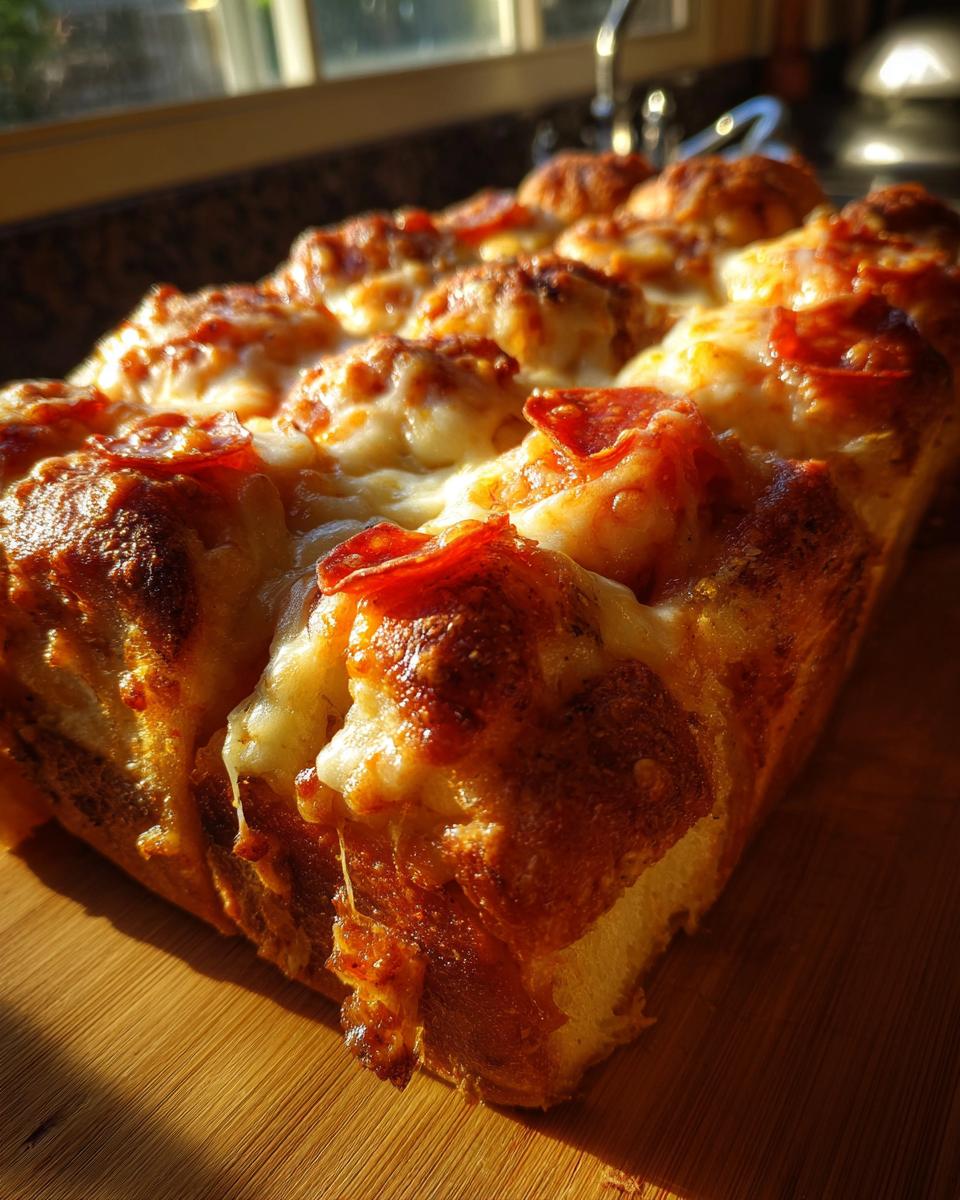
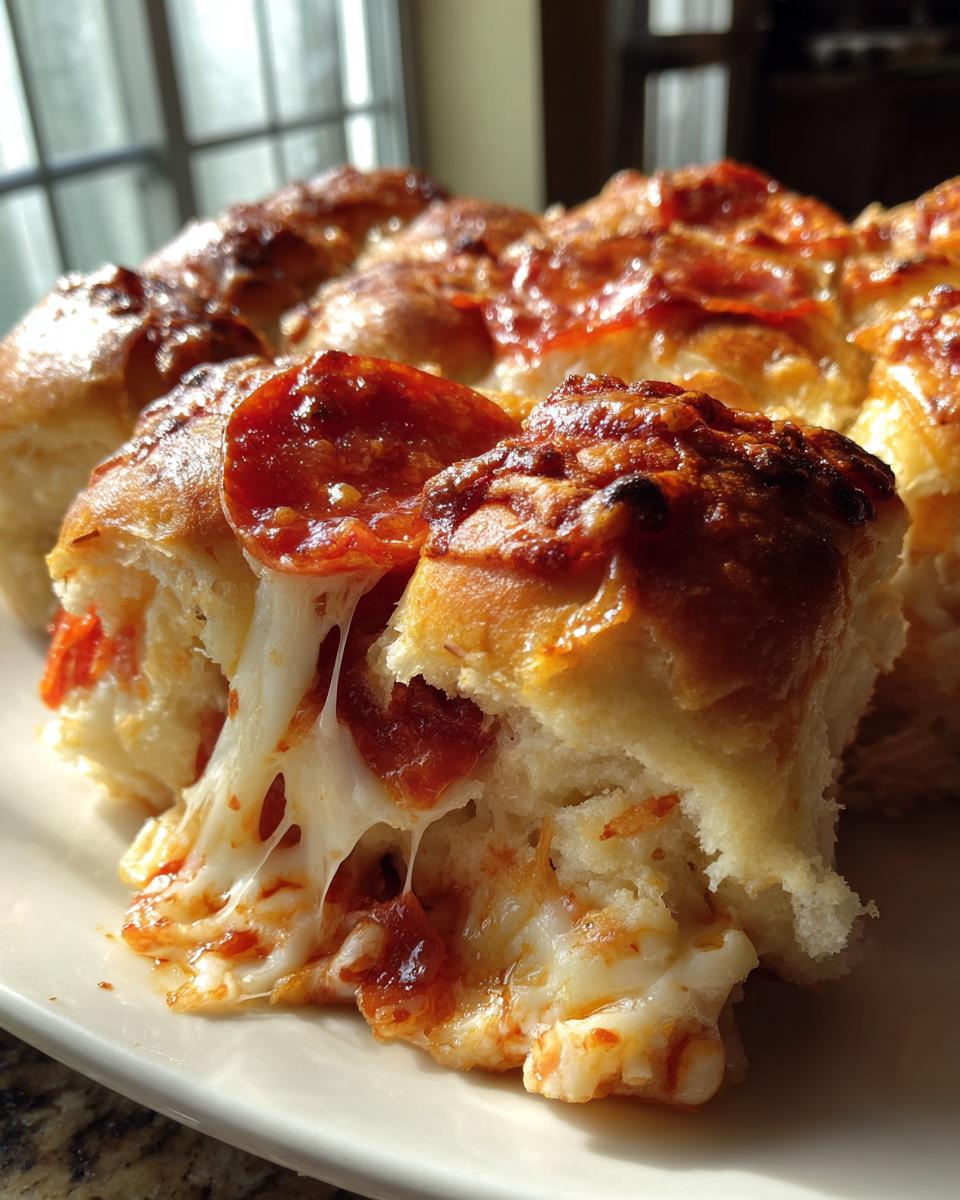
First things first, crank that oven up to 350°F (175°C) and grease whatever 9×13 pan you have handy. Now, take your entire package of Hawaiian rolls and slice them horizontally right through the middle—just one cut! You should have a uniform top slab and a uniform bottom slab, still connected on the sides. That’s the trick for perfect pull apart pizza sliders! Place the bottom layer into your prepared dish.
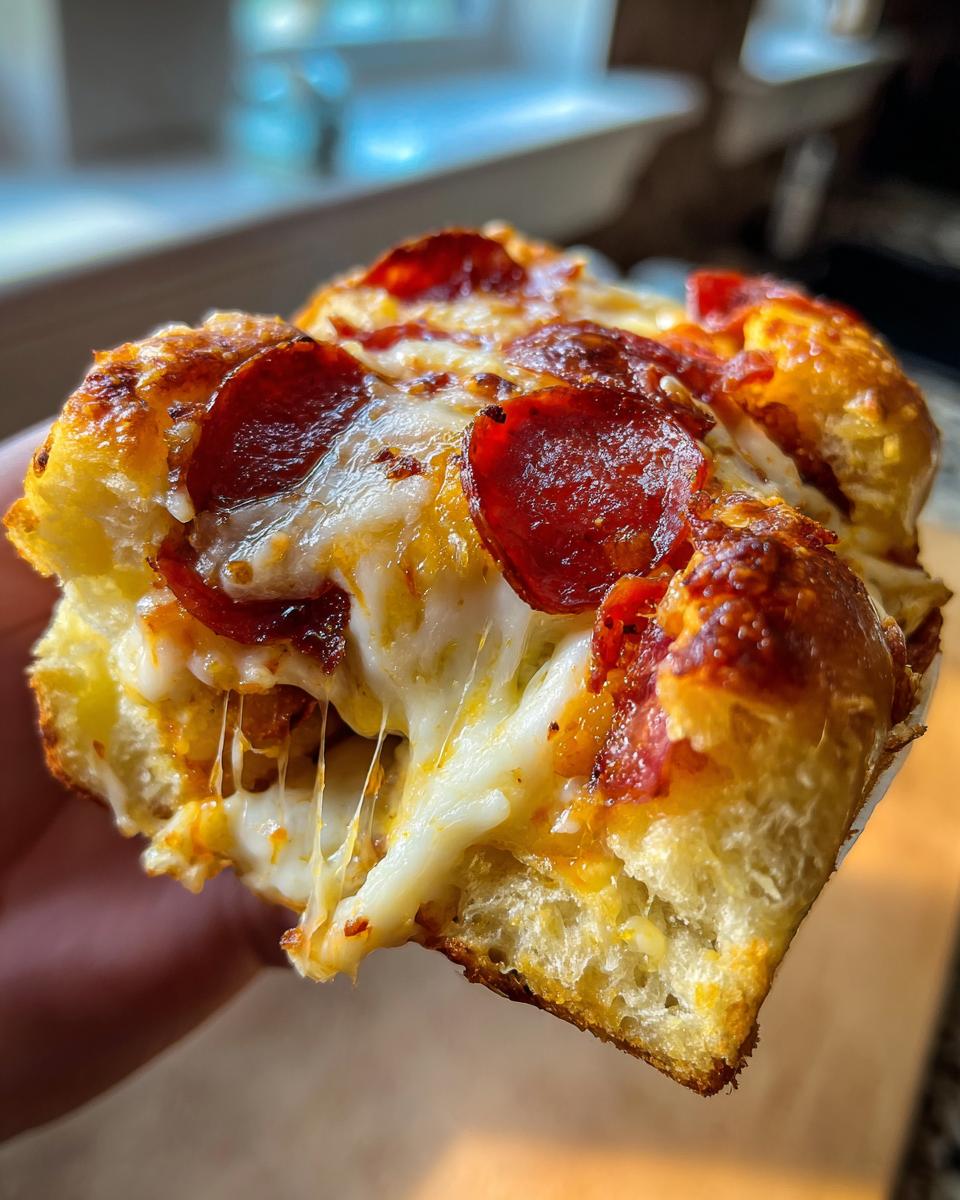
Now, layer up! Spread your pizza sauce gently over those sweet bottoms. Next, lay out all your little pepperoni slices. Don’t be shy! Then, dump that big pile of mozzarella right over the top. Put the lid (the top half of the rolls) back on nice and neat.
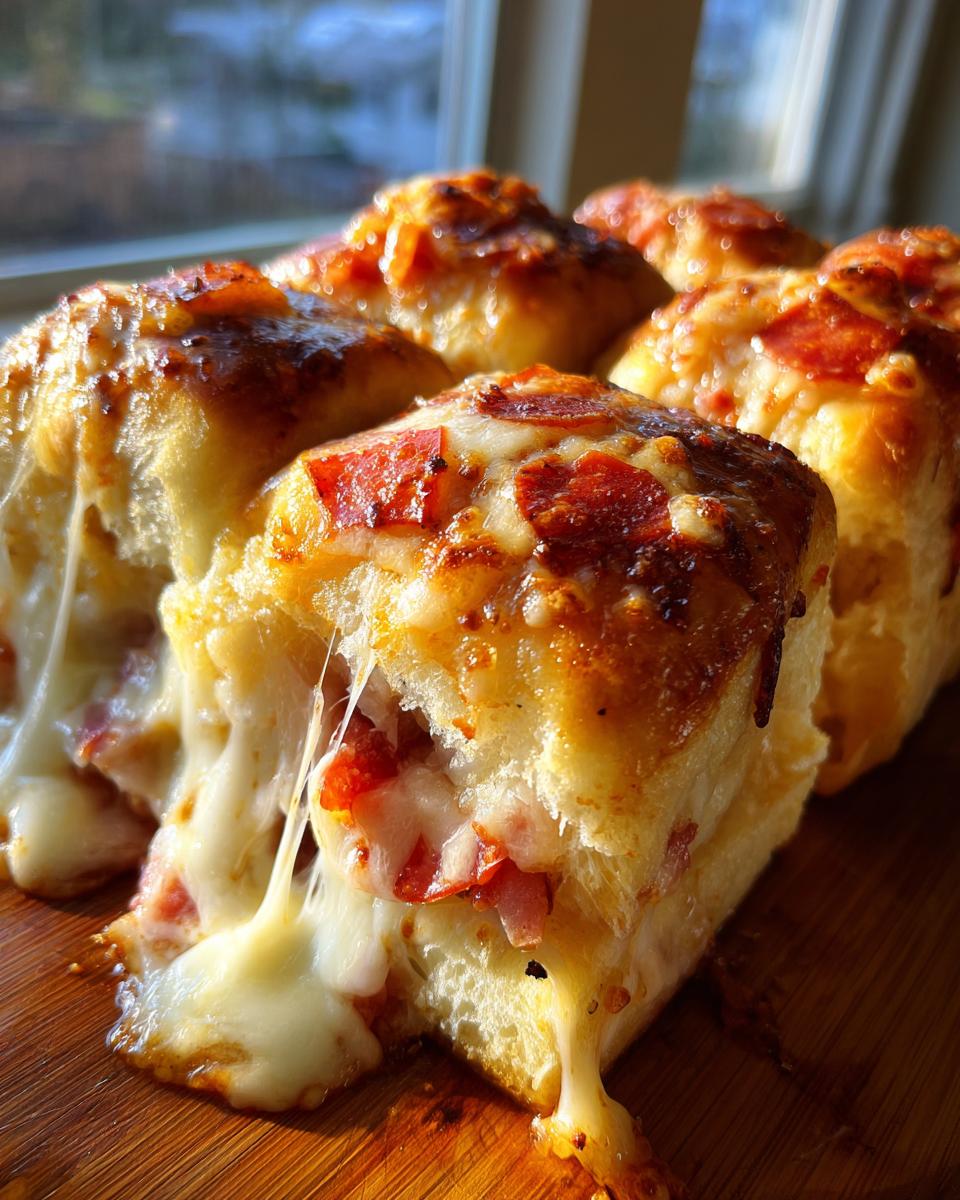
The Garlic Butter Topping and Baking for Cheesy Baked Sliders
For the superstar coating on top, whisk together your melted butter with that garlic powder and Italian seasoning. Brush this glorious mixture all over the top of the whole slab of rolls. I mean *everywhere*! Then, hit it with the Parmesan cheese. Now, cover that pan shiny-side-down with foil. Bake it covered for 15 minutes so the rolls get steamy and the cheese melts beautifully. After 15 minutes, ditch the foil and bake for another 5 to 10 minutes until those cheesy tops look golden brown. Don’t forget to let them sit for five minutes before you slice them! If you want to see another great way to use butter, check out my garlic butter rice recipe, though it’s definitely less messy than this!
For those who want serious inspiration on the layering process itself, check out the steps over at Flavor Mosaic—they have some great assembly shots!
Tips for Success with Your Savory Slider Recipes
Listen, even though these pizza sliders are almost foolproof, there’s one thing that can ruin the party fast: a soggy bottom layer! We don’t want that at all. My biggest tip for truly perfect cheesy baked sliders is to give the bottom half of those sweet rolls a little head start in the oven before you even think about adding the sauce.
Pop the bottom layer in by itself, uncovered, for about three minutes at 350°F. This dries them out just enough so the pizza sauce doesn’t soak them into mush. While that’s happening, make sure your pepperoni is as thin as you can get it. Thin pepperoni gets happily crisp around the edges when you bake them the second time, which adds a fantastic texture contrast to the gooey cheese. If you’re looking for more no-fuss meals, my creamy chicken taco soup is another tried-and-true flavor bomb for a crowd!
Making Ahead and Storing Leftover Pizza Sliders
Okay, let’s talk about survival—because sometimes, you just can’t make these marvelous pizza sliders right before the game starts! Good news: you can definitely assemble them ahead of time, which is a real lifesaver for party planning. I find it’s best to cover the entire pan, foil and all, and keep it chilling in the fridge for up to 12 hours. Don’t keep them assembled for too long, though; that moisture from the sauce will eventually make the bottom rolls sad.
Here is the crucial part if you plan on baking them later: you want to take the tray out of the fridge about 30 minutes before you plan to pop them into the oven. Letting them warm up just a tiny bit helps them bake more evenly. If you’re planning ahead for work lunches, leftover pizza sliders are wonderful, but you have to reheat them correctly if you want that cheesy texture back.
Forget the microwave! It makes them rubbery. When reheating leftovers, you must use the oven. Wrap individual sliders loosely in foil or place them on a baking sheet and warm them at 350°F until the cheese is gooey again. It keeps that lovely softness. If you’re looking for other make-ahead recipes that stay tasty, you should definitely peek at my easy egg bites recipe for meal prep!
If you need a recommendation for how to handle that assembly timing, check out the prep notes on this recipe for the full scoop on making them work for you: Bit-e-Tide has great tips for timing out your baking schedule.
Fun Variations for Your Pepperoni Pizza Bites
While the classic pepperoni and mozzarella combination makes these pizza sliders famous, half the fun of baking at home is customizing things, right? The Hawaiian rolls are just a fantastic, sweet canvas, so you can really layer on whatever you love most. Think beyond the basic! You don’t always need crushed pineapple like Grandma used in her pound cake to get a great flavor profile here.
If you’re feeling ambitious and want something beyond the standard, try building a little Supreme version. Just chop up some green peppers, maybe some finely diced onions, and toss them into the cheese layer. Make sure everything is finely chopped, though, because we don’t want big chunks sticking up and preventing that perfect top from settling down!
For a totally different vibe, ditch the red sauce and make these into a white pizza style. Use a thin layer of garlic-infused olive oil—like the spread we made for the tops!—instead of the marinara. Then, swap out the mozzarella for a blend of provolone and a little bit of ricotta cheese dolloped on top. It’s surprisingly elegant for something that started as a quick snack! If you need other ways to sneak veggies into your dinner routine, my recipe for broccoli cauliflower casserole is always a solid, comforting choice.
You could even try thinly sliced ham and pineapple for little sweet-and-savory Hawaiian versions—though I hear the debate on pineapple on pizza is never-ending! Whatever you choose, these mini pizza sandwiches are always forgiving.
Serving Suggestions for Game Day Sliders
These cheesy pizza sliders are the main event, but serving them with something fresh on the side really takes the whole spread up a notch! Since they are so rich and savory, you don’t want anything too heavy.
My go-to, especially when making these for big events like Super Bowl snacks parties, is always a simple dipping sauce. Keep a little bowl of extra warm marinara on the side—it’s fantastic for dipping the edges! If you want a true side dish, I love pairing them with my bright fall harvest salad. The crisp greens and that light maple vinaigrette cut right through the cheese perfectly!
Frequently Asked Questions About Pizza Sliders
When you’re whipping up something this fun, you always have a few little questions bubbling up! I’ve gathered the ones I hear most often about making these, especially when trying to figure out if they fit into a busy schedule as a quick family dinner idea.
Can I use regular slider buns instead of Hawaiian rolls for these pizza sliders?
You absolutely can, if that’s what you have on hand! But wow, you’ll miss out on the magic, seriously. The whole joy of these pizza sliders comes from the slight sweetness and the incredible tender texture of those Hawaiian rolls. They steam up so perfectly, making that signature pull-apart experience work flawlessly. Regular buns will still taste like pizza, of course, but they won’t have that signature soft, sweet, melt-in-your-mouth quality that makes this the best slider recipe!
How long do these cheesy baked sliders last as leftovers?
If, by some miracle, you have any leftover cheesy baked sliders, they keep pretty well in an airtight container in the fridge for about three or four days. I save mine because they are an excellent, almost-instant lunch the next day! Just remember my rule: never use the microwave to reheat them! If you want to keep that soft, slightly crispy top, wrap them loosely in foil and pop them into a 350°F oven for about 8 to 10 minutes until everything is nice and gooey again. Fast, easy, and ready for seconds!
What is the best cheese blend for these mini pizza sandwiches?
Mozzarella is the baseline for that glorious cheese pull, and you need tons of it! But if you want to kick up the flavor profile on your mini pizza sandwiches, I highly recommend mixing in a cup of provolone with your mozzarella. Provolone melts just beautifully and adds a little more tang. Some people even mix in just a half-cup of sharp cheddar for a little extra punch, but be careful—too much cheddar keeps the cheese from stretching as nicely. Keep it mostly mozzarella, and you’ll be golden!
If you’re looking for more ways to streamline your kitchen routine and fit delicious food in, you can always check out my collection of easy breakfast recipes for mornings that feel just as rushed!
Estimated Nutrition for Your Pizza Sliders
Okay, so these pizza sliders taste like pure joy, but it’s always smart to have a general idea of what you’re munching on, especially when these vanish so fast you might eat half the tray yourself! Since we are piling these sweet rolls high with pepperoni and cheese, they definitely fall into the satisfying, hearty snack category.
Based on the standard measurements (using one slider as the serving size, which I never actually follow, but here we are!), here is the snapshot of what your savory slider recipes are packing:
- Calories: Around 280 per slider
- Fat: That’s about 14 grams, most of that goodness coming from the cheese melt and the butter topping!
- Carbohydrates: Roughly 25 grams, thanks mostly to those sweet Hawaiian rolls.
- Protein: A surprising 14 grams, which helps keep you full while watching the game!
Now, listen up, because this is important: these are just estimates, people! If you use extra spicy pepperoni or swap to a leaner cheese, those numbers wiggle around. Since we are dealing with gooey cheese and buttery glazes, these are definitely meant to be an indulgent treat, not a daily staple. But honestly, for a crowd-pleasing appetizers, they fit the bill perfectly when you need that comfort food fix!
If you’re trying to keep things light while still craving something delicious, you can always sneak a peek at my healthy snack recipes for lighter options later in the week!
Share Your Experience Making These Crowd Pleasing Appetizers
And there you have it! That’s the whole delicious secret to making the easiest, cheesiest pizza sliders that will disappear the second they cool down enough to handle. I swear, every time I make these game day sliders, I get at least five people asking me right away how I did it.
So, now it’s your turn! I love hearing which way everyone makes theirs. Did you stick to the pepperoni classic, or did you try one of those crazy Supreme topping ideas I threw out? Head down to the comments below and give this recipe a rating! Let me know what you thought, and seriously, if you snap a picture of your amazing tray of cheesy, baked perfection, tag me! Sharing the joy of simple, delicious food is why I do this. If you need to reach out with specific questions, you can always use my contact page!
PrintEasy Hawaiian Roll Pizza Sliders

Make these quick, cheesy, pull-apart pizza sliders using Hawaiian rolls. They are perfect for game day, parties, or a simple family dinner.
- Prep Time: 10 min
- Cook Time: 25 min
- Total Time: 35 min
- Yield: 12 sliders 1x
- Category: Appetizer
- Method: Baking
- Cuisine: American
- Diet: Vegetarian
Ingredients
- 1 package (12 count) sweet Hawaiian rolls
- 1 cup pizza sauce
- 2 cups shredded mozzarella cheese
- 1 cup sliced pepperoni
- 4 tablespoons unsalted butter, melted
- 1 teaspoon garlic powder
- 1 teaspoon dried Italian seasoning
- 1/4 cup grated Parmesan cheese
Instructions
- Preheat your oven to 350°F (175°C). Lightly grease a 9×13 inch baking dish.
- Keep the Hawaiian rolls connected in their original package or slice the entire block of rolls horizontally, keeping the tops and bottoms separate.
- Place the bottom half of the rolls in the prepared baking dish.
- Spread the pizza sauce evenly over the bottom layer of rolls.
- Distribute the pepperoni slices over the sauce.
- Sprinkle the mozzarella cheese evenly over the pepperoni.
- Place the top half of the rolls over the cheese layer.
- In a small bowl, combine the melted butter, garlic powder, and Italian seasoning. Brush this mixture evenly over the top of the assembled sliders.
- Sprinkle the grated Parmesan cheese over the buttered tops.
- Cover the baking dish tightly with aluminum foil.
- Bake for 15 minutes covered.
- Remove the foil and bake for an additional 5 to 10 minutes, or until the cheese is fully melted and the tops are lightly golden brown.
- Let the sliders rest for 5 minutes before slicing between the rolls. Serve warm.
Notes
- For crispier pepperoni, you can pre-cook it slightly before assembling the sliders.
- To prevent soggy bottoms, lightly toast the bottom layer of rolls in the oven for 3 minutes before adding sauce and toppings.
- You can substitute mozzarella with provolone or a pizza blend cheese.
- Serve with extra marinara sauce on the side for dipping.
Nutrition
- Serving Size: 1 slider
- Calories: 280
- Sugar: 8
- Sodium: 650
- Fat: 14
- Saturated Fat: 7
- Unsaturated Fat: 5
- Trans Fat: 0.2
- Carbohydrates: 25
- Fiber: 1
- Protein: 14
- Cholesterol: 35