

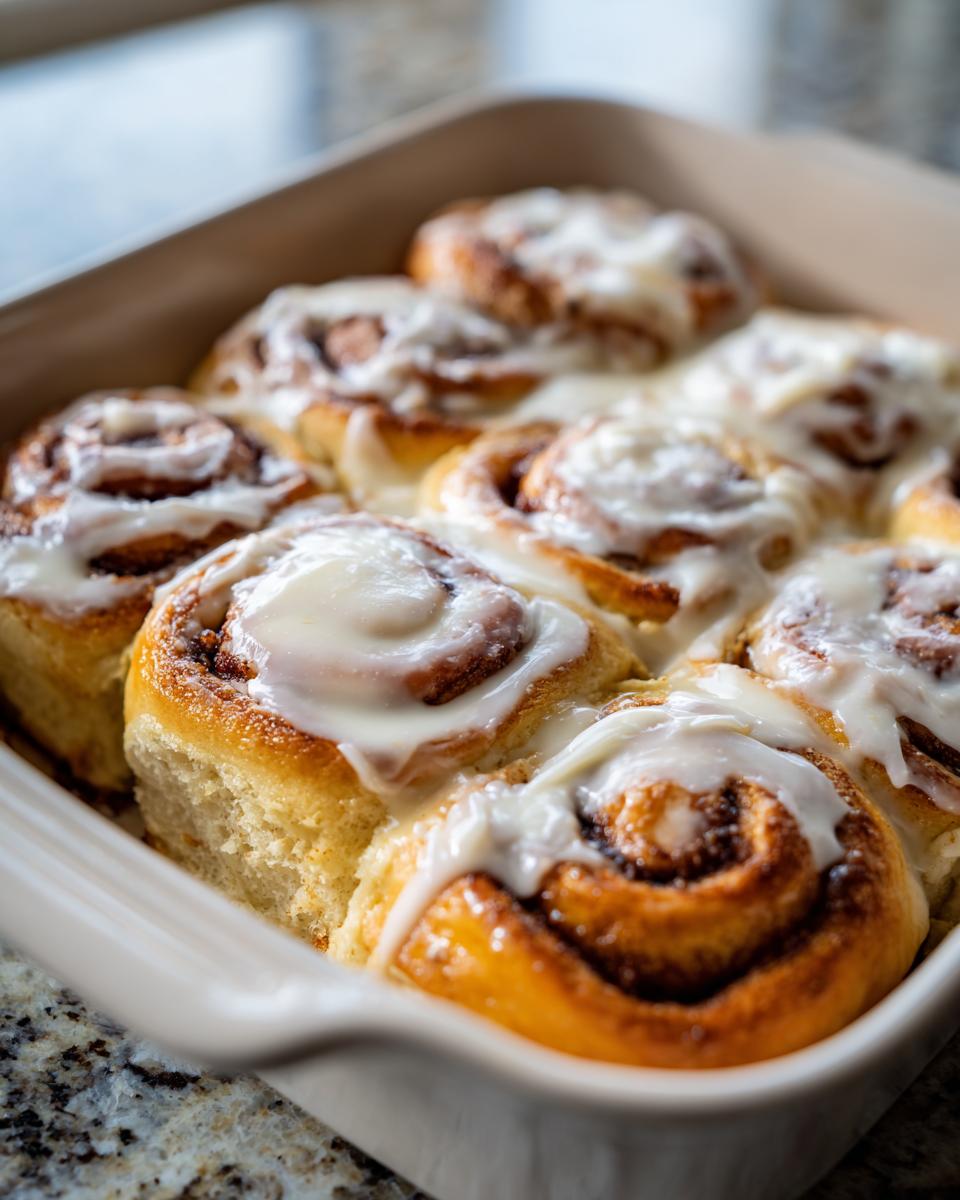
Oh, friend, let me tell you about the smell. It’s that perfect moment when the warm yeast dough meets bubbling brown sugar in the oven, and suddenly, your entire house smells like the best weekend morning ever. If you are hunting for the absolute BEST Homemade Cinnamon Rolls—the ones that are unbelievably Soft + Fluffy and totally Copycat Style with that decadent Cream Cheese Icing—you have landed in the right spot. Forget those dry, sad little rolls you sometimes find; these are the real deal. I’m talking about making incredible cinnamon buns without needing endless hours, thanks to a method I know our founder, Jaxson Riley, would approve of—flavor learned from diners and trucks all over the country, made accessible for your kitchen right now. These are officially my number one pick for Weekend Brunch Baking.
- Why You Will Make These Cinnamon Buns Again and Again
- Ingredients for the Best Soft and Fluffy Cinnamon Buns
- How to Prepare Cinnamon Buns From Scratch Baking
- Mastering the Gooey Cinnamon Rolls with Cream Cheese Icing
- Tips for Success with Your Homemade Cinnamon Rolls Recipe
- Make‑Ahead & Storage Instructions for Cinnamon Buns
- Variations on Classic Cinnamon Swirl Rolls
- Frequently Asked Questions About Baking Cinnamon Buns
- Nutrition Estimates for Homemade Cinnamon Rolls
- Share Your Weekend Brunch Baking Creations
Why You Will Make These Cinnamon Buns Again and Again
Seriously, these aren’t just good; they are the rolls that ruin you for all other cinnamon buns. When you pull these fluffy beauties out of the oven, you’ll know exactly why every minute was worth it. We made sure this is an Easy Cinnamon Roll Recipe that delivers show-stopping results.
- Achieving Bakery Style Soft and Fluffy Cinnamon Buns: The dough texture rivals anything you’d buy at a high-end bakery. We’ve streamlined the yeast process so you can get that incredibly soft, moist crumb with just one main rise—perfect when you need quick comfort food!
- The Perfect Copycat Cinnabon Rolls Recipe Experience: Look, we all love that classic, decadent flavor. These deliver a rich, buttery swirl packed with spice, totally nailing that Cinnabon vibe. And that frosting? It’s essential for those Gooey Cinnamon Rolls with Cream Cheese Icing moments that taste totally indulgent.
Ingredients for the Best Soft and Fluffy Cinnamon Buns
Okay, gather your crew! You can’t make bakery-style cinnamon buns without having your ingredients lined up and ready. Trust me, having everything measured out beforehand stops you from scrambling halfway through the kneading process. We are breaking this down into three parts: the dough that gives you that fluffy breakfast bun structure, the filling that melts on contact, and the icing heaven.
A quick note on the yeast, because this is where so many people panic! For the yeast to wake up properly, your milk absolutely must be warm, not hot. We are looking for that sweet spot between 105°F and 115°F. If it’s too cold, nothing happens. If it’s too hot, you accidentally kill it! Also, your egg needs to be room temperature—it incorporates much better into the dough that way.
For the Yeasted Sweet Dough Recipes
- 1 cup whole milk, warm (Aiming for 105°F–115°F!)
- 2 1/4 teaspoons active dry yeast
- 1/2 cup granulated sugar, divided
- 1/4 cup unsalted butter, melted, plus more for greasing
- 1 large egg, room temperature
- 3 1/2 cups all-purpose flour, plus more for dusting
- 1 teaspoon salt
For the Perfect Cinnamon Filling Recipe
This filling needs to be spreadable, so make sure your butter is truly soft. Packing that brown sugar tight is key for maximum flavor payoff!
- 1/2 cup unsalted butter, softened (not melted!)
- 3/4 cup packed light brown sugar
- 2 tablespoons ground cinnamon
For the Gooey Cream Cheese Icing
This Cream Cheese Icing is non-negotiable if you want that perfect gooey topping. Make sure your cream cheese is soft so your icing isn’t lumpy!
- 4 ounces cream cheese, softened
- 1/2 cup powdered sugar
- 1 teaspoon vanilla extract
- 1 tablespoon milk or heavy cream
How to Prepare Cinnamon Buns From Scratch Baking
Now for the fun part! Making your own cinnamon buns from scratch baking might sound intimidating because of the dough, but I promise, the steps are straightforward. Remember, this dough is basically a slightly sweet, tender version of bread dough, and treating it right means you get unbelievably soft rolls.
Activating the Yeast and Mixing the Dough
First things first: we wake up the yeast! That foamy layer you see after mixing yeast, warm milk, and a pinch of sugar? That’s visual proof that your yeast is alive and ready to work. It’s essential! Once it’s bubbly, we whisk in the egg and melted butter.
Next, we slowly add the dry ingredients. Don’t just dump it all in! We mix until it’s shaggy. Then, we get our hands in there. Kneading for 5 to 7 minutes develops the gluten, which gives these rolls their amazing chew. Pop that dough into a buttered bowl, cover it up, and let it chill out in a warm spot for a full hour. It needs that time to double in size!
Creating the Cinnamon Buns Filling and Rolling
While that dough is puffing up, whip up your filling. It should look like a thick, gorgeous cinnamon paste. Once the dough is doubled, punch it down—you’ll feel that satisfying release of air! Turn the dough out and roll it gently into a 12 by 18-inch rectangle. Think of it as a giant, fluffy canvas.
Spread that glorious filling right across the dough, but stop short on one long edge—leave about a half-inch bare patch. This patch is your seal! Starting on the opposite side, roll the dough up super tightly into one big log. Pinch that bare edge closed really well. If you don’t seal it, things get messy later!
The Final Rise and Baking Cinnamon Rolls At Home
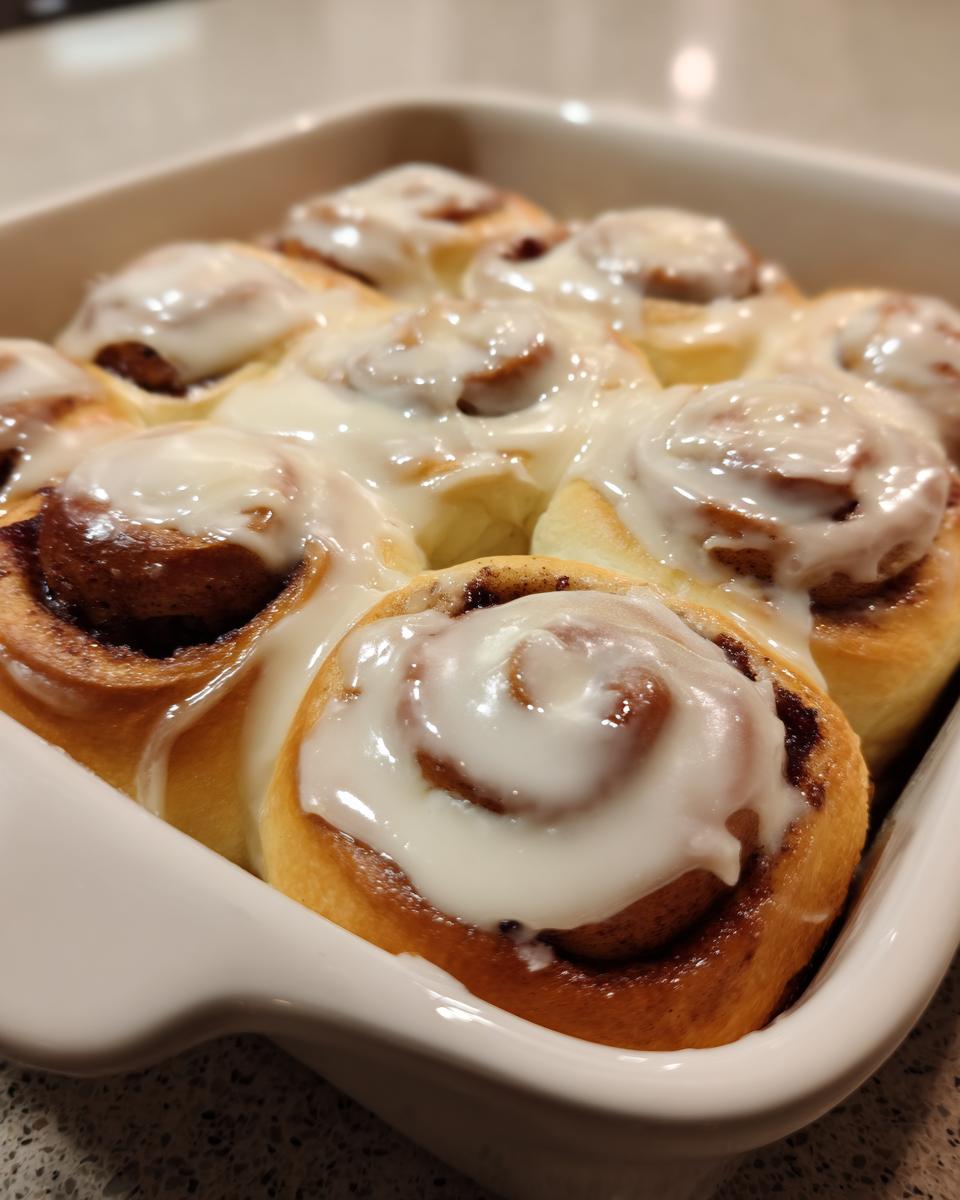
Use unflavored dental floss or a serrated knife to cut that log into 12 even rolls. Arrange them snuggly in your buttered 9×13 pan. They need one last hug—cover them and let them rest for another 30 minutes. This second rise is vital for fluffiness. When you preheat your oven to 375°F, keep an eye on them. Bake for only 20 to 25 minutes. Pull them out the second they look nicely golden brown on top. Over-baking is the enemy of soft cinnamon buns!
Mastering the Gooey Cinnamon Rolls with Cream Cheese Icing
Honestly, if you’ve mastered the dough, the icing is your victory lap. This specific cream cheese icing is what takes these rolls from great to ‘I can’t stop eating them’ territory. Remember, the cream cheese has to be fully softened. If it’s cold, you end up with tiny, hard white chunks in your lovely, smooth topping. I often use a stand mixer on low speed just to get things started, but you can absolutely beat this together by hand in a sturdy bowl!
We are aiming for something thick enough to coat the rolls but thin enough to drip down into all those wonderful crevices. You’ll start by beating the softened cream cheese, powdered sugar, and vanilla until it’s totally smooth—this is where you can check out my guide on my favorite buttercream base techniques if you want extra smoothness tips!
The trick is the liquid. Add the milk or cream one teaspoon at a time. Seriously, stop after the first teaspoon and see how it looks. If you flood it with liquid right away, you end up with a thin glaze perfect for donuts, but not for those thick, decadent stripes on our rolls. We want it thick, glossy, and ready to hug every swirl.
Tips for Spreading Icing on Warm Cinnamon Buns
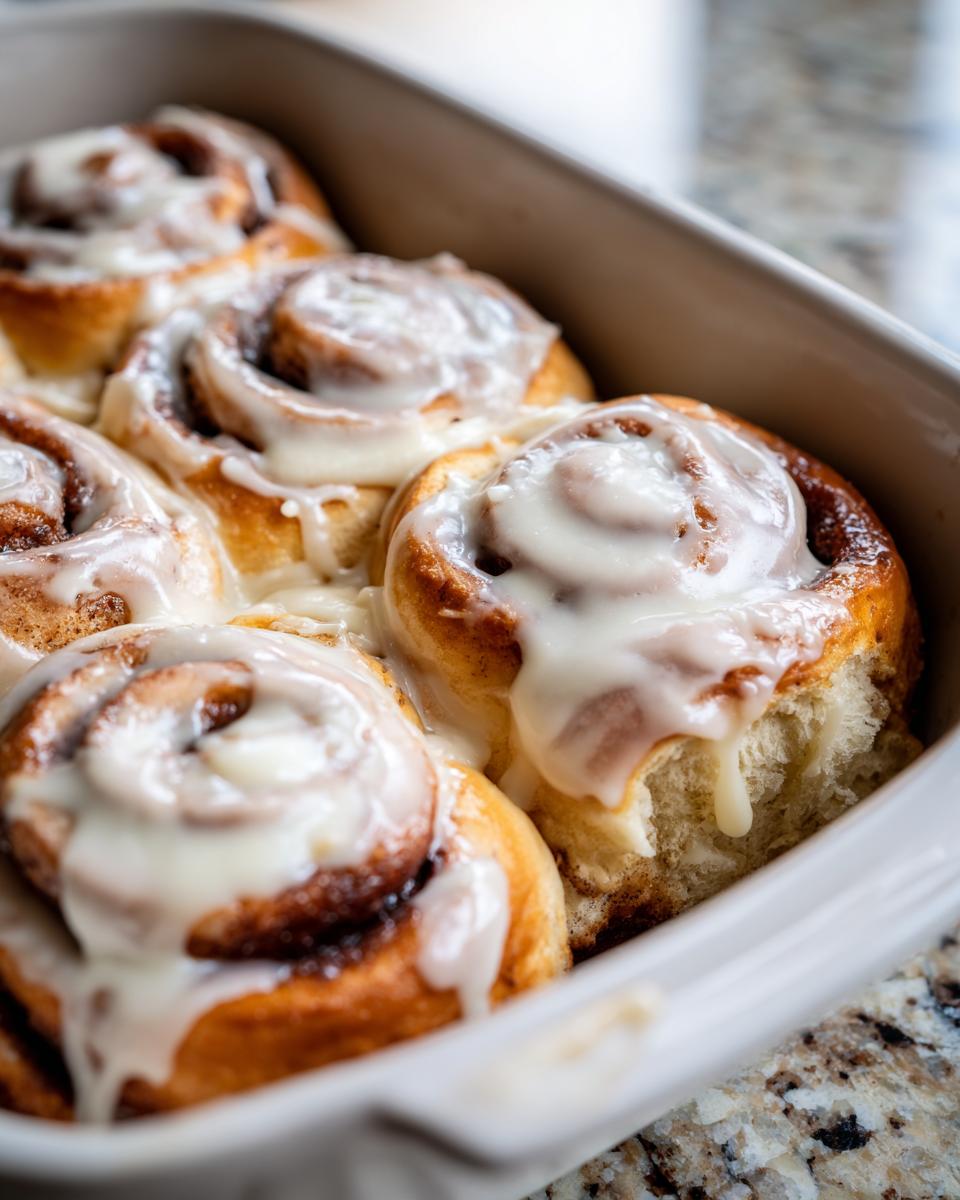
This is critical for that ‘gooey’ factor everyone craves. Do not wait until the rolls are completely cool! As soon as those pans come out of the oven, they should hit the cooling rack for about five minutes max, and then you get to work applying that icing right away.
When you spread the thick cream cheese icing over the warm cinnamon buns, the heat from the rolls immediately starts to melt the icing just perfectly. It seeps down into the layers, making the whole thing gooey and irresistible. If they cool too much, the icing just sits on top; if you frost them piping hot, it all melts off and runs into the pan. That five-minute window is everything! This is the exact opposite of letting them cool completely, which is what other recipes might tell you, but for that true bakery experience like the one from Butternut Bakery’s famous recipes, warm is the way to go!
Tips for Success with Your Homemade Cinnamon Rolls Recipe
Baking is always a learning process, even with tried-and-true dough recipes! When you spend this much time making your own Homemade Cinnamon Rolls Recipe, you want them to be perfect, right? Here are a few of my non-negotiable rules to make sure you get those wonderfully soft, fluffy breakfast buns every single time.
Achieving Maximum Fluffy Breakfast Buns Texture
When you are kneading the dough, watch your hands, not the clock! The dough should feel smooth and elastic, not sticky. That said, avoid dusting your workspace with so much flour that the surface becomes dry and tough. Too much flour makes your final rolls dense instead of fluffy. You are aiming for a soft, slightly tacky feel after kneading, which helps keep these yeasted sweet rolls tender.
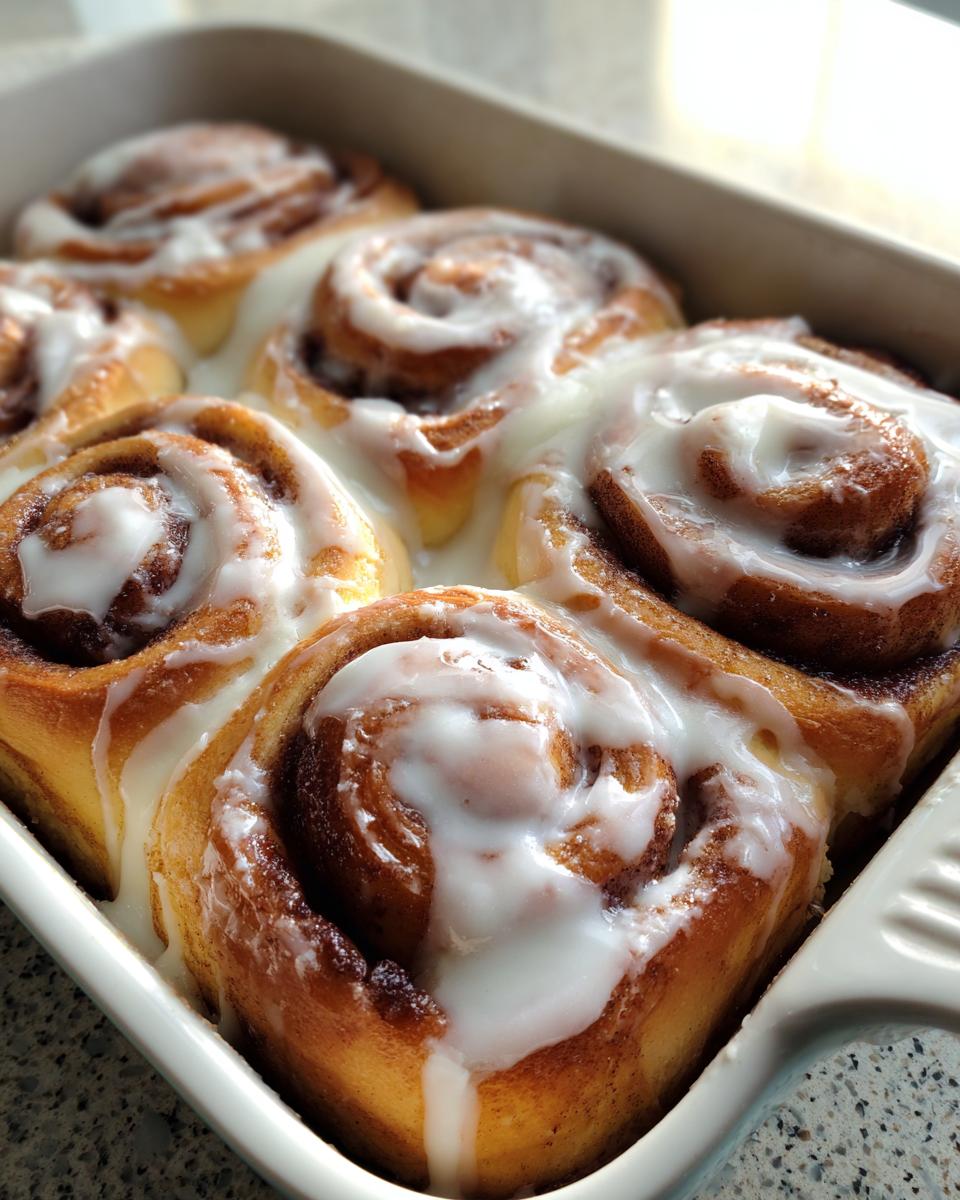
Controlling the Gooey Factor in Cinnamon Buns
Want them even gooier than described? I totally get it! If you are worried about your filling not being quite wet enough to create that signature melt, go ahead and add an extra tablespoon of softened butter or maybe another half teaspoon of brown sugar to your filling mixture. Just don’t go crazy, or it will squish right out when you roll it up! That slightly wetter filling turns into pure melted caramel goodness once baked.
Make‑Ahead & Storage Instructions for Cinnamon Buns
I know, I know. You want to eat all 12 rolls right now, but sometimes life happens! Luckily, these sweet rolls freeze and reheat like a dream. If you want to save time on a busy morning, you can totally get ahead of the game here. This is how I use my secret recipe for Overnight Cinnamon Rolls when I have company coming.
To prepare ahead, get everything done right up until Step 10—after you’ve cut the rolls and placed them in the greased 9×13 pan. Instead of letting them have that final 30-minute rise on the counter, cover the pan tightly with plastic wrap (maybe even foil over that). Pop the whole thing into the fridge for up to 24 hours. The cold slows down the yeast activity.
When you’re ready to bake, pull them out of the fridge and let them sit on the counter, still covered, for about an hour to warm up slightly before baking them according to the recipe. They might need an extra 5 minutes in the oven since they started colder, but they will still be wonderfully soft!
Storing Leftovers for Later
If you happen to have any survivors after breakfast, storing them correctly is key to keeping that soft texture. Once they’ve cooled completely *and* the icing has set up a bit, cover the pan tightly with plastic wrap or transfer them to an airtight container. They keep great at room temperature for about two days.
If you plan on keeping them longer than that, freeze them! You can freeze them frosted or unfrosted. If you freeze them unfrosted, wrap them tightly in plastic wrap, then foil. When you want one, just unwrap it and microwave it for about 30 to 45 seconds. Warm it up, then drizzle with a bit of store-bought honey or a quick smear of frosting, and boom—freshly baked!
Reheating for That Just-Out-of-the-Oven Feel
The microwave is your best friend for reheating single rolls perfectly. Place one roll on a paper towel or a microwave-safe plate and heat it for about 15-20 seconds. That quick blast restores the moisture. If you frosted them after thawing, you might want to warm the frosting slightly too, just to get that melty, gooey experience back again.
If you are trying to refresh the whole batch, wrap the entire pan loosely in foil and heat it in a 300°F oven for about 10 minutes. That gentle warmth gets them soft without drying out the edges.
Variations on Classic Cinnamon Swirl Rolls
Sometimes you just want to mix things up, right? While these cinnamon buns are perfect just as they are—classic, buttery, and spice-filled—it’s fun to see what we can do with additions. We aren’t changing that amazing yeasted sweet dough, but we can definitely play around with the filling!
You don’t need a whole new recipe to get creative. A little addition here or there turns your staple weeknight treat into something special for a holiday morning or just because you feel like it. Those buttery pecan swirls I saw online look incredible, and adding fruit keeps things bright!
Adding Nuts or Fruit to Your Cinnamon Buns
The best time to add anything extra is right when you are spreading that soft filling over your rolled-out dough. This keeps everything locked in place when you roll up the log, which is super important for clean slices!
If you want Butter Pecan Cinnamon Buns, like those tempting ones I saw on Pinterest from My Sister’s Recipes, simply chop up about a cup of toasted pecans. Sprinkle them lightly over the brown sugar and butter mixture right before you roll. Toasting the pecans beforehand really wakes up their flavor, making them fragrant before they even hit the oven.
For something a little brighter, maybe you’re craving those Blueberry Cinnamon Rolls other bakers are raving about? You need to be careful with fruit, though, because too much liquid will make your dough wet. If you are adding blueberries, use fresh ones and gently toss them with about a tablespoon of flour first—this helps them stick to the filling instead of sinking to the bottom of the pan. Alternatively, you can just skip the messy middle step and sprinkle the blueberries or pecans on top of the cream cheese icing! That way, you get the flavor pop without interfering with the roll structure.
If you’re feeling extra ambitious and want something totally different, maybe try swapping the filling entirely for my Red Velvet swirl recipe next time. Keep experimenting; that’s what baking is all about!
Frequently Asked Questions About Baking Cinnamon Buns
It’s totally normal to have questions when you are working with yeasted dough for the first time, or even when you’re just trying to tweak a perfect recipe! I’ve pulled together the ones I get asked most often about achieving these Best Soft and Fluffy Cinnamon Buns. Hopefully, this helps you feel totally confident about that oven!
Can I make these Quick Cinnamon Buns Under 2 Hours without the Second Rise?
That is the ultimate question for weeknight baking, isn’t it? If you absolutely have to save time, yes, you can skip that second, 30-minute rise after you cut the rolls. You can go straight from cutting to baking. I’ve done it in a pinch! But I have to be honest with you: you’ll definitely notice the difference.
The first rise builds the foundation, but that second, shorter rise—we call these Fluffy Breakfast Buns for a reason!—is what makes them puff up nice and tender in the oven. If you skip it, your cinnamon buns will bake up flatter and be a little denser, more like a pastry swirl than a pillowy soft roll. For the *best* results, stick to that second rest time!
What is the secret to making these rolls truly soft?
The magic is really a combination of three things, none of which involve fancy tricks! First, don’t over-knead. Once the dough is smooth, stop working it! Secondly, make sure your filling has enough softened butter—that fat keeps the inside from turning dry and bready. This is key for that melt-in-your-mouth texture.
And here’s the biggest secret: don’t over-bake them! Those Classic Cinnamon Swirl Rolls should look gorgeously golden brown, but the center should almost look slightly underdone when you pull them out. They keep cooking on residual heat after you take them out of the oven, and that residual heat is what prevents them from drying out later. Pull them early, ice them hot, and enjoy the melt!
Can I use instant yeast instead of active dry yeast for my cinnamon buns?
Oh yes, absolutely! Instant yeast is actually really convenient when you’re making a Yeasted Sweet Dough Recipe like this. You can technically skip the initial proofing step where you mix the yeast with warm milk. With instant yeast, you just whisk it directly into your dry ingredients (the flour and salt) before you add the wet stuff.
Usually, if a recipe calls for 2 1/4 teaspoons of active dry yeast, you can use the exact same amount of instant yeast. Just make sure your milk is warm (105°F–115°F) even if you aren’t proofing the yeast first. The yeast still needs that warmth to get going! It can even help speed up your rise times a little bit, which is great when you’re trying to get those Quick Cinnamon Buns on the table!
If you’re looking for other approachable baking solutions for breakfast or dinner, check out my guide on easy creamy chicken taco soup—you’ll be amazed at how simple comfort food can be!
Nutrition Estimates for Homemade Cinnamon Rolls
Okay, let’s talk numbers, because sometimes you just need to know what you’re diving into with these indulgent, warm breakfast pastries! I want to stress right up front that these figures are just estimates. Your exact nutrition facts will depend on the precise brands of butter, sugar, and cream cheese you use. These numbers are calculated based on making 12 rolls and eating one generous serving.
They’re decadent, yes, but worth every single calorie for that soft, gooey, bakery-style experience. Think of this as fuel for your weekend!
- Serving Size: 1 roll
- Calories: 450
- Fat: 22g (Be sure to watch that Saturated Fat listed at 13g—that’s the butter and cream cheese doing their job!)
- Carbohydrates: 58g
- Sugar: 35g (Yes, it’s a little high, but that’s what makes them amazing!)
- Protein: 7g
- Sodium: 320mg
There you have it! We aren’t exactly making a health food here, but we are making the absolute Best Soft and Fluffy Cinnamon Buns, and that’s a kind of nutrition all its own, if you ask me!
Share Your Weekend Brunch Baking Creations
Wow! If you’ve made it this far, congratulations! You’ve tackled the yeast, rolled out the dough, and you’re about to enjoy the very best, softest, gooiest cinnamon buns you’ve ever made at home. Seriously, I’m so proud of you for getting these Homemade Cinnamon Rolls Recipe success stories on paper!
Now, I need to hear all about them! Baking is a communal thing for me, even when I’m in my own kitchen. Did they come out picture-perfect? Did you manage to save any for the next day? Did you try one of those fun variations we talked about?
Please, don’t keep that sugary goodness a secret! I really want to see your creations. Head down to the comments section and let me know how your baking cinnamon rolls at home went down. If you have pictures, tag us online! A picture is worth a thousand words, especially when it involves copious amounts of cream cheese icing.
Also, if this recipe saved your sleepy morning or made your brunch legendary, please, please leave a rating for the recipe slider down below! It helps other folks who are scrolling and wondering if they should commit to making these amazing warm breakfast pastries. I love seeing your feedback—it fuels me to keep sharing all the best secrets I’ve picked up over the years.
If you’re already planning your next baking adventure, maybe check out some of my other favorite weeknight meals—it’s important to fuel up after all that kneading! You can always reach out directly if you have any specific questions about the dough through my contact page.
Thanks for baking with me today! I hope these rolls bring as much joy and buttery comfort to your table as they bring to mine. Be sure to bookmark this page so you can easily whip up these Best Homemade Cinnamon Rolls next time you need a spectacular treat!
PrintBest Homemade Cinnamon Rolls (Soft, Fluffy, Copycat Style)

Make bakery-style cinnamon rolls at home that are incredibly soft, fluffy, and gooey. This recipe uses a simple dough and produces results comparable to Cinnabon, complete with a rich cream cheese icing.
- Prep Time: 30 min
- Cook Time: 25 min
- Total Time: 1 hour 55 min
- Yield: 12 servings 1x
- Category: Breakfast
- Method: Baking
- Cuisine: American
- Diet: Vegetarian
Ingredients
- 1 cup whole milk, warm
- 2 1/4 teaspoons active dry yeast
- 1/2 cup granulated sugar, divided
- 1/4 cup unsalted butter, melted, plus more for greasing
- 1 large egg, room temperature
- 3 1/2 cups all-purpose flour, plus more for dusting
- 1 teaspoon salt
- 1/2 cup unsalted butter, softened (for filling)
- 3/4 cup packed light brown sugar (for filling)
- 2 tablespoons ground cinnamon (for filling)
- 4 ounces cream cheese, softened (for icing)
- 1/2 cup powdered sugar (for icing)
- 1 teaspoon vanilla extract (for icing)
- 1 tablespoon milk or heavy cream (for icing)
Instructions
- Warm the milk until it is between 105°F and 115°F. Pour the warm milk into a large bowl. Stir in the yeast and 1 tablespoon of the granulated sugar. Let stand for 5 to 10 minutes until foamy.
- Add the remaining granulated sugar, melted butter, and egg to the yeast mixture. Whisk to combine.
- In a separate bowl, whisk together the flour and salt. Gradually add the flour mixture to the wet ingredients, mixing until a shaggy dough forms.
- Turn the dough out onto a lightly floured surface. Knead for 5 to 7 minutes until the dough is smooth and elastic. Place the dough in a lightly buttered bowl, turning once to coat. Cover the bowl with plastic wrap and let it rise in a warm place for 1 hour, or until doubled in size.
- While the dough rises, prepare the filling. In a small bowl, mix the softened butter, brown sugar, and cinnamon until combined into a spreadable paste.
- Once the dough has risen, punch it down gently. Turn it out onto a lightly floured surface and roll it into a large rectangle, about 12 by 18 inches.
- Spread the cinnamon-sugar filling evenly over the entire surface of the dough, leaving a small border on one long edge.
- Starting from the long edge opposite the border, tightly roll the dough into a log. Pinch the seam closed.
- Use a sharp knife or unflavored dental floss to cut the log into 12 equal rolls.
- Arrange the rolls in a greased 9×13 inch baking pan. Cover the pan loosely with plastic wrap and let the rolls rise again in a warm spot for 30 minutes. This is your one rise technique for soft rolls.
- Preheat your oven to 375°F. Bake the rolls for 20 to 25 minutes, or until they are golden brown.
- While the rolls bake, prepare the cream cheese icing. Beat the softened cream cheese, powdered sugar, and vanilla extract together until smooth. Add the milk or cream, one teaspoon at a time, until you reach a thick, spreadable consistency.
- Remove the rolls from the oven. Immediately spread the cream cheese icing generously over the warm rolls. Serve warm.
Notes
- For extra gooey rolls, slightly increase the amount of butter used in the filling mixture.
- If you prefer a quicker method, you can skip the second rise and bake immediately after cutting, though the texture will be slightly less fluffy.
- To achieve bakery-style softness, avoid over-baking; remove them when the tops are just set.
Nutrition
- Serving Size: 1 roll
- Calories: 450
- Sugar: 35g
- Sodium: 320mg
- Fat: 22g
- Saturated Fat: 13g
- Unsaturated Fat: 9g
- Trans Fat: 0.5g
- Carbohydrates: 58g
- Fiber: 2g
- Protein: 7g
- Cholesterol: 55mg