
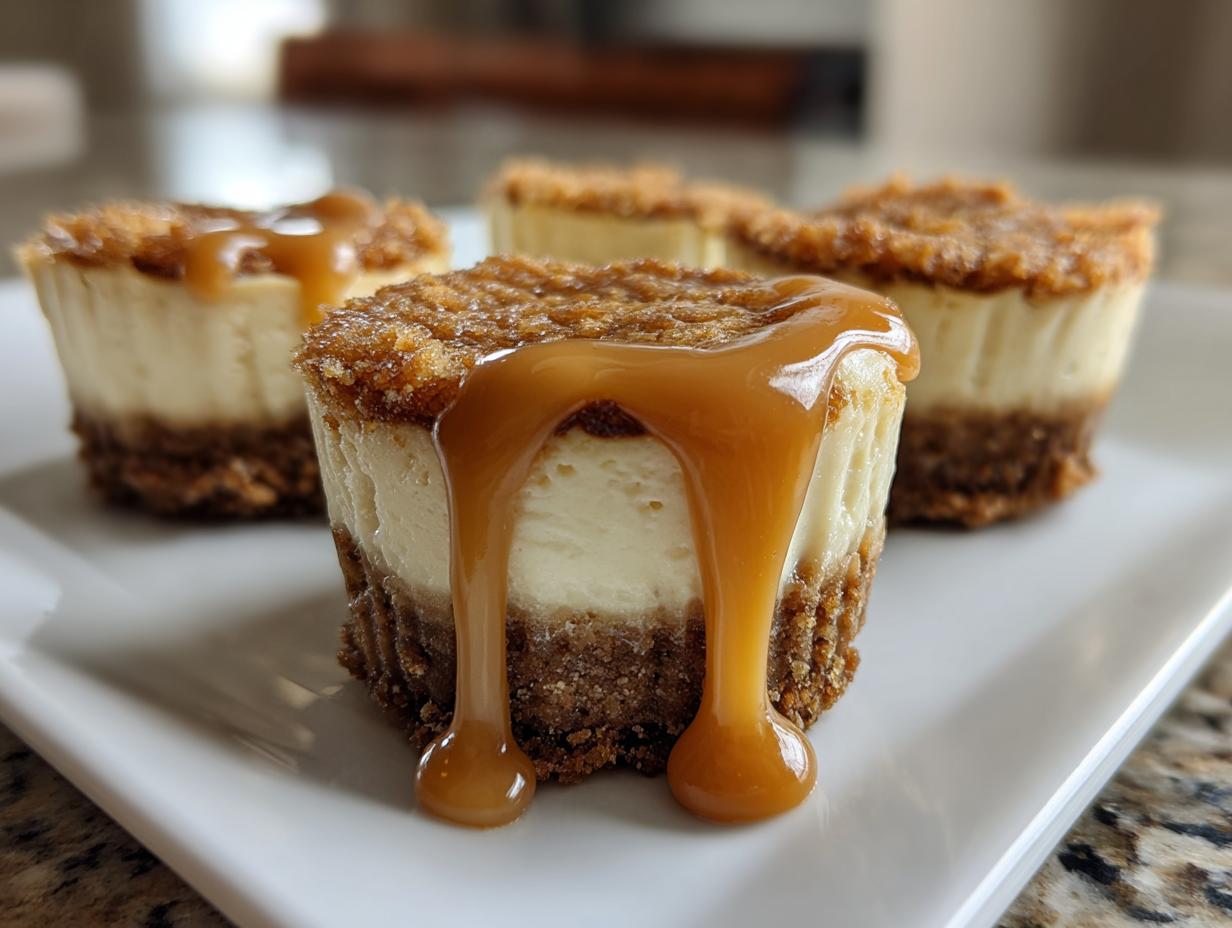
Listen, I get it. Sometimes you need a dessert that looks like you spent all day crafting it, but honestly, you just want to spend that time eating it. That’s where these cookie butter cheesecake cups change the game. Forget turning on the oven; these are completely no-bake. It’s that whole philosophy Jaxson Riley started YumDrizzle with: making incredible, showstopper food accessible for real life, not just for fancy cooking shows. We are taking that deeply spiced cookie butter flavor and folding it right into the creamiest individual cheesecake cups you’ve ever tasted. They chill up beautifully, making them a perfect make-ahead treat, much like our famous no-bake chocolate mousse pie. Seriously, these are dessert perfection in miniature form!
- Why You Will Make These No-Bake Cookie Butter Cheesecake Cups
- Essential Ingredients for Perfect Cookie Butter Cheesecake Cups
- Step-by-Step Guide to Making No-Bake Cookie Butter Cheesecake Cups
- Ingredient Notes and Substitutions for Your Cookie Butter Cheesecake Cups
- Tips for Success with No Oven Cheesecake Cups
- Serving Suggestions for Party Dessert Cups
- Make Ahead and Storage for Your Cookie Butter Cheesecake Cups
- Frequently Asked Questions About Cookie Butter Cheesecake Cups
- Share Your Creamy Cheesecake Cups Creations
Why You Will Make These No-Bake Cookie Butter Cheesecake Cups
I promise you, once you try making these delightful little treats, they’re going straight into your regular rotation. Why? Because they tick every single box for an amazing, satisfying dessert without any of the fuss. This is the definition of an easy cookie butter dessert!
- Zero Oven Time: That’s right, we’re keeping things cool! These are true no oven cheesecake recipes. This keeps your kitchen cool and saves you a ton of hassle, especially when you are already busy hosting.
- Portion Control Perfection: They are naturally individual dessert cups, which means no slicing, no messy platters, and everyone gets a perfect ratio of crust to filling. Perfect for party dessert cups!
- Incredibly Quick Assembly: You spend maybe 20 minutes actually mixing everything, and then the fridge does all the heavy lifting. It’s the ultimate quick cheesecake recipe.
- Unbeatable Creamy Texture: Because we are whipping the heavy cream separately and folding it in, you get that light, cloud-like texture that keeps these firmly in the creamy cheesecake cups category. Nobody wants dense, heavy stuff when they crave cheesecake!
- Make-Ahead Magic: These are fantastic for planning ahead. You can whip these *no bake cheesecake cups* up the day before a party, cover them, and just drizzle that good stuff on top right before serving.
Essential Ingredients for Perfect Cookie Butter Cheesecake Cups
Okay, let’s talk about what makes these desserts sing. Since we’re keeping this recipe beautifully simple—truly an easy cookie butter dessert—ingredient quality really shines through. Every single thing on this list serves a purpose, whether it’s providing that crucial crunch or building that impossibly smooth texture. Remember, if you skip out on softening your cream cheese, you are going to end up with lumps, and nobody wants a lumpy bite of what should be one of the best creamy cheesecake cups ever.
For the Buttery Cookie Crust
- 1 1/2 cups crushed Biscoff cookies (or graham crackers—but trust me, Biscoff is the way to go for that deep flavor!)
- 6 tablespoons unsalted butter, melted
Make sure those cookies are crushed finely, almost like coarse sand. If you’re using Biscoff instead of graham crackers, you’re already halfway to the best speculoos dessert recipe around!
For the Creamy Cheesecake Filling
- 16 ounces cream cheese, softened (Seriously, let this sit out for at least an hour. Cold cream cheese is the enemy of smooth cheesecake!)
- 1 cup powdered sugar
- 1 teaspoon vanilla extract
- 1/2 cup cookie butter (like Biscoff spread), plus extra for topping
- 1 cup heavy whipping cream, cold (Cold is non-negotiable here so it whips up stiff!)
- 1/4 cup granulated sugar (for whipping the cream)
For the Cookie Butter Topping
- Extra cookie butter (enough for a good drizzle)
That little bit of extra cookie butter is what finishes these off into incredible sweet creamy treats. You just warm it up slightly until it’s that perfect pourable consistency.
Step-by-Step Guide to Making No-Bake Cookie Butter Cheesecake Cups
Alright, this is the fun part! Making these no bake dessert ideas is honestly therapeutic because there’s no stress of overbaking or checking temperatures. We move fast, and the results are instantly stunning. Just make sure your cream cheese is actually soft, or that filling is going to fight you every step of the way!
Preparing the Biscuit Crust Base
First thing’s first, we build the foundation for these amazing mini cheesecake jars. You’re just mixing up those nicely crushed cookies with the melted butter right in a bowl. You want it to resemble wet sand—it should hold its shape when you squeeze a bit. Take your prepared muffin cups (I always use liners, makes cleanup a dream!) and press about a tablespoon and a half of the crust mix firmly into the bottom. Press hard! Once you have all 12 bases packed down, get them into the freezer right away. Seriously, five minutes in the freezer firms them up way better than just leaving them on the counter.
Creating the Rich Cookie Butter Cheesecake Filling
Now for the star flavor! In a large bowl, take that softened cream cheese and beat it until it’s totally smooth and fluffy—no excuses on this part! Add your powdered sugar and vanilla, mix until beautiful, then scrape down the sides. Next, beat in that wonderful cookie butter. Once that’s smooth and uniform, move to the cream. In a separate, chilled bowl, whip your heavy cream and that quarter cup of granulated sugar until you get stiff peaks. Here’s the critical tip: you have to fold that whipped cream into the cookie cheese base, not stir it. Use a spatula and gentle sweeping motions. If you stir aggressively, you knock all the air right out, and we lose that dreamy, light texture we’re aiming for in these bitesize cheesecake treats.
Assembling and Chilling Your Cookie Butter Cheesecake Cups
Once that filling is light and airy, spoon it right over your frozen crusts. If you have a piping bag, use a wide tip—it makes them look way more professional, like true indulgent individual desserts! Make sure they are even, then cover them gently with plastic wrap. These need to chill. You need at least four hours for them to set up firm, but I am telling you from experience, overnight is the golden ticket. When they are fully chilled, those cookie butter cheesecake cups will hold their shape perfectly when you peel the liner away.
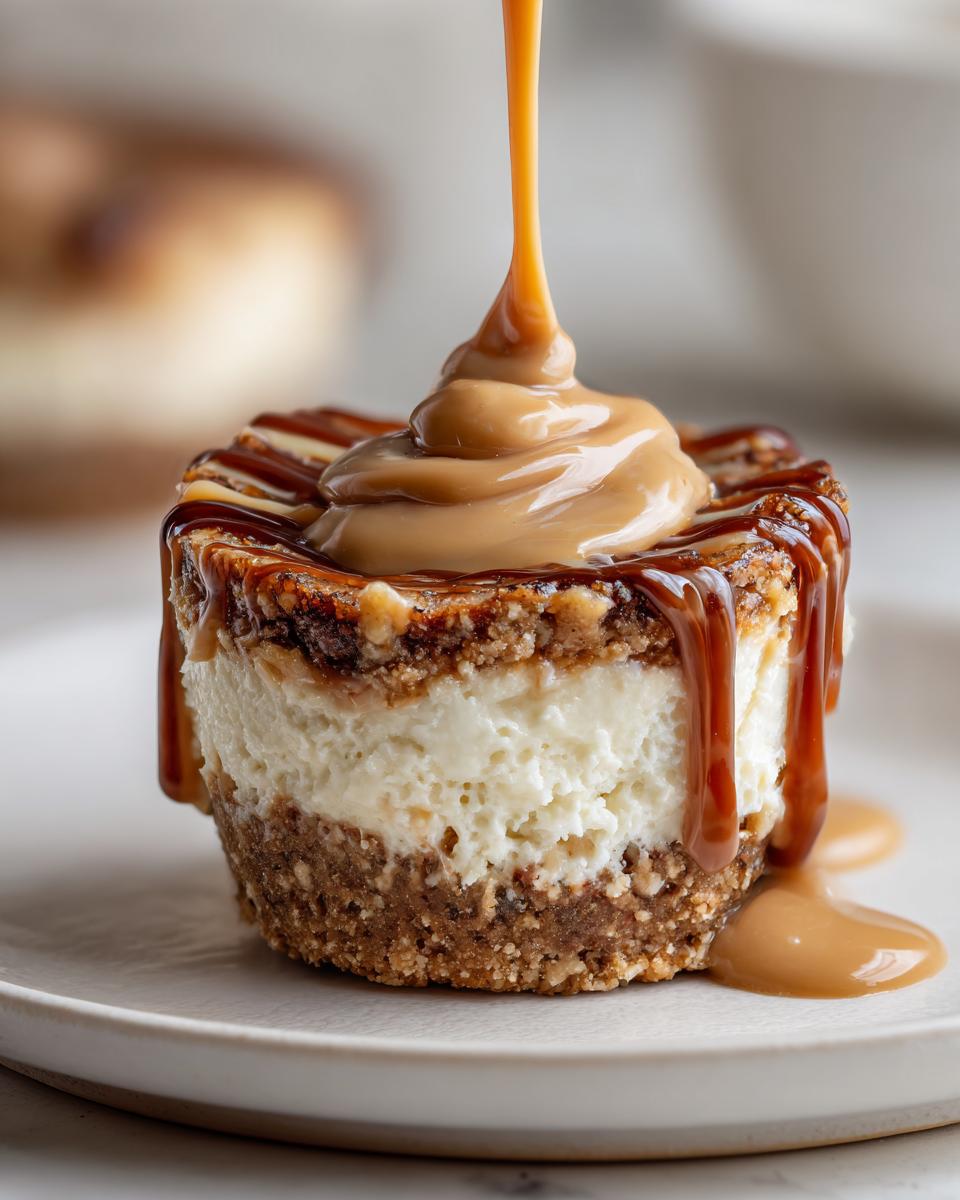
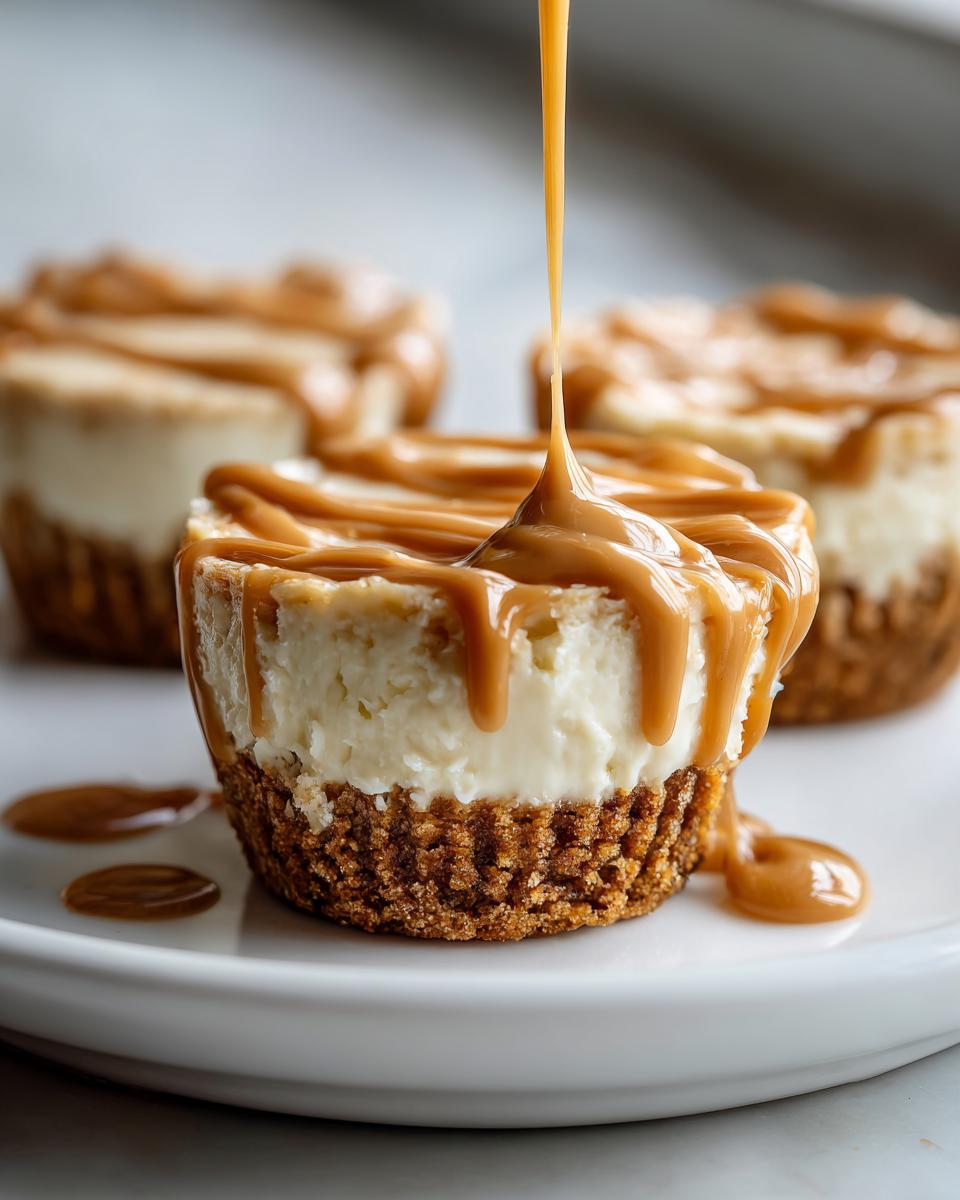
Finishing Touches: The Cookie Butter Drizzle
We aren’t done until the final drizzle gets applied! Take your topping cookie butter and microwave it in short bursts—maybe 10 seconds at a time—until it’s runny enough to drip nicely off a spoon. Do not overheat it, or it separates! Drizzle generously over the top of your set, cold cheesecake cups right before you serve them. It looks gorgeous, and that warm, slightly melted cookie butter on cold cheesecake? Pure magic, my friends.

Ingredient Notes and Substitutions for Your Cookie Butter Cheesecake Cups
I always get questions about what happens if you don’t have an exact ingredient, especially with specialty things like cookie butter. Look, I know specialty items can be annoying to hunt down, but let’s chat about how to make these work for you! If you are aiming for the absolute best flavor in your easy cookie butter dessert, you really need to stick with Biscoff cookies for the crust. They hold up better and give you that spiced depth.
However, if you’re stuck, graham crackers will work for the crust—they just won’t deliver that authentic *speculoos dessert recipe* punch. Now, for the spread itself, use whatever brand of cookie butter you love! Lotus Biscoff is the classic for a reason, but others work great too. Just make sure whatever jar you open up hasn’t separated too much. If it has, give that jar a really good stir with a sturdy spoon before you measure out that half cup for the filling. Remember, we want that smooth texture in our creamy cheesecake cups!
Tips for Success with No Oven Cheesecake Cups
I’ve messed up almost every step on these cheesecake cups at least once when I was first testing them out, so trust me, I know exactly where things can go sideways! Since these are no bake dessert ideas, temperature control is everything. You don’t have the oven to rescue you from a bad mix!
Here are the three things I always check before I even start mixing, because they make the difference between good and truly amazing:
- The Cream Cheese Temperature Check: I cannot stress this enough. I once rushed this step because I was trying to get these ready for a potluck, and my cream cheese was still cold in the middle. Ended up with lumps about the size of pebbles baked into my almost-finished filling! You need it soft enough that if you press your finger into the block, it sinks in easily without resistance.
- Don’t Overmix the Whipped Cream Fold: When you’re folding in the whipped cream, remember you are treating that air like it’s spun glass! You want to keep those beautiful air bubbles you just worked so hard to create. Stop folding the second you see no more white streaks. Any aggressive stirring afterward will deflate the mixture, and your creamy cups will turn into dense little hockey pucks.
- Crust Tamping Technique: For the perfect biscuit crust dessert, use the flat bottom of a small measuring cup or a shot glass to press the crust mix into the liner. This simple tool helps you get a super flat, compact base. A loose crust crumbles when you try to lift the final product!
- Chilling is Non-Negotiable: Because this is a no oven cheesecake recipe, chilling isn’t optional—it’s how we solidify the dessert. If you try to rush it after only two hours, the filling will be too floppy for that perfect drizzle finish. I always aim for six hours minimum, but overnight guarantees the best results for these individual treats.
Serving Suggestions for Party Dessert Cups
While cupcake liners are fast and super easy, sometimes you want these cookie butter cheesecake cups to really WOW your guests. If you’re looking to elevate these into stunning party dessert cups, think about ditching the paper liners!
Try assembling them right inside little 4-ounce glass **mini jars** or shot glasses. They look so elegant sitting out on a dessert table. Before that final cookie butter drizzle, pipe a swirl of leftover whipped cream on top and sprinkle with a few extra crushed Biscoff crumbs. It gives them height and makes them feel instantly fancier, even though they took zero extra baking effort!
Make Ahead and Storage for Your Cookie Butter Cheesecake Cups
One of the best things about keeping our recipes accessible is making sure they work for your busy schedule. With these cookie butter cheesecake cups, planning ahead is actually part of the magic! Since they are completely no-bake, they actually taste *better* after they’ve had time to chill out and let those cookie butter flavors mingle deep into the creamy filling.
For the best, firmest texture, you absolutely need a minimum of four hours, and honestly, chilling them overnight is the real secret weapon for these make ahead cheesecake dreams. When they’re completely chilled, they are sturdy enough to pop right out of the liners or serve straight in their jars when company arrives.
If you need to store leftovers (ha! As if there will be any!), keep them covered tightly in the refrigerator. They stay wonderfully fresh and delicious for about four or five days. I always keep the final drizzle off until right before serving, though, because that adds that fresh touch.
Now, can you freeze them? Yes, you totally can, which is great for these individual dessert cups if you’re making them weeks ahead for a big event! Freeze them uncovered until they are solid, then transfer them into an airtight container. When you’re ready to thaw, move them to the fridge overnight first. Thawing them slowly keeps that wonderful, creamy texture intact. Just wait until they are fully thawed and cold before adding that final drizzle!
Frequently Asked Questions About Cookie Butter Cheesecake Cups
When you’re diving into a recipe this decadent, naturally, you’re going to have some questions! I tried to anticipate everything I used to ask when making my first batch of these amazing *cookie butter cheesecake cups*. Since this is one of my favorite *easy cookie butter dessert* recipes, I want you to succeed on your first try!
Can I bake these cookie butter cheesecake cups?
That’s a biggie! The short answer is: you really shouldn’t, because these are specifically designed as a fantastic no oven cheesecake recipe. If you tried to bake this batter, it would essentially turn into a soft, sweet slab of baked cream cheese frosting, not the light, airy, cloud-like texture we are aiming for. The whole charm is that you get the richness of cheesecake without any of the slicing stress or risk of cracking that baked versions bring!
What is the best way to get a smooth Biscoff cheesecake filling?
Smoothness is everything for *creamy cheesecake cups*! You need two key things working for you here. First, your cream cheese MUST be soft—I mean room temperature soft—so it whips up without any lumps. Second, you have to stop mixing and scrape down the sides of your bowl often. I mean *often*. Seriously, scrape, mix a little, scrape again. This ensures every bit of cream cheese gets incorporated with the sugar and cookie butter for that silken texture you see in all the best speculoos dessert recipe pictures.
Share Your Creamy Cheesecake Cups Creations
So, there you have it! My absolute favorite, can’t-stop-eating-them recipe for creamy cheesecake cups. Now that you’ve mastered the crust and folded that heavenly filling, I genuinely want to know what you thought!
Did you end up using Biscoff cookies or did you stick with graham crackers for the base? Did you drizzle that warm cookie butter right before serving, or could you wait until the next day? Don’t be shy!
If you made a batch of these amazing individual dessert cups, please take a picture and tag me on social media so I can see your beautiful work. And if you have a moment, leaving a rating right here on the recipe card tells me you loved it, and it helps other busy folks like us find these simple, decadent treats. Happy cooking, and enjoy every single bite!
PrintUltimate No-Bake Cookie Butter (Biscoff) Cheesecake Cups
Make these easy, no-bake cookie butter cheesecake cups for a creamy, indulgent individual dessert. They feature a buttery cookie crust and rich filling, perfect for parties or a quick sweet treat.
- Prep Time: 20 min
- Cook Time: 0 min
- Total Time: 4 hr 20 min
- Yield: 12 servings 1x
- Category: Dessert
- Method: No-Bake
- Cuisine: American
- Diet: Vegetarian
Ingredients
- 1 1/2 cups crushed Biscoff cookies (or graham crackers)
- 6 tablespoons unsalted butter, melted
- 16 ounces cream cheese, softened
- 1 cup powdered sugar
- 1 teaspoon vanilla extract
- 1/2 cup cookie butter (like Biscoff spread), plus extra for topping
- 1 cup heavy whipping cream, cold
- 1/4 cup granulated sugar (for whipped cream)
Instructions
- Prepare the crust: Mix the crushed cookies and melted butter until evenly moistened. Press about 1 1/2 tablespoons of the mixture firmly into the bottom of 12 standard muffin cups lined with paper liners or into small serving jars. Place the cups in the freezer while you prepare the filling.
- Make the cheesecake filling: In a large bowl, beat the softened cream cheese, powdered sugar, and vanilla extract until smooth and creamy. Scrape down the sides of the bowl.
- Beat in the cookie butter until fully combined and the mixture is uniform in color and texture.
- In a separate, clean bowl, whip the cold heavy cream and granulated sugar until stiff peaks form.
- Gently fold the whipped cream into the cookie butter cream cheese mixture until just combined. Do not overmix.
- Spoon or pipe the cheesecake filling evenly over the chilled crusts in the muffin cups.
- Chill the cheesecake cups in the refrigerator for at least 4 hours, or until firm. For best results, chill overnight.
- Before serving, warm a small amount of extra cookie butter slightly so it is pourable. Drizzle the melted cookie butter over the top of each cheesecake cup.
Notes
- If you do not have Biscoff cookies, you can substitute with graham crackers for the crust, but using Biscoff enhances the overall cookie butter flavor.
- For a smoother drizzle, microwave the topping cookie butter in 10-second intervals until it reaches a thin, pourable consistency.
- You can use mini springform pans or small glass jars instead of muffin liners for a different presentation.
Nutrition
- Serving Size: 1 cup
- Calories: 350
- Sugar: 28
- Sodium: 210
- Fat: 22
- Saturated Fat: 13
- Unsaturated Fat: 9
- Trans Fat: 0
- Carbohydrates: 34
- Fiber: 1
- Protein: 5
- Cholesterol: 65