
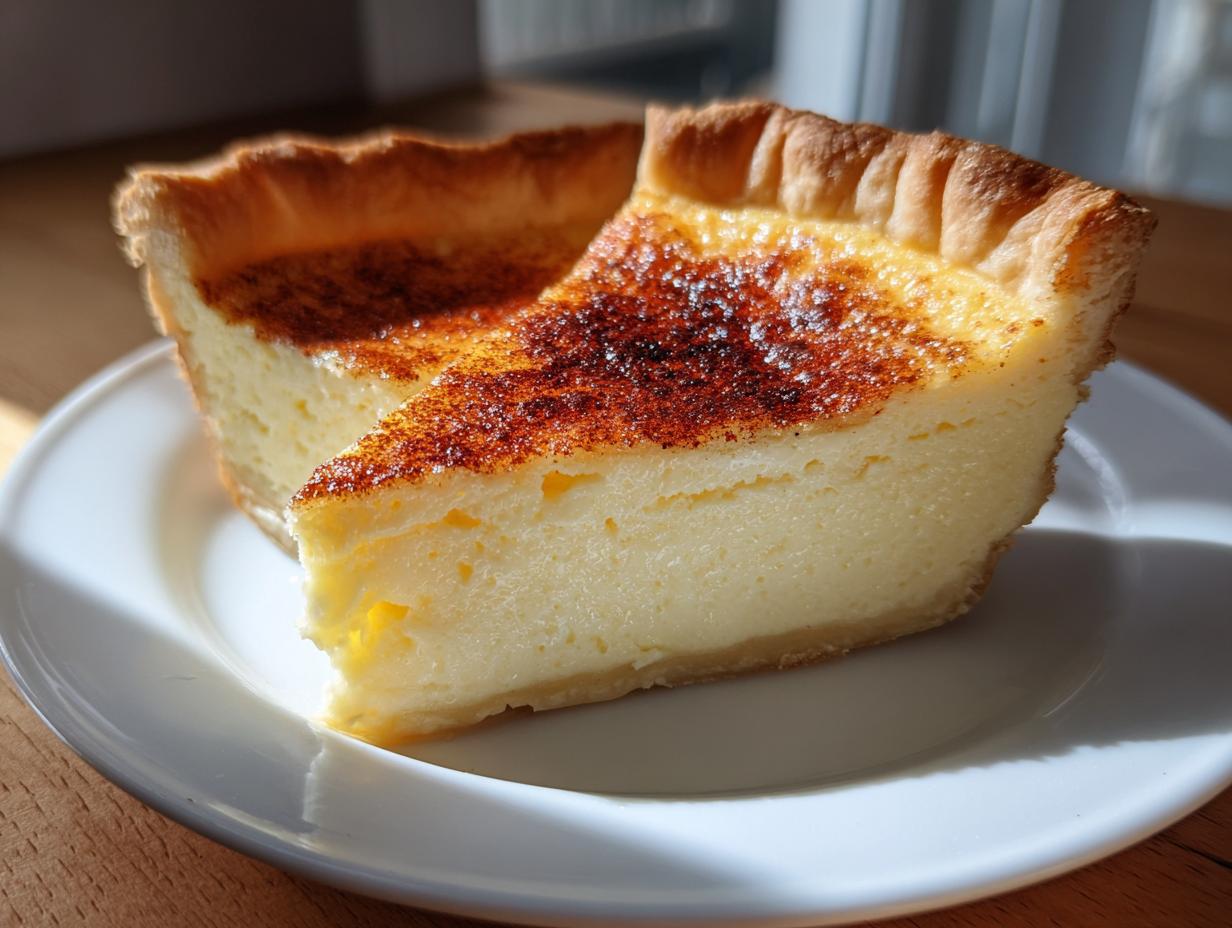
If I could bottle one smell that takes me straight back to those diners on the open road or to my grandma’s warm kitchen, it would be baking custard. Forget the fancy stuff for a minute—sometimes you just need food that comforts your soul, and nothing does that better than a truly classic, unapologetic custard pie. I spent years chasing the flavor of those simple, perfect desserts I stumbled upon in small towns across the map. That’s why I’m so excited to share this recipe for my Old Fashioned Creamy Egg Custard Pie. It’s got that old-school charm, yes, but the star here is the texture—it’s so incredibly silky and smooth you’ll swear it was made by a professional pastry chef. Trust me, this recipe is pure, accessible magic made from stuff you already have.
- Why This Old Fashioned Custard Pie Recipe Works (E-E-A-T)
- Ingredients for Your Silky Smooth Custard Pie Filling
- Step-by-Step Instructions for the Perfect Custard Pie
- Tips for an Old School Custard Pie That Impresses
- Serving Suggestions for Your Vanilla Custard Pie
- Storage and Reheating for This Classic Custard Pie Recipe
- Frequently Asked Questions About Egg Custard Pie
- Nutritional Estimates for Your Homemade Custard Pie
- Share Your Old Fashioned Custard Pie Experience
Why This Old Fashioned Custard Pie Recipe Works (E-E-A-T)
I learned on the road that the best food isn’t about thirty exotic ingredients; it’s about four or five things done absolutely right. That’s the philosophy baked right into this Old Fashioned Custard Pie. We aren’t messing around with gelatin or stabilizers here. This recipe relies on the pure teamwork of eggs and milk to create that signature texture.
What makes this work so well is its commitment to being a straightforward, Simple Dessert Pie. When I was sharing meals with the band in rough spots, I needed something reliable. This recipe delivers that gorgeous, Creamy Baked Custard Pie texture without fail, provided you stick to the mixing rules. It pulls those nostalgic feelings forward because it tastes exactly like tradition ought to taste—pure and true. If you want to see another one of my go-to reliable dishes that stick to simple ingredients, check out how I handle a classic creamy egg salad.
Ingredients for Your Silky Smooth Custard Pie Filling
This is where the magic starts, and honestly, it’s what makes this such an easy homemade custard pie. Seriously, open your pantry—you probably have everything you need right now! We are aiming for that lovely Silky Smooth Pie Filling, and simple, good quality ingredients are the answer, not complicated steps.
Here’s what you’ll gather for one perfect 9-inch pie:
- 1 unbaked 9-inch flaky pie crust (make sure it’s truly raw, we’ll talk about that soon!)
- 1 1/2 cups whole milk
- 3 large eggs, lightly beaten
- 3/4 cup granulated sugar
- 1 teaspoon pure vanilla extract
- 1/4 teaspoon ground cinnamon (plus a little extra later for dusting)
- A small pinch of salt—don’t skip this, it wakes up the flavor!
See? Nothing crazy, just foundational stuff we use every day. It’s proof that you don’t need a hundred ingredients to make something that tastes like it took all day.
Ingredient Notes and Substitutions for Your Custard Pie
Since we are relying on these few ingredients, treat them well! The milk choice is important for that classic texture. Whole milk is the standard because it provides the perfect fat content for structure. If you swap it for 2% or skim, you might end up with a slightly more fragile custard, though it will still be good.
If you really want to go rich—this is my personal shortcut when I’m feeling indulgent—substitute half of the whole milk with heavy cream. Wow, talk about luxurious! But the basic recipe works beautifully because we use three full eggs, which gives you that richness and that necessary set without any stabilizers. That pinch of salt I mentioned? It doesn’t make the pie salty, I promise. It actually helps balance the sugar, ensuring your easy homemade custard pie tastes balanced and complex, not just sweet.
Step-by-Step Instructions for the Perfect Custard Pie
Okay, deep breath! This is the fun part where we assemble our custard pie. Remember what I said about simplicity? It all comes down to how gentle you are when mixing the eggs and the milk. If you beat it like you’re making meringue, you’re going to get air bubbles, and those air bubbles cause cracks later. We are aiming for creamy, not aerated, okay?
First things first, get that oven warming up to 350 degrees F. Take your unbaked pie crust and gently place it into your 9-inch pie plate. Crimp those edges how you like—I tend to go with a simple fluted edge because it looks tidy.
In a medium bowl, whisk your sugar and salt together first. Then, in a separate bowl, just lightly beat your three large eggs—we’re talking gentle agitation, not a wrestling match! Whisk that sugar mixture into the eggs until they look happy together. Now for the slow part: gradually whisk in the whole milk and the vanilla. Keep whisking gently until everything looks unified. Seriously, stop whisking once it’s mixed! Don’t overthink it; too much air is the enemy of a silky finish.
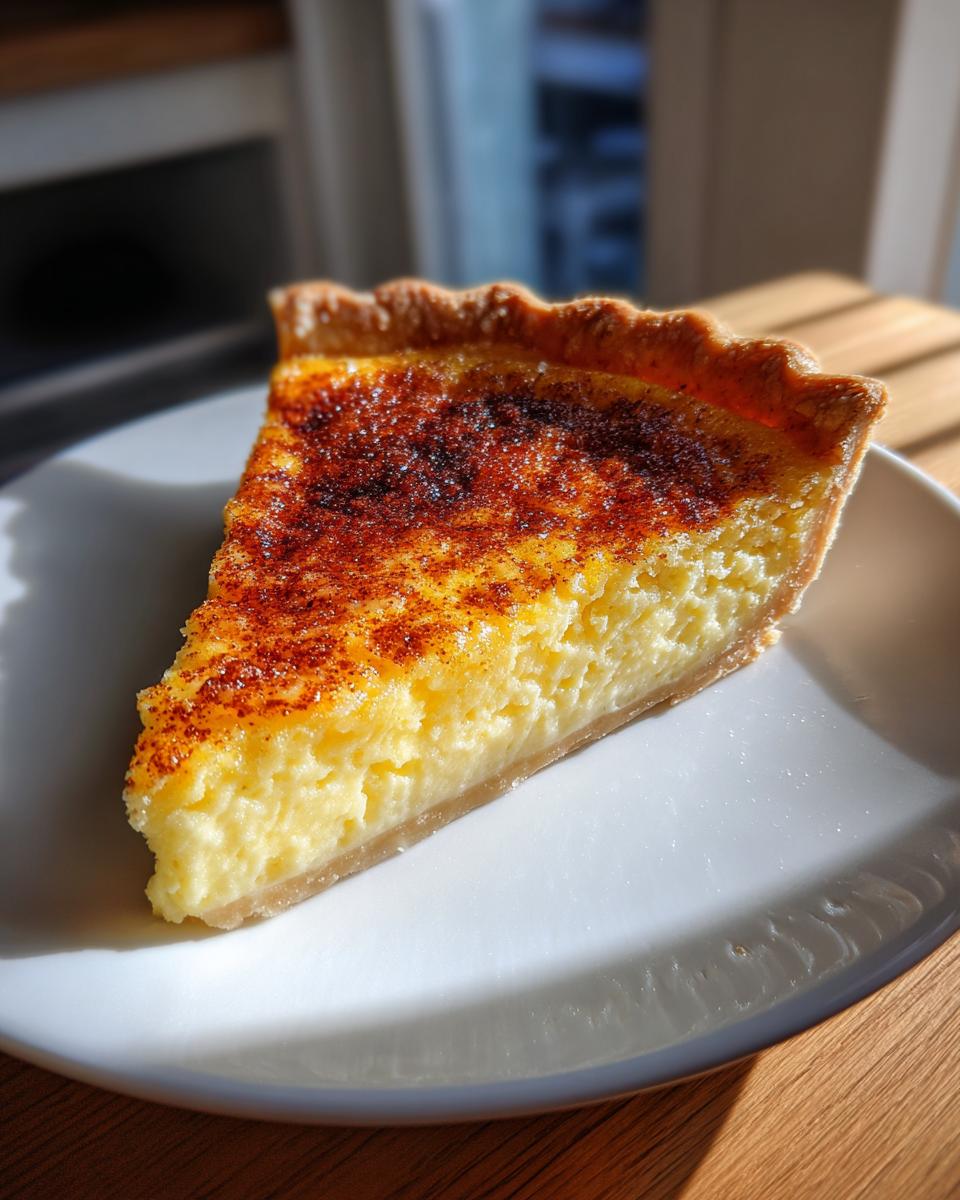
Carefully pour that liquid gold into your waiting pie shell. Before it goes in the oven, take that tiny bit of cinnamon and just dust it super lightly over the top liquid. This gives you that gorgeous, slightly mottled brown top without messing up our beautiful smooth surface.
Baking the Custard Pie: The No Crack Custard Pie Technique
This is where the E-E-A-T comes in! I know everyone stresses about cracks, but we combat them with technique, not panic. Make sure your pie goes into the lower third of your oven. That slightly lower heat helps the filling set slowly and evenly. I’ve got some tips for avoiding cracks in a totally different recipe, but the principle is the same: gentle setting is key. You can check out my no-crack cheesecake tips for more background on slow setting!
Bake this beauty for about 45 to 55 minutes. You need to resist opening that oven door for at least the first 30 minutes—peeking early drops the temperature too fast and shocks the filling. When it’s done, the edges should look totally set, but if you gently nudge the pan, the very middle should have just a little wobble, like Jell-O on a short set. That slight jiggle means you nailed it!
Cooling and Chilling Your Creamy Baked Custard Pie
Don’t rush this last part either, because cooling is just as important as baking for that silky, smooth texture. Pull the pie out and let it sit completely undisturbed on a wire rack. Slow cooling lets the filling finish cooking gently and is crucial for preventing that awful surface cracking.
Once it’s cooled down to room temperature—give it at least an hour on the counter—cover it loosely with plastic wrap and move it into the fridge. You want this pie chilled for a minimum of 4 hours. Honestly, overnight is best! Chilling is what transforms that baked liquid into that perfect, rich, sliceable custard dessert that tastes like tradition.
Tips for an Old School Custard Pie That Impresses
You’ve got the simple ingredients and the gentle mixing down—that’s already huge! But if you really want this to taste like one of those genuine, Old Fashioned Dessert Recipes that people talk about years later, here are a few little tweaks I picked up that elevate this standard recipe.
First, let’s talk about that crust again. It absolutely must be unbaked. If you try to use a partially baked crust, the moisture from the liquid filling will turn the bottom into a gummy mess before the top sets. We need that raw crust to absorb just enough moisture during the bake to become flaky, not soggy. If you love exploring other Traditional Pie Recipes that require a crisp bottom, you might want to check out how I handle pie dishes over at my buttermilk pie recipe.
Second, while this recipe calls for cinnamon on top, many true ‘old school’ versions skip that completely and use a tiny dusting of freshly grated nutmeg instead. Nutmeg gives you a warmer, deeper spice note that plays so well with the vanilla. Try that next time!
And finally, when you take the pie out, don’t stare at it! Resist the urge to poke it or move it around too much while it cools on the rack. Patience here is how we promise that silky texture and avoid any stress headaches. It’s worth the wait, trust me on this one.
Serving Suggestions for Your Vanilla Custard Pie
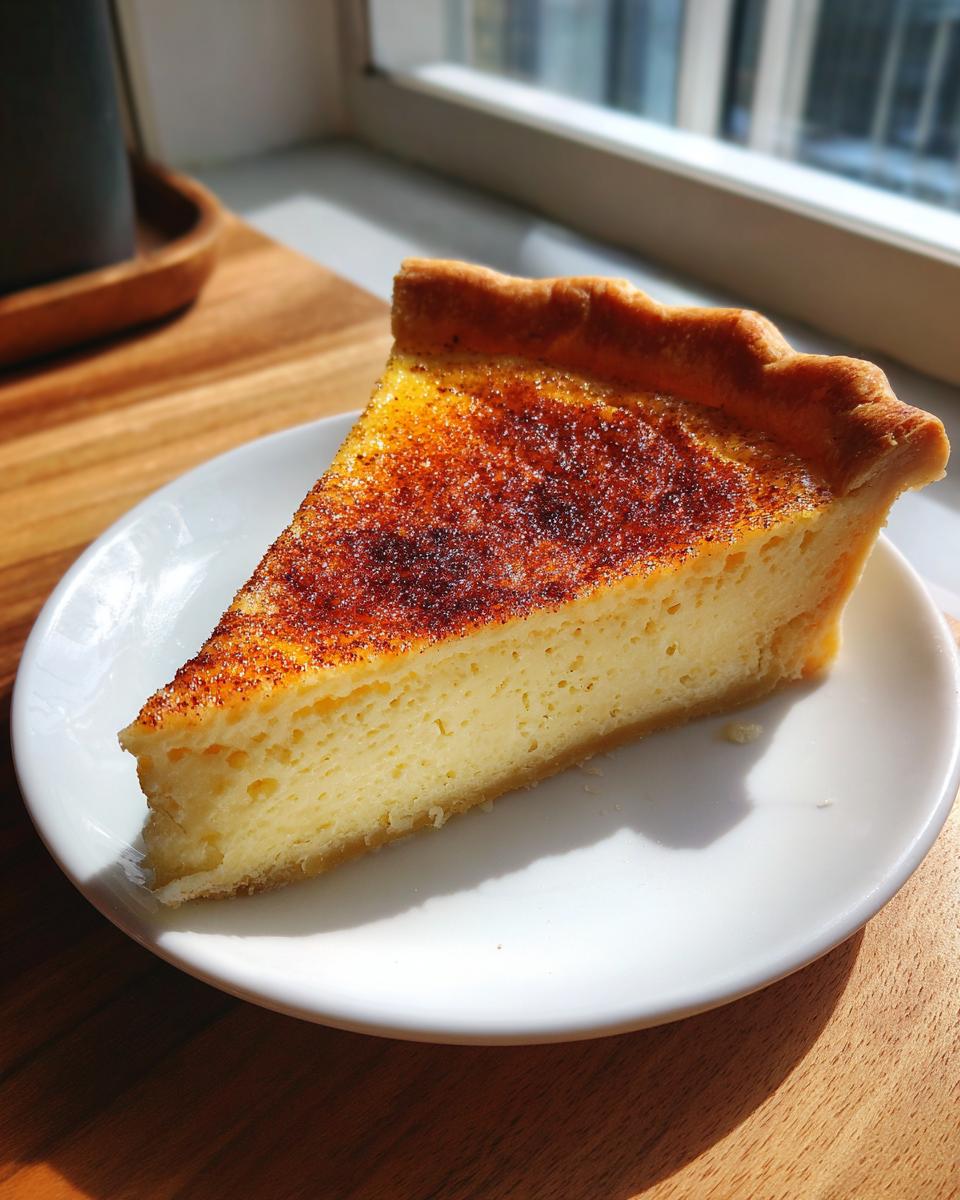
After all that patient cooling time, it’s time to enjoy this gorgeous Vanilla Custard Pie! Because the filling is so wonderfully simple and creamy, it actually pairs beautifully with almost anything bright or warm.
If you’re serving it warm—though I prefer it fridge-cold—a simple cup of strong, hot coffee is just the ticket. The heat contrasts perfectly with the chilled filling. If you want to dress it up a little bit after it’s chilled, skip the heavy whipped cream.
Instead, try a small handful of fresh raspberries or sliced strawberries scattered around the plate. That little bit of tart fruit cuts through the richness of the eggs and sugar just right. Sometimes, I’ll even just add an extra, very light dusting of cinnamon or nutmeg right before it hits the table. That’s it—simple elegance!

Storage and Reheating for This Classic Custard Pie Recipe
Because this is such a delicate egg custard pie, leftovers need respectful handling! Once it’s fully chilled, cover that pie tightly—plastic wrap works great—and keep it in the refrigerator. Trust me, it stays fantastic for about three to four days. Seriously, the texture is often even better on day two!
Now, here’s the big caveat: heat. Please, please don’t try to reheat slices of this pie in the microwave or oven. High heat messes up that lovely, silky custard structure, and you’ll end up with rubbery disappointment. This dessert is designed to be eaten cold, straight from the fridge. That’s when it achieves its peak, smooth comforting deliciousness.
Frequently Asked Questions About Egg Custard Pie
It happens! When you’re working with delicate baked custards, you’re bound to have a few questions pop up. I pulled together the questions I hear most often about making this classic Egg Custard Pie. Hopefully, these tips help you feel totally confident before you slide that pie into the oven!
Why did my custard pie crack when baking?
Oh, the dreaded crack! This is the number one worry for everyone making a Creamy Baked Custard Pie. Cracking is almost always caused by the custard setting too fast or unevenly, which pulls the surface apart. To beat this, remember the three rules we went over: one, never over-whisk to avoid incorporating air; two, bake it low and slow in the lower rack; and three, allow it to cool slowly on the counter before chilling. If you follow those steps, you’re going to get that beautiful, smooth top!
Can I make this custard pie ahead of time?
You absolutely can, and I highly recommend it! This recipe truly shines when it has time to set up properly in the fridge. While it’s technically ready after 4 hours of chilling, I find the texture is much firmer and more uniform if you make it the day before you plan to serve it. It keeps beautifully covered in the fridge for up to four days. If you like planning ahead for big meals, you might enjoy my recipe for make-ahead French toast casserole too!
What is the difference between this and a Southern Style Custard Pie?
That’s a great question, and it shows you know your pies! While both are comforting classics, a traditional Southern style often gets its structure and richness from using cornstarch or sometimes evaporated milk instead of, or in addition to, relying purely on the eggs. Our recipe is the pure, Old Fashioned style that uses milk, sugar, and eggs as the core structure builders, giving it that lighter, more delicate set than some of the denser Southern versions. It feels a little more like an English custard tart, just richer!
Nutritional Estimates for Your Homemade Custard Pie
Now, I know we’re baking for comfort here, not for calorie counting, but I always like to give you a heads-up on what’s in the pie. This Old Fashioned Creamy Egg Custard Pie is rich because it uses whole milk and real eggs, which is exactly what makes it so darn tasty!
Based on 8 generous slices, here are the estimates for a single slice of this custard pie:
- Serving Size: 1 slice
- Calories: 280
- Sugar: 25g
- Fat: 14g (6g Saturated)
- Carbohydrates: 32g
- Protein: 7g
Just keep in mind that these are just estimates, you know how it goes! Things like the brand of your pie crust or exactly how much butter you used trimming the edges can change things up a little. This data is just a starting point based on the basic pantry staples listed in the recipe. If you use a pre-made crust versus one made with all-butter shortening, you’ll see swings in the fat content. But either way, it’s a classic comfort treat!
Share Your Old Fashioned Custard Pie Experience
Whew! You’ve made it through the gentle mixing, the slow baking, and the even slower chilling process. Now comes my absolute favorite part: hearing about your kitchen success! I built YumDrizzle because I truly believe that sharing food—and sharing the joy of making it—is how we connect with people.
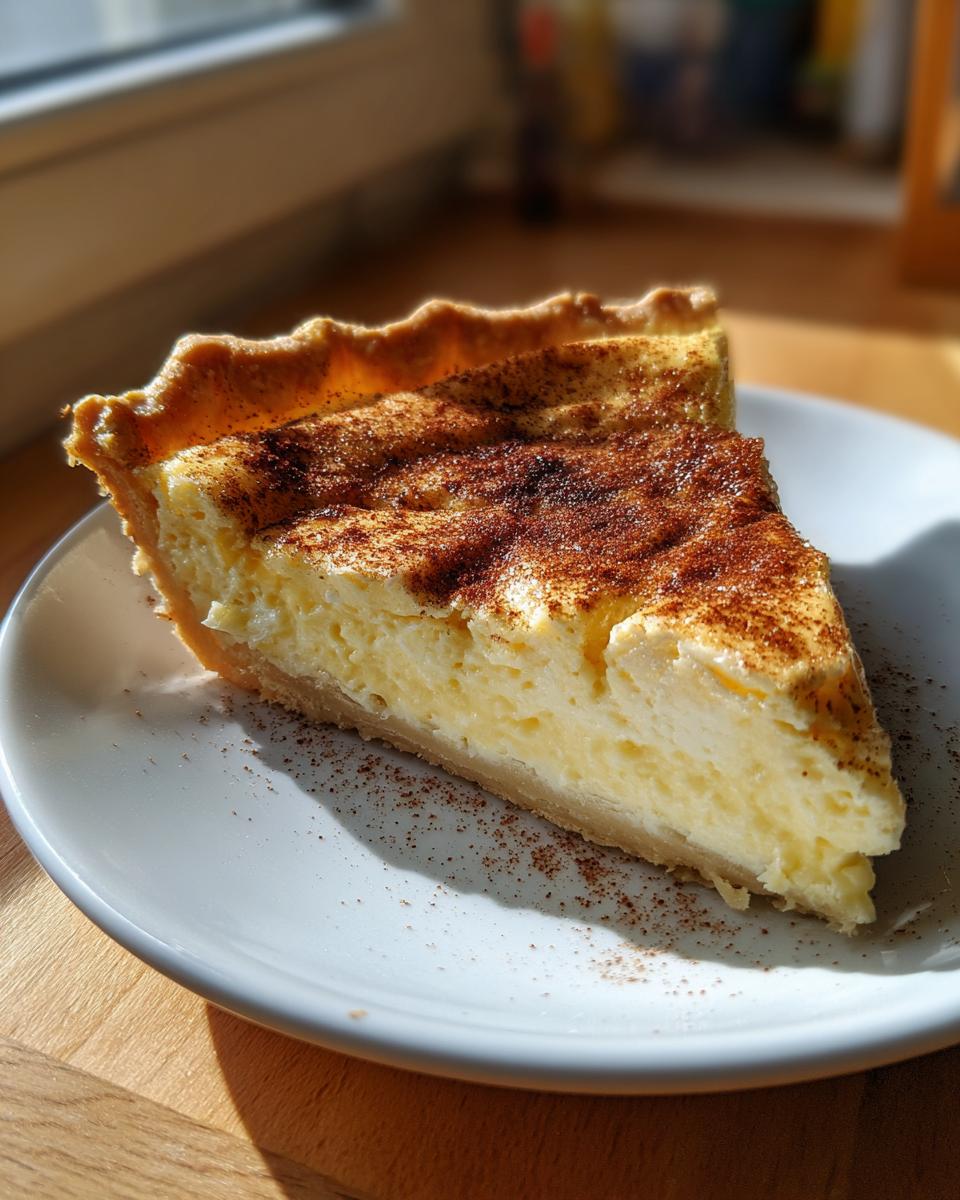
When you slice into your Old Fashioned Custard Pie and see that perfect, silky interior, I want to know about it! Did it turn out exactly like Grandma used to make? More importantly, did you try those gentle tips like baking on the lower rack or avoiding that oven door peek? If you managed a completely crack-free top, please shout it out in the comments!
Go ahead and give this recipe a solid 5 stars if it brought some comfort to your table. If you snapped a picture of that perfect slice—maybe with a little raspberry on top as we talked about—please tag us on social media! If you have any questions about tweaking or substituting ingredients for next time, my contact page is always open for a chat. Send me a message anytime; I love seeing your beautiful results!
PrintOld Fashioned Creamy Egg Custard Pie with Cinnamon and Vanilla

Make this classic, old-fashioned egg custard pie for a comforting dessert. This recipe delivers a silky, smooth vanilla filling in a flaky crust, perfect for holidays or any family gathering.
- Prep Time: 15 min
- Cook Time: 55 min
- Total Time: 1 hour 50 min
- Yield: 8 servings 1x
- Category: Dessert
- Method: Baking
- Cuisine: American
- Diet: Vegetarian
Ingredients
- 1 unbaked 9-inch flaky pie crust
- 1 1/2 cups whole milk
- 3 large eggs
- 3/4 cup granulated sugar
- 1 teaspoon pure vanilla extract
- 1/4 teaspoon ground cinnamon (plus extra for dusting)
- Pinch of salt
Instructions
- Preheat your oven to 350 degrees F. Place your unbaked pie crust into a 9-inch pie plate. Crimp the edges as desired.
- In a medium bowl, whisk together the sugar and salt.
- In a separate bowl, lightly beat the eggs. Whisk the sugar mixture into the eggs until combined.
- Slowly whisk in the whole milk and vanilla extract until the mixture is uniform. Do not over-whisk; you want to avoid incorporating too much air to prevent cracking.
- Pour the custard mixture carefully into the unbaked pie shell.
- Lightly dust the top of the liquid custard with the ground cinnamon. This helps create a nice color without disturbing the smooth filling.
- Bake for 45 to 55 minutes. The pie is done when the edges are set, and the center has only a slight jiggle when gently shaken.
- Remove the pie from the oven. Let it cool completely on a wire rack before slicing. Cooling slowly helps prevent cracks.
- Chill the pie for at least 4 hours before serving for the best, silkiest texture.
Notes
- To achieve a crack-free top, bake the pie in the lower third of your oven and avoid opening the oven door during the first 30 minutes of baking.
- For a richer flavor, substitute half the whole milk with heavy cream.
- This recipe uses simple pantry staples, making it an easy homemade custard pie.
Nutrition
- Serving Size: 1 slice
- Calories: 280
- Sugar: 25g
- Sodium: 180mg
- Fat: 14g
- Saturated Fat: 6g
- Unsaturated Fat: 8g
- Trans Fat: 0g
- Carbohydrates: 32g
- Fiber: 1g
- Protein: 7g
- Cholesterol: 95mg