
Christmas morning needs a centerpiece that smells like heaven and tastes like pure nostalgia, right? Forget wrestling with complicated pastry when the relatives are waiting! I want you to picture this: a towering, pull-apart sweet roll formation smelling strongly of cinnamon, shaped exactly like a perfect fir tree. That’s what we’re achieving today with these stunning, fluffy christmas tree cinnamon rolls.
My time out on the road taught me that the best experiences aren’t about stress; they’re about accessible magic. This recipe is our secret weapon for that. We’re giving you two ways to make this happen! You can use my absolute favorite homemade dough—the one that guarantees maximum fluff—or, if you’re running short on time, we have a simple hack using Pillsbury that still looks incredible. Either way, you’re bringing amazing flavor and tradition to the table without needing a culinary degree. Ready to make this your best Christmas morning breakfast idea yet?
Check out some other easy meals guaranteed to make your holiday simpler when you need quick wins: some of my favorite easy breakfast recipes should do the trick!
- Why These Christmas Tree Cinnamon Rolls Are Your New Holiday Must-Make
- Gathering Ingredients for Your Christmas Tree Cinnamon Rolls
- The Festive Cinnamon Rolls Shaping Guide (Homemade Dough)
- Quick Method: Store Bought Cinnamon Roll Hacks Holidays Version
- Assembling and Proofing Your **Christmas Tree Cinnamon Rolls**
- Baking and Creating the Perfect Glaze for Festive Cinnamon Rolls Shaping Guide
- Decorating Christmas Cinnamon Rolls for a Showstopper Centerpiece
- Storage and Reheating Instructions for Holiday Brunch Centerpiece Sweets
- Frequently Asked Questions About Christmas Morning Treats
Why These Christmas Tree Cinnamon Rolls Are Your New Holiday Must-Make
Seriously, this recipe is less about baking and more about creating instant holiday memories. When you pull this thing out of the oven, everyone stops talking. It’s a showstopper, trust me. We built this recipe around making your life easier while keeping that incredible homemade taste locked in.
-
Perfect for Christmas Morning Breakfast Ideas
Imagine the kids waking up to a warm, giant tree made of gooey rolls! If you use the store-bought dough hack, this centerpiece comes together in half the time, leaving you free to actually enjoy the presents.
-
Two Paths to Perfection: Scratch Dough or Quick Hack
I know some of you roll your own dough—and if you do, I’ve linked my favorite base recipe for the ultimate experience right here. But if you need a fast fix for a super impressive result using store bought cinnamon roll hacks holidays style, we cover that completely too. Zero guilt in choosing easy!
-
Achieving the Ideal Fluffy Holiday Sweet Rolls Texture
The goal isn’t a dense bread; it’s layers that melt in your mouth. Whether you use the scratch recipe or the quick hack, the shaping method guarantees those rolls expand just enough to touch, creating that delightful, soft, pull apart Christmas bread texture.
Gathering Ingredients for Your Christmas Tree Cinnamon Rolls
Okay, Jax here. Finding the right tools for the job is crucial, even when we’re aiming for accessibility! You don’t need anything fancy, but we do need precision, especially when mixing up that unbelievably delicious filling. Don’t skip the right sugar—it makes all the difference in the caramel notes of the final roll.
For the icing, listen to me closely on one point: the cream cheese *must* be softened. If it’s cold, your glaze will look clumpy, not glassy smooth. You want that luscious, smooth coating that melts perfectly over the warm rolls. For my favorite icing tips, I sometimes look back at my general frosting guide, but for this tree, we stick to the basics!
For the Shaped Sweet Rolls for Winter Holidays Base
Whether you’re making my scratch dough (which I hope you do!) or cracking open a can, these are the players you need for the main body and the filling:
- One batch homemade cinnamon roll dough, or grab one can of refrigerated dough—yes, the whole package!
- For the filling, make sure you use 1/2 cup of unsalted butter, melted down beautifully.
- 1/2 cup of light brown sugar, and this needs to be *packed* tight into your measuring cup, folks. That molasses is where the flavor lives!
- 1 tablespoon of ground cinnamon—spread it edge-to-edge!
Cream Cheese Icing Components
This glaze is rich but thin enough to drizzle everywhere, which is perfect for a holiday centerpiece sweet. Make sure you pull your cream cheese out early!
- 8 ounces of cream cheese, softened to room temperature. I mean totally soft, spreadable, no resistance soft.
- 1 cup of powdered sugar, sifted if you’re feeling fancy, but honestly, just whisk it well.
- 1/2 cup of cold heavy cream. The cold helps keep the icing thick enough to coat.
- 1 teaspoon of vanilla extract—the good stuff, if you have it!
- Don’t forget some green food coloring if you want that vibrant holiday tint!
The Festive Cinnamon Rolls Shaping Guide (Homemade Dough)
Alright, if you went the scratch route, this is where the magic shape happens. This technique takes your beautiful, fluffy dough and transforms it into something instantly festive. Trust me, this method gives you the best visual payoff for that hardworking dough, and it helps build structure for that great pull apart Christmas bread feel later on.
Rolling and Filling the Dough Log
First up, punch down your risen dough *gently*—we don’t want to knock all that air out! Roll it out onto a lightly floured surface into a big rectangle, aiming for about 12 by 18 inches. Think big! Once it’s flat, take that butter, brown sugar, and cinnamon filling we mixed up and spread it evenly from edge to edge. Seriously, cover every corner. Now, roll that dough up super tight along the long side. You want one long, gorgeous cinnamon log. If it feels a little sticky, dust your hands *lightly* with flour.
**How to Make Cinnamon Roll Trees** by Twisting
This is the secret sauce for the tree look! Take your long log and use a sharp knife or a piece of thread to carefully slice it right down the middle, lengthwise. You now have two long, filling-striped ropes. Now, we twist! Lay the two halves side-by-side, cut-side up, and gently twist them together like you’re braiding hair. Keep that cut side facing up as much as possible. That exposed filling is what creates those beautiful, crusty ribbons when it bakes.
Now you just cut these twisted sections into 1-inch slices. These individual shapes are what you’ll arrange to look like your festive tree on the baking sheet later. For extra tips on mastering that perfect dough consistency before you even get here, check out my favorite scratch dough recipe!
Quick Method: Store Bought Cinnamon Roll Hacks Holidays Version
Listen, I get it. Christmas morning is sacred, and sometimes you just don’t have the energy to mix, knead, and wait for dough to rise. That’s why we always keep a backup plan in the fridge! Using that refrigerated dough is one of my favorite store bought cinnamon roll hacks holidays secrets because it lets you focus your energy on the decorating and the coffee.
You don’t even need to unroll the tubes! Open up that can of rolls—the whole package, don’t separate them yet. Lay the entire sheet of dough, still stuck together, onto a baking sheet lined with parchment paper. This is the canvas for our speedy tree!
Now, take a sharp knife—be careful with this part!—and just cut the outline of a giant triangle right into the unseparated dough. Imagine where the branches are going. Once you have your main tree shape defined, you’ll likely have some dough scraps left over from trimming the sides. Don’t throw those away! Roll those scraps up tight and use them to form a small, cute trunk right at the base of your triangle. Instant structure!
The beauty of this hack is that the factory dough is already perfectly portioned, so you skip the messy swirl and the slicing step needed for the homemade version. You’re already halfway to your beautiful centerpiece! We’ll talk about arranging them in the next section, but for now, you’ve got a beautifully outlined, festive shape ready to get cozy and puffy before baking.
If you want to see how others take the Pillsbury shortcut to festive baking, check this out: this recipe focuses right on that shortcut. It’s great for getting inspiration!
Assembling and Proofing Your **Christmas Tree Cinnamon Rolls**
Okay, whether you painstakingly twisted your homemade dough or neatly carved the outline of the store-bought version, we now have to put the pieces together on the baking sheet correctly. This stage determines if you get a giant loaf or a genuine pull apart Christmas bread experience. Patience during the proofing stage is what guarantees that melt-in-your-mouth fluffiness, so don’t rush this part!
Arranging for the **Pull Apart Christmas Bread** Effect
Take those individual slices—whether they were cut from your twisted log or carefully separated from your shaped sheet—and start building your tree on a parchment-lined 9×13 inch baking dish. Start wide at the bottom, angling the rows inward as you go up to create that triangle shape. Remember to leave a little bit of space, maybe half an inch, between each roll. If you pack them too tight, they bake into one solid mass. If you leave too much space, you get dry edges when they bake!
The little gap is key, because as they do their final puff, they should expand just enough to kiss their neighbors. That touch point is what creates those glorious, perfectly soft seams when you pull them apart later on Christmas morning. Oh, and don’t forget the trunk! Take one slice, stand it upright at the bottom point of your tree shape. That’s your little base for the star we’ll put on top later.
Once the tree is assembled, cover the whole dish loosely with plastic wrap. Now, you need to find a warm, draft-free spot in your kitchen for the final proofing. This is essential for achieving that ultimate light texture. We just want them to get puffy and friendly with each other. Let them sit undisturbed for 30 to 45 minutes. You’re looking for them to noticeably increase in size—they should look pillowy and feel soft to the touch. If you want to see how I handle overnight assembly for zero morning stress, definitely check out my tips on making rolls ahead of time!
Baking and Creating the Perfect Glaze for Festive Cinnamon Rolls Shaping Guide
Now for the part where all your hard work pays off! We’re putting these beauties into the heat. Preheat your oven to 375 degrees Fahrenheit. That’s a nice steady heat that helps the rolls brown nicely without drying out the inside. Place your shaped tree onto the middle rack.
Bake time is usually 20 to 25 minutes. Keep an eye on them after the 20-minute mark. You’re looking for that deep golden brown color on the edges. If you notice the edges browning too fast before the center is done—which can happen easily with a big centerpiece like this—just make a loose tent of aluminum foil over the top. That keeps the color nice while the inside finishes cooking through.
This is the perfect time to whip up that icing because these rolls need to be glazed while they are still warm! If you need a refresher on handling cream cheese frosting, I have a great guide on the basics of frosting consistency, but here is the quick rundown for this glaze:
Start with your softened cream cheese. You absolutely must beat that first, on its own, until it’s completely smooth and creamy. No lumps allowed! Once it looks like silk, start adding the powdered sugar slowly. Then, drizzle in your heavy cream and that vanilla extract. Beat it until everything is happily combined and spreadable. If you feel like it’s a bit too thick—maybe you packed your sugar too tightly—just add cream a half teaspoon at a time until you hit that perfect pourable consistency.
If you’re making extra green icing for decorating later, now is the moment to stir in that green food coloring. A drop or two goes a long way! We want festive, not swampy, right? Keep that glaze ready to go, because the minute these rolls come out of the oven, they need that sweet blanket wrapped around them!
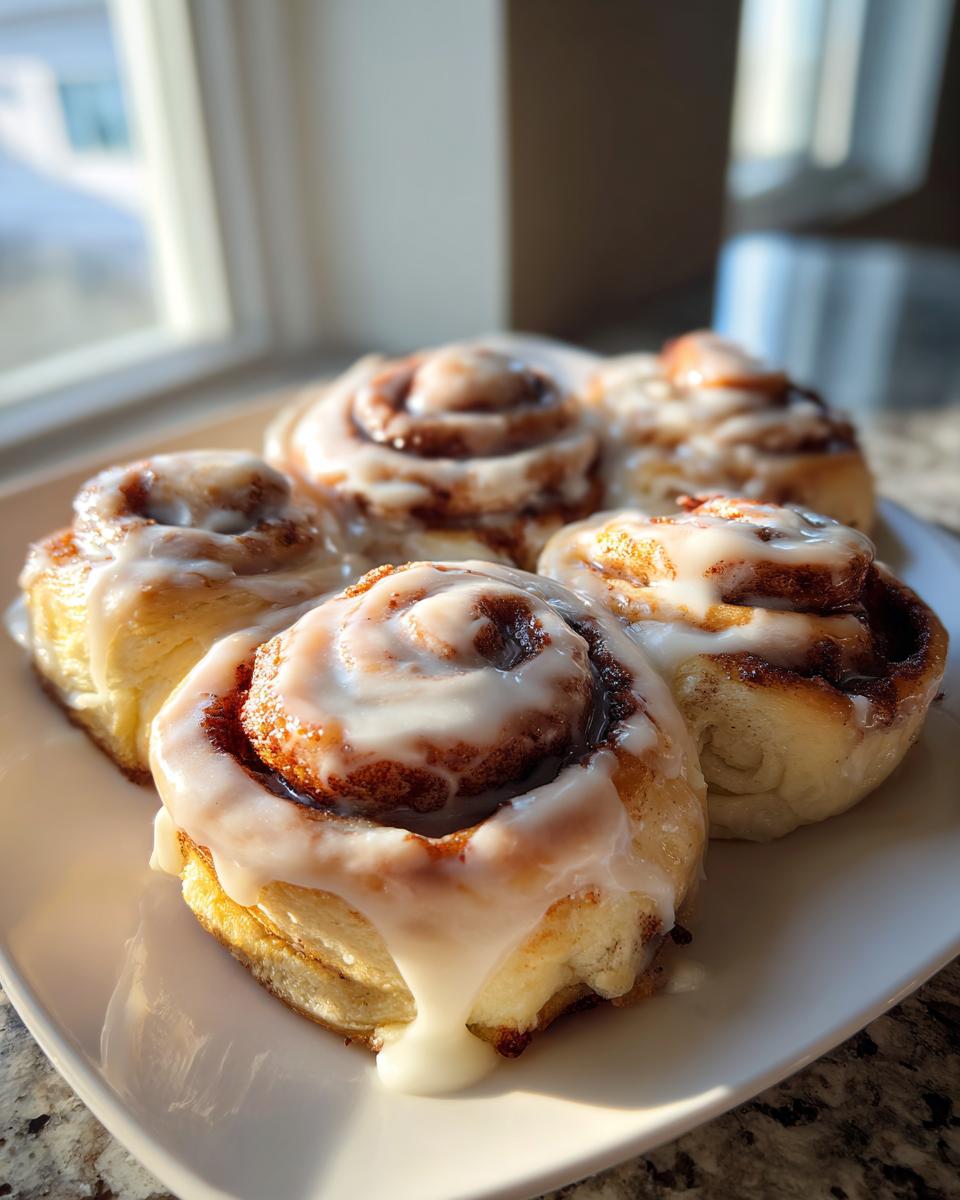
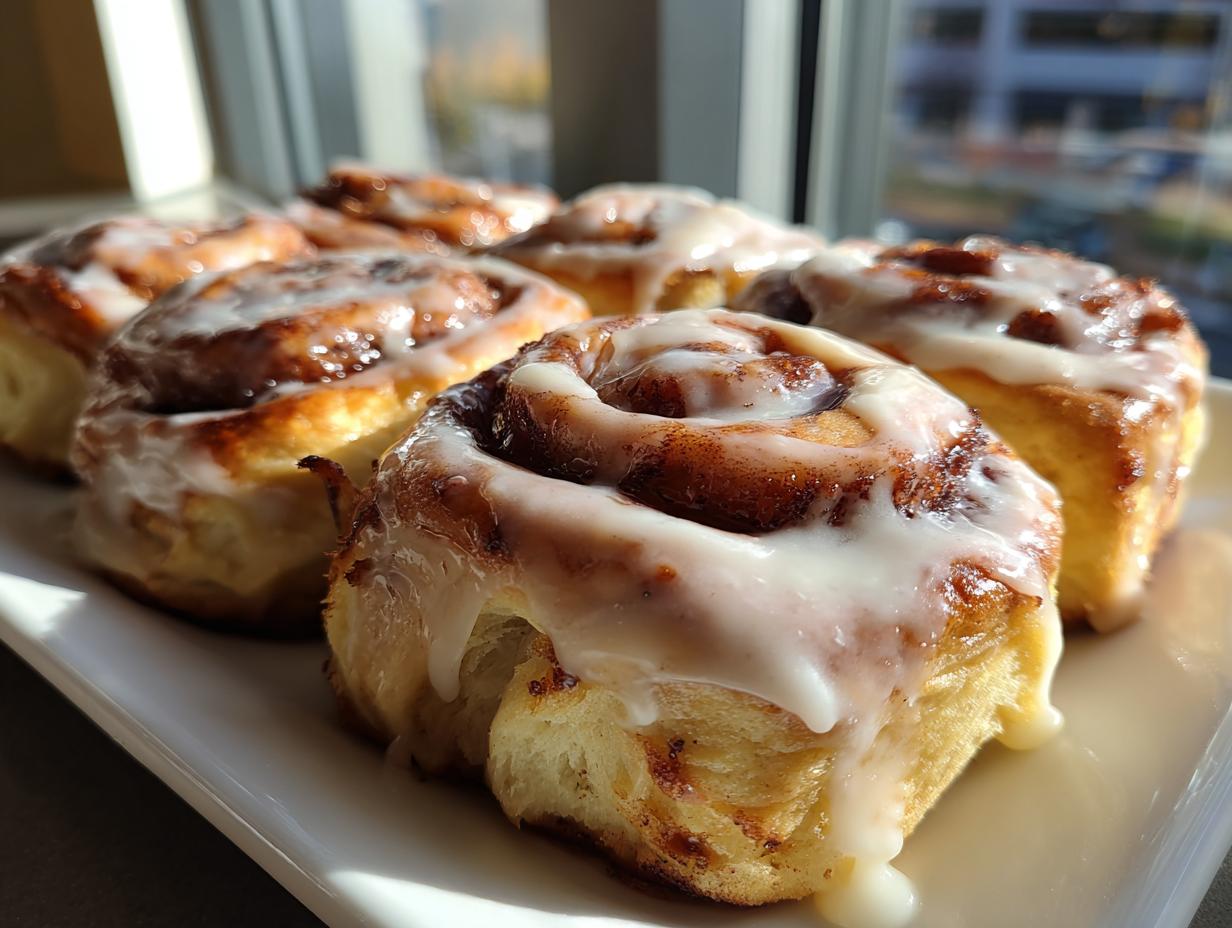
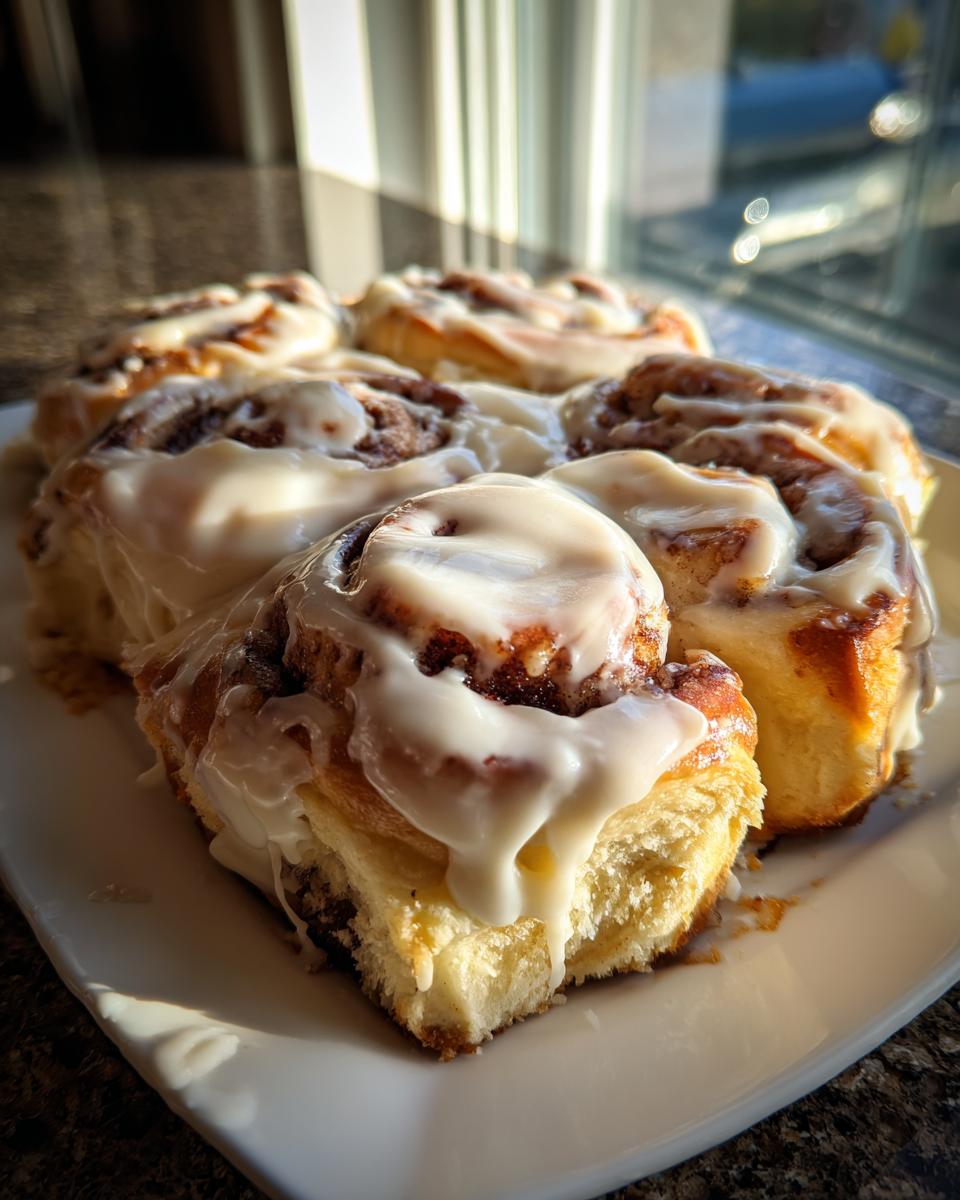
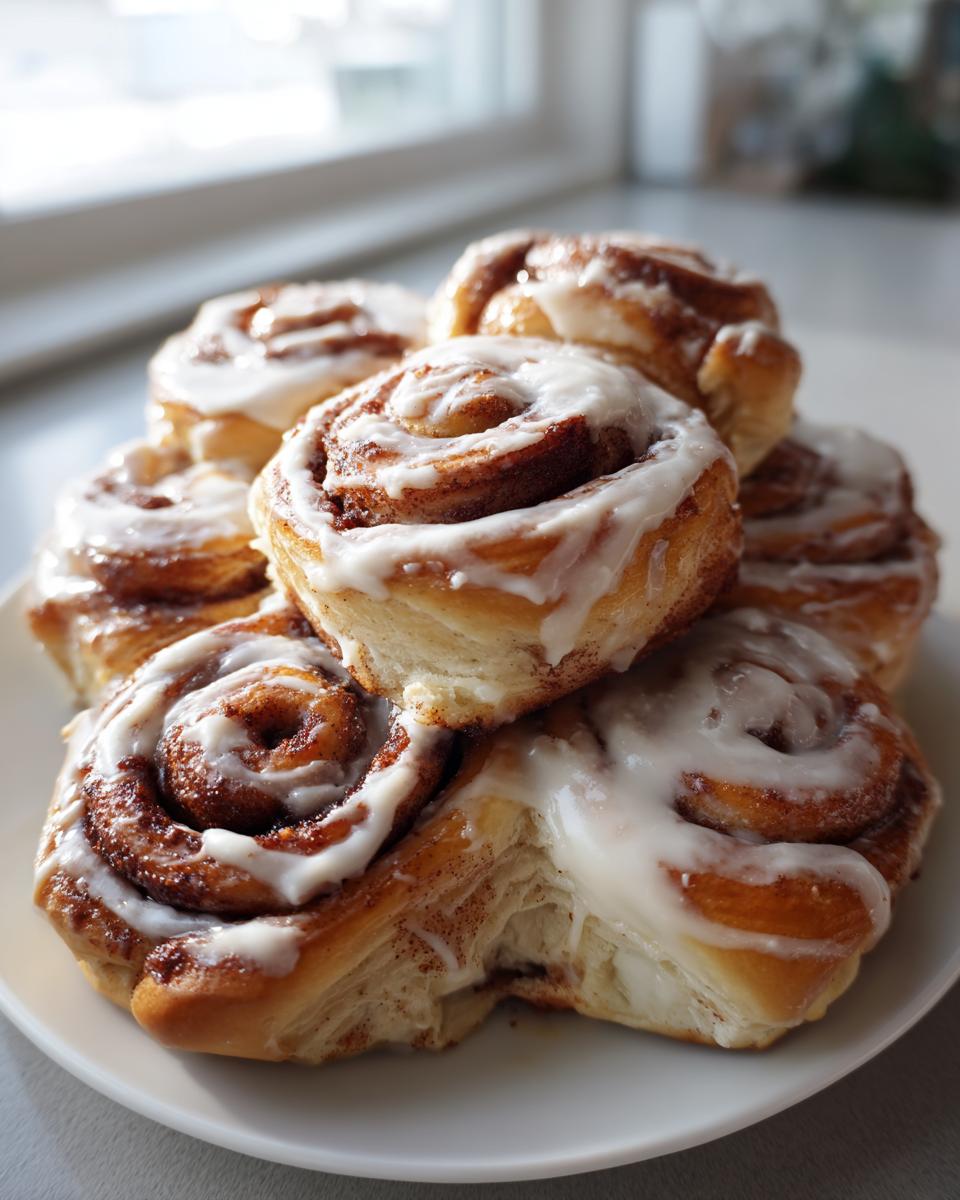
Decorating Christmas Cinnamon Rolls for a Showstopper Centerpiece
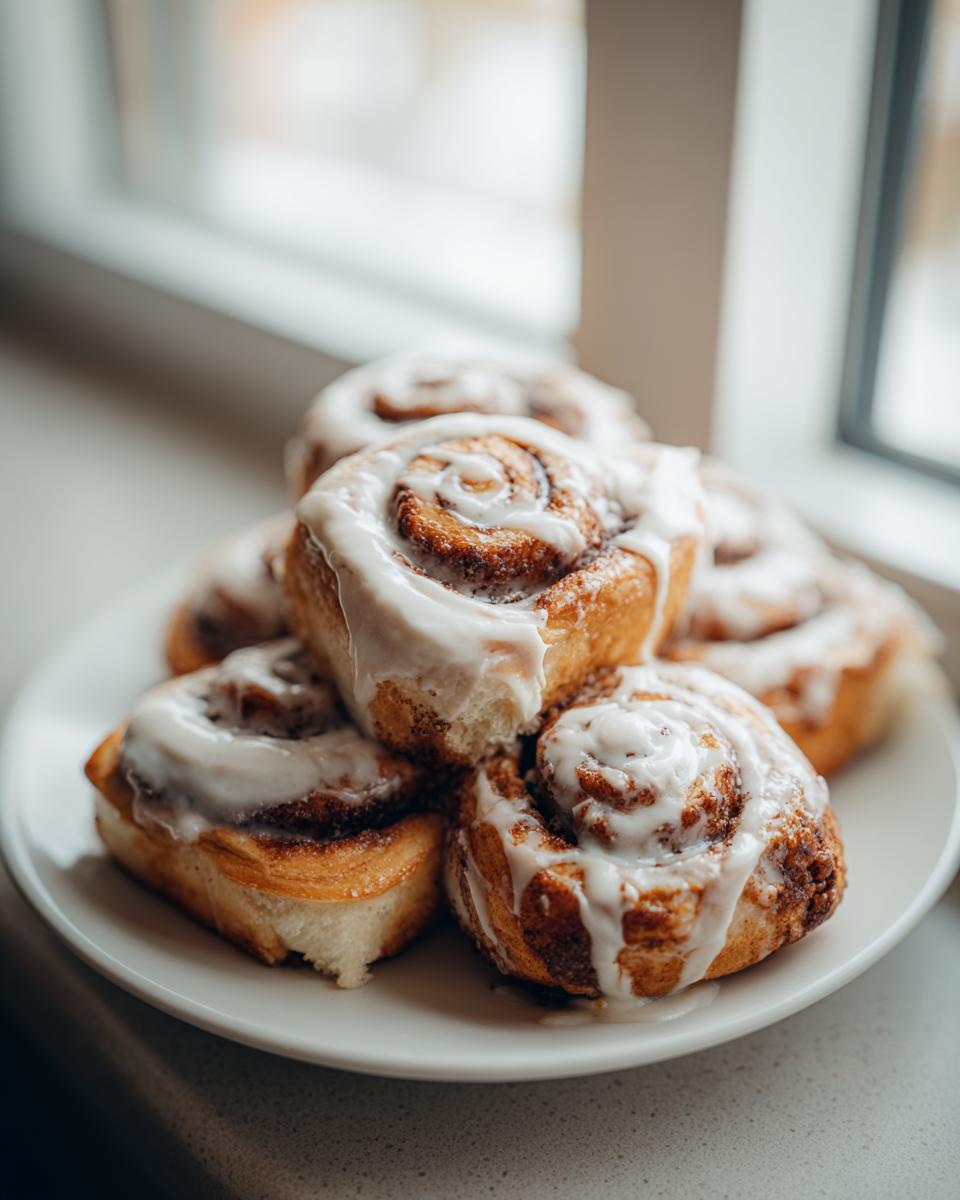
Okay, the rolls just came out of the oven—they are golden brown, they smell like the best part of Christmas morning, and they are hot! This is the make-or-break moment for presentation. You want that rich icing poured over the warmth so it melts just slightly into all the crevices. Don’t wait until they cool down completely, or you’ll just end up with a hard shell of frosting!
Grab that bowl of cream cheese icing we just whipped up. Using a spoon or an offset spatula, start draping that beautiful, slightly green (if you colored it!) icing all over the tree shape. Try to let it drip naturally down the sides—that’s what makes them look so wonderfully gooey and inviting. I personally like to make sure the ridges between the rolls get plenty of icing, since that’s where the best little bites hide later.
If you want to take this from delicious to ‘wow, I can’t believe you made this,’ we need the final flourish. Remember that small piece of dough we set aside for the trunk? If you cut a tiny star shape out of a separate small piece of dough using a little cookie cutter, you can bake that separately for about 8 minutes until golden. Once the rolls are iced, set that tiny star right on top of the dough trunk piece. Instant, edible tree topper!
After that, it’s time for sprinkles! Because we are aiming for maximum holiday cheer, use red and green sprinkles—or even some white ones for a snowy effect on the branches. If you’re looking for more ways to get your kitchen holiday-ready, I’ve got some great ideas for festive sprinkles and sugar cookies that might tickle your fancy!
This showstopper is guaranteed to be the highlight of your Christmas morning breakfast. You got the shape right, you got the fluffiness right, and now you have the decoration just perfect. For more truly joyous holiday breakfast inspiration, definitely click over and check this out!
Storage and Reheating Instructions for Holiday Brunch Centerpiece Sweets
The hardest part is over—you baked the tree! Now, we need to know how to keep that leftover magic alive for the next day. Since these rolls have that rich cream cheese glaze, they don’t behave exactly like plain rolls, but they are surprisingly resilient, which is perfect for handling leftovers after a big brunch.
If you have any of those gooey, delicious slices left, the best way to store them is right on the baking dish, covered tightly with foil or plastic wrap. Don’t worry about the glaze melting a bit; that just keeps the rolls moist overnight. At room temperature, tightly covered, these rolls—even with the glaze—are generally fine for about 2 days. I wouldn’t risk longer than that, especially once they’ve been sitting out during a party.
If you need them to last longer, pop the whole covered tree into the fridge. You can safely store them that way for up to 4 days. Just remember, chilling can tighten up the bread a little, so reheating is essential for bringing back that soft, straight-from-the-oven texture we worked so hard to achieve.
When it’s time to reheat, you have two options, depending on if you’re serving the whole tree or just grabbing a single slice. For reheating the entire thing, I recommend setting the foil-covered dish in a 300-degree oven for about 10 to 15 minutes. You must keep that foil on! It traps the steam and prevents the topping from turning hard or burning while the inside warms up through.
If you’re just grabbing an individual slice—say, for a quiet coffee outside the flurry of the main celebration—the microwave is your friend. Wrap that single roll in a slightly damp paper towel before heating it for about 15 to 20 seconds. That dampness helps steam the bread back to life, making it feel fresh and fluffy again. It brings back that perfect soft texture so you can enjoy your holiday brunch centerpiece sweets even on day two!
Frequently Asked Questions About Christmas Morning Treats
Anytime you make something this festive, questions always pop up! I totally hear you. We want this to be stress-free, memorable, and delicious. Here are a few things I get asked all the time about making these centerpiece rolls into perfect Christmas morning treats.
Can I prepare the christmas tree cinnamon rolls dough the night before?
Oh, you absolutely can! That’s one of my favorite ways to handle easy holiday breakfast recipes. If you used my scratch dough, you can assemble the entire tree shape (Step 5 for the homemade version) the night before, cover it tightly, and put it in the fridge overnight. The cold slows down the rising process. In the morning, just pull it out about an hour before you want to bake so it can warm up and have that final puff before going into the oven. If you use store-bought dough, I strongly suggest you cut and shape the tree, but don’t let it rise more than 30 minutes before baking—refrigerated doughs can get a little weird if left too long unbaked.
What is the best way to ensure my rolls are truly fluffy?
Fluffiness comes down to two main things, honestly. First, don’t over-mix your dough once the flour goes in. You want to stop mixing as soon as the ingredients are just combined. Overworking develops gluten, and gluten makes bread tough, not fluffy! Second, you *must* give them that second rise time, that 30 to 45 minutes where they sit puffy before baking. If your kitchen is cold, find a warm spot—like in an oven that you just turned off! That gentle warmth tells the yeast to wake up and inflate those rolls before they hit the heat.
Can I use a different type of sugar in the filling?
You sure can try, but I’m going to tell you why you might not want to! That dark brown sugar is non-negotiable for my **best homemade cinnamon roll dough for shaping** because it has more moisture and molasses, which creates that deep, almost butterscotch flavor that pairs so perfectly with cinnamon. If you substitute all white sugar, the filling will be sweeter but lack the depth of flavor. If you only have light brown sugar, that’s fine, but if you only have white, go ahead and use it, but maybe add an extra half teaspoon of molasses to the filling just to fake that rich caramel tone we love in our festive baking for kids recipes!
For more make-ahead magic that keeps your holiday mornings running smoothly, check out my tips over on my baked oatmeal guide—sometimes you just need something simple you can prep entirely the day before!
PrintThe Ultimate Homemade Christmas Tree Cinnamon Rolls

Make a festive centerpiece for your Christmas morning breakfast with these soft, pull-apart cinnamon rolls shaped like a Christmas tree. We provide instructions for a scratch dough recipe and a quick hack using store-bought dough.
- Prep Time: 30 min
- Cook Time: 25 min
- Total Time: 55 min
- Yield: 10 servings 1x
- Category: Breakfast
- Method: Baking
- Cuisine: American
- Diet: Vegetarian
Ingredients
- 1 batch homemade cinnamon roll dough (or 1 can refrigerated dough)
- 1/2 cup unsalted butter, melted
- 1/2 cup packed light brown sugar
- 1 tablespoon ground cinnamon
- 1/4 cup all-purpose flour
- 1/2 cup granulated sugar
- 1/4 teaspoon salt
- 1/2 cup (1 stick) cold unsalted butter, cut into small cubes
- 1/4 cup heavy cream
- 1 package (8 ounces) cream cheese, softened
- 1 cup powdered sugar
- 1 teaspoon vanilla extract
- Green food coloring (optional, for decoration)
- Small star-shaped cookie cutter (optional, for tree topper)
Instructions
- Prepare the filling: In a small bowl, mix the melted butter, brown sugar, and cinnamon until combined. Set aside.
- Prepare the dough (Homemade Method): Prepare your favorite fluffy sweet rolls dough recipe and let it rise according to the recipe instructions.
- Prepare the dough (Store-Bought Hack): Open the can of refrigerated cinnamon rolls. Do not separate the rolls.
- Shape the Tree (Homemade): Roll your dough into a large rectangle, about 12×18 inches. Spread the cinnamon filling evenly over the dough. Roll the dough tightly along the long edge. Cut the log in half lengthwise. Twist the two halves together, keeping the cut sides facing up.
- Shape the Tree (Store-Bought): Place the entire sheet of unseparated rolls onto a baking sheet lined with parchment paper. Using a sharp knife, cut a triangle shape out of the center of the roll sheet to form the tree outline. Use the leftover dough scraps to form a small trunk at the bottom.
- Arrange the Rolls: Cut the twisted dough log (homemade) or the shaped rolls (store-bought) into 1-inch thick slices. Arrange the slices on a parchment-lined 9×13 inch baking dish in the shape of a Christmas tree, leaving a small gap between the rolls so they expand and touch during baking. Use one slice for the trunk at the bottom.
- Second Rise: Cover the shaped rolls loosely with plastic wrap and let them rest in a warm spot for 30 to 45 minutes, or until puffy.
- Bake: Preheat your oven to 375 degrees Fahrenheit. Bake for 20 to 25 minutes, or until golden brown.
- Make the Glaze: While the rolls bake, prepare the cream cheese icing. Beat the softened cream cheese until smooth. Gradually beat in the powdered sugar, vanilla extract, and heavy cream until the icing is smooth and spreadable. Add a drop or two of green food coloring if desired for a festive tint.
- Glaze and Serve: Remove the rolls from the oven. Immediately spread the warm glaze over the rolls. If using a star cutter, cut a small star from a piece of dough, bake it separately, and place it on top of the tree trunk area for decoration. Serve warm as your Christmas morning breakfast idea.
Notes
- For a pull apart Christmas bread effect, ensure the rolls are touching slightly before the final rise.
- If you want a richer flavor, use heavy cream instead of milk in your dough recipe.
- Decorate with red and green sprinkles immediately after glazing for extra holiday cheer.
Nutrition
- Serving Size: 1 roll
- Calories: 450
- Sugar: 45g
- Sodium: 350mg
- Fat: 24g
- Saturated Fat: 14g
- Unsaturated Fat: 10g
- Trans Fat: 0.5g
- Carbohydrates: 55g
- Fiber: 2g
- Protein: 6g
- Cholesterol: 55mg