
If you’ve ever needed a dessert that screams ‘special occasion’ but requires zero oven time, stop what you are doing. We’re talking bite-sized elegance that comes together faster than ordering takeout. These red velvet cake balls are genuinely one of the easiest, most impressive treats I’ve ever thrown together. I learned long ago on the road that the best flavors often come from the things you already have in the pantry—and that’s exactly where this recipe starts. We’re skipping the fussy baking step entirely and relying on a good quality cake mix and creamy frosting to do the heavy lifting. Get ready for your new favorite party staple.
- Why These Red Velvet Cake Balls Are Your New Favorite Quick Party Desserts
- Gathering Ingredients for Your Red Velvet Cake Balls
- How to Prepare Easy Cake Balls Recipe: Step-by-Step
- Ingredient Notes and Substitutions for Red Velvet Cake Balls
- Tips for Success When Making Red Velvet Cake Balls
- Make Ahead Desserts: Storing Your Red Velvet Truffles
- Serving Suggestions for Bite Sized Red Velvet Desserts
- Frequently Asked Questions About Red Velvet Cake Balls
- Share Your Festive Red Desserts Creations
- Estimated Nutritional Data for Red Velvet Cake Balls
Why These Red Velvet Cake Balls Are Your New Favorite Quick Party Desserts
When I was out on the road, time was the most precious commodity. That’s why I gravitate toward recipes like this. These red velvet cake balls are the ultimate crowd-pleaser because they deliver maximum festive flavor with minimal effort. You don’t have to fuss with ovens or cooling racks for hours.
- They are perfect No Bake Red Velvet Treats—just mix, roll, chill, and dip.
- They look absolutely stunning for any event.
- They fit perfectly into that category of Quick Party Desserts that saves the day when you realize you need something amazing tomorrow morning.
Speed and Simplicity: The No-Bake Advantage
You skip the whole baking stage, which is huge! That means less cleanup and fewer chances for things to go wrong. Honestly, because they are so foolproof, I always call this combination the Best Cake Ball Recipe for anyone who thinks they don’t have time to make homemade desserts. They come together so fast, the hardest part will be resisting eating them before they get dipped!
Gathering Ingredients for Your Red Velvet Cake Balls
When building these red velvet cake balls, the secret to keeping things fast is leaning on quality pre-made items. I learned that sometimes, hitting up the supermarket for a good boxed mix is the difference between making a dessert and skipping it altogether. We need just a few components to create that rich, tender center. Don’t worry about measuring flour or sugar; we’re taking a shortcut here!
Cake Base and Binder Ingredients
For the interior—the part that gets that incredible texture—you’ll need the actual cake components first. This recipe calls for one full box of red velvet cake mix, roughly 15.25 ounces. We mix that with what the box demands: water, vegetable oil, and three large eggs. But the real magic that binds all this into one perfect bite are the 16 ounces of cream cheese frosting, straight from the container. That shortcut makes these simple to assemble and instantly earns them the title of Cream Cheese Frosting Balls.
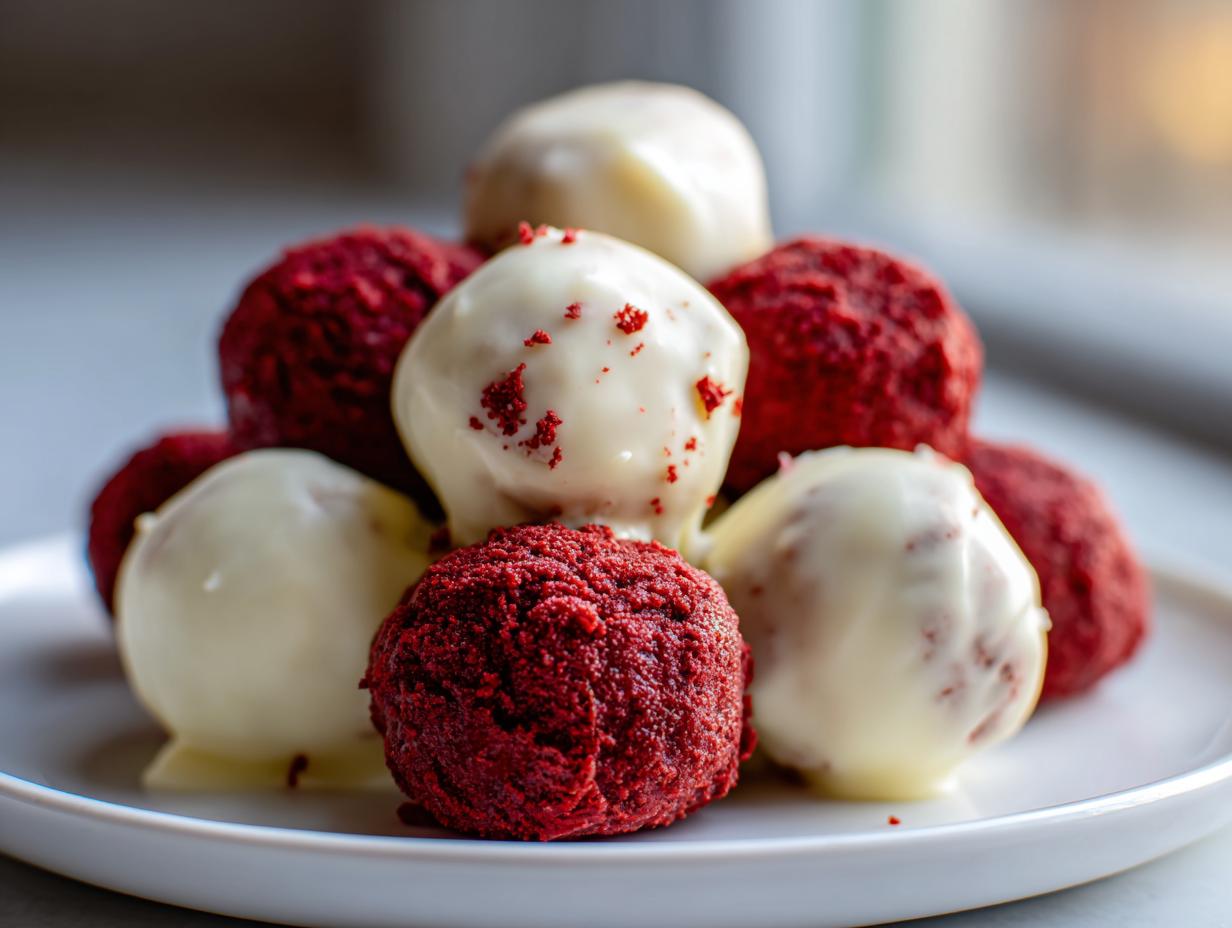
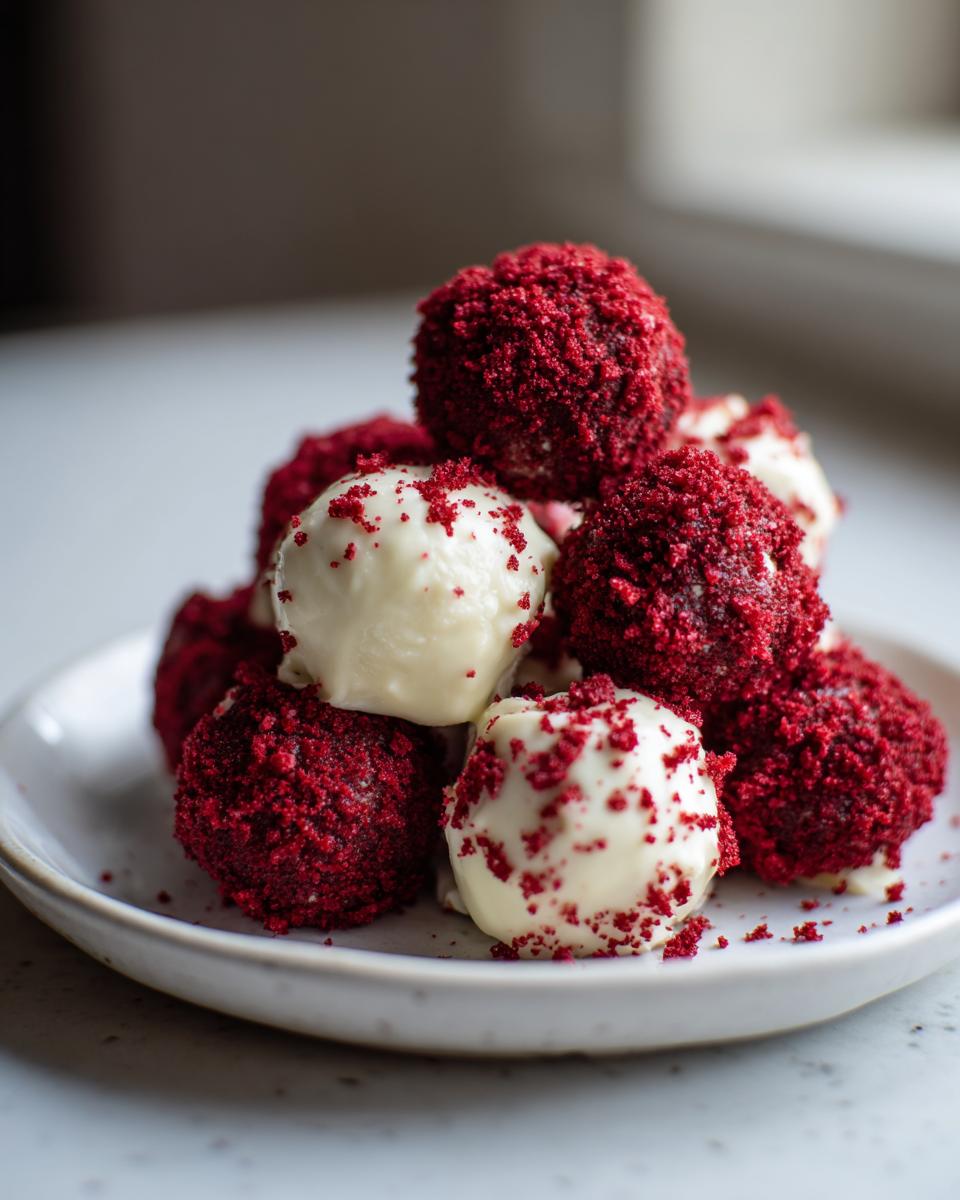
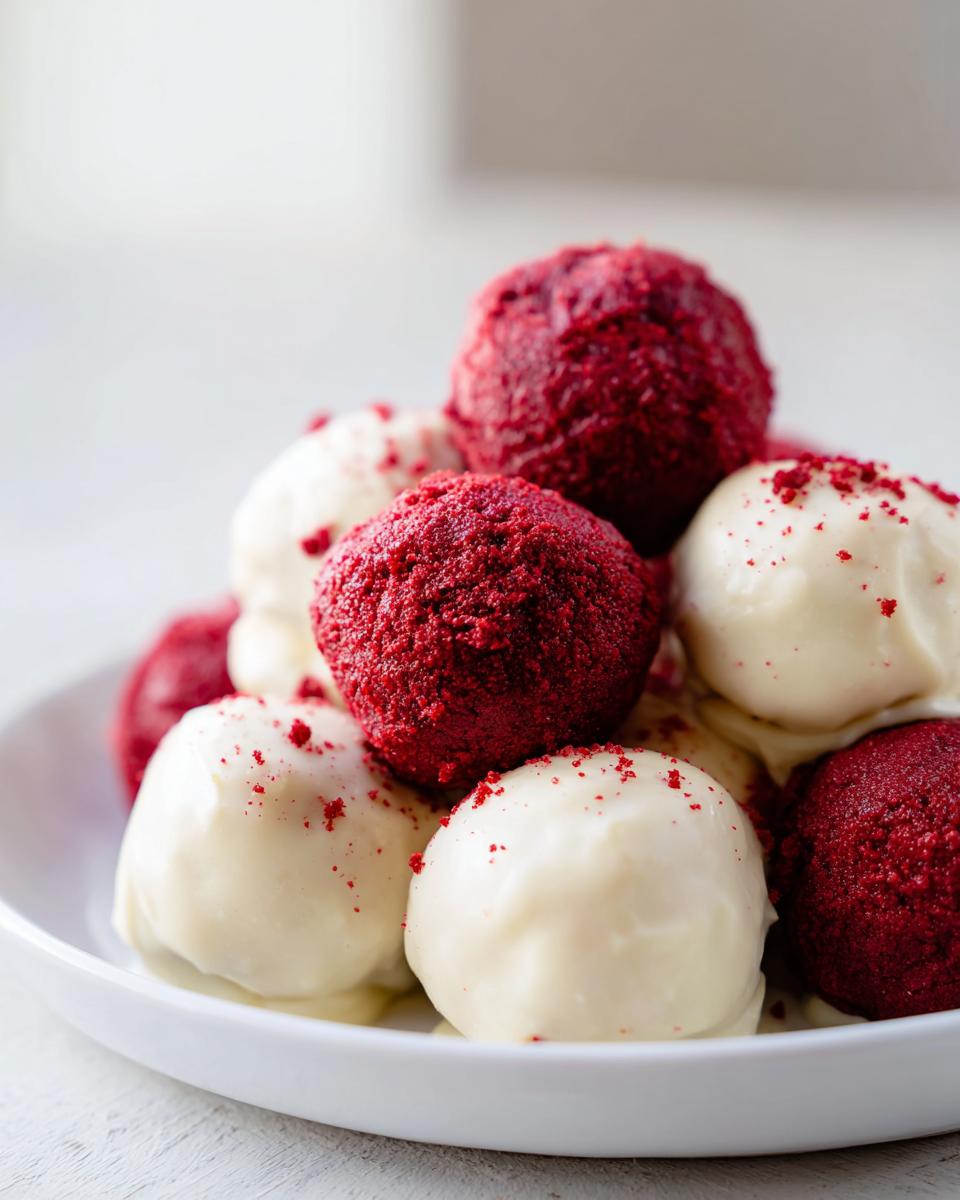
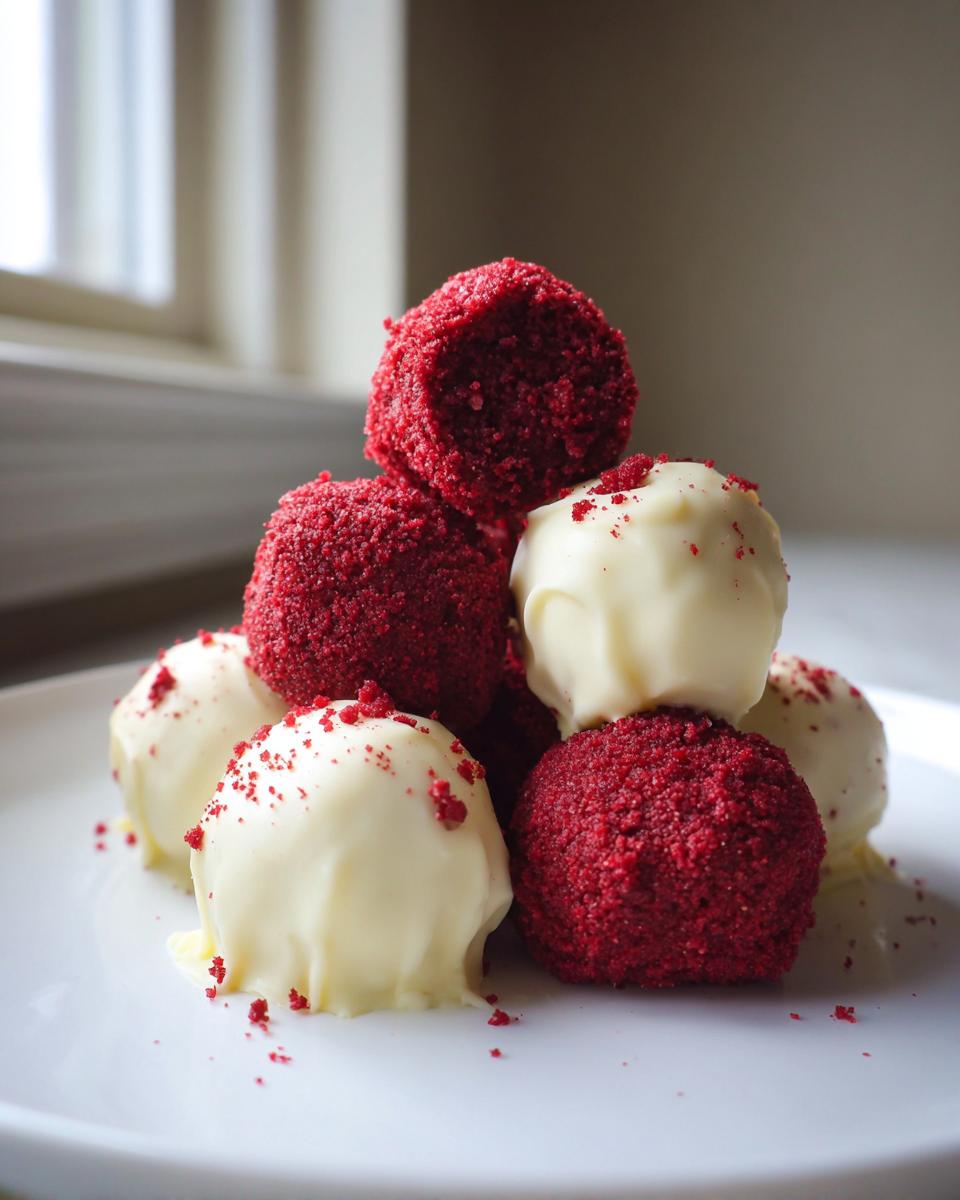
Coating and Decoration for White Chocolate Covered Red Velvet
Once your little red spheres are chilled, you need the shell. You’ll want about 24 ounces of white chocolate melting wafers. Melting wafers are much easier than trying to temper baking chocolate, trust me! For a super smooth dip that doesn’t feel thick or goopy, add just one tablespoon of coconut oil—it thins it out perfectly. And finally, grab some festive red sprinkles if you want to dress up these White Chocolate Covered Red Velvet bites for a party.
How to Prepare Easy Cake Balls Recipe: Step-by-Step
Okay, this is where the magic happens! Since we’re relying on a box mix, the actual hands-on time is ridiculously low, but we have to respect the waiting game—especially the chilling time. Follow these steps exactly, and you’ll have perfect red velvet cake balls ready for dipping. This whole method is so straightforward, which is why it’s a top favorite for creating delicious baked goods without turning on the oven.
Baking and Creating the Cake Crumb Base
First thing’s first: you need a cake! Whip up that red velvet cake mix exactly as the box says, using the required water, oil, and your three large eggs. Bake it in a standard 9×13 inch pan. Look, I know you’re eager, but you absolutely must let this cake cool down totally—and I mean totally—before you even touch it. Warm cake + frosting equals soup, and we don’t want soup! Once it’s cool, crumble it very finely into the largest bowl you have. A food processor makes this lightning fast, but honestly, using your hands feels right, so use whatever works for you.
Mixing and Chilling the Red Velvet Cake Balls
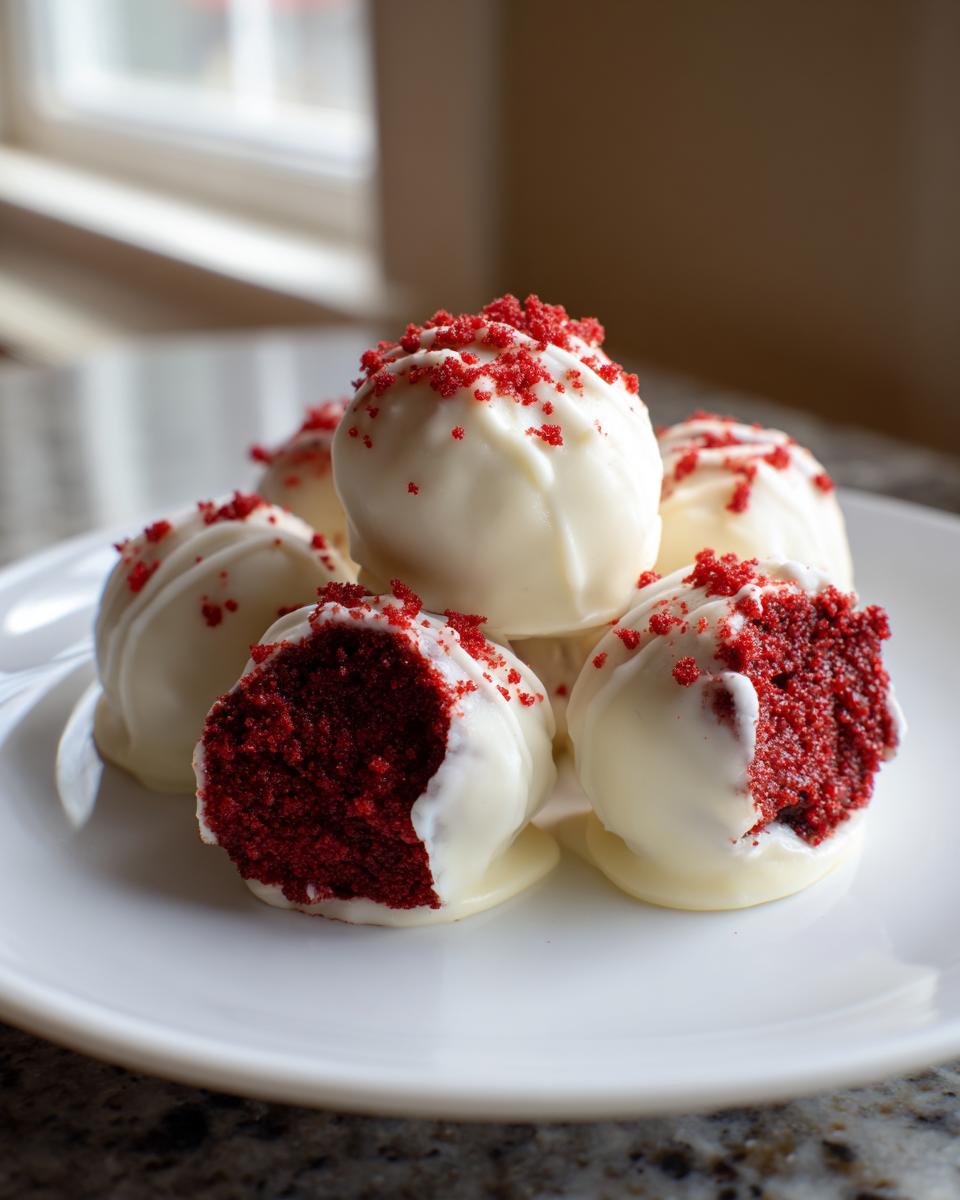
Now, dump that entire container of cream cheese frosting right on top of those fine crumbs! Mix it all up. Keep going until it’s one consistent, thick, deep-red dough that sticks together when you squeeze it. If it feels sticky, pop the whole bowl in the fridge for 15 minutes before rolling. Then, roll that dough into firm, uniform balls, about one inch wide. Line a baking sheet with parchment paper and place them all neatly on top. They need a trip to the refrigerator for at least 30 minutes. Don’t skip this chill time; it’s the secret sauce that stops them falling apart when you dip them!
Mastering the White Chocolate Coating Process
While the balls are chilling, melt your white chocolate wafers. I use the microwave, timing it in short, 30-second bursts, stirring aggressively in between each round until it’s silky smooth. If you added that optional coconut oil, this is when you stir it in! Once chilled, take your firm, cold balls and dip them one by one, making sure they are fully submerged. Use a fork to lift them out, and gently tap the side of the bowl to let the extra coating drip off. Plop them back onto the parchment paper, and if you’re decorating, sprinkle your festive tops on right away before that chocolate finishes setting. If you ever need help melding chocolate and needing a smoother dip, I have a great easy chocolate fondue recipe that explains melting tricks!
Ingredient Notes and Substitutions for Red Velvet Cake Balls
We went the cake mix route because, honestly, efficiency is my comfort zone, but I always get asked if you *have* to use a box mix for these red velvet cake balls. Listen, the beauty of this treat is its adaptability. Life happens, and sometimes you need that lightning-fast start. I know some folks are searching specifically for the 3 Ingredient Cake Balls trick, and that usually involves using store-bought finished cake, but we’re building from the ground up here just a tiny bit.
Cake Mix vs. Homemade Cake for Red Velvet Cake Balls
Using the mix saves you maybe 45 minutes of baking and cooling time, which is why it’s my go-to when I need quick party desserts. If you decide to bake your cake from scratch—and hey, hats off to you if you do!—just make sure that cake comes out dense. If you bake a light and airy sponge, once you start mixing in the frosting binder, it will turn to mush really fast. We need structure in these little guys!
Coating Alternatives to White Chocolate
While I love the stark contrast the white chocolate gives against the deep red interior—those are gorgeous White Chocolate Covered Red Velvet bites, right?—you absolutely do not have to stick with it. If you’re a milk chocolate fan, go for it! Dark chocolate works beautifully too, cutting through some of the sweetness from the frosting center. Just remember the rule about chilling: whatever you use for your Chocolate Coated Cake Bites, make darn sure the balls are cold before you dip them so the coating sets fast and doesn’t smear. For the best results with your binder, I highly recommend checking out my thoughts on the best cream cheese frosting recipe if you decide to go homemade on that part!
Tips for Success When Making Red Velvet Cake Balls
I feel like I’ve spent half my life tinkering in the kitchen, and with these red velvet cake balls, I’ve learned a few secrets that keep the recipe from turning into a sticky mess during the coating phase. When I talk about texture, I’m talking about making sure that inside mixture is sturdy enough to handle a dip in warm chocolate. My number one tip? Respect the cold! If your cake balls aren’t properly chilled, your coating will slide right off, or worse, stick to your hands when you roll them.
You remember how I mentioned chilling them for 30 minutes earlier? If you are making these on a humid day, or if your kitchen is just naturally warm, bump that time up to a solid hour. I even like to give them a quick five-minute freeze right before dipping. That super cold core acts like a brick, instantly setting the melted chocolate shell the second it touches it. It’s the cornerstone of getting those perfect, professional-looking red velvet cake balls every time.
Another thing I always watch out for is the quality of the melt. If you’re finding your white chocolate is separating or getting stiff halfway through dipping, don’t panic! As mentioned before, a tiny addition of coconut oil or even vegetable shortening can bring it right back to that smooth, glossy consistency. It’s all about resourcefulness. If I can get that perfect seal using ingredients I’d already have for other recipes, I’m happy. For even more general texture advice that carries over to other baking projects, check out my thoughts on my carrot cake recipe; texture tips are often universal!
Make Ahead Desserts: Storing Your Red Velvet Truffles
The absolute best part about making red velvet cake balls? They are the ultimate Make Ahead Desserts. Seriously, I wish everything I baked could be prepared days ahead! Since these don’t have a super perishable fresh fruit filling or anything, they hold up wonderfully, which is a lifesaver when you’re planning a big party or holiday spread.
When it comes to proper storage, the key is keeping them cool and shielded from strong odors. You want those luscious, dense centers and that crisp white chocolate exterior to stay perfect until serving time. These are best treated like a truffle, so we treat them right!
For short-term storage—say, you need them ready for the weekend—the refrigerator is your friend. Place your finished Red Velvet Truffles in a single layer in an airtight container. If you have to stack them, put a small piece of parchment paper between the layers so the chocolate coating doesn’t stick to itself or the container lid. They’ll stay great in the fridge for about a week, though honestly, my family rarely lets them last that long.
If you need to make these weeks ahead? You can absolutely freeze them. This is clutch for holiday prep! Just make sure the chocolate coating is completely set and firm first. Wrap the entire container well—maybe even wrap the whole thing in some plastic wrap followed by a layer of foil—to prevent any freezer burn or weird fridge smells from clinging to the chocolate. They freeze beautifully for up to three months. Just pull them out the day before you plan to serve them and let them thaw slowly in the refrigerator before taking them out to come fully to room temperature. Easy peasy!
Serving Suggestions for Bite Sized Red Velvet Desserts
Okay, we finally have these perfect little spheres dipped, decorated, and ready to hit the party table! How you serve these Bite Sized Red Velvet Desserts makes almost as much difference as how you make them. They are little bombs of flavor, so they pair well with things that cut through the richness, like something tangy or something warm.
For holidays, setting them up on a simple white platter lets that vibrant red color really pop against the white chocolate coating. If you’re making these for Valentine’s Day, you already know—heart sprinkles are mandatory! But presentation doesn’t stop at the plate. You want to think about what people are drinking alongside these rich treats.
If you’re serving these in the afternoon, a strong cup of coffee or a simple espresso shot is a wonderful counterpoint to the sweet cake and frosting center. If you’re doing a big buffet spread, or if you have kids running around, nothing beats a big batch of punch! I have this amazing Thanksgiving punch recipe that works year-round—it’s bright, bubbly, and the fruitiness cuts right through the richness of chocolate and cream cheese beautifully. They vanish so fast once they hit the table, but setting up a great little display makes them feel extra special!
Frequently Asked Questions About Red Velvet Cake Balls
Since everyone has a different approach to baking—and trust me, I’ve seen every trick in the book from my touring days—I figured I’d tackle the most common things folks ask me about making these red velvet cake balls. We want every batch to turn out perfectly, whether you’re making them for a huge party or just a Tuesday craving!
Can I make these without using cake mix?
Absolutely, you can! If you prefer going the full scratch route—and I respect that dedication—you certainly can bake your favorite red velvet cake recipe from scratch first. Just remember the heavy emphasis I put on texture earlier (that E-E-A-T thing means making sure your cake base is dense!). Store-bought mix provides a consistent, slightly denser crumb right out of the gate, which is why it works so perfectly with the frosting binder. Homemade will be slightly lighter, but you have full control over the flavor, so give it a shot!
What is the difference between cake balls and cake pops?
This is such a simple question, but it trips people up all the time! Honestly, there is zero difference in the actual edible truffle part. These little wonders are essentially the body of the Red Velvet Cake Pop Recipe—just without the stick shoved into them. If you wanted them to be cake pops, you’d follow the recipe exactly as written, chill the balls, and before you dip them, just insert a lollipop stick into the center of each chilled ball. Easy transformation!
How do I prevent my chocolate coating from cracking on the red velvet cake balls?
Cracking is usually caused by a temperature shock. The coating sets fast, but if the inside ball is room temperature, the chocolate coating contracts drastically when it hits the cold cake, and *crack*—it breaks right off! Rule number one is that the cake balls must be rock solid cold from the fridge or freezer before they even see the melted chocolate. Rule number two, as we talked about, is managing that chocolate. If your coating feels too thick when melting, a little bit of coconut oil (that’s my secret weapon!) or even a quick, gentle reheat will keep it fluid enough to coat without too much stress. A smooth coat sets without cracking!
If you ever have other burning questions, feel free to reach out to me via my contact page—I love hearing how everyone is tackling these recipes!
Share Your Festive Red Desserts Creations
That’s it! You’ve made it through the mixing, the chilling, and the decadent chocolate dipping. Now comes my favorite part: seeing how you brought these Festive Red Desserts to life in your own kitchen. For me, cooking has always been about sharing what works and celebrating the results with the community around you. I spent years serving my road crew, and now I want to celebrate with you!
If these red velvet cake balls turned out just as gorgeous and delicious as I hope they did, please do me a favor: head down to the comments below and drop a rating! Are they a solid five stars for quick party desserts? Let me know!
I’m especially keen to hear about your decorating game! Did you stick with simple red sprinkles, or did you get fancy with drizzles or different colored chocolate? Snap a photo and tag us on social media. Seeing those deep red bites makes my day and reminds me that good, accessible food is being made all over the country. Remember, YumDrizzle is all about making cooking fun, and there’s nothing more fun than that final flourish!
We’re all learning together here, and your feedback helps me keep these recipes as practical and delicious as possible for everyone else looking for that perfect, easy treat. Thanks for cooking with me today; you can always learn more about my philosophy on accessible food prep over on my About Page!
Estimated Nutritional Data for Red Velvet Cake Balls
Now, let’s talk numbers for a second. I know not everyone needs to track these things, especially when we’re talking about occasional treats, but it’s good to have a baseline idea of what you’re enjoying. When I worked out the details on these red velvet cake balls using the standard cake mix and frosting amounts, here’s what the estimations came out to per ball.
Remember what I always say about the road? Ingredients vary based on the truck stop or grocery store you hit. So, consider these figures a helpful guide, not gospel! If you swap out the white chocolate for dark chocolate or use a different brand of cream cheese frosting, those totals will shift a little. But for a standard, delicious, chocolate coated cake bite, this is a good starting point.
- Serving Size: 1 ball
- Calories: 210
- Sugar: 22g
- Sodium: 150mg
- Fat: 13g
- Saturated Fat: 7g
- Unsaturated Fat: 6g
- Trans Fat: 0g
- Carbohydrates: 23g
- Fiber: 0g
- Protein: 2g
- Cholesterol: 25mg
That’s surprisingly reasonable for a decadent, no-bake treat, right? If you manage to stick to just one, you’re doing great! I usually have to immediately package the rest so I don’t eat the whole batch. If you want to see the breakdown for some of my other simplified desserts that focus on everyday flavor, check out my easy make ahead desserts list!
PrintNo-Bake Red Velvet Cake Balls with Cream Cheese Frosting
Make these easy, no-bake red velvet cake balls using cake mix and cream cheese frosting, then coat them in smooth white chocolate. They are perfect for parties or any sweet craving.
- Prep Time: 25 min
- Cook Time: 30 min
- Total Time: 1 hr 55 min
- Yield: About 30 cake balls 1x
- Category: Dessert
- Method: No Bake
- Cuisine: American
- Diet: Vegetarian
Ingredients
- 1 box (15.25 oz) red velvet cake mix
- 1 cup water
- 1/2 cup vegetable oil
- 3 large eggs
- 1 container (16 oz) cream cheese frosting
- 24 oz white chocolate melting wafers
- 1 tablespoon coconut oil (optional, for smoother coating)
- Red sprinkles (optional, for decoration)
Instructions
- Prepare the red velvet cake according to the package directions, substituting the required water, oil, and eggs. Bake the cake in a 9×13 inch pan.
- Let the cake cool completely on a wire rack.
- Crumble the cooled cake into fine crumbs in a large bowl. You can use your hands or a food processor for this step.
- Add the entire container of cream cheese frosting to the cake crumbs. Mix well until the mixture is fully combined and holds together when pressed.
- Roll the mixture into small, uniform balls, about 1 inch in diameter. Place the balls on a parchment-lined baking sheet.
- Chill the cake balls in the refrigerator for at least 30 minutes. This step helps them firm up before dipping.
- Melt the white chocolate wafers in a microwave-safe bowl in 30-second intervals, stirring well after each interval, until smooth. If using, stir in the coconut oil for a thinner consistency.
- Dip each chilled cake ball into the melted white chocolate, ensuring it is fully coated. Use a fork or dipping tool to lift the ball out, tapping off any excess chocolate.
- Place the coated ball back onto the parchment-lined sheet. Immediately add red sprinkles, if desired, before the chocolate sets.
- Allow the chocolate coating to set completely at room temperature, or speed up the process by chilling them for 10-15 minutes.
- Serve these delicious red velvet truffles or store them in an airtight container in the refrigerator.
Notes
- For a richer flavor, you can use a homemade red velvet cake recipe instead of a mix.
- If you want a firmer ball, chill the mixture for an hour before rolling.
- If the white chocolate seizes (becomes thick and grainy), add a teaspoon of vegetable shortening or coconut oil and stir vigorously to try and smooth it out.
Nutrition
- Serving Size: 1 ball
- Calories: 210
- Sugar: 22g
- Sodium: 150mg
- Fat: 13g
- Saturated Fat: 7g
- Unsaturated Fat: 6g
- Trans Fat: 0g
- Carbohydrates: 23g
- Fiber: 0g
- Protein: 2g
- Cholesterol: 25mg