
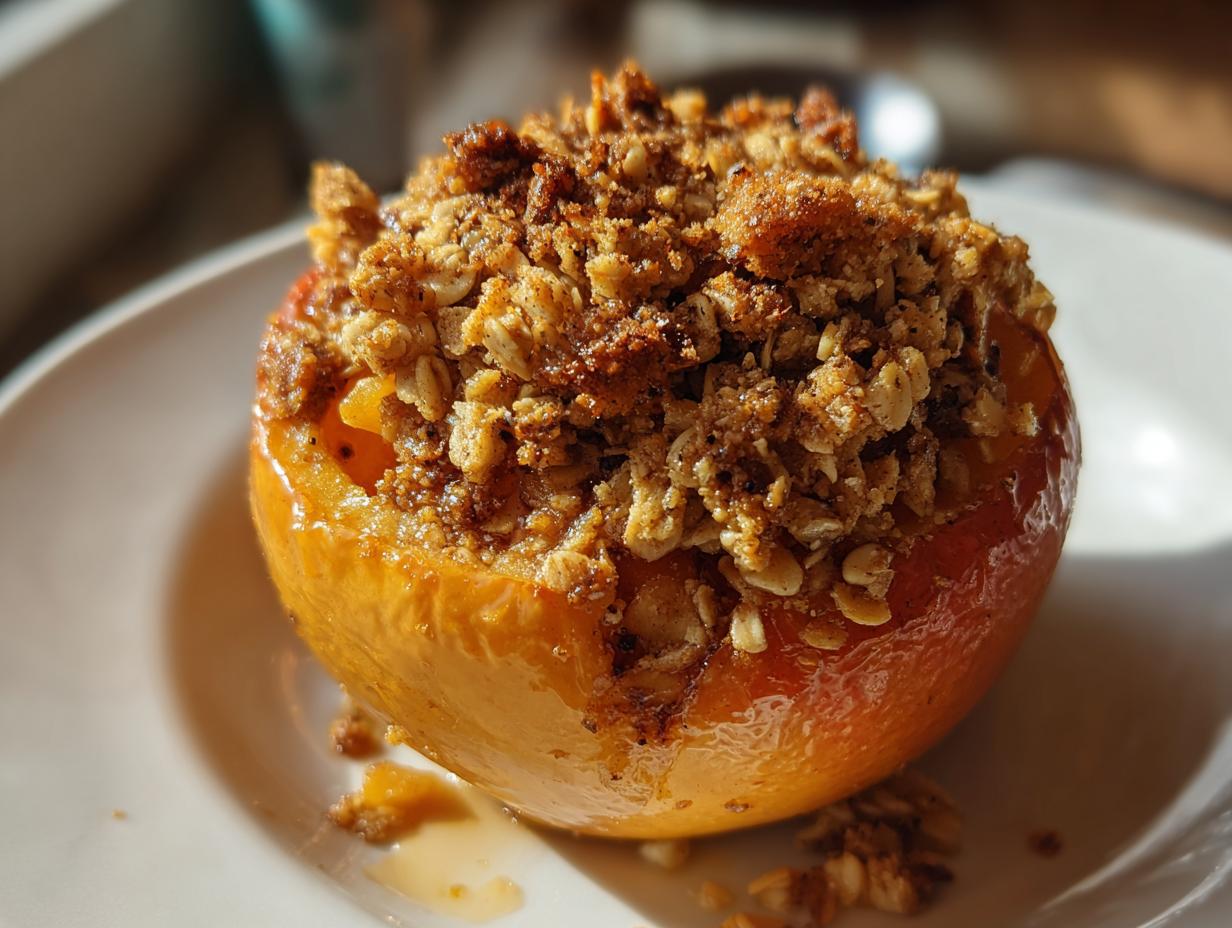
There’s just nothing that screams cozy autumn quite like apples baked until they are meltingly tender. Forget complicated sugar work—when the air gets crisp, we want genuine comfort, and that means these baked apples loaded with a crunchy cinnamon-oat crumble are non-negotiable. Here at YumDrizzle, we follow Jaxson Riley’s playbook, which you can read more about on our About Us page: amazing flavor doesn’t need impossible techniques. We strip everything down to the essentials so you get that incredible, nostalgic taste without spending hours chained to the stove. Trust me, this simple recipe is truly the ultimate fall treat.
- Why This Is the Best Baked Apples Recipe You Will Make
- Ingredients for Classic Stuffed Baked Apples with Oat Crumble
- Step-by-Step Instructions for Oven Baked Apples
- Tips for Perfect Stuffed Baked Apples
- Making Your Baked Apples a Healthier Fall Apple Dessert
- Serving Suggestions for Warm Spiced Apples
- Storing and Reheating Your Baked Apples
- Frequently Asked Questions About Baked Apples
- Share Your Homestyle Baked Fruit Creations
Why This Is the Best Baked Apples Recipe You Will Make
Look, there are a million ways to bake an apple, right? But ours hits that sweet spot where ‘easy’ meets ‘absolutely decadent.’ This isn’t fussy baking; this is pure comfort delivered in a fruit wrapper. You’re going to feel like a domestic goddess when you pull this tray out of the oven, even though it took hardly any time at all!
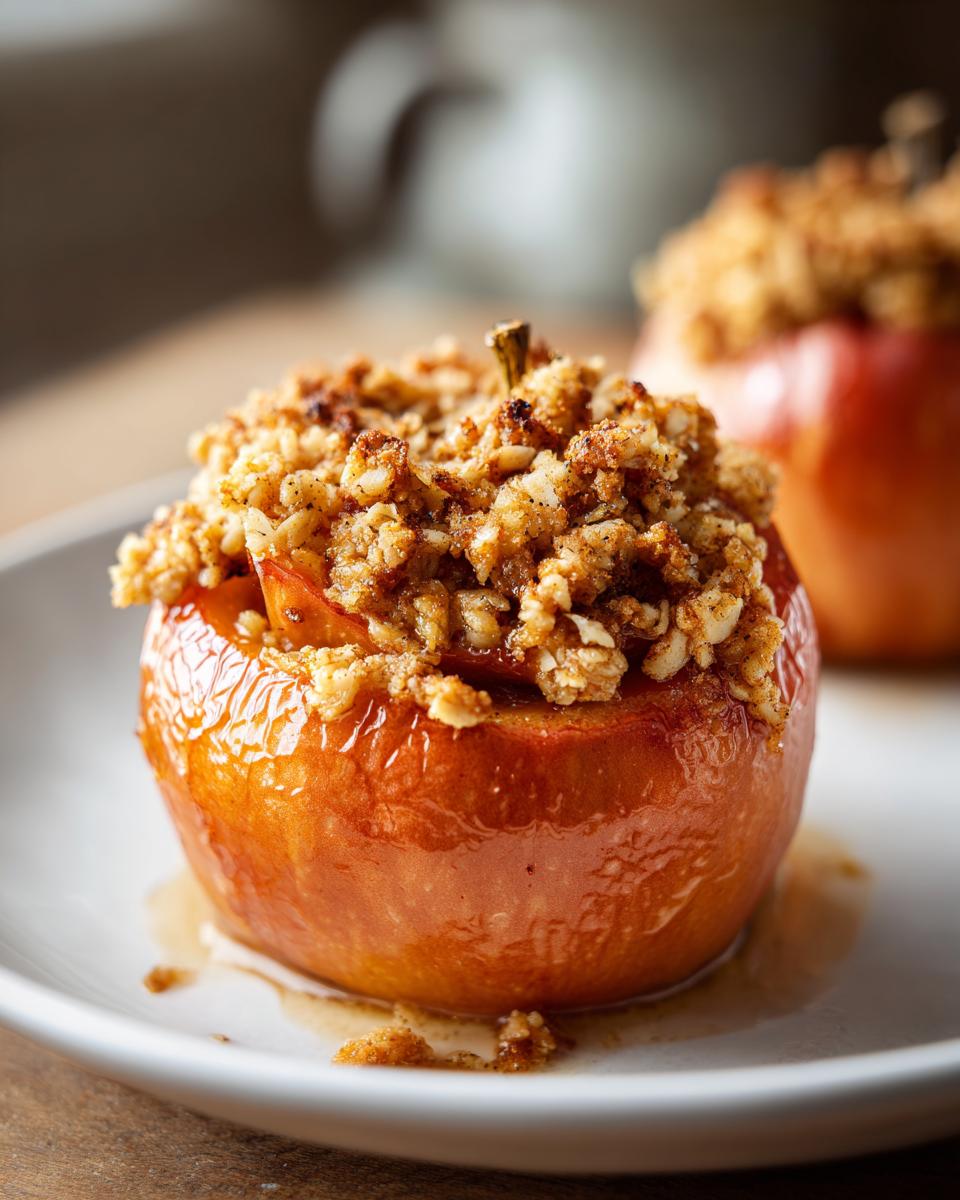
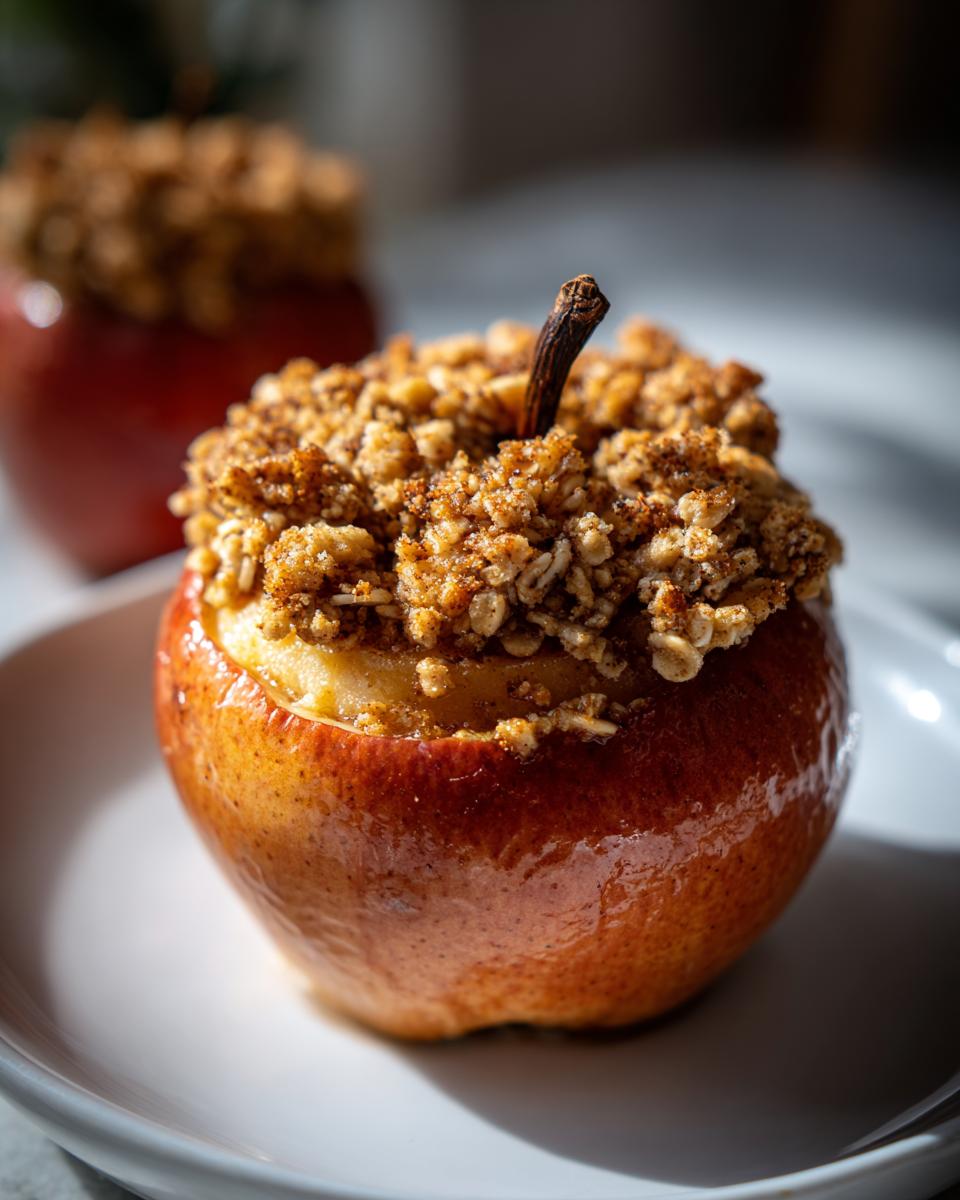
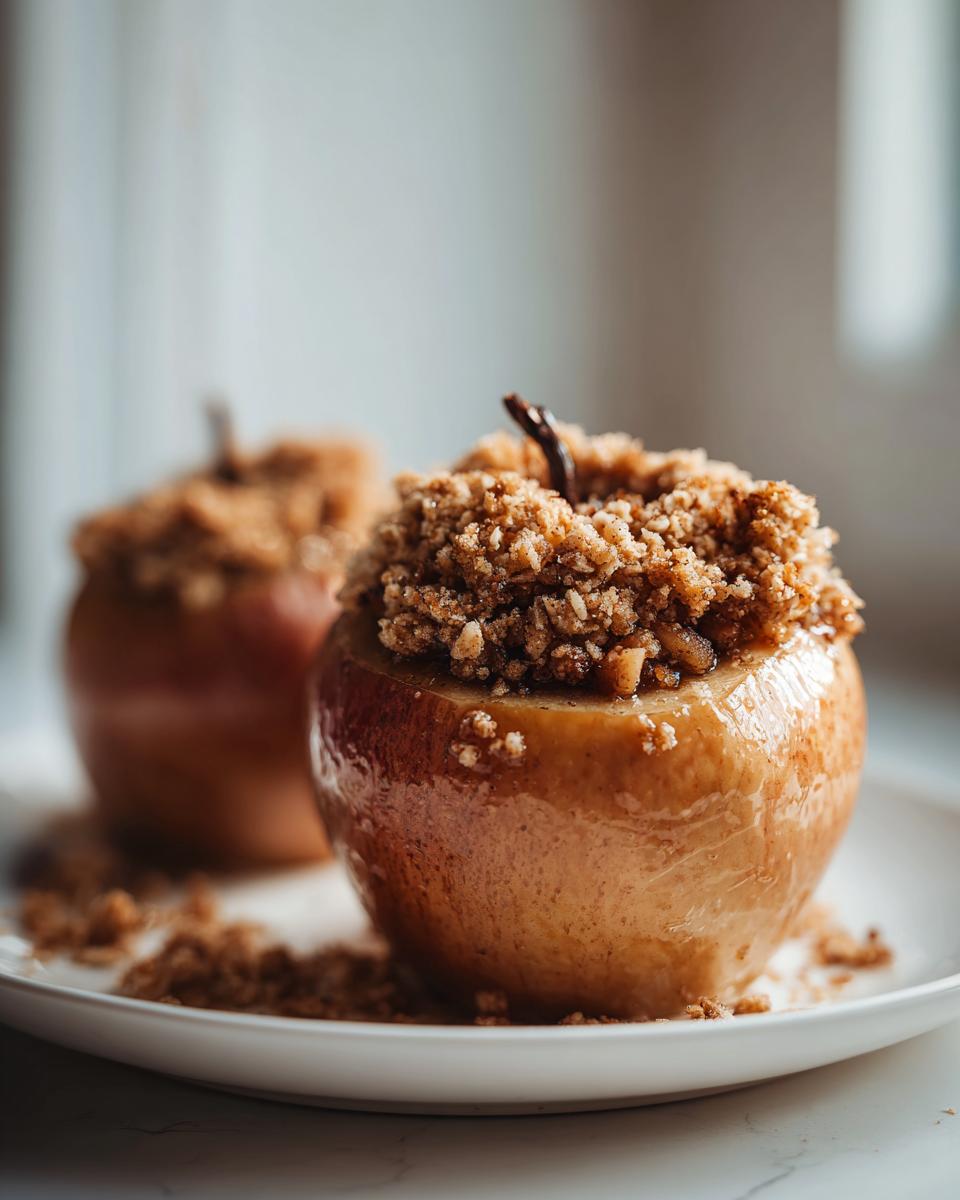
- We nail the texture every time! You get that wonderfully tender apple that yields perfectly to a fork, contrasted by a beautifully crisp, buttery oat crumble topping. It’s a textural dream, honestly.
- This is designed to be an easy baked apples recipe. Prep time is seriously under 15 minutes. You just mix, stuff, and bake. That’s it!
- The flavor profile is pure nostalgia. That warm hug feeling we all crave in the fall? That’s courtesy of the brown sugar and cinnamon working their magic. These are the ultimate cozy apple treats.
- It’s flexible! It works just as well as a Sunday side dish as it does a stand-alone dessert topped with ice cream. Talk about versatile comfort food!
Ingredients for Classic Stuffed Baked Apples with Oat Crumble
Okay, let’s talk about what you actually need. The beauty of these baked apples with brown sugar is that almost everything in this list is probably already in your pantry. We aren’t doing ingredient scavenger hunts here! Keeping the list tight means you can make these on a whim when that fall craving hits.
Grab the following—I made sure to list the details just like I write them on my worn-out index card:
- 4 large firm apples (I love Honeycrisp or Fuji because they don’t turn to complete mush!)
- 1/4 cup rolled oats (use the regular old-fashioned kind, please!)
- 1/4 cup packed brown sugar—don’t skimp here; that molasses gives us flavor!
- 1 teaspoon ground cinnamon (or maybe a little more if you’re like me)
- 2 tablespoons all-purpose flour
- 2 tablespoons cold unsalted butter, cut into small pieces (Cold is the secret for that crumble texture!)
- 1/4 cup water
- 1 tablespoon lemon juice
- Pinch of salt
See? That’s it! We get a tender fruit, a spiced filling, and just enough liquid in the pan to steam them perfectly. Easy, right?
Step-by-Step Instructions for Oven Baked Apples
Alright, this is where the magic really happens, and I promise it’s super straightforward. We want tender fruit here, not apple mush! My whole philosophy centers around making sure these oven baked apples come out perfectly baked but still holding their structure, especially because we are stuffing them full of that delicious oat crumble we mixed up.
Preparing the Apples and Baking Dish
First things first: fire up that oven to 375°F (190°C). While it’s heating up, grab a small baking dish—nothing too big—and give it a little grease, just so we don’t have any sticking drama later on. Wash your fruit well. Now, for the coring part: use a little paring knife or maybe one of those fancy melon ballers. You need to scoop out the seeds and the center, but this is important—you absolutely cannot cut all the way through the bottom! We need a little basin to hold the filling, so stop about a half-inch from the bottom edge. Firm apples, remember? They hold up to the heat so much better.
Creating the Cinnamon Baked Apples Filling
Time to make the stuffing! Toss the oats, brown sugar, cinnamon, and flour right into a bowl. Then, get those specks of cold butter in there. This is where you need your fingers! Rub that cold butter into the dry mix until it seriously looks like coarse, sandy crumbs. If you have a pastry blender, great, but I usually just use my fingertips because I can feel when it’s right. You don’t want it smooth; we want little clumps of buttery goodness that will crisp up nicely when baked.
Baking and Checking for Tenderness
Carefully spoon that oat mixture right into the hole of each prepared apple. Press it down gently so it stays put. Now, here’s a little secret that keeps them from drying out while baking: pour the water and lemon juice right into the bottom of the baking dish, surrounding the fruits. This steams them slightly! Pop the whole dish into the oven for about 35 to 45 minutes. Since you are looking for that ‘tender’ texture (we want fork-tender, not spoon-mushy!), pierce the thickest part of the apple wall. If the fork slides in with just a little resistance, they are done! If you want to try some other great fall recipes like apple cinnamon French toast, check out that link next time.
Tips for Perfect Stuffed Baked Apples
I know a few little tricks now, after making this recipe so many times I could probably do it in my sleep! If you want to really master how to bake apples and ensure they come out looking like they belong on a magazine cover—and tasting amazing—you need to pay attention to the fruit itself.
Apple Selection is Everything
First off, use firm apples! I mentioned Fuji and Honeycrisp earlier, and I stand by that. Granny Smith is great too if you like a sharper tartness cutting through that sweet brown sugar filling. Please, avoid soft apples like McIntosh if you are stuffing them. They just disintegrate before the topping gets nice and golden, which is a total baking tragedy. We need structure!
Keeping Moisture Locked In
We put water and citrus in the bottom of the pan for a good reason—it creates steam! Baking fruit in dry heat is the fastest way to get tough, leathery apples. Also, don’t forget to cover the apples with foil for the first half of the baking time. Pulling that foil off halfway through is the secret handshake that lets the tops get golden brown and crisp while the steam underneath makes the inside perfectly tender.
Craving a Crispier Topping?
If you like things extra crunchy, melt a tiny bit more butter—maybe just a teaspoon—and drizzle it over the exposed filling right before you uncover the apples for the last 10 minutes of baking. That little extra fat and heat gets the oats and sugar to really caramelize. It makes the crumble pop!

Making Your Baked Apples a Healthier Fall Apple Dessert
I totally get it; sometimes you want that cozy apple comfort, but you’re trying to keep things lighter, especially if you are eyeing these as a healthy baked apples side dish rather than a full dessert. Guess what? We can absolutely lighten this up without losing that amazing warm spice flavor. This recipe is super flexible, which is exactly how I like my baking to be!
The easiest swap is stepping away from the brown sugar. Instead of using the whole 1/4 cup, try cutting that amount in half and then replacing the volume difference with pure maple syrup. Maple syrup has a richer, deeper flavor, so you feel like you aren’t missing anything. You can even sub some of that syrup for water when you put the liquid in the pan.
Also, seriously consider cutting the butter in the crumble by a third. The flour and oats still give you structure, and honestly, the apples release their own juices! If you head over to my collection of healthy lunch recipes, you’ll see I preach balance, and these tweaks prove you can have a healthier version of this amazing fall fruit bake easily.
Serving Suggestions for Warm Spiced Apples
Once these warm spiced apples come out of the oven, the only decision left is how decadent you want to get! My personal favorite way to serve these stuffed beauties is straight up, warm in a little bowl with maybe just the vanilla ice cream scoop melting right over that crumble topping. The instant hot meets cold action is incredible.
But don’t stop at dessert! Because the base is honestly just fruit and oats, these make a fantastic upgrade for breakfast. Seriously, try one alongside your morning coffee or spoon the fruit and extra juices over a bowl of oatmeal. If you aren’t already, check out my favorite easy breakfast recipes for more ways to start your day right!
Storing and Reheating Your Baked Apples
The bad news is that these never last long because they are just *that* good. The good news is that if you somehow manage to have leftovers, storing them is a breeze! This is great because honestly, I think they taste even better the next day when the spices have really melted into the apple flesh.
If you have any leftovers of these baked apples, cover the baking dish tightly with foil or transfer the apples to an airtight container. Keep them tucked away in the fridge. They hold up really well for about three or four days, which is perfect for having a quick, healthy snack or a simple side dish ready when you need it.
Preventing a Soggy Topping in Storage
If you know you’re going to have leftovers, here’s a pro tip: don’t drench them in any extra sauces or creams before storing them. Also, if you used ice cream or whipped cream, obviously toss that! For the best experience upon reheating, try to keep the oat crumble topping as dry as possible before it goes into storage. Soggy crumble is a sad crumble, and we want zero sadness around here!
The Best Way to Reheat
You have two main roads you can take for reheating, depending on how much time you have. If you have about 15 minutes and you want that topping to crisp up again, use the oven! Pop them onto a baking sheet at about 325°F (160°C) until they are warmed through. This keeps the texture honest.
If you’re frantically trying to get out the door and need one fast, the microwave works in a pinch. But listen to me: only microwave them for 30 to 45 seconds, maximum. Microwaving fruit tends to make it steam internally and can turn it soft way too fast. If you use the microwave, skip trying to keep the topping crispy; just enjoy the warm, soft fruit!
Serving Leftovers for Breakfast
Oh, you absolutely must save one or two for breakfast! Just reheat it gently in a small saucepan with just a splash of water or apple juice—don’t boil it!—and spoon that warm spiced apple mixture right over yogurt or oatmeal. It transforms into the easiest, most comforting breakfast treat imaginable. I always save one specifically for this purpose!
Frequently Asked Questions About Baked Apples
I know when you try a new recipe, especially a classic comfort dish, you always have a few little nagging questions running around in your head. Don’t stress! I’ve gathered up the most common ones I hear about these baked apples. We want this to be foolproof, whether you’re throwing this together for a weeknight meal or prepping for a big gathering. If you’re looking for other super simple ideas, my list of weeknight dinner recipes might give you some inspiration too!
What are the best apples for baked apples?
This is a huge one! The success of your final product depends almost entirely on the apple you choose. You absolutely need a firm apple that can stand up to the heat of the oven without just collapsing into sauce. I always reach for Fuji or Honeycrisp—they manage to stay tender but keep their shape beautifully. If you like a little bit of zing to cut through that sweet brown sugar, Granny Smith is a fantastic choice. Just avoid soft varieties like Red Delicious or McIntosh if you’re planning on stuffing them, unless you truly want a very soft, almost applesauce-like result!
Can I make these stuffed baked apples ahead of time?
Yes, you totally can, and that is such a huge time-saver, especially around the holidays! You have two good options here. You can fully assemble the apples—stuffing them and putting them in the dish with the water and lemon juice—and then cover the whole thing and chill them in the fridge for up to 24 hours. Just add about 10 to 15 extra minutes to the baking time since they start cold. My other favorite trick for making this an even more minimal ingredient apple bake is prepping the oat crumble ahead of time. Keep the filling dry and sealed up, and then just stuff the fresh apples right before you plan on baking them!
What if I don’t have brown sugar for the filling?
See, this is exactly the kind of real-life cooking hurdle I love tackling! If you’re fresh out of brown sugar but have white granulated sugar, you can still make this work for a super simple apple dessert. The flavor won’t be quite as deep—you lose that rich molasses note—but the texture will still be great. You can use an equal amount of white sugar. For the best taste substitution, mix the white sugar with just a tiny splash of molasses if you have it on hand! That instantly brings back the warmth we’re aiming for in these cinnamon baked apples.
Share Your Homestyle Baked Fruit Creations
Whew! Now that you’ve got the secret to perfect, tender, crumb-topped baked apples, I really want to hear about your experience. Cooking should always be a conversation, not a solo mission!
Did you stick to the classic brown sugar filling, or did you sneak in some chopped pecans like I sometimes do when I’m feeling extra? Drop a rating below—let me know how many stars you give these easy baked apples recipe knockouts. Don’t be shy about sharing your favorite way to dress them up, either! Maybe you tried serving them over oatmeal or drizzling them with caramel sauce; the comments section is the perfect potluck for these kinds of tips!
If you made these and snapped a picture, please tag me on social media! Seeing my recipes living their best life in your kitchen is honestly the best part of what I do here at YumDrizzle. Seeing your beautiful fall apple dessert creations just proves that anyone can make incredible comfort food with just a few simple, quality ingredients. Seriously, I can’t wait to see what you whip up!
PrintClassic Stuffed Baked Apples with Oat Crumble
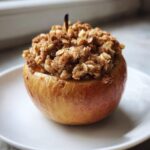
Make these tender, spiced baked apples stuffed with a simple cinnamon-oat crumble. This easy recipe delivers a warm, comforting fall dessert or side dish.
- Prep Time: 15 min
- Cook Time: 40 min
- Total Time: 55 min
- Yield: 4 servings 1x
- Category: Dessert
- Method: Baking
- Cuisine: American
- Diet: Vegetarian
Ingredients
- 4 large firm apples (like Honeycrisp or Fuji)
- 1/4 cup rolled oats
- 1/4 cup packed brown sugar
- 1 teaspoon ground cinnamon
- 2 tablespoons all-purpose flour
- 2 tablespoons cold unsalted butter, cut into small pieces
- 1/4 cup water
- 1 tablespoon lemon juice
- Pinch of salt
Instructions
- Preheat your oven to 375°F (190°C). Lightly grease a small baking dish.
- Wash the apples. Use a small knife or melon baller to carefully core the apples, removing the seeds and center, leaving about a half-inch thick wall around the core cavity. Do not cut all the way through the bottom.
- In a small bowl, mix the rolled oats, brown sugar, cinnamon, and flour.
- Cut the cold butter into the oat mixture using your fingers or a pastry blender until the mixture resembles coarse crumbs.
- Place the cored apples into the prepared baking dish.
- Spoon the oat crumble mixture evenly into the center cavity of each apple. Press it down gently.
- Pour the water and lemon juice into the bottom of the baking dish around the apples. This creates steam to keep the apples moist.
- Bake for 35 to 45 minutes, or until the apples are tender when pierced with a fork.
- Carefully remove from the oven. Let the apples cool slightly before serving warm.
Notes
- Serve these warm baked apples with a scoop of vanilla ice cream or a drizzle of caramel sauce for a richer dessert.
- If you prefer a softer apple, you can peel the apples before coring them.
- For a healthier option, reduce the brown sugar to 2 tablespoons and use maple syrup instead of water in the bottom of the dish.
Nutrition
- Serving Size: 1 apple
- Calories: 280
- Sugar: 35g
- Sodium: 5mg
- Fat: 12g
- Saturated Fat: 7g
- Unsaturated Fat: 5g
- Trans Fat: 0g
- Carbohydrates: 45g
- Fiber: 6g
- Protein: 2g
- Cholesterol: 30mg